
Leaderboard


Popular Content
Showing content with the highest reputation on 02/06/2023 in Posts
-
7 pointsHere is a free down load of the manual. Do you have the belt guard installed? The belt will not stop unless the belt guard is in place, If you are wishing to add an extra belt brake to the idle/tension pulley. You can make a piece out of some sheet that will bolt on behind the pulley. This will eliminate the need to remove the clutch/brake rock shaft. Below is one version that I made for one of my tractors. It is held on with the same bolt that holds the idle/tension pulley on. It could be simplified with a piece of sheet metal that has a 90 degree bend instead of the round stock like I used.
-
6 pointsI had a company install one piece 40 foot gutters on my pole barn. The rolled it out on the job from a huge roll of aluminum, and molded it to whatever shape or dimension is needed. Installed all the brackets, etc. The price was reasonable because they do nothing else but rain gutters & downspouts. And, I didn't have to risk getting up and down on ladders. Well worth the money. That's how all of the home builders do it. Jim
-
6 pointsThe best way to find a lost object is to go to the store and buy a replacement, when you put the bag down the lost object will be right next to it, works every time.
-
5 pointshttps://barnfinds.com/found-in-grandpas-garage-1924-model-t-hot-rod/
-
5 pointsYou may want to find out how much the delivery fee is. My particular location up in the Northeast here is $35. Some areas it's free but of course nothing's really free.... I don't know what your cutoff threshold would be but place the value on that carefully of you needing to transport gutter that is flimsy, down the road, versus just paying somebody a few extra bucks to get it to your house where it's guaranteed to arrive in good condition.
-
5 pointsDitto.... I also teamed up the frame plate with this triangular brace locked into the lower frame holes. These have been on the 854 8 speed for a few years now....
-
5 pointsIf I can buy some seamless. cash and carry, I will go that route. But there is no budget to hire it done, time for my kids to pay it back a bit! I only have 8' walls so I can almost touch the facia boards from the ground, no big ladder. Aluminum is what I figured, it's what I have on my house and we have lived there since 94 without any problems. I appreciate the advice guys!!! Randy
-
5 pointsRandy you may want to shop around on the price a little. The building supply company I work for sells gutters that are one piece up to 38 ft. Delivered right to the job site. Not having a seam in the middle of the setup would make a fairly serious price difference worth it to me. Has to material, I'd go aluminum. Plastic is fine and I've used it in the past but it's prone to cracking in very cold weather so I won't go that route again.
-
5 points@Achto has you covered, the belt guard has a bottom rail that the slack of the belt will contact when the clutch is depressed, that will stop the belt from rotating. If you don't have a belt guard for your tractor you could attach a piece of angle iron below the belt on the bottom and another at the top above the belt and cover it with some sheet metal.
-
5 pointsGood advise there. The frame I showed IS fixable, but it also has a 1/4" twist that needs to be dealt with first - I do as above, but drill about twelve 3/8" holes in the F plate so I can then plug weld the reinforcement plate in from behind, using the 4 fasteners to hold it in position. That one, because of it's crusty, rusty patina is destined to be the base for an upcoming "Yard Art" project....
-
4 pointsThat's exactly why I'm trying to either downsize or finish all of my projects this year. I don't want to leave it all for my children to have to clean out, or sell for pennies on the dollar. Sincerely, an 80 year-old collector.
-
4 pointsA few tractors have passed thru my barn that have shown signs of cracking. Of course I have no history on how they were used and/or abused. Having said that, the tractors that I plow with, a 312H w 48" and a 520H w/54' show no signs of cracking. They both have a front centering support on the frame. Both are chained up and have substantial weight on the rears, so they have great traction and can push some pretty big loads. I clear 4-5 paved driveways and a stone road. They have also been used to move and grade a 50 ton pile of black top millings and to clear limbs, rocks, and leaves from woods trails and right-o-ways around the farm. My feeling is the blade trip springs do a very good job of limiting the amount of force that is transmitted to the frame/tranny connection. The one exception is if the blade is rammed into a solid object that is as high as the blade that prevents the trip springs from flipping the blade over the object. Like a 2' high frozen ridge of snow that is often found at the end of driveways.
-
4 pointsI surely understand your position here and I agree that the stamped-in valleys that stiffen the later F plates were a good improvement. I’ll add that I suspect a LOT depends on the style of plowing by the “plower". The plow’s force is directly on the transaxle, of course, but I also look at the overall forces at play. In particular, how is the force on the transaxle being transmitted to the frame? Consider: - angled plowing being offset by steering force (puts sideways bending force on the F plate--a plow centering guide can lessen this by keeping the frame and transaxle aligned) - ramming the plow into material or hitting solid obstructions with significant force, e.g. sidewalk seams (these try to separate the transaxle from the frame at the F plate horizontally and in rotation since the plow mount is below the F plate)
-
4 pointsDefinitely seemless... Aluminum. Pay particular attention to downspout locations... Water / ice where you want it, not at doors / walkways...
-
4 pointsone thing I made is a couple starter bolts to place these frames back into the four transmission holes. Just grind off the threads on a couple of the bolts and use to align frame with transmission! Then add two other bolts with threads to get in place. Saves a lot of time and stress!
-
4 pointsI think you have a 1987 machine.
-
3 pointsYou've got a couple years on me but I know the feeling. I have sold a couple of bigger projects and need to thin the herd a bit. Not something I want to do but know I should do.
-
3 pointsI think that the cats are rarely sold for use, it is the valuable contents that brings the value.
-
3 pointsDon't rush the old man, he's not use to moving fast, he might have an accident.
-
3 pointsWell got the ends welded up and painted it Regal Red! First time filling gaps welding and it was a learning curve. So don't expect to see a pretty bead on them. But they'll do the job. Looks much better than rusty black! Thanks for looking!
-
3 pointsYou buy it cash & carry - you own it. You kink it installing it - tough cookies !! The installer that made it on site - if HE kinks it - he just bangs out another one.....
-
3 pointsAll the above. Seamless aluminum, made right here by a local vendor - INSTALLED by him - did a great job on the pitch and the downspout that hugs the house. Also had him install the screw-in removable "gutter guards" Not that fly-away in a wind storm snap in garbage. Removeable is the key word - he told me that in 10 years or so, there may be enough silt accumulated to allow small plants to grow thru the guard. Call him back to clean them out!!!
-
3 pointsWe were away from the house all weekend. Cats stayed inside and rabbits were running everywhere last night! Today, not much different. I could easily have nabbed my limit of 5. I popped 3 in about 5 minutes and called it enough for a stew meal. Time to clean and salt bath!
-
3 pointsYes. It is for that also. Just a different number on the tube /bottle
-
3 pointsI have a car trailer, so I could haul a 26' piece no problem. I will check in to that, thanks! Randy
-
3 pointsOriginally had 10w-30 motor oil Check your dipstick if the fluid is tan that is it. Filter is wix 51410
-
3 pointsThanks Pete. I have part numbers for mustang rotors. Going to scavenge the local salvage yards around here after I get it moving. At least with mustang rotors, it’s still all horse.
-
3 pointsIf you're needing to reinforce the back of the frame keep in mind what you'll be using the tractor for and design your reinforcement accordingly. If you're going to use an attachment that mounts back there like a sickle on a push type center blade it's easy for it to interfere with the bolts. That's do say not hear say. Fortunately I got lucky and the clearance was just enough for a tight fit with the bonus of holding the nut by the flat to actually assist me. Another thing I'm just throwing out there. I hear it all the time but I'm not convinced the front plow puts as much stress on the tractor frame as claimed. Besides snow I've pushed countless yards of dirt, gravel and stone and I've never cracked one. I've also cleared paths through the woods and with the roots and the like that's probably the hardest on it. But the frame is connected directly to the transmission. Sure, there's still some stress but not a direct cause. In the early years that area was simply the weak link on the frame. Then they started reinforcing it sometime in the mid 60's.
-
3 pointsBest bet would be to download the IPL for the two transmissions models you have and take a look at the part numbers. The brake shafts are not the same and depending on axle sizes the differentials may or may not be the same. https://www.wheelhorseforum.com/files/category/23-manual/
-
3 pointsGreen? Boy you REALLY don't want those to come out ehh?
-
3 pointsThis is an Eaton 1100. No tow valve on the Eaton 700 and 1100. Only the Sundstrands and the Eaton 5 had a tow valve. The Eaton 1100s can be pushed by hand slowly without any damage. The Eaton 700 is very difficult to push. Do not tow them .
-
3 pointsI try to use allen head bolts when i remember to get them, i can spin them out faster and the driver doesn't slip off like flathead or phillips
-
3 pointsMost of another great day spent wrenchin'. Trina's special project for today was to find, create, manufacture, produce, the motion control lever extension out of the bottom of a previously whittled stick. She found a piece of Striped Maple with a good big beefy feel to it. Trimmed the bottom so it was at the right angle. I decided the length that I wanted. She cut and trimmed it then put it in the drill press and made a 7/16" x 3" deep hole to insert the lever. Sanded the corners and coated it with polyurethane spray. A bit odd for most? Yes. Fits my Big hand and personality? Definitely. I made up my Engine crankshaft seal installer. Installed: Engine crankshaft seal. Engine drive pulley. Engine grass screen flattened and installed with 4 new screws. Exhaust old stub pipe removed with giant huge wicked incredible leverage bar on large pipe wrench and big heavy bear. Small Trina assisting. Correct exhaust stub pipe installed. ALL NEW grade 8 fasteners are used whenever possible. Trina did: Belt idler pulley removed and brake lever with linkage and spring installed. Drive belt. Air cleaner base. Crossbar that holds steps and seat pan latch. Belt guard. Both side steps. Rear tail light. We put a washer/spacer on brake pedal connection to shift linkage. Also replaced brake pedal bushings. I found a near NOS trailer hitch in my stock. Thanks to @Mows4three Dave for that. Trina cleaned, sanded, painted it. Lift valve lever removed, cleaned, painted black, reinstalled in reverse for more user friendly location. Volt gauge/voltage regulator installed. Engine oil dumped in. 2 qts Kinetix HD30. Coiled up choke and throttle cables. Soaking them with Liquid Wrench Penetrating Oil. They were working fine but figured I'd give them a good lubing to make @peter lena Greasy Pete happy. 😃 I brought 2 five gallon pails 🪣of Rimguard Tire Filling Fluid down from the new shop building to the basement workshop. Figure around 55 lbs per pail. Walked about 100, 120 ft carrying them both. THAT... Was a workout. 🏋️🏋️🏋️🏋️ @Pullstart
-
3 pointsTook a couple of sideshots today while fixing the the snowblower chute cable...
-
3 pointsI've done them a more crude and simpler route without any special machines or expensive tooling. Just a 7/8" construction reamer, a cordless drill and a Dremel. Pay attention, take your time, keep it straight and it will self center and the hole will line up. The spindle holes need to be done from both ends of the hole because of the depth. Best to only go part way through on the top, then go full depth on the bottom. The reamer won't just pass all the way through unless you grind off the flange at the top and extend the shank. 3/4" ID x 7/8" OD bronze bushings. Insert 1 on each end with the center left open for the grease zerk and grease. That's how that hole is now. Same process for the axle pivot. The frame holes can be done as well if they're wallowed. If the spindles go in too tight into the bushings that's a good thing as they are tight into the axle. The bushings can be filed or use a Dremel sander to tweak them until the spindle fits loose but still snug. Get any file dust cleaned out. https://www.amazon.com/Drill-America-Qualtech-High-Speed-Uncoated/dp/B00FXJGURA/ref=asc_df_B00FXJGURA?tag=bingshoppinga-20&linkCode=df0&hvadid=80058242473102&hvnetw=o&hvqmt=e&hvbmt=be&hvdev=c&hvlocint=&hvlocphy=&hvtargid=pla-4583657821672122&th=1 Is having it done with expensive machines at a machine shop much more accurate and the best option? You betchya it is!!!! But, do these 7 mph tractors require the accuracy like the space shuttle does? IDK Plus you now have the tool to do more if need be. It definitely gets easier to do and better results the more you do. Holes can also get bushings for the 3/4" stuff on the steering sector to tighten that stuff up at the fan gear.
-
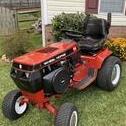
3 pointsStopped by a buddies house to trouble shoot his GFCI issue in his garage..,afterwards he says “You want this? If not it’s going to the dump,” Of course I hauled it home. Needs both tires replaced. Not sure I got it in me to hook it behind one of my Wheel Horse’s though
-
3 pointsDecided to give the front end a little different look. Although I like the look if the D series, I always thought the grille was just BIG. So I figured I would do an insert using an old D160 grille I had laying around. Took 4” out of the old grille width & 2” heightwise. I also welded the bottom up solid. This gives me 2” of clearance on the sides and 1” clearance on the top and bottom. The inner grille is only 2” wide as viewed from the side so it will clear the mufflers. It may also poke out the front a half inch. May make new slats to make the center or come up with some kind of mesh to stick in there. We’ll see. A simple photo hack showing the idea The beginning
-
2 pointsI have a 654 model wheelhorse tractor. The gears were grinding no matter what I did. Longer belt-shorter belt. Than by going on this site I was told about brake or piece of metal that is by the clutch pulley. So am trying to get the parts off so I can weld or what ever get a piece of metal to help stop the belt from moving when I depress the clutch. I took everything off the linkage or what ever you’d call it. Knocked out the spring pin. Now I can not get the part off the rod. Any ideas would be greatly appreciated. I believe this to be my overall problem because I have 4 other wheel horse tractors (different models) (not running) that seem to have that metal attached to the pulley to stop the belt from turning. I tried heating the metal part to get it off but that didn’t work. I think it is cast iron and don’t wanna break it. I have hammered on it with punch. Any ideas or advice would be greatly ap[appreciated, I am at my wits end. I don’t have a manual for this model and do not know where I can get parts. I was thinking that maybe there was pursuable pulley that had metal already on. I know my next problem will be to get metal piece to weld to a washer on the pulley. Also if someone has a parts manual so I can see what is what it would be greatly appreciated. Thank you in advance. Any help is good. This is part I have to get off.
-
2 pointsCool car... I was literally just talking about "Swedish Death Cleaning" with a neighbor while Mrs Sylvan and I were out for a walk tonight... Never heard it called that (it's actually a book)... basically, deal with your stuff so your kids don't have to... I've had that talk with Mrs Sylvan regarding the 's... she of course wants no part of such talk, as we, like the 's, will live forever in marital bliss... but per chance something happens, there's a member or two on here who will be getting a call to take over the SL&WHN RR, all accompanying accouterments, duties and responsibilities, along with obligatory rides for "The Littles" for the foreseeable future... hhhmmm...
-
2 pointsI wire brushed some hardware so Trina could get the choke and throttle cables back in the dash. She got that in the tractor. We fastened and adjusted the choke to the proper set. She's been hitting the motion control stick with poly a few times yesterday and today. That's now on.
-
2 points@ineedanother, Here is some pics of the front wheel spindles on my C-160… spindle length = 4.25” spindle diameter = .75” spindle height through axle end(upright) = 3.25” depth/ length of wheel hub/ center = 3.5” Let me know if the spindles you have are the ones I need.
-
2 pointsthanks for the info
-
2 points
-
2 pointsWalk softly, but DRIVE with a big stick!
-
2 pointsThat is a very nice reinforcement plate. I like how you made that, as well as how you're attaching it.
-
2 pointsJust tight, not 38 ft/lbs my man 🤣🤣🤣 But really, with the right size allen, you should be able to install/remove them with a 1/4" impact. I use a tekton impact allen driver set alot.
-
2 pointsThis is the belt I use on my 1990 312Hydro. This has the Eaton 1100 transmission. Your 1987 312A has the Eaton 700 transmission and may take a different length belt. I buy all my belts from TSC and when in doubt about the size, I buy several and return the ones that I don't use. Oh, to the
-
2 points@ebinmaine like this , bigger picture helps clear up confusion , also shoes yellow electrical lug going to headlight grounding . get some perforated trim pieces , to use in your rectifier mounting , there is your spring pull to assist cable action . remember the light spring pull , CLOSES THE CABLE ACTION , super lube oil . if nothing else , worth a try . have tis on my 3 horses it works , pete
-
2 pointsIm 99% sure kohler and onan are both 10-32x3/8. if you have a known 10-32 you can try it and see.
-
2 pointsMike, I just showed the pictures to Trina. Her words, after 10 seconds of blank stare, "Why hasn't he painted it yet?"


This leaderboard is set to New York/GMT-04:00