Leaderboard
-
in Posts
- All areas
- Markers
- Marker Comments
- Marker Reviews
- Articles
- Article Comments
- Article Reviews
- Classfieds
- Classified Comments
- Classified Reviews
- Wiki's
- Wiki Comments
- Wiki Reviews
- Blog Entries
- Blog Comments
- Images
- Image Comments
- Image Reviews
- Albums
- Album Comments
- Album Reviews
- Files
- File Comments
- File Reviews
- Posts
-
Custom Date
-
All time
November 28 2011 - November 30 2025
-
Year
November 30 2024 - November 30 2025
-
Month
October 30 2025 - November 30 2025
-
Week
November 23 2025 - November 30 2025
-
Today
November 30 2025
-
Custom Date
01/25/2020 - 01/25/2020
-
All time
Popular Content
Showing content with the highest reputation on 01/25/2020 in Posts
-
16 pointsWhile I was out playing, I mean plowing today my wife decided to catch me on camera. A few shots that she took of my C145 in action. It amazes me some times as to just how much snow these lil tractors will move.
-
7 pointsbut seat time is seat time! @dclarke now you know why I need a backup to the backup!
-
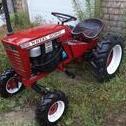
6 pointsWent to West Virginia today (2nd time in this month) to pick up two round hoods that have been housed for five years in a shed! 702 and 753 ! Both need some work but good 7 hp motors and extra parts to replace those missing! I want to thank Earl Howell for saving these and selling to me. 702 has a unique cast muffler I have never seen before on 702. I have new front wheels and tires for the 702. I picked up replacement original steering wheel and gas tank.
-
6 pointsThat piddly little engine he has won't work with that! Go huge with a Wisconsin V4
-
5 pointsNo added weight on the rear. She digs pretty good with just the chains on. It could use some weight on the front or different steer tires. The front wheels tend to push a lot when turning even with the plow raised. Sure scraps the side walk down nice when the front wheels are dangling in the air though.
-
5 pointsWow, I've changed several drive belts, never knew how much work it was until I read your write-up. I need to take a nap to recover from it!
-
5 pointsWheel Horse version? Just throwing stuff out there because ya never know what triggers the light bulbs!
-
5 pointsLike that huh? Me too and always wanted to build something similar. Toro General Search Toro General Golf Truck or click here for more images https://images.search.yahoo.com/search/images;_ylt=AwrExlRGPCxeQ1gAuCqJzbkF;_ylu=X3oDMTBsZ29xY3ZzBHNlYwNzZWFyY2gEc2xrA2J1dHRvbg--;_ylc=X1MDOTYwNjI4NTcEX3IDMgRhY3RuA2NsawRjc3JjcHZpZAM0TFBSd1RFd0xqS0oyYVlTV3MxZkFBRUROamd1TVFBQUFBQjZ1clBiBGZyA3lmcC10LXMEZnIyA3NhLWdwBGdwcmlkA2JGamhYTFhPU3ZhaGxUZjVINDM0X0EEbl9zdWdnAzAEb3JpZ2luA2ltYWdlcy5zZWFyY2gueWFob28uY29tBHBvcwMwBHBxc3RyAwRwcXN0cmwDBHFzdHJsAzI5BHF1ZXJ5A3Rvcm8lMjBnZW5lcmFsJTIwZ29sZiUyMHRydWNrBHRfc3RtcAMxNTc5OTU3MzY2?p=toro+general+golf+truck&fr=yfp-t-s&fr2=sb-top-images.search&ei=UTF-8&n=60&x=wrt
-
5 pointsConcerning the dump bed @dells68.... reminds me of words from the great theologian Freddy Mercury, “Another one bites the dust”....... My opinion only, I would have to figure out a way to set the bed between the rear tires and lower it down some. Too tall for me. Leave the front wheels but flip the axle and drop it too. But then again, when I see this, I see a T bucket roadster instead of a tractor.
-
4 pointsIt’s Saturday night and I’m home alone. Wife and one daughter in DFW / TX for a gymnastics meet, other daughter at a friend’s house. Why not waste some time building cool stuff?
-
4 points
-
4 points
-
4 pointsTrina spent some time this evening cleaning up the front axle. This axle is one off the parts pile from a C series I believe. Here's a pictorial: Here it is after degreasing by soaking with "Incredible Pink" After a little time with her wire brush. More brown sparkly paint tomorrow.
-
4 pointsI’m going to stew on this for a while. Overall body length is 8’8” from the top of the tailgate to the nose of the hood, the hood is 39” high! I might just need to build a frame.
-
4 points
-
3 pointsThis is quite the video, with proof! When properly set up, flux core wire seems to have a better advantage than gas shielded! Am I going to run out and change everything I have to flux core? Probably not. Am I going to remember to reverse my polarity if I ever need to use flux core? Youbetcha!
-
3 pointsWe’re all in this together! Some of these things, I can act like I know what’s up. Most the time, I’m just along for the ride too!
-
3 points
-
3 pointsI know it's not a Wheel Horse (sorry for posting) but look what followed me home. A Speedex basket case
-
3 pointsThanks kevin for sharing that that agrees exactly what i found out, when i purchased my new Welder and built my FEL. The whole Liftarms and nearly the complete Quickchanger is Flux welded with changed polarity, only the Hydraulic Cylindermounts i welded only with Gas. My experiences was, It needs a lot of Training to get a clean Seam on Flux more as Gas protected, but the Seams lasting same. A nice Seam can result in Gasprotected Wire Welding much easier. My experience was also - both has the same stability, but after that Vid i see, i need much more training. He meant, it shall be better, even just if it‘s the same stability im fine with. I think that is also a thing of training. Especialy the advice with the distance between Weldertip and puddle improves the Result much, that was a good advive, i didn‘t know or heared before. Thanks therefore. Only the Splatter on welding Hydraulic Cylinders for me seems to be a problem, that‘s the reason i welded them just Gas protected, because i had a fear to destroy them. The brutforce Work Tests on my FEL show‘s me nothing rips until now, also i had one day the option in our neighbour’s Forrest and can play with about 10 cubicmeters of Gravel, to shift it 30 meter Far just with FEL. The Rearweight is required to release the Front Axle, but my weldings last.
-
3 points
-
3 points
-
3 pointsSo I’m not sure if I can raise the rear of the frame due to the hydro controls, but if I flip the “front” frame and put the axle on top, I might be able to achieve the same effect. Build an engine plate and hood mount and steering and everything else I need... and I’m golden!
-
3 points
-
3 pointsI'm going to stay out of this discussion, except to quote the wise words of one of our own, member Audioshot, from back in 2010: "Don't research too much about different oils. Your head will explode."
-
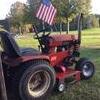
3 pointsI put some new tires front and rear on the 753 and took it out for a ride.
-
3 pointsThis entry is for all my Local Circle plow dog buddies who have seen old “Clyde” turning earth. Dad likes this tractor so much that he wanted to plow with it in the winter too... Thanks again. @Shynon for making this gift Tractor a reality for my dad...he really enjoys this machine! @WVHillbilly520H will love the fact that dad gets all the traction he needs with those monster 7.60-15 AG’s and the WW-93 weights to push the wet heavy stuff. He really enjoyed his seat time today. When I stopped by tonight, I’m pretty sure he had the drive wide enough to land a small Boeing😁. When you’re having fun...
-
3 pointsHere are the pics. The unit is a 25 series of Englander with nice options like electronic speed controls. I fired it up last night in the open bay and there was no visible smoke at any time. It puts out plenty of heat after a half hour from a cold start with the unit. After reading the manual and observing the lack of any smoky scent in the exhaust smell, I have determined that this stove will not be run indoors until and unless a CO detector is present. After research, I found that it is rated for 2200 Sq ft. My insulated shop is 1350 or so.. This stove is rated with direct contact at the base with the only concern being sparks during clean out. It only needs 6" of clearance at the back and 3" at the sides. Glad i have the motorcycle lift/ pallet jack [shown in one pic] that can lift it 30". I am thinking about running the exhaust through a heat saver.. at 25 degrees.
-
2 pointsC Series, 300 Series and I think the the 400 Series as well > its a 5/8 x 82 inch. Today I used the Stens "TrueBlue" for the C81 which I had in the parts draw. , Tractor Supply sells the Blue Kevlar Huskee , same belt for $25. I put one of these on my 310-8 probably 10 years ago, maybe longer . Its still performing strong. I didn't take photos but here's the steps, real easy, except for ONE location, the clutch pulley. This is for an 8 Speed tractor. I'm writing this more for me so the next time I can look it up . A Power Driver and a couple of sockets makes this task about as easy as pie ! You can literally do this inside of an hour. I took longer as I was cleaning and lubing along the way. And drinking coffee. Take pictures of parts and screws if need be, but this is really quite simple. I did take the seat and rear fender off but you really don't need to. Its not a bad idea to remove these as cleaning the tranny area is always a good thing while it is accessible. Removing them does allow full access to the rear pulley on the tranny. Also on the LEFT side clean and lube the threaded clutch adjust ROD that feeds the clutch pedal .Check the spring as well. Adjustment may be necessary later Either remove the shifter cover or just the TWO right side Phillips screws which screw into the right side panel Remove the Power Take off assy. The drive belt sits on the inside pulley right at the engine remove the right side cover , one screw at the bottom center at the foot rest and two screws at the front of the cover secured to the frame. remove the right side foot rest , two screws from underneath. The entire Drive Belt and Clutch pulley is now in full view. The Clutch Pulley arm is welded so be careful not to bend it outward when removing the Pulley. It can easily bend outward . There is a screwed on small bracket which strikes the ON/OFF switch ( forward of the Clutch Pulley arm) it looks like a small dimple. This bracket strikes the switch when the Clutch is engaged and allows starting the tractor. OF course we can disengage the switch all together. To keep slack on the belt, two ways to do this, remove the spring at the adjustable rod going to the clutch pedal or push the clutch pedal full forward and secure it so it doesn't come BACK. This is what I did. Here is the only part of the process which can be deemed as " why did they do it this way ":. We have to remove the Clutch Pulley on the Clutch Arm so the V- Belt can slide into the Pulley underneath the Belt Guide which is WELDED onto the Clutch arm. The pulley bolt is removed from the outside and there is barely enough room for an open end wrench to fit behind the pulley to grab the NUT. IF the clutch arm happenes to pull outward, bent, its ok, bend it back gently , we can also adjust the switch striker bracket if need be, Its not a big deal. . Once the clutch pulley is removed, inspect it, check the bearings, lube it. By now the old belt can be fully removed and the new belt can be placed over each of the pulleys, rear and front. Now is the crazy part reinstall the clutch pulley with the belt installed into the V but under the belt guide on the clutch arm. Secure the bolt and get that open end wrench to hold the nut at the back. THIS should have been a welded NUT on the backside. Release the Clutch Pedal from being full forward. Inspect. Make sure when the clutch is depressed the striker plate is actually hitting the small switch directly in front of the clutch pulley . Make sure the clutch pulley and rear tranny pulley are aligned Put it all back together, Don't forget there are 3 factory switches which will prevent the Tractor from starting. , Seat Switch, Clutch Switch and Power Take Off switch. Start the tractor and check the clutch action , maybe adjust that clutch rod which is at the bottom of the Clutch Pedal, remember we cleaned it at the other end and lubed it, a few turns one way or the other and all should be good. By the way, it is possible to get extra life out of a stretched Drive Belt by adjusting that Clutch Rod , thus tightening the BELT at the Clutch.Pulley, MAYBE. Good luck !
-
2 points
-
2 pointsI think you'll also find that when welding outdoors in any kind of breeze that flux core does a much better job.
-
2 pointsI'm trying to balance time between the two of them. I really want to drive this one a little and see what it's like. Because I only wanted a hydro to try plowing snow... And because snow season will be done before this project is... I'll be spending more time on Colossus soon. Once that's up and running I'll finish up this Charger.
-
2 pointsIt does... I'd love to have a Speedex... And a Power King. I may be slightly envious of @AHS. Not likely a project I'd get to until NEXT winter though. Trina and I have quite a few lined up already not to mention home/yard stuff.....
-
2 points
-
2 points
-
2 pointsI thought about that last night, however the 15” wheels up front have different size inner and outer bearings that fit a VW beetle spindle. I have a set of spindles from my buggy that happened to be a little bent so I won’t mind cutting them apart to build new tractor spindles.
-
2 pointsNormally there is no lube. However just to get it running you could try some WD-40 or similar. if it is hard to move the motion control lever the more likely issue is the cone just beyond the big spring in your picture. You do NOT lubricat that you take it out clean it up and reinstall.
-
2 pointsHa ! Funny, it seems like a lot but if you've been there done that, it really is not a big deal, just that stinkin Clutch Pulley, it takes more time to do that than almost the whole job ! This is only the 2nd time I've ever changed one, first was a 310-8 about 10 years ago and then today, the C81 which I have only had for a year or two. . Its probably the original belt for all I know. The belt didn't break it was just stretched, it was slipping. . I decided to change it rather than adjust the clutch rod for more tension. . It was inevitable. When I changed the 310 belt , it broke I now have the ref on the C81 drive belt. This C81 has a Johnny Bucket on the front and 50 Pounds sitting on the hitch. I'm sure the Drive Belt loves it ! This machine gets a workout, I use it for multiple chores regularly . Firewood, Gravel, Soil , Mulch, Leaves..whatever I can think of so I don't have to carry it !
-
2 pointshi, again i finaly got my parts, I seperated the blower from the gear box to get the original wooden block tensioner replaced it,it was completely worn out, put it back together, then installed a new chain, the old one broke because it was riding on adjustment bracket of the block,I adjusted the chain tension to 1/2 inch, then I took it on a test blow on the lawn, it works perfectly. it took me 2 weeks to figure it out thanks to you guys. I had never worked on the blower since I bought it 6 years a ago, now I know how it works, I will keep a closer look at it from now on. Thanks again.....
-
2 pointsJonah, I’ve hauled a couple trucks and a car in to the bone yard now and even a full size in tow up a pretty long steep hill is continuing to impress. Like you say... it’s hard to argue the numbers. I don’t know where all the numbers come from, but they are alive and well!
-
2 pointsYou’re not late, I was just up past midnight when it changed the list
-
2 pointsWell a bit of an update. After some more testing this, trying that, swapping t'other, all to no avail, I ran a new wire from switch to solenoid. BINGO! That cured that problem. Only to have another arise. The engine kept stopping and faffing about when trying to restart. I found the p.t.o lever was moving slightly. Investigation showed the switch had been messed with. So that was removed and a link put in the connecting block. That done and the charging problem was still a problem. So I decided to have a look at the stator. Took off the engine cover etc. Undoing the screws holding the screen on, strange noises emanated from behind the flywheel. No need to guess what was making them. Removing the fly wheel revealed a sorry stator and magnets in a right state. If you'll pardon the pun. Bit of a mess and no wonder it wasn't charging. All is not lost though. A Raider 10 engine I rebuilt a while ago, has donated it's flywheel and stator. Tomorrow I'll reassemble things and hopefully all will be well.
-
2 pointsI moved the hood forward after the video was taken and gained quite a bit of room. At this point, I don’t think I need to stretch the frame any more, just figure out where the hood needs to be in relation to a bench seat. I am pretty stuck on not hacking the bed for the time being. We’ll see how it works out...
-
2 pointsI would not argue with any of you fellas, as your knowledge of these tractors far exceeds mine. Even though I have been a wheel horse owner since 1985, my old 417 has been like a timex and has just kept ticking with normal maintenance. Like changing fluids, ignition stuff,tires and so on.
-
2 pointsFoot room looks a bit scarce on your mock up @pullstart Kevin. Think of a big Bear like me going for a cruise... 6'-1"+. " Not small" me frame. Size 13 kicks. IMHO you'd be better to size it for Max current reach of the girls (to drive) and let them grow into it some. Don't sweat the length. I drive all sizes of machinery. Your mind will adjust to the space of the rig just fine. If you want it to turn tighter you can widen the front axle to the point that the front wheels/tires can turn to about 50 or 60 degrees from straight without hitting the inside of the frame. There are Pete's and other trucks that do that.
-
2 points
-
2 pointsI like the proportions on this one, with the hood a little lower than the bed. It just looks right to me. But maybe looks more functional and truck like than a hot rod.
-
2 points
-
2 pointsI did the same thing once. In my case the "Snap Sound" was the hub cracking the entire length of the keyway. Hub came off well after that. A little "V" cut and a few passes with the Mig and the hub is good as new.
-
2 pointsI have been humping pellets well over 20 years as well. I used to sell & service quite a few of them and corn stoves as well until the market became flooded with them and pellet prices skyrocketed due to demand. Lennox owned a company that made them but they have long since gotten out of the hearth products business. Things back down to reasonable now that the demand isn't as great. This was all way before the big boxes were selling them. I go through about 3 tons of pellets a year. All pellet stoves are equipped to be direct vented meaning they can be sidewall vented and combustion air be brought in. Most stoves are required by the manual to be vented this way. Always follow the install manual as far as venting or you will have problems. If you don't have the manual write the manufacturer for one. Short sidewall venting with the least amount of elbows is always preferred and running the exhaust through a heat save is ill advised, it will plug up quickly with fly ash these things produce. Most do not have a overly powerful combustion air blower. Harmans are the best by far and now they even have touchscreens, usb ports and phone apps! Whoda thunk that 25 years ago! I've got a few NOS stashed way in case I ever quit burning wood in the shop.


