
Leaderboard




Popular Content
Showing content with the highest reputation on 01/26/2019 in Posts
-
19 pointsMy baby girls 1st birthday was last weekend (19th), but we pushed her party back because of the forecast (🙄). We decided on a Unicorn theme.... now isn’t this just the cutest “horse” you’ve ever seen?? Figured some baby pictures would brighten up this overcast day haha!
-
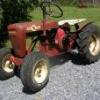
17 pointsDesign by Nathan Amyx & Barry Gundlach started as a basket of 854 parts. powered by 6.5 predator with build kit. Currently produces appx 11-12 hp. The larger wrench on left side is hand clutch. This has right foot throttle control. Yes, it’s pretty fast. I’m really happy with the way this turned out. My entire collection is Wheel Horse Custom Modified’s. This fits right in.
-
10 pointsBack to the decal project that I am much more knowledgeable about than motors. The decals I made for this tractor are digital printed on Satin finished clear overlaminate vinyl and then a layer of satin overlaminate to encapsulate and protect the solvent inks. After that I Laminate the 2 layers of clear onto a little longer piece of brushed chrome adhesive backed vinyl making a fairly thick decal which does make install a little easier but not nearly as forgiving as the vehicle wrap vinyl I use for most of my decal sets. So I cover the decal with medium tack transfer paper to help line up the hood decals as shown in this first image. Once I get it registered where I want it I put a piece of masking tape over the middle of the decal as shown in the next image. This will hold your decal registration while your applying the first half of your hood decal. I usually start with the left end of a hood decal first. Does not matter which end you apply first it just seems natural to me to apply the left end frirst. The chrome vinyl has no air egress adhesive like the wrap material (that is so forgiving and easy to rub out any air pockets after install) So I revert to the traditional decal prep and application. Make sure as always to clean your suface to remove any dust. Best to wipe it with isopropyl alcohol . then remove the tape from the end your starting with and peel back the liner then cut off the liner. A pair of scissors comes in handy for this. sometimes a third hand is helpful. Next I use a plastic squeegee to apply the decal forcing any air out as I go to get a smooth bubble free application. Then remove the masking tape from the middle and the opposite end. Lift the decal away from the hood to peel away the other remaining piece of liner and finish applying your decal. Now your ready to carefully peel off the transfer tape as shown And as simple as that you have your finished install. Yes you can use the wet application method if you feel more comfortable with that method.
-
6 pointsI didn't do this all today, but I did take it off paint it and reinstall it. Bracing the transmission mount. I had already done this to my 312-8. This the C-120/180. The black reinforcing is 1/4" x 1 1/2" that I ground to fit in between the ridges on the transmission plate. I also used new bolts that were 1/4" longer. My neighbor did the welding as I can't see anything after the flash. I put these new seat on my tractor a while back, they sat up to straight. I had already put a 1/2" spacer under the hinges on the 312-8, so I made some for my C-120/180.
-
5 pointsFINALLY added this 104 to my collection today. I've been after the previous owner to sell it to me for about 4 years now, and after he replaced it with a john deere he was ready to part with it. Never had a cub with a hydraulic lift like this before and I'm really excited about it! It has a 48" deck and lights. Original engine took a crap in the 90's and it was replaced with a new k241 at that time. Had the lighter too, but it went missing at some point in time. I have a snow blade here that will fit it, but I'm not sure what I'll need to hook it up to the hydraulic lift. Really happy to have this one!
-
5 pointsAnd here I thought we were just getting started 🐾🐾⛄❄⛄❄
-
5 pointsBeen sliding a piece of vacuum hose on and filling with oil. Go back the next day and it's lubed to the knob.
-
4 pointsHa you guys whining like a bunch of school girls... This is what I had for an outside temp with the morning coffee...
-
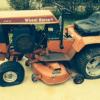
3 pointsalong the lines of a "patina" restoration here is a 701, I did all mechanicals and only painted the rims, all the metal was scuffed down and hand buffed with Johnsons paste wax, it really looks incredible in person, keeping all the original paint and scratches memories, etc.. something you might want to consider being you guys owned it since new. also I attached a picture of my 854 this was an ex pulling tractor I returned back to stock and I cut my grass weekly with it, all the red was buffed and polished and the wheels and seat were painted antique white
-
3 pointsI actually found the bolt p/n 911400 the spacer p/n 100309 bushing p/n MW2195 and the pulley p/n MW8821 from the local Toro dealer score, locally sourced 3/16” bar stock and in the process of make a new link. installed new point condenser coil and plug. Put a new fuel pump and rebuilt the carb. Hooked up a fuel source and a battery fired on the first couple of turns and no smoke success. started to rewire. And now I noticed hydraulic fluid leaking from the cam box I hope it is just “o” rings. Then I will be able to see if the hydro will work. Never ending on these old machines.
-
3 pointsI had a couple of those once of a different flavor. Somehow I woke up one day and they were 6'4" and 240. Enjoy the heck out of it man! What a bug!
-
3 pointsFinished both hubs and mounted the wheels, I didn’t realise how narrow it would be compared to my GT14... So left with the quandary of making bigger spacers or modifying the centres I went with the latter. I drilled the spot welds out and beat the crap out getting the first centre out. Holes welded up up ready to grind down I ran out of mig wire, so that’s it for this weekend...
-
3 pointsI would love to find a round hood while the kids are still little for them to put around on, but I don’t doubt it one bit, she loves the tractors haha. She’ll be the one that would pick out a “D” series for her own too 😂.
-
3 pointsThink I need to clarify something here.I wasn't using the C17. when the rear locked.I had started it and moved it a week or so before.and it was fine.The next time I started it and tried too move it was when I smoked the belt,I actually thought the rearend was frozen to the ground until my son pulled it out of where it was parked and then discovered the rear end was locked up.Again though it was probably in the 40s the last time it moved to the 20s when the belt blew and now it sits n 1-2 ft snow so nothing is going to be done with it for a while.
-
3 points
-
2 pointsPics of the 5-7321 drive belt, and mower deck belt guard .
-
2 pointsI've been taking my parts down to bare metal and using an etching primer first then putting regular primer then sending smooth before paint. Then using a rattle can and have had great results so far.
-
2 pointsNot to mention all those Projects on hold that's ready for paint. Need some warmth to get back on them, get them reassembled and electrify the heart brining them back to life!
-
2 points42 til daylight savings. 10 th of March.
-
2 pointsStarting to put it together today I did some touch ups along the way of the paint. The anticipation is killing me!
-
2 pointsMan I wish I lived closer. To get paid to do something that I enjoy doing....oh I see that he said reputable...lol. Really need to see pics of the 854 in question. I have one that is in line waiting for summer to begin for it's rebuild. That is one of my favorite tractors. Oh and welcome to the forum, I'm waiting to follow the thread on this one.
-
2 pointsThose 26in tires you want to run are bigger than you think. Here is a set I made up to go on a 74 roper SS16 I use to pull a 10 in moldboard plow. I had to space them out 4.5in to clear my fenders. I still had to twerk the fenders a little to get 1/4 of clearance. It is a neat look and they work great. A set of turf savers would look really good that wide on the 875. Go for it.
-
2 pointsYou can use the wet or (light soapy water or windex) method if you are more comfortable with that method. The dry application method is faster and much less messy for me.
-
2 pointsCute! You know she is thinking..."Hey Dad...This Unicorn thing - it's nice and all, but...Where's my Wheel Horse?...Maybe a little Lawn Ranger to start...then when I can reach the pedals, I'll take a C or a D... "
-
2 pointsWe are home from FL. Daytona Beach to Middleville, in 26 hours total
-
2 points@Bear G that thing looks terrible! You surely don’t want to be seen on that one. Tell you what, how about a couple of us ole VA boys come and take it off of your hands? That way you won’t have to worry about looking too cool cruising it😂! Seriously, fantastic build! I love the stance!
-
2 pointsAbsolutely, I make no attempt at denying it haha. She is the most sure of herself, confident, head strong baby I’ve ever encountered. I thought my mom had prophesied my son when she said “I hope you have one just like you some day”.... over the last year I’ve come to the conclusion that she was talking about Little Miss 😂
-
2 pointsOnly when Mommy and Bubby aren’t around haha. I’m third on her list, but at least I finished in the top 3 😂😂
-
2 pointsWell done! That install looks professional! Who’d ya hire?
-
2 pointsWelcome thats a good looking 52 year old tractor and great to here it has been kept in the family. There are some sundstrand transmission experts here. I’m not one, but one thing I picked up on is it’s helpful to have tractor running to do transmission diagnostics. So you might tackle the carb to see if you can get it running a little better (while you read up on transmissions). Type “Sundstrand” in the search box and go through the transmission section here for others past repairs. @daveoman1966 is one of our resident hydro guru’s so look for some good info in reply’s to others by him. One area to take a close took at is the transmission mountain plate since it has seen many years of plow duty the tranny mount is a weaker area of these horses and can develop cracks. This is not a deal breaker, and there are many good threads on repairing this As others have said a good fine wet San and buff can bring a lot of paint back. If you want a little more metal protection for a worker, a couple of coats of clear coat is my personal preference. Redo your Horse in the Vendors section has great replacement decals. Of course I also did a full bladt and paint on my sons 312-8 and currently on some suburban. The important think is keep it in the family and make the restoration your own. PS. Any pictures with your grandpa or you as a youth with the tractor would be great to see
-
2 pointsI think the guys have you covered so the only thing I can suggest is move to Florida. Yep, as this winter has turned more normal for Missouri, a move south is looking better each passing, freezing day. I just checked yesterday when the temps were warming up to 17 here, it was 53 in New Orleans, 50 in Baton Rouge, 45 in Jackson, Ms,.......Louisiana, Mississippi, or Alabama would be more my choice than Florida, but it would be a few degrees warmer more south you go in that state.
-
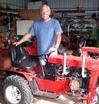
2 pointsGary bought the building 11 years ago for his business. He is a Harley man so when we decided to build a bar it had to represent. We had our sign shop here for about 6 years till we retired. Here is a picture of the powder coat room.
-
2 points
-
2 pointsNot the horse, but the hauler........ Got bored and made some “carbon fiber” window decals. Now the hauler is official. 👍
-
1 pointSo...They riding RJ's or C Series or what??? Probably will need chains now...
-
1 point😎 beans, my very first garden tractor was CC106 with the "creeper" drive hi/lo box and a 42" deck, was brought up on the cubs, but wanted hydraulics and a brand new one at that so I ended up with my Anniversary 520H March of 1998, I found another 106 near me for sale but will needs lots of TLC, Good luck with your new toy.
-
1 pointThanks Belleville and jabelman. Our 854 was purchased new by my father-in-law and used for for many years, mowing an acre and 1/2. I replaced the rusted out mower deck,with 1/4" aluminum and installed the original hardware. Our children learned driving fundamentals on it, plus got the grass done:). This mower sat for over 20 years in various sheds, so it will need a thorough going over.
-
1 pointDid the jumper test, will start cleaning connections and cleaning grounds.
-
1 pointWhere's that global warming when we need it...
-
1 pointWH wasn't very forthcoming with parts listings for Wheel a Matics, the 875 manual shows nothing...I have a WheelaMatic manual also shows nothing But by 69 they showed the O rings...but since this and the later hydrogears are essentially the same I would suspect you need a dash #026 I use the square profile version ( Dash # 026S ) as it is easier to install and I haven't had any leaks. The other shaft O ring is dash #116.. If you need the O rings pm your address i will mail you a pair. I bought in bulk from McMaster
-
1 pointExcellent pictures Kyle.
-
1 pointDid the same thing. Much better!
-
1 pointSharp looking decal
-
1 pointQuite a machine sir. Love to see a video of it sometime...
-
1 pointDas- You do not have to repaint if you like. A good cleaning and try buffing out the paint. Or I am lazy I use Marvel on the finish when I had a W/H. It brings out the color what is there. Just rub in let it set for a day rub off. An easy way to get some color back. Enjoy the project.
-
1 pointLooking Good and I like the decals!
-
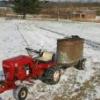
1 pointI would highly recommend cinders for winter traction. I was trustee for our subdivision for 10+ years starting in the late ‘80s. The best snow and ice guy I had for our roads used cinders. I do not know if he mixed salt, I don’t think he did. This treatment did a great job ice or snow. And it was used on the road prior to it being paved. The cinders just mixed in with the gravel. Never saw any road deterioration. Only complaints I ever heard were about having to clean there cars after we paved the road. Don’t think that would be a problem with a gravel surface. Cinder piles need to be kept dry. Getting them wet will freeze into a big black iceberg.
-
1 pointThanks Tom... Nice to have a place like that to hangout in. What better place to have a man cave than a ex car dealer garage!
-
1 point
-
1 point















.JPG.9f2ecb26065c66527b0730084ab7fc7a.thumb.jpg.7dc8a04d9a53d44ee2b23f26ee94496f.jpg)
This leaderboard is set to New York/GMT-04:00