
Leaderboard


Popular Content
Showing content with the highest reputation on 09/04/2018 in Posts
-
8 pointsJust a few of the signs.... Feel free to add yours to the list.
-
6 pointsDid this in 2009. Time flies. not a lot of pics but guys ask generic questions when building these. Used PK drawings but 3/16" steel instead of 1/4". Bucket is a scoop hybrid that the guy who welded everything recommended. Frame is a PK copy and clamps onto the tractor frame. Towers are the hydraulic tank. Arms are very heavy! Grease fittings in the pivot points. bucket: finished product First show Memorial Day 2009 Delivered a WH mower deck at the Steam Pageant.
-
6 points
-
5 pointsThat’s just completely ridiculous and obnoxious. I like it!!!
-
5 pointsAlways do that first. The issue may also be a bad starter relay or solenoid. The click sound is the coil in the relay or solenoid closing a switch to energize the starter. After time the contacts on these switches get burn spots on them & will no longer make a good contact. The starter relay should be mounted under your battery tray, when you turn the key this relay closes & sends power to the starter solenoid. The starter solenoid is mounted on the starter, when the solenoid closes it sends power to the starter motor. If you are not hearing / feeling the click at the starter motor, then I would investigate the relay under the battery tray. If you can hear / feel the click at the starter, then I would suspect that the solenoid on the starter may be bad.
-
5 pointsPrimarily setting the depth of the plow in the soil. If your tractor is set up with a stop like a strong arm (manual lift) tractor does, then you can dial that to the exact height that works for your conditions and it keeps a consistent depth. If you have a tractor that doesn’t have an adjustable stop, then you find yourself constantly playing with the lift to get the right depth. A land wheel, lets you drop it and go! Dad’s Clyde has hydraulic lift with no provision for a depth stop...so he built a super cool adjustable land wheel that works great. It allows him to adjust for conditions yet drop the plow all the way at the beginning of each furrow. It works really well! Funny story about that—early on in my plowing experience, I had set up a CC682 for plowing. It was a hydro with a Magnum 18 and I used it with my first plow, an old style “flat beam” 10” Brinly. It didn’t take me long to get the hang of it because the soil conditions were nearly perfect on harvested wheat ground. I decided to open it up a bit and was doing about 5mph when I heard this loud BANG! The whole tractor jumped and lurched forward. I quickly looked behind me and saw a 50# rock sitting up beside my furrow. It did a number on my upper adjuster turning the threaded rod into an “S”! Lesson learned: Rocks, Suck points on plows, and speed don’t make a good cocktail!
-
4 pointsI bought an 857 at the big show that most guys said belonged to a set of stirrups originally but came with running boards... it doesn’t have the second round bar out back but considering her weight, I doubt that is a concern. The rear of the running board bolts to the front fender support/latch bar.
-
4 pointsI don’t have any pics of this bracket since the trans was rebuilt, but this pic may help. The bracket is a little hard to see, as WH had a habit of painting everything red! I will make some better pictures tomorrow, as it looks like I will be replacing the drive belt that came off twice tonight... The bracket clamps to the left side of the axle housing using the U bolt, and has a secondary attachment on the 3/4 inch diameter pin that holds the hitches.
-
4 points
-
3 pointsrecently picking up a 312-8 ,in addition to wanting to recover a lot of areas of neglect, the main thing was the loose noise this rig made, like a rock in a garbage can. lower front hood pin, swing hinge, removed that and replaced with 2 5/16 x1x1/2" bolts with 2 fender washers on each bolt and elastic nuts , result ? silence. next rebuilt the pto lever rod assembly, I was going to replace the steering rod shaft bearing with a two bolt flange bearing , so I was there anyway. that pto set up was a rattling mess , made up some Teflon washers and spacers and that is smooth and silent, no noise. added a soft extension spring to the rattling clevis pin on the pto curved arm to bottom of arm mount pin, silence. I just love bringing this thing back . my old c-85 has been upgraded the same way, on to the next service area, pete
-
3 pointsThis came in one of the totes of parts I recently purchased. Not exactly sure what it's for. So if anyone knows please fill me in.
-
3 pointsYou shouldn't have any issues running wheel weights. Wheel weights are probably one of the best ways to add weight to your tractor and or filling the tires with liquid ballast. One of my tractors is over loaded with weight which hangs on the frame. That adds much more abuse than weight added directly to the tires. Never had it weighed but there's a FEL and a backhoe hanging on it since 2008.
-
3 points
-
3 pointsI went ahead and pinned this, but I think it should end up in the "Reference section" after it runs it's course.
-
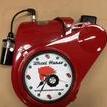
3 pointsDid she raise your life insurance at the same time?😀 Looking good!
-
3 pointsThank you. My wife made the decal. Has one on the engine too
-
3 pointsCan we have a bit more information please? Is this a new problem on a previously good working deck? Had the belt been tightened prior to the problem occurring? Had the deck or mule drive been removed or the belt replaced recently? Are the idler pulleys on the mule drive turning freely?
-
3 pointsAre you talking about the running boards that started being used in '68 or '69? If that is it all you need is a second piece of 3/4" round stock on each side near the back of the running boards to support them.
-
3 pointsThe striped wire is positive.
-
3 pointsI chased a few issues on my GT14 at the weekend. Finally I thought solenoid... so ran a jumper from the battery to the starter - nothing! Undid and tightened a few engine bolts and voila! it was a poor earth, solenoid was clicking, but not a good enough ground for the starter to spin!
-
3 pointsMe and the misses dancing for our Family. I made my regalia. Lakota from Eagle Butte, S.D.
-
3 pointsI really enjoy this thread. A great way to enjoy the morning. Drinking coffee and watching wheel horse tractor turning over some dirt.
-
3 pointsFinally! A question I can answer! That is the bracket used to mount an electric lift mechanism to a six or eight speed transmission. I just cleaned mine up and mounted it on my Raider 10.
-
3 pointsIt is one of the brackets for an electric lift for a clevis hitch
-
3 points
-
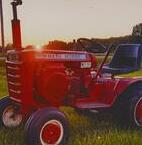
3 pointsWell it’s home. Meet “Hank”. Deck is as solid as it gets plus no dents or rust whatsoever. I have to find some way to get the hood and grille back to the original patina. I do have the side covers off of the 1054 that are original so they may get used on this one. I Want to keep it original at this point.
-
3 pointsIt's been kind of hit and miss getting time to work on it but...... I did find a steering wheel for richmandred1that cleaned up really nice. Broke down the engine so I could send it out to the machine shop. The hobbs meter on it said 1823.7 but I found out it was broken so not sure how much time it has on the engine. It had a STD piston and like I said earlier it ran real nice without any smoke!?! The blast cabinet has been getting a workout. Lots of little parts and a couple of bigger ones. And a new set of drag links
-
3 pointsI changed the back rims/tires out for the ones off the Baby Farm tractor project so I get this one to roll. Fronts I think I'll have to buy a new cheap set of garden cart wheels/tires. I like the look of these 6/12 AG's much better than the 8.5 x 12 turfs that were on there.
-
3 pointsMade up a set of NHRA approved wheelie bars today.
-
2 pointsI’m sure there have been threads started specifically for this topic on here and if the moderators want to combine this with one of those, please do. Per @Daron1965‘s request, I’ll start a thread about my personal favorite attachment for a Garden Tractor—the furrow plow. I want to state clearly here that I don’t claim to be an authority on this subject. Maybe like doctors “practice medicine”, I find myself “practicing with a Brinly” every time that I head out into a field. I’m going to tag a few of my buddies like @Achto @WHX20 @Shynon @prondzy @Stormin @WVHillbilly520H (If i’ve Forgotten you, not my intention, please join the discussion) Who are all “plow dogs” in that they enjoy climbing into the furrows and turning earth for extended periods of time! I hope that they will weigh in here with their experiences and things that they have done with their rigs and plows. Pictures will definitely welcome and encouraged in this thread, both for instruction and coolness factor. It is funny how people look at someone on a garden tractor turning under a field! I wish I had a dollar for every time someone uninitiated said to me, “I didn’t think you could do that with a lawnmower!” Many folks today have seen people blading with a GT, mowing with a GT, blowing with a GT, but when they see someone plowing with one—they are often shocked. Our culture has moved so far from the agregarian society that people aren’t familiar with it. I bought a 10” Brinly two weeks ago from a buddy who brought it to my Uncle’s Farm day. It was a vey cost efficient price. Apparently, he found it at a garage sale. The person had painted it all black and was using it for a yard ornament because they had no idea what it was for. The first thing I want to make clear about plowing with a GT: GROUND CONDITIONS ARE OF UTMOST IMPORTANCE! If you are trying to plow red or blue clay that hasn’t seen a drop of rain in two months—Don’t Even waste your time. You won’t have fun, you won’t have very good success, and you’ll probably break your tractor in the process! Also, be aware that a garden will traditionally plow easier than a field because the field gets compacted throughout the year with large equipment that weigh anywhere from 5 ton to 20 and more. If the soil is too wet when you are trying to plow it will stick to everything unless it is a real sandy soil. This soil here was quite sandy but was still as hard as a rock. We had trouble getting the plows to suck in. When a plow is only cutting a 2” deep furrow, the geometry of the plow isn’t correct and the next pass or tractor in the furrow is acting more like a chisel plow than a moldboard plow. One of the awesome things about GT plow days, is the opportunity to share the experience with some buddies. Rarely do we get together to blow snow or cut lawn. I like GT shows but I like plow days better. Why? Because not only do we get to look at cool tractors or show off our own, we get to use them and see them in operation. Here my Uncle Roger is using his 314-8 to turn my garden. He was cutting a 6-7” deep furrow with his 10” Brinly and it was doing a beautiful job. This soil is a sandy loam and the moisture content was perfect. One problem with most WH’s as a plow tractor—they are way too light in the front. If you want to do any SERIOUS plowing with one, you need at least a good 60-70#’s or more of front end weight. I’m running 3- 22# weights on my front attach-a-matic and a pair of cast front wheel weights on GhostRider. When I first plowed with him, I couldn’t keep the front down! I was tempted to sit on the hood and look backwards over my shoulder . Power is important and it is good to have a strong running engine. However, there is no need for 25hp when a strong K301 will pull a 12” Brinly in moderate soil conditions with proper adjustments and weight all day. Size your plow to your tractor and it’s power. Comanche is an 8hp Tractor and an 8” Plow is suited well to it. I regularly run the Punisher(my 12” Brinly) behind GhostRider (my 314-8). Conditions were nearly perfect this particular day. I was cutting a 6-8” furrow (notice the lean angle on the tractor) and the soil had just the right amount of moisture to scour really well. Tires are important. I like the modern Carlisle TruPower on the left but I know that Tom and Mike swear by Firestone 23’s and I can’t wait for them to weigh in on their experiences. Dan and I have been discussing the pros and cons of tire width. Too wide and your tractor floats more and then it takes more weight to keep it from spinning. Too skinny and you don’t have enough bite in the ground. A clean moldboard is also very important especially if the soil is sticky at all. If you buy a used Brinly and the moldboard and plowshare are all rusty, I’d suggest cleaning them up some with a wire wheel on a grinder or a drill before using it. The dirt in the field will do the rest. I love the mirror shine that Dan has on his plow here! You know the plowing was good when you leave the field and your plow looks like this and your rear tire like that! I have a lot more to say but I have a few other things to take care of right now and so I’ll check back in later...
-
2 pointsI just got an electric fuel pump for my 520-HC off eBay and didn't get ant instructions for the wiring. Which is positive and which is negative? One wire is all black and the other is blue with a white stripe. https://www.ebay.com/itm/141845126993
-
2 points@WHrookie all of us started the same way knowing nothing about these wheel horse tractors. I read a lot of the posts here just to learn from others problems. Great people here that's why I stayed.
-
2 pointsA little background on this 1978 C81. It hadn’t been cranked in 6.5 years and when I got it home, cleaned carb and put in a Lowe’s spark plug. A little fuel in cylinder and it fired right up. Happiest person in the world, until it shut off and wouldn’t crank. Checked coil, close to being bad, so it was replaced. Rebuilt carb, new point and cond. went through hrs of retiming and setting point, still wouldn’t crank. Checked fire to plug and had spark. Bottom line was, bad new plug. Finally figured it out by taking plug from electro 12 and there you have it. I’m just a rookie on the small engines, but with all the help here, figured it out. My last extra spark problem was Grounding. Removed points and sanded points base and base on block, no extra spark. What a wonderful site to soothe from blowing up a good tractor. Now, I will refurbish this one first and the tackle the electro 12 next. The 12 is a running tractor but needs some love. The C81 still smokes some, but I can live with that. You guys are great. Patience, I’m starting to learn since retirement.
-
2 pointsFlower child.
-
2 pointsI have to agree. Without Steve's videos and coaching, I would not have torn into this transmission. This thing would be spilling oil like the Exxon Valdez, and my bearings would be chewing up shafts!
-
2 pointsAlso, make sure you have plenty of storage space. Horses are well known to be a herd animal and they will soon multiply. I was told that about 2 years ago. I started with one because I needed a good heavy duty tractor and now I might have more than one or... More than... like 7. ...Or more.....
-
2 pointsThanks, my first thought was grounding and then the cond. the cond. is NOS and it did have some discoloration to its casing. Ill let you know what I find out.
-
2 pointsAfter reading posts by @stevasaurus I’ve come to understand how Luke Skywalker felt when talking with Yoda. The force is strong with Stevasaurus!
-
2 pointsI was using one of my tractors the other day to pull the yard cart to pick up some fallen apples for the deer. The tractor didn’t have a battery so I grabbed one and stuck it in. Tightened the cables and started it no problem. The boys were driving the tractor while I was finishing cutting the lawn in another part of the yard. I finally drove to the orchard to see what was taking them so long and I saw the tractor sitting there. Caleb said that the tractor won’t start. I turned the key and just a click. I monkeyed with it for a minute or two but to no avail. Remembering the above statement, I grabbed my wrenches, looses the bolts and tightened again. This time—success! I hope that yours would be this easy, but if not, I hope you find it is something simple. Wiring issues can make you pull out your hair for sure.
-
2 pointsAll of the above switches are held closed for normal starting. If any of these were open you would not hear a click at the starter solenoid. Check your ground cable at the battery & where it bolts to the engine. The starter gets its ground through the block, so may be loosen the starter bolt & retighten them to try for a better ground. If all this fails then I would try a new start solenoid.
-
2 pointsTry this dealer in KY. They traditionally have beaten local dealers on sales (even adding in truck delivery) and may do the same on parts. http://barlowequipment.com/
-
2 pointsI went to mow last night and things didn't go great! - Got on my Husky (primary mower) and noticed the blades didn't come on smoothly. I hadn't greased the spindles in about so I went for my grease gun. - Grease gun was empty so I went to put in a new tube - Back of the grease gun metal ripped out (another Harbor Freight delight) so no greasing - Decided I will mow with the Wheel Horse, it will just take a lot longer. - Started mowing with the Wheel Horse, 30 mins later, tractor shuts off. (investigation points to fuel pump) - Came inside to declare defeat and wife says the A/C upstairs isn't working Both mowers down, yard mowed about 30%, hot. Momma said there would be days like these!
-
2 pointsSounds like the body of the points that is secured to the engine block does not have a good electrical contact to the block. One would think the screw mounting the points would be sufficient. Perhaps the points have a clear coating on them or an oil applied to prevent corrosion in the box is the cause. I would remove the points and sand the side contacting the block and do the block as well. Garry
-
2 pointsThe first good general service manual was about 1978-89 but much of the info applies to older and later models. Click on the picture. Garry
-
2 pointsfor everything other than the transmission, they are pretty well like lego... most things are easy to take apart clean and fix... I thought there was a GT14 service manual?
-
2 pointsSome of the Rigs: @Shynon‘s Machine @Achto‘s Raider @prondzy‘s Beast @WHX20‘s WHX1😉 My Dad’s Clyde GhostRider Here you can see how they are set up and in action. Most of these videos have been posted on the Forum before but in keeping with the topic, I feel it is good to have them all here in one place...
-
2 pointsUpdate.......got the headboard and footboard done! Those pocket hole jigs are the bomb!!
-
2 pointsWorked on the trailer and grillin
-
2 pointsYOu win the prize! Total repair cost $0.52! Thanks!
-
2 pointsMe and my buddy peanut


This leaderboard is set to New York/GMT-04:00