
Leaderboard


Popular Content
Showing content with the highest reputation on 05/18/2018 in Posts
-
6 pointsOil is Oil!
-
5 pointsFinally had a chance to bolt the fresh K-341 on my 76. I'm probably not going to get it going until after the big show. There's a few things I want to find for it. An ammeter or voltmeter, an OE style muffler, headlight lens, an OE style rectifier/regulator, brake liner, drawbar hitch (works great with the old tub cart) and probably a few other things. I installed a hourmeter in the shifter plate so I can track the hours on the 'new' motor.
-
5 pointsIf you have a bottle jack, some 3/8" all-thread and an old hub you can do this.
-
5 pointsThey made a blower that fit on the Ranger's which were only 6hp. I don't think that you will have any trouble running one with a 10hp. Unless you want an excuse to buy another tractor, then don't disclose the above info to your significant other.
-
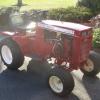
4 pointsMy newly acquired 1981 C-105 that I picked up in a trade with @Chris T ... and MY first time mowing with it ( my dad already used it). Ran great and cut great! Very impressed with this 37 year old machine.
-
4 pointsI picked this one up late last fall so I never was able to try the mower deck. Today I did. Mowed really well.
-
4 pointsLet me go through this again. The C-Series has a 45.5" WB. The 74-75 B-Series had a 43.5" WB. The 76-77 B-Series had a 45.5" WB and were identical to the C-series save for the following. Horsepower, low back seat vs high back, 13" steering wheel vs 15", 22.750 rear tires vs 23-8.50, headlights optional vs standard and a couple other minor things but you get the picture. Download the brochures and check the specs. I have a 1976 B-80 that I bought new and then converted it to a C-160. The only thing that didn't get converted is the steering wheel because I preferred the 13". Measuring the 74-75 B-Series as 3" shorter is probably because the overall length is about that with the smaller rear tires. The WB is axle to axle and they are 2" shorter. Again, the 76-77 B and C series share the exact same frame. In 1978 the B's became lawn tractors and were entirely different.
-
4 pointsWhat Malmac said. More HP is better but 10hp beats the heck out of 1 Manpower! You can drop speed to a crawl. Take smaller cuts. Try to divide the storm and blow during the storm. I'd want more than 10hp but it would certainly help!
-
4 pointsA few of the views here... from my office window this week. Can you say, Trees? Or, the damage they sustained, has been the word of the week here, this week. So, for now, the crisis is over... the power grid has been restored... and, my happy little life can pick up where it left off.
-
3 pointsDead Dinosaurs are dead dinosaurs...
-
3 pointsThe other thing to consider is if is a hydro, the effective HP available is decreased some, just how much is not clear to me. I have used a single stage on a 10hp, a 14hp and a 20hp. There is definitely a difference. The lower hp does not have the oomph to barrel thru the snow at the end of the drive. But as one member said, 10 hp beats one manpower any day.
-
3 pointsIf you have a Lawn Ranger and a Lawn Ranger Snowblower a 6 HP motor will do just fine for blowing snow! Get a Horse , a Wheel Horse of Course~!
-
3 pointsI've got one of those on my ebay watch list Jim but I'm kinda wondering about durability and if it would be visible in the sunlight. Nothing too fancy for this old girl. With the history of this tractor some may wonder why I'm not restoring it. In my little way it's a tribute to the late gentleman that had it for the 17 years we were living in Florida. He did do some painting on it and it could use some freshening up but he took such good care of it I've decided to leave it physically as is and work the snot out of it like I always did. His wifes words that I was the only person Larry would want to see with this tractor goes through my mind every time I look at it.
-
3 pointsany spec over 24300 Series 2 Full pressure oiling system. Good engine...But even a good engine can be damaged by abuse, neglect or oaer use....
-
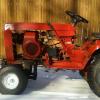
3 pointsYes the B-80 that Eric has from me was a 1976 8-speed. I ran it for many years until I got a princess of a 1974 B-80 4-speed. I then made the 76 a parts tractor. Same frame, known as a mid-frame. I just picked up a 77 C-160 (pictured) last weekend that I would like to restore with another long frame as well.
-
3 pointsIt is a foot pedal for engaging the deck on alot of 60's model WH.
-
2 pointsMy C-105 says "HI!" to his cousin... GREAT tractor! Cheers!
-
2 pointsMixing Oil Brands, You're real rebel Sparky!
-
2 pointsYou guys made me laugh!! Mixed it is! Has to be better that what came out .
-
2 pointsSorta related: My Power King transmission takes a 1/2 pint. It has a mix of 90 Wt., STP and Lucas oil stabilizer. Been in there for 5 yrs.
-
2 pointsYes. Other users specified oil filters. Why WH did not is anybodies guess. Look throughte Kohler engine parts website fo rKT17s. look at spec #s for cub cadet or others Some had filters. That will show what parts you have to round up.
-
2 pointsGreyghost, The 417-As to the best of my knowledge all had the series II. The C-175 for example would have had the bad series one. Others will confirm for sure.
-
2 pointsI may be spoiled on this, but to quote Homer: More power is more better! Basically you can only have to little power, no such thing as too much. Just my
-
2 pointsSnowblower was used once.Paint isn't scratched on the pulley.
-
2 pointsI had a blower on a 12hp Charger worked just great. I had one my 6hp Ranger...not so great. Problem is your first pass you have to take full width and depending on the type snow it may choke. You have to go very slowly and yet have engine RPM maxed. With a 3 speed that requires a lot of clutch slipping. If you have an 8 speed you can use low range for the first pass. Subsequent passes are not an issue as you can control how much snow you are taking.on
-
2 pointsMorning Karl just saw the above, (still no power running on Wheel Horse Gen power)...… no damage to house MULTIPLE trees down, when this is over don't want to see a chainsaw for like 6 months!
-
2 pointsI'm stealing both of your ideas!
-
2 pointsYour seat back takes a pair of 1 3/4" 1/4-20 round head machine screws that will go into a pair of "T Nuts" in the seat back. I made up a devise that attaches to the plywood of seat cushion which does a good job of holding it down. you can make one up using any heavy wire and attach it to the seat bottom where it will go into the gas fill opening of the seat base. Mine is made of 1/8" spring wire and the screw eye bent in it is one inch from a 90* bend that positions it. There is one thing we request of all new members,
-
2 pointsType of snow is the biggest factor. Wet snow VS Dry powdery snow. Also I am assuming the snowblower in question here is a single stage. If we’re a 2 stage Blower then a 10hp would be severely under powered.
-
2 pointsgot an old hub...if so, try this setup
-
2 pointsAll this work to get this fan on here and it was pointed out to me I have the wrong direction fan. Thanks @wallfish. I was looking at it spinning from the wrong way. Back to the drawing board
-
2 pointsThe machine was a trade in and is being sold as is. It is in good shape otherwise but isn't something I really need. I thought about using the motor for parts for my other Onan if needed. These things are addictive. Bill
-
2 pointsI spent some time during off season and restored the old girl she will out last me. I have a 416-8 and I love this one. I don't see many around well not here in Va.
-
1 pointLove those old power kings
-
1 pointSkipper, that's a GoodLookin Horse. Thanks for the pictures.
-
1 pointI got half a mind to try one of these or something similar Bob and try and fit it into a 520 dash. https://www.ebay.com/itm/Red-LED-Digital-Waterproof-Voltmeter-Gauge-Meter-12V-24V-Car-Auto-Motorcycle-ATV/322137549849?ssPageName=STRK%3AMEBIDX%3AIT&_trksid=p2060353.m1438.l2649
-
1 pointThanks for the info !!!! My 12hp Ariens works great but its not pushing a tractor around.... I'll go pick up the blower, clean it up and see how it mounts.. I'll try and get him to send me some pics to see if its one or two stage.. but can't be too picky for free (my favorite price)
-
1 pointThank you. Same goes for you if you need anything
-
1 point
-
1 pointYour correct Dells that lift handle for a suburban . The other parts are just a wishlist as is the idea of custom being built . Heck I’ll be lucky to get that special pic to Terry for the trading cards in time.
-
1 pointSame here Ritchie, I live on a big sand hill and grass was impossible to grow without hauling in tons of topsoil and even then. Turfs & deck rollers would even dig what little grass I had up. Got real old always dragging sand in the house. Installed a DIY underground sprinkler system and now I can get grass to grow in the cat box if needed! I do have an almost unlimited water source tho.
-
1 pointNice thinking outside the box on the mount ...Can't just flip it around? Wasn't sure if I liked those rears at first Richie but starting to grow on me! I guess I'm just stuck in an AG tire mindset.
-
1 pointGreat idea, the Ford/MoPar five hole 4 1/2" bolt patern is the same as the .
-
1 pointOk, just hit the back of the truck. Lots of supplies and tools and some more nice horse parts. Gonna keep the inside weights. Lots of manuals for wheel horse, Pennsylvania Panzer, Simplicity, Case, Ford, etc... Gt14 double pulley, 701 double pulley, lots of mule drives, etc...
-
1 pointTractor supply? shorter link
-
1 pointAs I didn't have the sprockets at the time, and most of the jobs left to do involve having the 90'd drive in place, I was scratching around for something to do on MadTrax, so I decided to sort this little problem out! The problem being it should fit here (the tape is only to keep the dust etc out), but I don't have a key for it! But I do have this tank from a Honda CX trike with a locking cap... I feel a bit of tank slicing coming up It would of been a shame to scrap the fantasic art work... So I now have some more wall decoration The filler hole section was cut from the CX tank, cleaned up and tried for size on MadTrax's tank. To mark where I would need to cut on MT's tank I needed to cut out a small section so the new bit would sit flat.. And here is the very same hole after being part welded back in! Yes my brain wasn't functioning to well that day and I cut too much out! The correct size hole marked and cut out.. A test fit, only a few little tweaks needed.. While I was getting on with the welding Rob was cleaning all the paint off the locking cap thingy. Quite a few layers of paint! Ta-Daa As you can see with the flap open it needs a little bit of filler work.. Not much though I gave it a quick coat of paint to help show up where I may of missed any welding... Here's one of the holes. The new cap looks the part, I can't decide if it needs painting of just a coat of matt clear coat.. Time will tell
-
1 pointIt was at this point I started to have a few of those "Groundhog day" sort of moments! Having worked out how to make a shaft that fit's over the gearbox splines, has a bearing at the other end and also has a sproket in the middle, I proceeded to make a mess of things 3 times! Attempt 1... Having just checked the bearing fit I forgot to tighten the tailstock back up for the final cut! The result was some nice deep gouges! (not seen in this pic as I trimmed some more off to check which tools cut best) Attempt 2... Counted twice what I should of done and took too much metal off making the bearing a loose fit! Attempt 3!!! All was going well until I broke a small drill bit off about 1/2 inch in!! No way of getting it out! Attempt 4... In it's raw state And attempt 4 in it's finished (and correctly sized) state. Not a perfect finish inside, but the measurements are right. The splined bit pressure fitted, a nice tight fit.. It will be welded on then the welds and overhang will be tidied up on the lathe. And finally with the bearing, I still need to buy the sprockets but as they will need boring out to fit the shaft I could get on and make this part.. Plenty more lathe work to go, I needed to make something that would fit over this stepped shaft on the TB input side of things. The reason being I need to fit a sprocket to the shaft but there isn't a keyway for location, only splines at the outer end. Lot of time was spent with some 40mm bar to create this. Outer splines presure fitted to the sleave one end, it will be welded also. Stepped inside to fit the shaft. It would of been nice to cut a taper inside to match taper on the shaft, but don't have the tools to do it.. Splined sleeve bolted on the TB shaft, the sleeve walls are not thick enough to cut a keyway so the sprocket will have to be welded on. Back to the 90'd drive thingy from the Honda Silverwing that I'm using to turn the drive around.. On the bike the rear wheel would of bolted to this bit. But I need to put the drive from the gearbox into the 90'd drive from this way... But how to bolt a sprocket to it? Starting with a slab of 10mm thick steel and a photo that won't turn the right way! To bolt the splined bit flush on the plate I had to cut a wide groove in one face. That looks good. To fit a sprocket to all this a shaft is needed.. This will do. It fits in the circular plate like this, the tapers will be filled with weld. The other side will get welded on and the welds turned down to look good on the lathe.. The shaft has been made over sized as I don't know the measurements until I get the sprockets and try to fit the whole thing in place. This is quite a big "whole thing" to fit!
-
1 pointBack to the headlamp but only very quickly.. When it came to wire the lamp in I found there wasn't enough space around the outside of the bulb holder to run the wires,so three holes were dilled and then slotted to feed the wires through. Time to turn to the other end of MadTrax.. Starting with a cardboard template.. Which fits about here.. I'm sure you will of guessed by now it's for a rear light.. Even though I've no plans to put MadTrax on the road it needs a rear light to balance out the front light.. Not having any rear lights that will fit I need to make my own, starting with this Honda Silverwing light lens. Trimmed to shape including the lens inside. Hard to hold in position and take a picture! I have an idea on how I want the rear light to look, template time.. Rubbing dirty fingers on paper to make some marks and then cutting out didn't work too well.. No idea why this pic keeps turning around! Template number 2 involved cutting lots of bits of cardboard but it looks much better and is much more usable as an actual template Turning this into steel is going to be fun The transfer box gear stick needed a tweak so it wasn't in the way of any knees, so it was moved in by an inch, lengthened and a new hip and groovy knob was put on the end It needs a little tidy up but it looks good Back to the rear light and I needed some sheet steel to make it from. This will do.. Yes it came from our old tumble drier and still has some fluff on it to prove it A grinder with a 1mm disc was used to cut the long slices, a sharpened screwdriver (yes it was a very old one of which I have many) was used to chop the ends out. No idea why certain photo's like to turn the wrong way! Lot's of time spent with a file later and the lens almost fits. Time to bend the edges round, wanting a nice curve some bar stock was used for beating around. Ta-Daa. A lens check. "Let there be light" And held in postion.
-
1 pointHi Jim, I can see a few scrap pile trips coming up on MadTrax, a tow ball will be going on the back, ideal for a small trailer Hi CountryRock, there is quite a big update to come so watch this space.. "Quite a project" might be a tad of an understatement... It's what happens when you get carried away and things evolve Hi all, sorry for the total lack of updates of late. I knew I was a bit behind but didn't realise Feb 21st was my last posting! I'd best get on with an update.. While digging through the Quadzilla wiring loom for connectors to pilage I found something that would most certainly be a good upgrade.. So this small bracket was made.. It was welded onto the frame just under the seat. If you hadn't guessed it holds up a modern fuse block, much better than the old Honda one With the 4 wheel drive bit wired in, the time had come to think about lights starting with the er.. headlamp.. Not having the correct bulb holder (which would of been for a really old style bulb anyway) I had this problem to overcome! I had an idea on how to solve the er..gap problem but not the materials until Nigel found me this old pully.. Thank Nigel No photo's of all the lathe stages (plenty of that in the next video) but the pulley ending up looking like this.. The shallow slots were done with a milling bit in my pillar drill. Not ideal as the bed does try to move sideways! The bulb pokes through like this. Then the whole thing drops into the back of the lamp bowl. The little black slot through the bowl is a handy bolt hole, as is the one the other side Now something to hold the bulb to the holder. Starting with this.. Thanks again Nigel It was turned into this.. Which of course fits here.. I found some nice small bolts to use but I didn't have a tap to cut a thread..... So I made one Best test it.. Yep it works... Lots of drilling, thread cutting and countersinking and bolt shortening later.. Tad-Daaa A lot of work for something that won't be seen
-
1 pointMore Progress on the 1958 RJ restore today! Here are some more pics!


.JPG.9f2ecb26065c66527b0730084ab7fc7a.thumb.jpg.7dc8a04d9a53d44ee2b23f26ee94496f.jpg)


This leaderboard is set to New York/GMT-04:00