
Leaderboard


Popular Content
Showing content with the highest reputation on 09/22/2017 in Posts
-
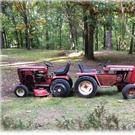
9 pointsFor the third year now, I am ready and looking forwards to Fall. Thanks to Oldredrider for the idea and inspiration. What was a nightmare job turned into something I actually look forwards to and enjoy. The ease and efficiency of this idea cuts job in a fraction of the time it used to take and makes for great seat time. Not only another example of what is possible with these old machines but also of the talent , vision, and willingness of forum members to share their knowledge and experience.
-
7 pointsI used the newly acquired 417 Auto with the 48" deck for mowing duty yesterday. I like the big tractor feel and sound of the twin Kohler. And that 48" deck makes a nice cut. But, now I remember why I converted the 520 to a dedicated snow chucker. Those twins throw too much heat to use as a mower in this 85 degree heat. May be a dedicated plow tractor is coming.
-
7 pointsHello, I picked up this rear blade and it just seemed to fit the tractor excellent! So I began the process of cleaning and painting. Next it's the decals, maybe the older style implement decals? I like this blade as it not only does angles, it is reversible too.......
-
7 pointsJim what is wrong with moons? It is a cheap dress up. Just my
-
7 pointsCheck the "thermostat " Ed!
-
6 pointsWe can deck it out real well!
-
6 pointsThat twin might be warm but the hub caps make it cool.
-
5 pointsNow Mike, don't start that up. Hey, they came with the deal Jim. Ya think I should add some spinners?
-
4 pointsNormally I'm not one for vanity over function. But I have always liked the black or stainless heat shield on the Wheelhorse mufflers. One of the many details that make these tractors standout. I found one used off a 5/20, about an inch longer than my 12hp muffler but that didn't bother me. I marked the mounting location for 4 of the 6 holes. Then I found the spots and tacked on 4 8-32 bolts. Next I put the shield on and cut the excess stud off. I left enough to put nuts with lock washers and brass acorn nuts on. I think it looks pretty good. Now I just need a 520 swept axle and reduction steering👍
-
4 pointsDid I miss the 4th of July?
-
4 pointsNo curbs where I live Craig, but they may save the rattlesnakes and rabbits from getting sliced and diced.
-
4 pointsDon't forget your curb feelers.
-
3 pointsFind you "D" series moldboard they're 56" wide, Duke has/had a NOS one for sale in the classifieds, and yes I widened a 42" to 50" for my 520H ain't pretty but got the job done, Jeff.
-
3 points
-
3 pointsNow remind me how you report inappropriate posts to the mods???!!!
-
3 pointsThey can put it out as early as they want. I refuse to buy till the last minute.
-
3 points520 axle is direct bolt on...
-
3 pointsthanks for the warm welcomes, the wife hopped on it for half the yard and loves it. its kinda fun to pop a wheely out the gate in high 3rd...I may or may not have warned her about that just for fun.
-
3 pointsMoon protectors!
-
3 pointsThose spare parts can move before the storm hits so put them in a giant bag marked with fluorescent tape!
-
3 pointsWell got it to the house and started tinkering with it. Carb is mess but I was able to get it to start so I at least know it has potential. From what I can see this is a 3hp motor?? I have more pics so maybe y'all can give me more info
-
3 pointsReally Ed... baby moonz
-
3 pointsYou have what is commonly referred to as a single stage short chute. Check for play in the chain. With use, the links can stretch. Look for the connector link and make sure it looks OK. The chain itself can be tightened by adjusting the idler sprocket. Make sure the auger and all the bearings are free and have no radial play. Check and tighten the set screws in the drive pulley and sprocket on the jack shaft. Check the belt tensioning spring. It should tighten the belt so you only have about 1/2" deflection with slight pressure. Check the chute rotator cable and replace if it is worn or twisted badly. I have successfully used heavy string trimmer line to replace cables. If all is OK, I would keep a spare belt and a spare chain connector link where you can find them when the blizzard arrives.
-
2 pointsIf it ran good before then I would check everything you touched and make sure you did not mess anything up. For the trigger to fail at the exact time you de-carboned it seems like a real coincidence.
-
2 pointsI have the single side pulleys. 3 3/8 OD and 4 3/4 OD. Can you post a picture of the shaft. I have never seen a cast iron pulley wear out a steel shaft. If you are interested in the pulley, send me a PM.
-
2 pointsI have shafts and spindle housings. I also have bearings, what I don't have is a pulley. I have another deck, an 05-42 MS02 which has the shaft with the hex nut as part of it just above the blade. This takes blades with a round hole. I'm sure everyone here knows this. I'm the rookie here. I really would like to find a pulley because with 2 decks I have some flexibility. One is set up for the TracVac and the other could be used for actually mowing lawn! What a concept.
-
2 pointsTough crowd here... but, I've got you bro. http://www.schillmania.com/projects/snowstorm/lights/
-
2 pointsI don't get it, there aren't even any lights to blow up!
-
2 pointsHere are some pics. It looks pretty close to 3 3/8 dia. The hole is round and so is the shaft. Bob
-
2 pointsSorry to hear about your dream not going so well. So many times our dreams are dashed by unexpected events, health or otherwise. I'm sure there is someone here who has a similar dream, and can help you get rid of those C-195's.
-
2 pointsThe engine is a new old stock Briggs 8 hp that's never had gas in it
-
2 pointsCan you post a picture with the OD dimension. I may have one.
-
2 pointsThe 42" deck Lt or RT spindle pulley is # 5877 or 106846. If the center hole is round, then it is completely slopped out. There should bo no thrust washer at all. There may be a spacer, but it too would be double d configuration. I do not have any 5877 pulleys and they are hard to find. Better that you replae the entire spindle to escape the DD configuration... Newer model spindles will bolt right in, but will need to have non-DD blades tool.
-
2 pointsI think a volt meter is better, An amp meter can't tell you anything about the battery condition and won't show voltage drop while cranking. I feel that the volt meter should have a line of it's own going directly to the battery side of the solenoid. Also, it should be fused to protect the wiring from an accidental short to ground.
-
2 pointsI was in HD yesterday and the snowblowers are already on display.
-
2 pointsThe engine installed, although I will have to separate them again to apply loctite RC-680 on the pump shaft spline & driven coupling! Good looking out Paul.......
-
2 points
-
2 pointsNot a dang thing Wrencher... I should have said it's always nice when an unexpected score come with caps! That is one nice 1257 your sitting on there as well! Seat is perfect! Good one Richard!
-
2 pointsThanks, all the info helps! Prices are all over the place so it's good to hear from those that have experience with these. I'll go with Richard's suggestion.
-
2 pointsThanks! I read that section in the manual before, but must've stopped paying attention when it said in the first sentence "The Dial-A-Height control (Fig. 14) is used to limit the downward travel of attachments other than mowers." However, looking at it again, it says to turn it all the way to the plastic thread cap for mowing, should have read the whole paragraph before! I tried yesterday to turn it all the way, but I've still got at least 1.5" of thread left to go until the thread cap, and I can absolutely not get it any farther by hand. I'm going to assume that either something is binding up the threads, or there's something further down preventing movement. Looking at the parts diagrams, I believe I now understand how the dial control works with the lever. Hoping to get back home this weekend, should be able to pick up the choke linkage from the post office and hopefully get the thing running, and have a closer look at the lever issue. Also checked the shifter boot yesterday, and will need to change that out when I can get the part, as well. As far as I can figure, to remove the lever there's just a jam nut and set screw to remove the lever, swap the boot, and reinstall? On the note of the transmission, just shifting it around while sitting I can get it into High/Low/R-1-2, but the lever doesn't want to go into third. It doesn't seem that the big metal spring on the console faceplate is getting in the way, and I watched the video on how the trannys work last night. Is it possible that the 3rd gear/pinion is just a little stuck, and maybe a good cleaning/flushing/fluid change might get it moving/shiftable again? Or am I likely to have to open the dang thing up and do some real work? Thanks for all of the advice and words so far, glad I found an active forum with so much knowledge on these machines! Just tinkering around with this one (never had a riding mower/tractor before), I can tell why people like them so much, though the youtube videos I watched about removing the mower deck took some liberties to make it look much easier/quicker than it really is... all the ones I saw don't mention anything about removing the PTO belt. They all just said "push this button, remove this pin, and slide it out!" ....not quite that simple, but it's still not bad at all. -Dan
-
1 pointThe 400 frame is the same as the 520.The only difference is that with the gear reduction steering on the 520 there is an extra pair of holes drilled in the frame rail where the lower portion of the steering shaft and gears are mounted.The axles are roughly the same height but if you bush the swept axle for the 400 spindles you need to keep in mind that the 520 swept axle has a needle bearing and washer setup at the bottom.The 520 axle is also wider,track wise than the 300/400 series so you will need longer tie rods as well.You can drop the 400 axle and the 520 will bolt right I place of it. This swap is doable but not just a bolt on as you might hope.JMHO,Luck,JAinVA
-
1 pointNice looking blade - Brinly I believe
-
1 pointNow Sparkeye...let's get the decks off first shall we?
-
1 pointIf they are Toro yes they are quite proud of them. Doesn't mean you have to shop ther tho. Richard's link is a good one so consider ther. Get an extra set for the shelf after all ALL bearings were designed to be worn out! Ya get some extra time drewd we do like our ! BTW you get them bearings off clean up the spindles with some fine emery cloth and clean up the rim bores and while you have them off maybe a shot of paint. Check those zerks they can plug up. You might already know all that just making sure the bases are covered.
-
1 pointThanks again guys! Mine are flanged after all. I knocked one out (on the wheel I could get off the axle) and they are flanged. Thanks for the tip on picking the inner seal off if one is in place. I do grease my equipment and this will be a worker! Also, thanks for all your info on pricing. I had looked them up on Jacks Small Engines and unless I was seeing things the flanged bearings were expensive.
-
1 pointplus a can of PB Blaster, a box of drill bits, and a bag full of those 4 letter words we learned in 4th grade.
-
1 pointOk. i was at that point having drained and swapped trannies. It took about 1 1/3 quarts for it to start to flow out the check port. Thanks for the assist guys.
-
1 pointThanks. I got all the manuals back in May when I got the tractor. That should be 16hp, not 18hp
-
1 pointThat idler pulley shaft eating through the bushing can be a real problem. The transmission support tunnel is so thin that there is a cutting action on the bushing. It is in a hidden area, but you need to OIL THEM. I did a farmer repair with one of these--a bronze flange sleeve bearing. https://www.fastenal.com/products/power-transmission-motors/unmounted-bearings/flanged-sleeve-bearings;jsessionid=B0ABBD78833CAB826C981A93157C9C4E.jvm3?r=~|categoryl1:"603582 Power Transmission 9and Motors"|~ ~|categoryl2:"610631 Unmounted Bearings"|~ ~|categoryl3:"612463 Flanged Sleeve Bearings"|~ I happen to have a 400 series that is a newer tractor, and there is a gas shock which applies tension on the idler pulley. It is much superior to the little spring that tensions my 520,and belt flopping is not an issue. This tells me that Toro knew they had a problem with the tension spring being too short and stiff and therefore not a constant force spring. I finally found a solution to the problem. A strip of rubber band cut from a bicycle or motorcycle tube applies constant tension on the swing shaft and vibration is all but gone. It really does not take gobs of tension on the belt to drive that Eaton because of the tremendous mechanical advantage. Of course, I just mow my yard and don't push snow.
-
1 pointHere's a few more! I tried for mostly action shots this year.


This leaderboard is set to New York/GMT-04:00