
Leaderboard


Popular Content
Showing content with the highest reputation on 09/03/2017 in Posts
-
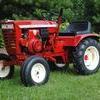
14 pointsThe A-81 is coming along nicely 😊
-
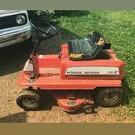
9 pointsI bathed the red team today and to make sure I'll have very little snow removal this winter I put the blower on. If I want to wear shorts in January, I'll put the chains on.
-
8 pointsTwo more followed us home again. One is a 654 and the other appears to be a 551. The 654 runs cuts and drives, but needs throttle and choke cables, ignition switch, battery, and of course, axle seals. The 551 has the complete deck and even the belt guard, but was bundled with an H60 that was pulled off a snow blower, and is missing the carburetor. The pair set us back $175. I hope we didn't get taken...
-
6 points
-
5 pointsTri ribs . The wider ribbed tires remind me too much of the Western Auto, Monkey Wards, MonteCarlo cheapie riders from the 70's. Plus they steer easier.
-
5 pointsHad our first outing today, since getting the 1056 back on its feet... & I gotta say, this old performed flawlessly for my Mrs Rules too.
-
4 pointsWell maybe not a set but one this week and one next week (local Tractor Supply only had one in stock but more coming on next week's truck). They are a Hi-Run 23x10.50-12, and will be going on my C-125. Wasn't wanting to cough up the money for tires just yet, but want to get started slowly putting the 701 back together, and needed the tires and wheels that have been "temporarily" mounted on the 125 since I bought it. Anyone have any ideas for what to run on the front to go along with these beauties?
-
4 points
-
4 pointsHappy Birthday Denny ! Have a good one and remember....
-
4 pointsAbsolutely use Never Seize (or equal). You shouldn't need a BFH if you have cleaned the axle and the hub
-
4 pointsGonna get the girls out and play with them some after church. Planning on mowing with the lawn ranger some tomorrow. I'll try to take some pics to post. Have a great Sunday!!
-
4 pointsTwo nice little round hoods.Maybe a little diesel implant for the one with the missing engine???Have fun with your new toys.
-
3 pointsI picked up my second 520 awhile back from @DeterminingFactor that had no spark. Changed out the 9 pin connector from @rmaynard as the red wire was already routed around the 9 pin. Found the coil was bad and replaced. Motor runs good and now on to the next step. PO said hydro was leaking I think I found the problem so tomorrow I will open up the hydro and replace all seals and gaskets. Plan on wet sanding all the tins and repaint, new decals will need to be ordered. Now if I could only convince @ACman to release the rights to the wheel a matic decals, other wise it may end up being the patriotic series decals. This one may take a while as still working 10hr days and Saturdays. I'll try to post as much as I can. Also picked up an Ark loader for it. Need to build subframe, new hoses and modify a few other things
-
3 pointsThank you Craig for the video and thank you guys Dad did a full put. He could have towed the sled home if he wanted to lol
-
3 pointsI got one 854 drivable so the grandkids could ride. Carburetor was broke on one half of the mounting flange and the treads had pulled loose on the exhaust.
-
3 pointsTime to get you both a couple of these... will succinctly, sum up the whole story. http://www.redoyourhorse.com/wheel-horse-horse-a-holic-decal/
-
3 points
-
3 pointsIt a rainy day here today so I got some more done on it. Mounted the hitch and wheelie bars today and mock up on the seat. Also had to make some brackets for engine shields. PROGRESS
-
3 pointsMy Mom asked if Deadguy and I are addicted to tractors. I told her no, but we are on our way to pick up another horse now. We might have a slight addiction, but it's a great one to have!
-
3 pointsThanks to @Vinylguy and @ACman for the creation and release of this great looking set of decals. Now Minnesota will have one and maybe even two 520 Wheel-a-matics. Terry let me know how I can order a set then maybe I can be sent with the toy tractor you are working on . Thanks Again for all you do
-
3 pointsThank you Thank you. It's not perfect, but it puts a smile on my face every time I open the garage door and see it sitting there.
-
3 points@Vinylguy has my blessing to sell the 520Wheel-a-Matic decal set especially if he can make some $ and keep fellow members happy. I had the idea but he pulled it right out of my head and did the hard work . Terry and Lola for supporting our hobby
-
3 pointsim not a tecky guy but those are some nice horses i would love to have!
-
3 pointsThanks for all the comments. Regarding removal and re-installation, I added 3/8 holes above each of the bottom screws and put a plastic cap over them. That allows room to put the screw head through. I am a bit worried about about air flow, but so far the air being pulled through seems sufficient. It's definitely better than the partially clogged condition it seems to be whenever I'm mowing. So I'm going to monitor the temperature and see if I need to open it up more. I think that engine cooling screen would help, would love to get my hands on one.
-
3 pointsDon't , ding, ding we have a winner!!! I just got home. We're worn out, but had a great day! I picked up a 68 lawn ranger that will be put to work mowing our yard and a C125. I'm tickled with both and they run great!!! Below are a couple pics I made when we picked them up. Planning on visiting again in December to pick up a few more parts while we are in town for a dr appt. @oldredrider and I have nicknamed the black hood Coyote Ugly since it's so ugly that I just can't help think she looks pretty good!
-
3 points'60 Model 400
-
2 points...when you've stumbled upon another keeper. Earlier this week, I noticed a newly listed C/L ad for this "barn find" 1056... price was right, so I picked up the phone, contacted the seller who was still at work. Made arrangements to meet up with him around 5pm later that afternoon, a take a peek at what he dragged home. Story goes, he's a John Deere guy...who picked this up in a recent package deal, & just wanted to pass it on to the "right guy". Original owners son, run on some hard times...(aka, going to jail ) & was selling off some of his deceased fathers collection to pay off some bills. Seller was told, his Dad was meticulous with his maintenance, which seemed plausible, considering it was covered in grease, & inside of the fuel tank looked brand new. Said he always fogged the engine before being put up for storage, so...other than a front tire off the rim, and the JD seat...seemed like a pretty good deal for $100. That said, I took the chance, shook the man's hand...and loaded the ol' girl up. After getting it home & unloading...I was hoping the story wasn't BS. Had to admit here, the old girl was looking pretty rough. The following day, I did my usual routine though...took it to work and it an hours bath with our heated pressure washer...followed by a good dose of compressed air. Then left it sit for a couple days to dry out, while I tackled the usual fuel system refresh, new plug, new oil & air filter...then tubed the flat front tire. Today was the day to try putting some fire in the hole, though it did initially try to pop off...I discovered it had a really weak spark. Once I cleaned to points, she fired right off...smoked like a chimney at first. Then, cleared up, and is running like a champ now...no runs, drips, or errors. Was so stoked, that I took the rest of the afternoon, to do a little aesthetic detailing, changed the gawd awful seat for another I had here "in stock". Took a couple picts here to show the progress so far, plan to to the rims, and probably add new rubber in the future. I think it turned out pretty good so far...let me know what you think.
-
2 pointsBack in 2012 I bought a Work Horse 700 from a friend. It was not running with a newer 8HP Techumseh retrofitted. I got it running and mowed with it a little bit before I ripped it apart and did a full restoration. The tractor turned out so beautiful I did not want to use it. So it sat in the garage for two years until I sold it and put the money towards a Harley. So I went the last two years without a tractor. I recently shopped around looking at John Deere X300-series tractors and really liked what I rode, but did not want to pay that much money. Last weekend my friend went to a show in Portland, Indiana and brought me a tractor. I am now the proud owner of a 857! I was intending on having a B or C series, but I could not resist another short frame. It runs and mows great. It appears to be very complete and originally, but could use some cleaning up. Somebody brushed paint all over and it is driving me crazy! It also came with a plow, rear lift, and the original cigar lighter. My plans are to remove the brushed-over paint to reveal the original patina, new tires and wheel paint, redo the dash, and some other new parts. The original deck works well, but is rotted in the from center - so I need to find a new deck. My friend picked up another deck, but it is not the same and does not look usable. What deck do I have mounted on the tractor, is it a 5-1362?
-
2 pointsI was working at my friend's new to his business building today and we saw wild turkeys crossing Market Street in West York!
-
2 pointsGood news, Henry approves of our new acquisition!
-
2 pointsAlso got the center cover on too. Finishing touches. Still have to make up a way to mount the gas pedal. Warning labels and all lol
-
2 pointsThanks for the birthday wishes.
-
2 pointsAfter the grill and surround was mounted it was thought that additional support would be a good idea. Various ways were thought up and discarded. Some being too unsightly, others not rigid enough. The method finally settled on was simple and strong. Two brackets were bent up which were bolted to the front face of the engine cover and to the underside of the grill surround. 4BA nuts and bolts were used making sure that the holes drilled in the cover were clear of the fuel tank underside and internal deflectors. These photo's are out of focus but show the set up. The headlamp surround was bent up around a shaped wood former. I don't appear to have photo's of this. The full size was welded to the grill surround but bolted on the model, again using 4BA nuts and bolts. These can just be seen on the grill photo above.
-
2 pointsI remember talking to a gentleman at the big show a few years ago. I believe it was Chad Veromin? Anyway I was told that there was a shortage of the "regular" style rims in late 1977 into the early 79. So another manufacturer supplied these solid rims. Seems like that could be true, but I can't say for sure. I always wanted a set of those rims and recently was given a C-160 Automatic that had homemade concrete wheel weights. The other day I was looking at it and noticed it had solid wheels, so today off came the ugly weights to reveal my solid wheels!!!
-
2 pointsGood timing Birthday one day and Holiday the next. Have a great Birthday.
-
2 pointsYet another one to follow us home. 312H with only 456 hours, 50" belly blade, belly mount cultivator set, 42" side discharge deck, and snowblower. Great condition. Makes it well worth the 460 mile round trip to get it.
-
2 points
-
2 pointsThese are the blades supplied for the 953, 1054 and 1054A. They are different because they are 54" wide rather than the 42" also available at the time. I do not know if the A-frames were the same. Click on the fuzzy pictures below. Garry
-
2 pointsWent through another 400lbs of coal slag yesterday finishing up the main frame (some pretty nasty areas) and getting the 2 ramp sections done - that seemed to take forever due to the expanded metal . I'm about wore out and my lower back really took a beating yesterday . Last bag on the shed floor from the stack turned out to be wet as heck from being in contact with the floor - got it fed through the blaster without too much issue but it definitely doesn't cut as well as dry material . I tried getting some pics of the difference in anchor profile of the different grades of media - but the gray/silver color of the steel just doesn't let the camera see the surface detail enough with a filter or something . On the main frame , the difference is almost negligible - but it does show up on the sheet metal fenders a fair bit - maybe the primer will show it more clearly . Now that the weather is changing yet again with more humidity - time to prime it and get it curing . Using Rustoleum's Rusty Metal Primer (red oxide) and I wouldn't be surprised if it takes until Wednesday before the top coat can go on it . Might try some acetone to reduce it a bit for running through the old Sharpe gun I have - at least then it has a better chance with this weather change . When it's done , cured and back on the ground I'll have to get the gravel ripper out and work that coal slag into the parking lot - when the stuff gets wet it tracks inside easily and sort of turns into a nasty mud mixture... Sarge
-
2 pointsIf you feel you got taken, let me know and I'll come get them and pay you what you gave for them ... plus a little to make you feel better.
-
2 pointsThe Vred 5 ribs are good choices too.
-
2 pointsI saw it in person and loved it. I think it needs some ags out back and a pulling hitch now....
-
2 pointsContact @wheelhorseman and he will fix you up. https://www.wheelhorsepartsandmore.com/all-products.html#!/Toro-Wheel-Horse-Headlight-Bezels/p/84960293/category=23636126
-
2 pointsFinding an engine that will work is easy, but finding the correct one is probably close to impossible. Yeah, I got them in spite of the Teckys, not because of them!
-
2 pointsGot taken? I'd be worried "someone" got took. A couple of nice scores there...congrats.
-
2 pointsAnd it has the battery ignition system rather than the "Trigger system" You could go up to VA and buy one at the Sept. 16 auction, they have a couple of GT-14s.
-
2 pointsI don't think you need an engineering degree to solve the problem or measure the cfm volume of air flow with and without your invention. If it works for you, that's the important thing! It's your 520H and your creation. Who knows, bu next year the guys telling you the sky is falling and you're going to blow it up might be trying to order one from you for their horses............
-
2 pointsNo type of silicate should ever be used for blasting . Now , that said I have used it in the past quite a lot and it does work well - we have 4 very large pits near this area so the stuff is pretty cheap . Using any type of silicate requires the use of a respirator and honestly you need organic rated cartridges to really be safe - the normal R100 series dust filters are not good enough . I've watched several of our Retirees die a slow death from silicosis - no human should ever die that way but years ago they didn't use any sort of protection from the stuff - just didn't know any better . Due to all the training we have to carry and certifications to work in my industry (Union Laborer) I have the equipment here to prevent problems - but that equipment is seriously expensive . Last set of cartridges I bought were nearly $100 alone - those are just for painting with enamel hardener and reducers . Having full HazMat , IMSHA , OSHA certifications keeps us up on industry changes and requirements for protection , not to mention being educated on what can slowly or quickly kill you . Now , as to what the average guy can use in a blast pot , safely - Be careful buying coal slag - it's cheap on average but will contain traces of silicates . Quality brands will be lower amounts but it's always there - so wear protection . Do not rely on cheap dust masks - they will not protect you from lead or organics in existing paints - remember the age of our tractors and some related equipment - even trailers . Older paints can contain lead and several other bad elements - so when you blast it the stuff becomes airborne in small enough particles to be ingested into your lungs/sinus systems . Same with zinc based galvanizing compounds which can be even worse . Wear a respirator and read up or get training on proper and correct mask fitting from a local Fire Dept - they can show you in short order the proper fitment of a half mask . There are times you can't wear a blast hood - when using a grinding shield or similar a lot more particles end up in your face , so proper fitment is very important or you're wasting your time . Ear plugs are also a must - the noise alone is bad enough but getting that fine dust in your ears is not fun , nor easy to flush out and can cause infections , been there - done that on a big pipeline project . As an example of grit size / dust content and results - Black Diamond from TSC in coarse grade , very little fines (dust) versus the Black Blast from Menards - around a buck a bag difference in price per 50lb bags . The excessive dust in the Black Blast from Menards means it will not cut nearly as efficient , especially on heavy mill scale and rust - nor cut through heavy paint runs as is the case with many trailers . Not to mention it takes forever to get any decent results . Keep in mind that the more coarse the media , the larger the nozzle size required to use it - the coarse Black Diamond at that heavy grit range takes a 5/32" tip size at minimum . Testing last night after waiting all day for UPS to show up (they are usually here by 10:30 , but didn't come until 16:10 !!) wasted a whole work day in perfect weather , but the new nozzles at that size work excellent and don't run the compressor out of the cfm needed to make the pot work correctly . The lighter media from Menards can use 1/8" or even smaller nozzles , but will not do the heavy work such as this extremely thick , rusty mill scale that they painted over - I'll try to get some pics later today to show the results of the heavier grit media from TSC - it works 3 times as fast and cuts right through that scale in a hurry , far better results and much less overall dust . It's nearly impossible to photograph the detail in the metal , but I do not recommend this heavier media for use on thinner sheet metal - you'll have to fill in the surface with a lot of builder/primer to get a decent finish job on your paint . On really thin metal it could actually cut through or even warp it from heat - yes metal can get hot from the abrasive action of the media . Here's the mods to the Clarke pot setup - first is the modified feed piping and the wye fitting to aid in better flow mixture of the media into the air stream - 3/8"x1/4"NPT "T" style high flow plug fitting to get better cfm through the pot system - The older style water separators flow better than the newer ones - you may need to upgrade the separator if you have a newer pot or one of the off branded ones . Most of the culprit is the moisture wicking coalescent element inside - they are too fine to allow enough cfm to flow through and plug up easily . High cfm rating separators can be had in 1/2-3/4NPT sizes pretty reasonable - just make sure parts can be had later . The business end of the blast hose setup - This is not a dead man valve setup - so be aware if you happen to lose control of this thing it can seriously hurt you - sandblasting streams will remove clothing and skin very quickly and the results are not fun to look at . This setup is just a simple hose adapter , 1/2"NPTx3/4"NPT adapter, 3/4" steel ball valve and the nozzle adapter sold by the auction site seller . The nozzle is the common C series 3-3/4"L X 1-1/8" base diameter and 5/8" tip diameter tapered cone nozzle style . These are high velocity venturi style nozzles , hence the tapered portion which will accelerate the air volume/pressure and concentrate the media into a blast stream . Far more efficient than the usual straight nose wide pattern or short nose style nozzles sold with many of these blast pots . The last 1/8" nozzle ran through 1,100lbs of finer media before any noticeable change in tip sizing - it's out to .138" compared to the starting point of .125" (1/8") . Very little wear versus how much work it's done already and lots of life left . The new nozzles I buy are now from McMaster and are ultra hardened ceramic USA made quality nozzles - around $11.42 each and will outlast any of the small nozzles 10:1 easily . McMaster does sell the real-deal dead man valve setup for use with these nozzles - it's right at $100 and probably worth the investment just for safety's sake . They also sell the rubber stop blocks for that valve setup at a minor cost for 3-packs . This stuff , while expensive will put a cheap blast pot nearly on par with commercial equipment , albeit a couple thousand dollars cheaper . The whole key to doing this stuff is having an air compressor that can handle the task and push enough cfm to do the job . It's also very important to note I'm running large diameter piping , hoses and fittings . At the smallest point I use 1/4" I/M plugs and couplers for most small air tools and such by running an adapter to go from the larger high-flow 3/8" "T" style plugs/couplers . The smallest hose I run on anything in the system is 3/8" . Piping system is 3/4" and the main hoses are 1/2" with 3/8"NPT ends , not the common 1/4" hose ends . This makes a huge difference in flow and heat back to the compressor source and keeps the cfm high enough to do this type of work . I'm also using a second 60 gallon reservoir tank outside to aid in storage to take some loading off the pump . Biggest trick is trying to keep the water out when it's humid and lately that's been a real issue . The pipe leg drops in the basement catch a lot of it and 3 different system filters along the way help as the air stream cools from the distance traveled to the blast area . A proper chiller and air/water separator would be the ultimate setup but even smaller systems cost several thousand dollars . If you're really serious about doing larger jobs it would be much better to rent a trailer mounted rotary pump setup at least 85cfm in size - then you'd have unlimited air flow for an even larger blast pot system . I missed out on a nice 85cfm trailer unit last year - it sold for only $800 due to the engine not running , which I can fix easily enough . I'd really rather not do large jobs anyway - so no big loss there . If I were younger I'd be very interested in buying into a full trailer mounted dustless blast system - but not at my age , lol . Red garnet cuts great , but in cabinets it's really tough to keep up with the dust and have a large enough dust collector that can handle enough air flow to keep the cabinet cleared . The Scat HEPA blast collector would work well , but they are around $400 for a decent sized one . Just a heads up too - shop vacs aren't a good idea for dust removal - their motors and filters are not rated to handle this type of dust and will basically spew a lot of the most harmful small particles into the air around that vac . Yes , using a respirator when even doing cabinet work is a good idea - no cabinet system is perfectly sealed unless it's a dedicated commercial cabinet with a matching dust collector and protection must still be used when servicing the system . An alternative to garnet , which is expensive for what it is would be to use angular shaped glass - it will remove the heaviest rust scale and paint and still leave an acceptable surface finish for painting . I generally run 40/80 glass beads in my big shop cabinet with good results and it's cost isn't bad . I'd never recommend using play sand - it contains a certain percentage of clay - that is what will bind it together and it also attracts moisture like a sponge . If you want to keep costs down , use a very fine coal slag and a small cone nozzle setup or Scat's trigger type blast gun for siphon systems and a large, clean tarp . The material can be re-used and screened to remove dirt and recycled . Be aware that this will create more potentially harmful dust since you're adding in paint dust , rust , galvanizing/zinc coatings and such, so again - respirator is a must . One other thing I have not touched upon but it's important in both cabinets as well as outdoor siphon/pot blasting - pressures . At most I run 100psi of air pressure , regulated at the compressor's outlet by a filter/regulator . Using excessive pressure over 90psi will quickly erode gun parts , blast hoses and in cabinet systems it will destroy the media much quicker . If you're not getting good results it's a lack of cfm and velocity in your system , not a lack of pressure . On large commercial pot systems we use at Work we only run 90psi on everything - it's the industry limit . Results come easier the more cfm used and the better the nozzle design - hence my upgrading the pot system as well as my cabinet to better nozzles . The Scat blast gun in the cabinet (more pics to come) uses a tungsten carbide nozzle that is designed to provide a much better wear rate and keep the stream shaped correctly . On that type of blast guns it's also important to have the correct air jet and they still wear and have to be changed . Cheap siphon guns sold for bucket use have their air jet built into the handle so once they wear much the gun is useless . Once the air jet is worn you'll also wear out tips faster - so keep that in mind too . One of these Scat 35 series guns , a suction hose and mixer and a bucket for media with a decent compressor could get you started and provide much better results than the crap Campbell setup at home and farm stores http://www.tptools.com/S-35-Series-Trigger-Operated-Power-Gun,8592.html?b=d*8026 http://www.tptools.com/Siphon-Hose-and-Pickup-Tubes.html Replacement nozzles and air jets are cheap and you can size them to fit your air system's cfm capability easily with some research . Anyway , hands are tired and I've got to get out there and get to work - more pics/info to come... Sarge
-
2 pointsAfter finally getting the new gates and latches in. I removed the damaged gates, latches and hinges loaded the new parts and delivered it to a trailer repair center. (Never again.) I had to remove the gates and hinges to rework them so they would work properly. This is one project I'm happy to have behind me. Delivered back to owner today. All damage repaired plus all new wheel bearings, replaced 2 marker lights, and 1 tail light. And upgraded hinges to greaseable bullet style and made the gates removable.
-
2 pointsTook a few pictures outside this morning. What a difference natural light makes!


(800x673).jpg.cc3aefcd170c6bab1f22408014a1eb53.thumb.jpg.37c62115dec7a1fc65b8e86afd6af643.jpg)
.JPG.9f2ecb26065c66527b0730084ab7fc7a.thumb.jpg.7dc8a04d9a53d44ee2b23f26ee94496f.jpg)
This leaderboard is set to New York/GMT-04:00