
Leaderboard


.thumb.jpg.0c495eaa7ff874c741991d7b1de2f119.jpg)
Popular Content
Showing content with the highest reputation on 08/15/2017 in Posts
-
17 pointsI thought you guys may want to see this. Now excuse the sears has it was dads second favorite.
-
8 pointsWhat an awesome pic this is
-
7 pointsI mow over an acre of smooth flat lawn with the c-160-48" deck. 2nd gear works fine even in thick grass , but 1st gear high range is my favorite gear. I like to watch the clippings flow out of the discharge and the seat time is the only time i get to relax . I usually grin ear to ear the whole time. Over 40 years of memories with my Wheelhorses come back to me every time i drive it.
-
6 pointsWould be great to do a vintage calendar using some pics from our vintage pic thread ,for a trip down memory lane ,
-
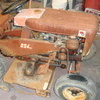
5 pointsHello everyone! I recently inherited my grandpa's Wheel Horse 753. I remember it running before his health declined about 15 years ago. My intentions are just to get it running and do a mild restoration, it'll stay in the family. Without further ado, here it is! Having a hard time with pictures due to no phone service at my shop. I'll be sure to update soon.
-
5 pointsHmm, looks like it's not only outa' state horse rustlers we need to watch out for....
-
5 pointsHere's a couple. 1961 551 1967 Lawn Ranger 1981 GT2500
-
4 pointsIt's that time of year that we need to start thinking, planning, and preparing for our annual Wheel Horse Red Square calendar. If you want a chance to have your tractor(s) appear on next year's calendar, here is the thread to post your pictures. This year, I also asked that you put your username and year/model of your tractor for each picture you submit. We want HIGH resolution images only as they display better on our calendars. I would like season related images, i.e. snow blowing or snow blading for winter, grass mowing for summer, fall clean up for fall, and, of course, any tractor working or just sitting pretty for all to see are surely welcome. I don't know if we would want a theme or not, but that could be an idea. So, maybe suggestions for a theme, if we go that route. Examples are RJs, or Suburbans, or maybe big wheel tractors like the 953/1054/GT-14/C-195, or maybe a 70's theme? I don't know if we will do a theme, but I still like to have some suggestions and/or comments added here also. Thanks. OH, if anyone wants to tackle this project besides me, feel free to volunteer.
-
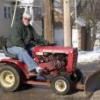
4 pointsBet this guy... is really from CT.
-
4 pointsPerhaps modern pics that have been "antiqued"? Just thinkin out loud here Terry... 1960 Suburban 400
-
3 pointsAt the rate life is throwing curves recently I will be lucky to make it to the auction. Trying to figure out if the El Camino will make it 55 miles one way. If it does I will be the one dumb A riding in the tow truck hauling a El Camino and a , listening to " I told you not to drive it " on the phone while I am trying to explain why I am late.
-
3 points@elcamino/wheelhorse Shhhhh!
-
3 points'60 Model 400
-
3 points'58 Ride-Away Jr.
-
3 pointsWell, honestly, I would believe your location has the most to do with it! You have to remember that Wheel Horses were much more abundant in the states than they were overseas. You may notice there are far more of these scores and deals posts from members in the states than there are from the guys over in the European countries. If I were you I'd scrap the quest for the 520 and look for a nice 512-D.... that's a model that was only available overseas. How I wish they would have made that one available over here! As to where/how/what you're searching... perhaps one of the gents from your side could chip in some better tips?
-
3 pointsWas glad that I had GPS in the boat this morn. Visibility was not good. Fishing has not been the best but still better than working.😀
-
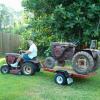
3 pointsNow you can really haul some horses! Next up---an even bigger trailer! With that Cummins, you won't even know that you have your trailer attached AND
-
3 pointsSpeaking of this type of situation...I had a middle aged couple come to my house tonight to buy a John Deere dealer sign from me tonight... both huge John Deere fans but she seemed worse then him, well he fell in love with my RJ and wanted her to fork over money so he could buy it.. before I got to say anything she says "we would have to paint it John Deere green for it to go to my house" they would of had to kill me before they took my little RJ(killer)....
-
2 pointsFound some old pics of my dad's tractors. Thought I would share a few. I think this one is possiblly a 704 or 854. He seems to remember owning a '64 model of some kind. Dad sold new Chevrolets and Buicks at the local dealer. That's a new '65 Impala in the drive and my mom's '62 Nova in the garage. This pic would be 1964-65. Oh, and that's me in the dump cart.
-
2 pointsI concur with the observations by both Lane and Garry. However, there is still something not right about the supports that hold the center bar to the shell. One or more of them is bent (someone hit a rock or a tree stump with the deck). Even though these are 1/4 inch thick steel, they will tear (or rip the shell). Disassemble the supports and check to see if the right angles are truly 90 degrees. If not, pound them into the correct alignment.
-
2 points@elcamino/wheelhorse, it's a heavy Chevy it'll make, have faith in the Bowtie as well as the , I think I might know a lil sumpthin' about fixing up a G body if you ever need anything, Jeff.
-
2 pointsGreat job, Lane!!! I wouldn't want to have to change that drive belt very often. Looks like a real PITA to do, especially the thing mounted to the tractor. Remove bottom plate, remove bolts in bearing flanges, loosen set screws, move pulley shaft enough to install belt, then reassemble everything. Not much fun on your knees or on your back........
-
2 points@Jjohnny1 I already have 1984 SS Choo Choo one of 1389 produced that year. The wife would kill me twice if I brought another home. Make drive the El up to the auction @Skipper This is the auction thread. Check out the pictures.
-
2 pointsWhat I do is loosen the motor mounts then pull the engine forward as far as it will go (having the tension off of the belt will help this). Also at this time try and make sure the engine is sitting square so the belt is in as close an alignment as you can get. You won't get a lot of movement but it may help. Cleat
-
2 points1964 Wheel Horse 854 with 50 inch Wheel Horse Sickle Bar Mower
-
2 points'56 RJ-35
-
2 pointsI'm sure we can find 12 worthy vintage photos , even if they are a little on the grainy side , , I know the more you increase the size the picture quality deminishes , or maybe the front cover could have a collage of vintage pics all on one page ,
-
2 pointsI actually like the pic in B&W , shows the nostalgia
-
2 pointsI have found that when you are searching for a short that is blowing fuses it can best be done with a test light. Remove the bad fuse and replace it with a 12 volt test light connected across the fuse holder. When the short is there the light will be bright, move the wires around and when the light dims or goes out you have found the short.
-
2 pointsJust thought I would update this thread with some modern day pics...no Bob @rmaynard we're not saying your old just your thread! Like was mentioned this was done on a snow blower but applies to anything with hard to find insert bearings. Note these are 7/8 ID but need to go on a 3/4 shaft. My research showed that the correct ones are still available from Toro ....at anywhere from 60 -90 bucks apiece. That's nuts & and I am (sometimes) cheap. Bearings from here, 6.50 a piece with a little for ship, they have the needed 52mm OD to fit the 50 yo flanges. http://bearingson.com/category/insert_bearings/uc_insert_bearings/78_insert_bearings_uc205-14.asp?page=1&SortType=0 Bushings from McMaster 2868T172 https://www.mcmaster.com/#catalog/123/1175/=18ycui0 Bout 2.50 each shipped with some other needed hardware some pics Carefully press the bushing into the bearing until centered - use a little oil to help, it is a snug fit. Don't forget to remove set screws first! Use a small starter bit then up to about 3/16". Be care full when working around the existing threads. Next using a 1/4-28 tap rethread the set screw holes. Should take little to no effort. Blow off the chips with compressed air ...try and not blow the chips into the bearing (they are sealed BTW and NOT re-lubeable)
-
2 pointsBottom plate off, remove shaft,
-
2 pointsThat's the whole point Josh... I kept thinking about that climb out of the Mississippi river valley on the MN side on the way to Leseur, last year the trailer was passing the truck ...the old GMC truck couldn't get out of it's own way and the gas gauge went down faster than the speedometer! Your right maybe gonna wish I sprung for a 16 footer! I'm thinkin down the road as I near retirement may have to look at hauler/camping combos?
-
2 pointsComing from a guy that is supposed to be thinning the herd?!?!
-
2 pointsWow! Next time my wife wonders aloud how many tractors I have, I'll show her this and how much worse it could be. I suspect this will be a bargain hunter's paradise. With so many run-of-the-mill models and so many duplicates I think this will be a great place to be a buyer. And, I think the right crowd might help the selling family on a few of the special models like the RJ35, 1054, and backhoe equipped D-auto. I like the looks of a couple of those green ones and the old Case models. Looks like a great time. I just might be in that neck of the woods on the 15th...I wonder if a detour could be in the works. Good luck to all who go! Steve
-
2 pointsJim you know you want it I know I do ... you just laid out how much $ on a truck don't let three batteries hold you back . My trackchair batteries are going on 6yrs old and still going strong . Deep cycle gels are the best but some good maintenance free will work fine. Break them in right and then keep them charged and you can get years of service out of them .
-
2 pointsRelax guys! It just isn't ripe yet. By the way, I painted both of my restored Wheel Horses FORD tractor red.
-
2 pointsHappy Birthday , Jim !! Nice Truck too !!!
-
2 points
-
2 pointsHappy Birthday Jim, nice ride we'll see you in a couple weeks.
-
2 pointsAt the rate he is going that will be about 1- 2 years. @WHX12 If that's what I get for my 58th I am looking forward to next year's birthday!
-
2 pointsFull throttle high range in 2nd gear. I run 1st gear along the ditch or tricky spots. 3rd gear is too fast for bumps, it doesn't leave a nice cut. My dad mows in 3rd gear usually and the results are poor IMO. If I'm gonna put in the effort to mow, I prefer it to look good when I'm done, not have it look like it needs mowing again.
-
2 pointsOk so.... I bought it 😉 cleaned up and now running I'll pick it up next week..
-
2 pointsHappy birthday Jim!
-
2 pointsYes it will be there....doesnt quite look as good as that one though, maybe someday
-
1 pointLowell made 12 sets of the Traveling Hook (and two bolt bracket for the tower to ride on) and the Lift Rod for Sickle Bar Mowers and I just happened to contact him after he finished doing that to ask about making me one. I traded him a 1054 front grill/cowling for the set. I spent last year and early this year working on this 7-1312 Sickle Bar Mower that was given to me and my brother. I bought all new bolts (mostly stainless steel from Bolt Depot) in a package based off the parts manual. I put new bearings, a new machine pin in the wobble box and several other parts I bought at various swap meets to put it all back together. I ordered the spring for the drive belt tensioner today after getting the mower all installed on the 854. WHX12: If you do a search on 7-1312 Sickle Bar Mowers I thinbk there are a couple threads of info on my rebuild.
-
1 pointOh yeah !! This looks super interesting! Details... We want details.
-
1 pointThat makes sense now. Thanks for the input guys. I should have downloaded the manual first.
-
1 pointTrue True ...just because your not hungry Steve doesn't mean you can't look at the menu!
-
1 pointIn that case, you don't have to worry about it engaging into the flywheel starter ring and making the engine run backwards!
-
1 pointI decided while I was in the midst of some other maintenance on my GT 14, to attempt the restoration method authored by MikesRJ. I neglected to take any "before" pics of my dash panel and the hydro control panel prior to starting, but suffice to say they were dingy at best and in some instances on certain symbols and characters, the contrasting white printing was nearly worn off. Since I wasn't restoring the tractor I wasn't concerned with getting results that would win a blue ribbon at a one foot distance. I mainly wanted to see if I could just spruce things up and at least provide more contrast to the background and definition to the raised surfaces and improve the overall appearance without getting carried away with producing something which was flawless in appearance. My tractor is a "worker" not a trailer queen, so you have to draw the line somewhere. I did opt to use the VHT product initially suggested after finding it available through an O' Reilly's auto parts store in a neighboring town. Locating the suggested Elmer's "Painter's" Opaque Paint Marker prove to be much more problematic. I looked for this product in several retail settings including Walmart and Hobby Lobby and finally gave up locating the specified brand. I was amazed that Hobby Lobby didn't have this product, since they seem to have about everything thing else in the way of hobby and craft items, but they did have a product that appeared to be similar to the Elmer's, so I threw in the towel and rolled the dice. I wound up with three different size/tips of the same product by Sharpie because I was unsure what would work best and I didn't care to be running back to H.L. to get a different size until I hit on the "right" one. It's called Paint Peinture, but it said nothing about being opaque. It is an oil based product and it comes in many different colors, although for my purposes of course, I chose white/blanc. To be honest, the suggestion of using automotive brake fluid concerned me a little and I decided to see if some things I had more familiarity with might loosen and remove the original layer of white printing. I gave both panels a vigorous scrubbing in medium hot soapy water with a medium stiff bristle brush and also a used tooth brush for smaller details. That technique prove relatively successful, removing I would estimate about 60% of the printing. Maybe is was more a case of natural deterioration of the material used in the original printing than my methodology, but none the less it worked quite well. For the remainder of the process, I used a fairly high concentration of Simple Green in hot water and left it soaking overnight. I removed the panels the next morning and repeated my scrubbing process. That resulted in another approximately 35% of the original printing being removed. I repeated the process again, and virtually all but smallest and most difficult areas of printed matter remained. The bulk of those remaining where removed relatively easily with toothpicks, needles, and an Exacto knife. At some point, I figured it was good enough since the panels were going to get redyed again anyway. After thoroughly rinsing and drying, the panels were ready for the next step. I first experimented spraying the back side of the panels to see what the results would be. Nothing seemed to be a problem, so I shot the front sides after the backs had dried. I gave each panel two coats of the vinyl dye and the result were very nice......and I don't consider myself a skilled painter. I then moved on to the printed surfaces with the Sharpie. Initially, the tips of the paint pens were dry and lacking much color. Then I discover the tip would move inward when depressed and release paint to wet the fiber tip. I quickly discovered the largest tip was much too large for anything....it just covered too much area and was not very controllable at all. Fortunately I made no huge errors with the large tip. I then attempted using the smallest tip, which was about the size of a very fine ball point pen. I quickly found it didn't deliver much in the way of material on the raised characters, and it was too small to span the high surface of the characters......it was too easy to slip off the edge. So my final option was the medium tip paint pen, and this seemed like the ideal compromise of delivering an adequate amount to paint for sufficient coverage, while being controllable as far as specific paint placement. It was an ongoing balance of keeping the tip wet enough to get decent coverage, yet being dry enough not to flow too much material. That had to be constantly adjusted between compressing the tip for more paint, to dabbing with a paper towel to dry it out enough to use. I seemed to have the best success with coverage when I could approach sections of letters at roughly right angles instead of inline. The dabbing technique proved to be most effective for lettering and characters, however the long straight or gently curved borders could be done in a continuous motion with the side of the tip much more effectively and quickly than dabbing. Working from the inside or middle of the area toward the outside prevents marring or smudging previously painted areas that may still be wet or tacky. I found it advantageous to work certain sections or areas, then come back to the panel later, rather than attempting to do the whole thing in one setting. This proved to be one of the most tedious things I have done in a long, long time. I requires very good lighting be able to clearly see what you are doing. It also requires a very high level of concentration because it is extremely easy to mess things up with a momentary span of inattentiveness. The coverage I got was generally very good, but I did have to go back over some areas to insure complete coverage. My example is not up to show standards and it still needs a few areas touched up lightly, but overall, for being a "first timer", I'm very pleased with the results and the huge improvement in appearance. At 24-36", my panels look good enough for my "worker" usage, IMO. The only thing I might have done differently, was maybe have used the satin vinyl paint instead of the gloss. On MikesRJ's dash example, the has a crinkle type finish which kind of breaks up the glossiness of the vinyl paint. The panels of the GT 14 are smooth however, and reflect the surface back at you more. I think if I had side by side example of the GT 14 panels, one done in gloss and one done in satin, I think I probably would have preferred the satin, because of the reflective nature of the smooth surfaces on my particular panels. This is a very good instrumentation panel restoration procedure which works well with the suggested techniques and materials. Just don't be in a hurry or get in a hurry when you tackle this operation, or you'll be less than happy with your results. If you get tired or inattentive, quit and take a break until you can return to the work relaxed.















This leaderboard is set to New York/GMT-04:00