
Leaderboard


Popular Content
Showing content with the highest reputation on 07/30/2017 in Posts
-
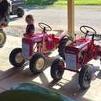
14 pointsHad a couple of the various years carts out, catching some sun here today.
-
12 pointsSo I talked to this gentlemen back in fall of 2016 and he wanted $800+ for this tractor. I talked him down to $450 as the 16 horse engine needed a new spark module. Then found my 520h and 312-8 and forgot about this one. So I was browsing CL yesterday and saw this 1993 416-8 for sale again... $250 with a nice 48" deck! Boom! Took it home at noon today! It has 662hrs in it. Has matching deck both with numbers. The engine sound tight and powerful. No smoking and only noise sounds like lifters and thats barely noticeable. Clean cylinder heat sinks from what I can see. The deck is a SD 48" and super quiet and still has some red on the bottom in spots. Photos.
-
11 pointsI have just recently finished a 48" deck complete restoration and a 60" deck restoration. Every bushing, bearing and wear spot has been repaired on both. Neither deck required any welding, just cleanup and repaint. Now I don't want to use them and get them dirty. Thanks to Terry for the excellent decals. That 60" deck is a beast. You can easily see the size difference in the pic. What you can't see is the weight difference. I can lift the 48" around by myself where the 60" is difficult with 2 people. Cleat
-
9 pointsI have a big thank you for Achto! Without his help it would not have been possible for us to put up our Wheel Horse display at the Symco Thresheree. See the pictures! Thanks again Achto!
-
8 pointsJust picked this beast up. $60 was a steal in my mind. Motor runs great but I think there some other issues with the rest. But either way I atleast got a good running K141.
-
8 pointsWhat caliber pistol were you using to get it for $250.00 ?
-
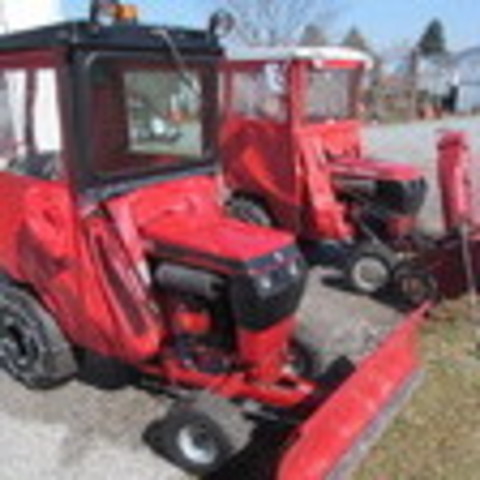
7 pointsA GT2500 followed us home today. The metal has some rust, but it is straight. It runs nice and strong to. Came with what appears to be a late 60's snow plow and wheel weights.
-
7 pointsThis August 24th I will be having an auction at my home in Garrettsville, Ohio at 5pm. I am selling a lot of my tools that I am no longer gong to be able to use. I'm also downsizing my collection of tractors from four to two I will be selling my C85 with the transplanted Oh140 Tecumseh and my 68 Commando 8. The Commando is torn down and has been power washed in preparation for a restoration that I am unable to complete. I have everything for this tractor The C85 has a snow plow on it and will be sold as a unit. I also have some decks for this and other models. Some are complete and some are shells that need finished. I know most of you can't possibly attend but I thought I would post this for those members in the area and anyone who would like to come. If you do come I would be most pleased to meet any or all of you. I will be easily identifiable as I will be the guy crying his eyes out on the sidelines. Ha ha, just kidding folks. I will admit that it's going to be a sad day for me but I recognize that it's time to let go. I hope some of you can attend. It would be nice to meet some more members. Thanks for your kind attention. ( Sorry for posting this in the wrong section. I forgot where I was when the light bulb came on to post this)
-
6 pointsSlot hitches are a bit hard to come by this side of the pond. I have one, but a couple of others would be handy. So Chris Sutton and I thought it would be a good idea to make two each, while I was staying with him on my annual trip down south. Last year we knocked up a couple of belly graders/ I decided to make a jig for when welding parts up. At the back of the bench, a piece of cast iron machined channel had been residing for years. Just the right size to fit inside the original slot hitch. A piece of plate and some bits of pipe and I had this. Apologies for the fuzzy photo. The crap welding is due to trying out a gasless mig welder for the first time. I told Chris I would get the steel and take it down with me. This was when I started to get carried away a bit. I decided to make a prototype. First I made some bosses for the hitch pin to fit through. Several pieces of cardboard cut outs were made to get the shape and angle of the sides, then I cut out some plate for the sides. Next thing was to get the bend on the side plates. I don't have a hydraulic press but I do have a pipe bender. With a 3/4" former mounted vertically instead of horizontal, with scribe lines on the centre and a line scribed on the plates where I wanted them bent, they turned out grand. I didn't take photo's of this, but I will while making the next ones. Plates cut for top and bottom of the slot, with a scrap slitting disc each side of the jig to give clearance inside the slot, things were tack welded. The assembly was removed from the jig, welded up and the result is below. I test fitted it to one of my horses and was pleased with the result. I then got carried away again and prime painted it. The eagle eyed of you will notice there is no lift arm. So flush with success I proceeded to set to on the other bits for the next three. Photo of two of side plates and two top and bottom of slot plates. Plates roughed out to fit bosses. 40mm black bar machined down and drilled out ready to make two bosses each. Plates finished off.
-
6 pointsI find myself checking out the "Other Brands" thread quiet a lot....& feel a little guilty for not being a Wheel Horse purist. The three Horse's I have do me fine, sure I'd like to have a couple more round hoods when & if I ever get my pull barn up....maybe a Speedex, one of them green round fenders, Powerking, etc, etc... So to get this thread on track & end my rambling, I like the odd ones, hand built or obscure GT's that never caught on (see my Homesteader thread). Whatchamacalit, I'm not sure what else to call this or what thread this should go under. But Odd & Obscure fit it pretty good. I believe it was built as a parade car? It's 11' long & 55" wide, powered by an 8HP B&S, with a belt driven 3 speed car trans & a car type rear axle. No suspension & with all the weight towards the front, if the front end dips low enough to lift a back tire....there it sits. What I have....a 22HP Predator engine, a HD 8 speed from a C series, a pair of Samurai axles & driveshaft's. Maybe some 26" ag's or bigger, have to do some math, see what kid of gearing I would have in the axles & at the drive from the engine to the trans. For suspension I'm thinking maybe a transverse leaf at the front & golf cart leaf springs in back. Anyone seeing where I'm going with this? Isn't it fun to dream & ramble.....
-
6 pointsWe are all getting to that point Jim. When my Dad passed, it fell to me to sort out all the stuff he had amassed. It took me over 2 years to get through it all. It is much better if you do it yourself. Wish I was closer Mate. How about some pictures.
-
6 pointsPlow days are becoming very popular. Lots of folks have a garden tractor but don't have enough land to plow. Give it a shot, may have a good turn out; just remember to hold off on offering adult beverages until the job is done!
-
5 pointsAs with many things, opinions on leaving our horses in "patina" or refurbing can run heated in both directions I thought maybe showing a pic of what a 1054 can look like in something other that "patina" -- this is mine in its "after" appearance. And, no it isnt back to specs/original, its just had a thorough rework and some nice paint. So can you guess how I like my horses
-
4 pointswell about a couple of weeks ago I had a friend of mine make me a lift bracket that attaches to the roof rafters so I could hang my chain hoist from tested a john deere 112 on it and the rafters didn't make a peep!
-
4 pointsI purchased a 1054 last week above Pittsburgh Pa for 200, Running & complete, Did any of you change out the oil bath air cleaner to a standard filter or is it better to keep OEM filter ? 953Nut is gonna wack me with his baseball cap i bet if i change it, So let me read your thoughts Men, Red Fred
-
4 pointsJust...awesome!
-
4 pointsIt' not , but my next door neighbor invited me to the Grand Opening of his newly acquired garage. He is a collector of anything auto and old. The back half of his building is rented to a working repair/restoration shop....UK Motors. A couple visitors arrived in some cool rides. A Chevy with 28K miles and original paint.
-
4 pointsi'm cleaning my original in solvent bath which now I got to over haul my carb or fuel pump one or the 2 but anyways will be using the original just got my tranny back together today no grind at all and thank you steve for the new dog screw!
-
4 pointsLooks like a nice place. Id love to have just a small bay of that. I didn't see a morris minor but that Nash metropolitan would make a killer hot rod
-
4 points
-
4 pointsI do it with the wheels on the rear axle , roll it into place using a floor jack to hold the nose up and align it with the frame - never had an issue . Sarge
-
3 pointsSince the original question in the thread was if a Horse 8 speed could be used as a center mounted trans/xfer gearbox, I started another thread showing what I'm working (dreaming) on. See "Whatchamacalit" in the Other Brands thread. And if an admin or mod wants to merge or consolidate the two threads
-
3 pointsSee this is the complicated part...."math". Easier for some to comprehend, complete mystery for those like myself. What I have....or brainstorming. A pair of Suzuki Samurai axles, an 8 speed in the middle & powered by a Predator 22HP using either a torque converter or simple belt with tension idler style clutch. Depending on what the ratio of the axles are I can set up the drive off the engine for some reduction. Really not looking for a lot of speed.
-
3 pointsFor true 4x4 yes, but leaving the diff open would help the steering. Eh....more like a golf cart/tractor/4x4 thing.
-
3 pointsA bit more progress today. Finished off the bosses. They needed a light skim. Finished. Next the side plates were bent using my pipe bender. Fitted in the jig for tack welding. Then removed, tacked t'other side then fully welded up. Unfortunately I forgot all about taking photo's at this stage. Suffice to say, two more hitches are tacked up ready to fully weld.
-
3 pointsWorked on her again today. Made the fender spacers and got the fenders on loosely. Made the engine mounts and mounted that too. And also the steering wheel on it.
-
3 pointsI have no need for more stuff so I won't be making the drive, just wish ya weren't so far away. Would love to meet up and shake hands in person. Mike....
-
3 pointsYes, this is very true .... When I got my D-200 it was smoking REALLY bad. The PO's grandfather had rounded up a spare engine and the kid wanted to sell it along with the tractor, for a hundred $ which certainly sounded like a pretty good deal -- but, something kept niggling at my brain about its appearance - finally dawned on me it was the "funny" looking crankshaft on the PTO side - tapered and short! I decided to go into mine first to see if I even needed to replace it, and, it turned out OK. At some point someone had did a rebuild on it taking it out to .020 in bore and had "stacked" the rings on the down side of both cylinders! New pistons/rings (rings properly aligned!) and that is one sweet running engine. Course, I think back and realize that I should have bought it anyway for all the others parts, it was complete. But, yeah parts for these thing are really getting scarce. Luckily the pistons/rings from 10 & 12hp Kohlers will at least fit (thats what I used in my rebuild)
-
3 pointsSwapping to a modern engine is not impossible , but there is a lot of fab work involved and sometimes machining as well - which gets quite expensive in a hurry . Using almost any "modern" engine requires going 30-40% bigger in horsepower to make up for the rotational mass and torque level of the original cast iron Kohlers , whether single or twin cylinder . There is a swap documented here in the Restorations section that uses the Predator aluminum engine , believe it was a 22hp version . These swaps also change the way the tractors work , 110lb aluminum engine up front versus the nearly 200lb cast iron original - so the front end is much lighter and it will handle differently . Kohler severely underrated their engines as they used the Briggs formula for calculated hp ratings - I'm sure if you put even a fairly worn out Kohler on a small engine dyno it would test at some pretty eye opening numbers in both hp and torque . You can gain a better oiling/filter system in most cases and that's not a bad thing . Dealing with the flywheel side engine to hydraulic pump coupling on the D engines is the biggest challenge as well as keeping the layout to the pto parts on the pto side of the engine is another close second in difficulty . A low hour , proven 20hp Kohler is worth a lot as repair/rebuild parts for that series engine are becoming pretty tough to find - I intend to have a talk with a local rebuilder shop that specializes in Kohler engines to see if he can overhaul my K482 now before that option becomes lost from a lack of parts . Good running 13 fin K341 16hp single cylinder versions are going up in price pretty fast as well since many end up in pulling tractors and get blown up - it's hard to beat that big single's torque curve , same as those big heavy early twins . I've often wondered , although never researched - if a later version twin Magnum would work in a D as those were very well made and known to last a very long time with the same torque levels but were available in much higher hp ratings .....? That price , with freight isn't all that bad if it's been tested , which Joe's is known for doing before they sell parts . Sarge
-
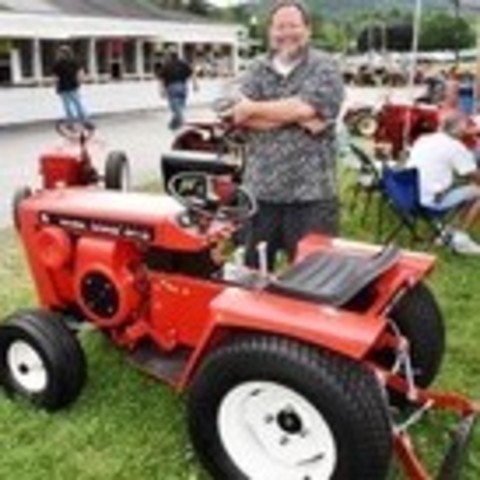
3 pointsHere are some pics from Saturday's Tractor Show (2nd Annual) in Downtown Plymouth, Indiana. I got to see Bob Parks (Racinbob), and several other Red Square members. Two blocks were closed off completely for the tractors, hit and miss engines, etc. Farmers Market was also going on in City Park, and a good country string band was playing . Show lasted from 8 am to 3 pm. Weather was perfect!
-
3 pointsSome excellent advice for ALL aspects of life and tractors
-
3 pointsThe "internets" will tell ya they are Not related... A Hedgehog, subfamily Erinacinae, is covered in short spines. It resembles an echidna or a little porcupine, though these animals are not related. A Groundhog is a totally different species, family Sciuridae, related to marmots and ground squirrels.... Both cute little things though. MMMMM-MMMMMMM !!!!!!! Delicious slimy slugs. GAG, Cough, Wretch....ugh
-
3 pointsI used five 20 cals and a 10 cal! Thanks guys! This was almost a good year in the making... real nice guy. He had an old toro grounds master as well for sale but with a 16hp single. Was hoping to find a kubota D600 under the hood of that for a later buy but no luck.
-
3 pointsYeah that's it! Love those tractors. Looking to get a few Here's my 4 digit 61 and I have a 62 also. This is my 62 Willing to trade this guy
-
3 pointsI lean towards shiny. But I think they should be used too. It's easy to avoid using them if you put a ton of work into it. But you do get style points too:-)
-
3 pointsActually I have a paper element air filter on my Street Rod 953 because it didn't come with an original one and I had the other on the shelf. It is a PITA to change out though, got to remove the grill and reach up behind the headlights to replace the element. If you don't want the oil bath filter I know there is bound to be a market for it, but think you would wish you kept it later on.
-
3 points
-
3 pointsJim, that is a sad day we will all have to face sooner or later. I know I already have too many toys, but can't resist picking up another 953 when I find one. Too far away for me but hope to be able to meet you some day.
-
3 pointsAdd in a HF lift table. Have the frame on stands. Put the tranny on the table. Lift the tranny with the table and roll the tranny in place.
-
3 pointsI have a pair of 3/8-16 X 2" set screws that I use. They align the transaxle and I run nuts up on them to snug it into place and then insert the lower bolts. Once the lower bolts are tight I replace them with regular bolts.Couple of bucks, but saves a lot of time.
-
2 pointsAny golf cart fans or owners here at Redsquare? We have an E-Z-GO TXT & a ClubCar DS Carryall. We use them for tooling around the yard & trailer the E-Z-GO to community garage sales where they are golf cart friendly & a big flea market in Lima, OH every summer. (Maxx's Trader Days & Water Dog Races). http://maxstraderdays.com/ We have a lot of fun with them. I picked up the E-Z-GO as it sits & other than adding a stereo haven't changed it. The Club Car was a former Notre Dame mail car & has the full cab (doors come off in the summer) , I put a 4" lift on with 23" tires, the front bumper & the LED lights. It's my go too for weedeater, chainsaw, bird & deer corn hauler. Any other golf carters here?....lets see them.
-
2 pointsWhat brand and size tires do you have on the front of your C-160? They look great!
-
2 pointsVery nice Craig!
-
2 pointsYes Dennis you are spot on. I remember as a kid the thick sears catalogs that had everything. Sears had the power of knowing how to markets their items and it must have worked . I remember the neighborhood where I grew up was predominately Sears. They had some cool attatchments to boot. I also remember going with my Dad tp Big 4 lumber and looking at Speedex tractors on the showroom floor. I sold them both this morning to an old gentleman who really likes them so im happy and hes happy. I think one reason for me screwing around with these tractors is the memories of yesteryear. You dont want to lose those.
-
2 pointsSo, it ran bad before the carburetor was changed, and it improved slightly but still runs bad afterwards. Makes me think that it's not the carburetor but a bad fuel delivery system, including the pump and fuel lines. I have seen fuel pumps that work erratically. Because the tank is higher than the carburetor, if the one-way valves in the pump are weak, fuel will flow through the pump and fill the bowl. Engine will run and a weak pump will keep trying to fill the bowl, but if the one-way valve discs are not sealing or the diaphragm is weak, the fuel volume can't keep up with the need.
-
2 pointsThat's a wittle tranny.
-
2 pointsYou paid the going price for the recoil starter, the rest was a gift!
-
2 pointsNice photos, Ed! I never envisioned a Metropolitan as a street rod, but I believe I've seen the light thanks to @19richie66's photos! What's the story behind the AACA Museum sign and awning in the 4th photo? That's one of those places I've been meaning to visit for several years now, but just haven't gotten to it yet. I'm thinking road trip on my motorcycle. That and the America on Wheels Museum in Allentown.
-
2 pointsI like it! And there is always more paint should you scratch it while putting it to work!
-
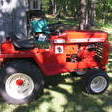
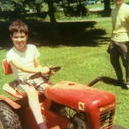
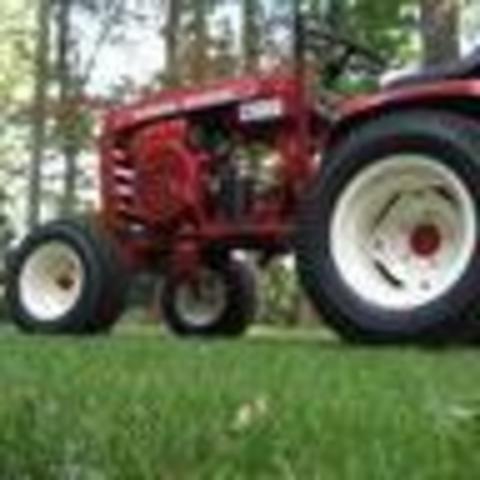
2 points1961-63 usually fenderless but fenders were an option, 7 hp Kohler, belt driven clutch to shaft to transmission, that's what I grew up on ,dad bought his in 1976-77 and has had it ever since , first 2 pics of a nicely restored version then ours that's still mowing/working with a newer style K181 gear drive starter and padded seat, Jeff.





.thumb.jpg.affe7d34ead61ae3c7684997c39109d8.jpg)






This leaderboard is set to New York/GMT-04:00