
Leaderboard


Popular Content
Showing content with the highest reputation on 02/08/2017 in Posts
-
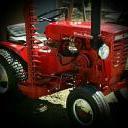
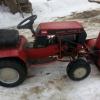
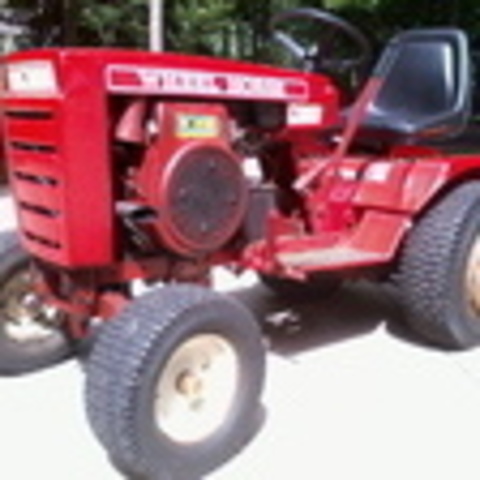
7 pointsSo besides a little engine refreshing, I managed to put on wheel weights that I painted and threw on behind the wheels. Also put on the hubcaps finally.
-
6 pointsThis video was taken back in oct 2015 . I was amazed what that little 4hp kohler could do ! Think spring... https://youtu.be/pSnWliSydIU
-
5 pointsI'm sure that the timing is a bit advanced. I need to pull the shroud to locate and hi light the timing mark. As tall as the stack is, I was surprised to see a flame at the tip. Mark.
-
5 pointsThey're mine, hence the recycled pictures and descriptions. I want them gone. I'll have to check, but I think I set these up as an auction. I'm losing money on each of them at the opening bid, but that's not really a big deal at this point. I just want the space back. Shipping can be an option if someone is interested. I can palletize (might take me a while) and either have picked up at work loading dock or dropped at a Fastenal store. But buyer needs to do all the legwork. The 520H/48 is actually already palletized (see pic). Hopefully they go. Steve
-
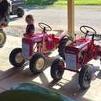
4 pointsI thought i'd post the restoration of my Cub Cadet 70 which is very rare in the UK, I finished her last year. I was very happy when I won the auction but a massive task was ahead of me, it was nice to get a tractor that came with all of the original manuals and although someone had badly painted her at some point it was in an original condition, complete condition. Here is how I got her One of the first jobs was fixing the steering box which didn't work very well. We could see straight away why, as parts are expensive to import to the UK we tried to fix everything we could. My dad (meadowfield) fixed the steering box using bicycle headset parts and the steering box works exceptionally now. Since the steering box had been fixed I went on to refurbishing the steering wheel. First I used a dremel to remove all the rust and also drilled small holes into the plastic so that the epoxy putty i used would hold. I was very happy and its not noticeable now. Below is how she was before i stripped her down. Rust was very bad as you can see. After years of use and no way of greasing the axle the pin had seized solid, we tried many methods to remove it but had to resort to drilling out the pin, when reassembling the axle i added a grease nipple and we turned a groove in the pin. We then worked on removing all the bad metal and fabricating new pieces. \ I like to do restorations properly and so I sandblasted 99% of the parts to remove all the rust. Some one had smashed the hood stand to but a larger battery in so we had to fix that as well. That was then sandblasted. After many hours of repair and sandblasting it was time to etch prime the parts and paint the parts. I managed to save the original rear tyres which was good. Every part was painted separately and then i assembled for the last coats. The hood was littered with rust holes and pitts but in an effort to keep the originality the holes were welded up and lots of filler was required. Back on all 4 wheels The light knob was missing so from a picture I turned one on the lathe. After a few more bits and pieces and decals from my dad she was finished. Here I am on the first test drive! I managed to save the original number plates which i was very happy with. This has been my most favourite restoration i have done so far and i have learnt many skills including painting with a spray gun, (i did all the painting myself) all these skills will be helpful with my up and coming RJ 58 restoration
-
4 pointsFinally got the Honda Horse dialed in! Even with the factory 6:1 gear reduction on the G300, this thing plows perfectly! Just it will actually plow at an idle in 3rd gear. Doesn't even sputter! Can't wait to hook the dozer blade up to see what it can push
-
4 pointsMine isn't cored out. I wanted it as quiet as I could get it. The muffler is from a 2015 Road King. Best of all, it was free. I'll try to get a video at night soon. Mark.
-
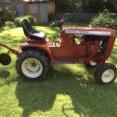
4 pointsJust waiting for decals noeNoe
-
4 pointsI would err on the side of caution Mike and go with the weather guy" 18" figure and just be ready with the equipment fueled up.
-
3 pointsHello all. Today it was ok enough outside to go out in the shed and replace one of the many things I bought from fleabay. I decided to replace the head gasket, (all original, never taken off.) I was really nervous, but surprisingly all 9 bolts came right off no problem. Also, I've definately seen worse. For 50 years old, this thing really surprised me. I also replaced the front breather cover filter and gaskets. Here's a couple before and after pics.
-
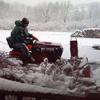
3 pointsGotta love it...night time plowing!
-
3 points1964 953 and 1054 snowthrower 1965-66 953 1054 and 1054A snowthrower They brought out a kit to change the ST-375 to one that would fit the long frame tractors which is what the C-Series are but the C-Series has a front quick hitch. The long frame models prior to the C-Series did not have the front quick hitch unless it was added as an option later on. You can see the differences in this bulletin. Belt widths were 1/2" for these where later models used a 5/8". Belt length for the 953, 1054 and 1054A was different. Garry Did not answer your blade question - have had snowthrower on the brain lately.
-
3 pointsThat's the plan Jim....fill up my fuel tanks and my 4x4 truck. Mike......
-
3 pointsThey're incredible little machines... nothing better than seeing 'em still being worked.
-
3 pointsSnow blowers were built to capture and direct the snow while the blower moves it. You NEED a second with a snow blade on it.
-
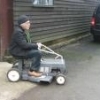
2 pointsWell I found a 312-8 locally yesterday in good shape so I went to look at it with the wife. Long story short she dropped me off and I drove it 4 miles back home. It is a strong runner and only took almost an hour to get home after a few short cuts through the town park. The picture of her at home under the deck till I can get her inside.
-
2 pointsEastern PA, didn't push snow ... yet! Forecast soooooo, 416-8 and the 520-8 dressed. Wheel weights, chains, 48" blades. The Horses are happily excited. What's with that?
-
2 pointsElectrical lock nuts come in steel and aluminum, you may need to go to an electrical sippl house to find the steel ones. I think I shared a picture of mine and contributed to @Hacksawhero123 delinquency!
-
2 pointsto red square............. The first part sounds like a weak fuel pump - tank is under the seat and it takes a bit to get the fuel to the carb - had the same problem and put an electric pump on...problem solved..however...it could be something else entirely..others will chime in.. it won't turn over if the safety switches aren't made - make sure the pto is disengaged when starting ( has a seat switch too )
-
2 pointsYUK!!!
-
2 pointsA soft wire wheel on a cordless drill, brake cleaner, and a microfiber cloth. Used the kohler manual for torque spec and sequence. I really thought those bolts would give me a hard time I was prepared for the worse, but it was literally like butter. Will do, that actually slipped my mind about the retorque lol. I got the carb off and few other things too that I gotta take care of.
-
2 pointsRemember to redo the torque on the head bolts after it has run for an hour or so.
-
2 pointsCraig says it's OK.....if he was displaying a SMV sign.
-
2 pointsYou should be reading about 14.4 VDC. Not sure why you see VAC, but some some simple rectifiers can put out a pulsed signal that will look like VAC to some meters. Just a thought. For the Light Bulbs. The 520H bulbs are no. PAR36. There are LED bulbs available. See superbrightleds.com
-
2 points1/2-13 x 2 inches for the bolts.
-
2 pointsWe need more details Wildman.
-
2 pointsStill 65 F here this morning, but I just saw one forecast for 8-12" starting in 12 hours go figger ? I did fill the tanks, check the oil, and hook up the chargers on the snow team.
-
2 pointsThanks for posting the video. I embedded the video for you.
-
2 pointsNapa RuGLYDE will clean and refresh the rubber, scrub them first and then apply this stuff and bag them up for a week and let it soak in.
-
2 pointsDon't do that if you want snow. Sure-fire way to scare it off!
-
2 pointsamazing little engine
-
2 pointsWow, 70 F here today, so I was able to work outside.
-
2 pointsA case of "don't try to reinvent the wheel" (horse) for sure! Have blown heavy snow with our C-81 for years... Our C-141 has more power but the 81 is still my favorite.
-
2 pointsUnless you have absolutely nothing else to do,why bother?? Both are great tractors just the way they are.Just my opinion.
-
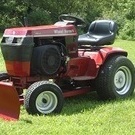
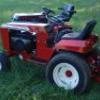
2 pointsWell tires are on and new exhaust made it's not quite finished in the picts
-
1 pointWhat size kohler do I have just cant fine it its leaking seal need to replace it just not sure the size I have thanks John T-875 serial# 132215
-
1 pointThat looks factory to me
-
1 pointD-648 is the Delco replacement and will work just fine. When it comes to finding engine parts for your you need to use the engine manufacturers manuals.
-
1 pointSounds like you horse wants to be a
-
1 pointHello all, I'm restoring this 1957 rj 35 and was wondering if anyone makes repop brake parts for it. This one had no parts when I bought it and I just wanted to know if someone repops this stuff. Any help would be greatly appreciated. Thank you.
-
1 pointBrother Ed speaking words of wisdom. Let it be!!
-
1 pointAwesome work bringing that one back from the dead!
-
1 pointAldon, I think its high time the forum awarded you a doctorate in GT 14 Studies!!! From this day forward, you shall be properly addressed as Dr.Trimble!!!
-
1 pointNice 520 Jeff... I'm thinkin' ACcuz needs one of these.
-
1 pointto sleezer1004. Glad to have you here!!! Jim
-
1 pointHow about some forks for the loader.
-
1 pointBackhoe - NOT FAIR!!!!!!!!!! Nice machine... Yea! Everyone dreams of a loader...... until they get one and then they see the guy with the backhoe ....... then the dreaming starts all over! Thanks John for making me feel so "unsatisfied" all over again Seriously, Awsome toys!
-
1 pointMust have missed this topic the first time around
-
1 pointI've done a couple loaders, the first one was on a D160, it ran great but was a little too much around the yard. I later retro fitted that loader to a 520. My son liked it so much, I built him one too! The second one came out better, I was able to pick up a 520 roller with gear reduction steering for the build.
-
1 pointOnly engine for a D 250 is the 4cylinder Renault Moves that 60inch pretty good, now she doesn't want to mow with the C195 or the 520H My mistake to have her test it out I guess Duane


.thumb.jpg.0c495eaa7ff874c741991d7b1de2f119.jpg)


This leaderboard is set to New York/GMT-04:00