
Leaderboard


Popular Content
Showing content with the highest reputation on 12/14/2016 in Posts
-
13 pointsSaw this on Facebook today and I thought it would be good to share here. It looks like it would sure get the job done!
-
10 pointsFinished up the refurb on the 64" Allis Chalmers dozer blade the other day. Made and installed new wear edge for the blade and have installed on the BIG TEN ready for the next snow.
-
10 pointsA while ago I pulled the K301 12hp out of the C120. My mechanic buddy worked it into his busy schedule and rebuilt it for me. . Early Christmas present for me. . I ever get a chance when I am not working I'll go pick it up. The C120 should really purr this summer mowing lawn.
-
7 pointsJust finished putting the finishing touches on my first project, Here are the before and after pictures. One of my "Just Cuz" additions was using amber tail lights that are on a flasher for "Hazard Lights"
-
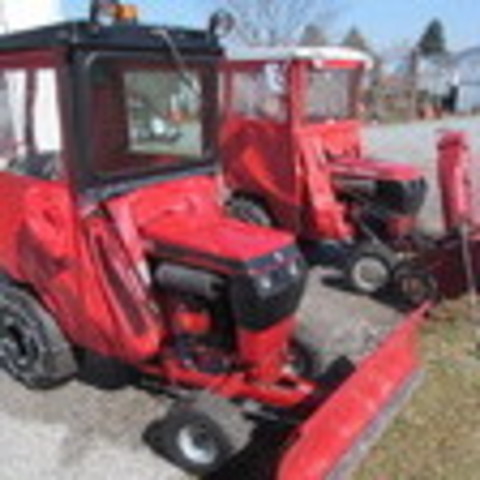
7 pointsThat's one way to get a tractor with a heated cab.
-
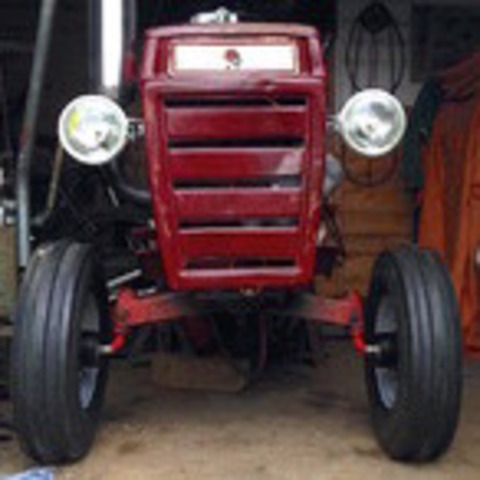
6 pointsHi guys my newly added C-81 came sans lights (first pic below) .... so I thought it would be easy to find a used light bracket WRONG .... so next best thing engineered one from a front set off an OLD Craftsman mower I had in my stash.... was surprised on how well it adapted some cutting, pop riveting and voila....... of course added all the lines and a 20 Amp fuse to onto the Accessory starter switch block..... Thought I would share this with you all..... Merry Christmas let there be light! P.S. also added a Cigarette lighting outlet (so I can easily add a rotating yellow danger light when pushing snow. Cheers
-
5 points12-14-2005 King Kong remake debuts On this day in 2005, King Kong, a remake of the classic 1933 film of the same name about a fictional giant ape who climbs New York City’s Empire State Building, opens in theaters. The original King Kong, starring Fay Wray as the great ape’s love interest, as well as Robert Armstrong and Bruce Cabot, turned the larger-than-life gorilla into one of Hollywood’s most enduring icons. The 1933 film, which contains the now-famous line, “It was beauty killed the beast,” earned particular notice for its pioneering special effects. The film spawned a series of sequels, including Son of King Kong(1933), King Kong vs. Godzilla (1962), King Kong Escapes (1967) and King Kong Lives(1987). Born on September 15, 1907, in Cardston, Alberta, Canada, the actress Fay Wray appeared in some 90 movies during her career, but was best known for her role as Ann Darrow, an out-of-work actress who travels to Skull Island, where King Kong falls in love with her. When the giant ape is later captured and taken to New York City, he snatches Wray and climbs up the Empire State Building. Wray was reportedly asked to make a cameo in 2005’s King Kong; before that could happen, however, she died at the age of 96 on August 8, 2004.
-
4 pointsGood question Callum, maybe some time when winter goes and the weather warms up.. Well, Why Not has had a quiet life for quite a while, just pushed out and in the workshop and not even started in a long while.. Until..... I had a video idea.. Stage 1. Get WN running again.. Stage 2... A Seasonal Special
-
4 pointsIf you get that stuck for room you can always put one in the dinning room, much nicer to work on in the warm and can even watch tv and its nearer the kettle.
-
4 pointsI found the light assy's on an RV parts website. They also had chrome bezels to go with them but I passed on them. After I had bought them I was at a NAPA store in Boonsboro and they had the very same light assy's They are stair/ladder treads that I found at Harbor Freight. Tractor Supply had something similar but they were way too thick. Home Depot has the grit type so I bought a set and trimmed them and the Harbor Freight ones to the correct size then put one on one side and the other type on the other side. The wife thought the Harbor Freight ones looked the best. I was NOT about to disagree.
-
4 pointsSounds like an excuse to add on to the garage to me......
-
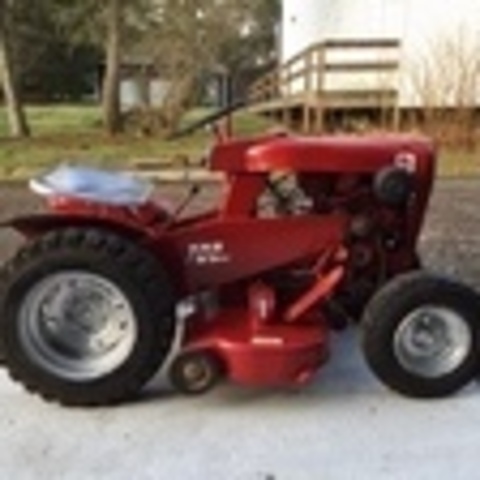
3 pointsAnd.. I'm back. I never really left, been poking around off and on in between. Some major life changes over the last couple years. Applied for and got a new trade, I spent a year and a half in Ontario learning to be an Aircraft Structures Tech. Got posted and moved to Nova Scotia, not too far away but far enough. Two sons in college now, makes me feel old. Anyway, the old horse has been working like a charm. I am really in love with the little beast. Figured it is about time it got some love, so into the shop it goes for the winter... I won't lie, I actually like the worn, sun-faded, worked look. I still haven't decided if I will repaint or just give it a really good "take it apart and clean it". In any case, the engine will be tore down as it's smoking/leaking a bit. So new seals and take a close look at the internals. Some new dancing shoes will be in order, I'm not sure the front ones will even survive being removed from the rims they are cracked/checked that badly. Anyway, I'm not in a rush. Don't need it until mowing season which is some months away now in the frozen north...
-
3 pointsA video with Chris and Norm's grader blades in action
-
3 pointsFrom the words of Larry the Cable Guy...Git'r Done !!!!
-
2 pointsIt's mostly red!
-
2 points
-
2 pointsAlmost done, if I get fed up with the stationary engine I can always fit a Clinton or Three.
-
2 pointsI made a little progress this week, while it's apart I replaced the o-rings in the hydraulic valve and I've ordered an o-ring kit from "classic kitchens" for the lift cylinder. I got "Matt's" foot pedal installed this morning and I replaced the rear lug bolts with one of "Bob Maynard's" conversion kits. Also put a new valve and grommet in the gas tank and mounted it and I have most of the dash stand back together, I need to get the engine cleaned up and get it back on then get to work on the wire harness.
-
2 pointsWelcome Drillbit. Got right under my skin you did. This is my B80. It's life story is very similar to yours. Decided to restore it. Obviously I am slower than the 7 year itch. second picture is where it sits now. Maybe I will get it finished one day. Enjoy yours and I hope your restoration progresses faster than mine. Marvin
-
2 pointsBefore I would go to all kinds of trouble to re-engineer one of those tents, why not build it a bit stronger like this one? truss forhttps://www.menards.com/main/building-materials/yard-buildings-outdoor-storage-accessories/yard-building-accessories/10-gable-ez-build-storage-building-frame-with-8-sidewalls/p-1444448793206-c-9565.htm?tid=-6317892249592687516 You can build that truss for 11 bucks 7 of them make a 10x12 building. Add that little tie joistat the notch in the floor and the entire frame for a 10x 12 is . You could also substitute a treated piece for the floor deck and also add 6 extra floor joists to the floor for 23 bucks and then your floor would nail at 12 inch centers for a super solid feel. Stay away from the kit mini barns--they are a ripoff. No reason that you could not lay out chalk lines and build the end panels and frames inside a garage. Figure the basic frame at 290 lineal ft. of 2x4 or add 6o extra feet of 2x4 for the stiff floor. At $.25 a lineal foot that figures at about 75 dollars and 90 dollars respectively. You will need one sheet of treated plywood at the door and the rest can be exterior grade non-treated. You can get a 3/4 inch treated floor for 120.00 or a half inch for 107.00 if that is haw you want to roll.Add two treated runners 4x6x12 for a total of 50 dollars and then there is your basic frame for under $300 That gives you a whole bunch of money before you get to the kit price for a building like this http://www.menards.com/main/building-materials/yard-buildings-outdoor-storage-accessories/yard-building-projects/midwest-manufacturing-e-z-build-10w-x-12d-gable-storage-building/p-1444422314146.htm. All you need to finish it is exterior sheathing and vinyl siding or just steel siding. Add roof sheathing and shingles for $200.
-
2 pointsGT4. I would say get one of the tarp sheds to keep the truck in it. That way you do not need to clean off the snow. In the morning to go to work
-
2 pointsA few Stallions might like looking around from high!
-
2 pointsA few more progress photos.
-
2 pointsDecided sanding and painting could wait till spring/summer. I am putting panels and plow back on in preparation for winter storms. Kind of stoked to see how it will do when a good snow hits. I did sand and paint front of plow more for function as it was degraded a bit.
-
2 pointsI'm a little late to the party, but I've had my WH out in it 3 of the last 5 days. Admittedly the first day was really just playing around but Saturday, Sunday, and yesterday were to do real work. This is my first year with a blower. I love it. It worked great on the powered stuff we got last week and then yesterday it did a fine job throwing much wetter stuff. Looks like we're getting more as I type so I might have cause to get her out again tomorrow. Seeing those cabs makes me very jealous. I've got a 700' drive where the wind dependably blows from the house toward the road. I can get 1/2 way down the drive in either direction, but the more exposed half (closer to the house) seems to give me a face full every time I try to blow snow as I approach the house. I'm too stubborn to just drive back to the house with the blower off so I get one of those ice-cream headaches every time I crest the small hill approaching the house.... Here's a not great photo clearing out in front of the neighbor's mailbox.
-
2 pointsCouple years back I took a Dodge dually in for an alignment. Sat in the waiting room for about 3.5 hrs, finally went up and asked the owner of the shop what's taking so long. His reply was we are waiting on parts all four of your ball joints are shot...we are surprised you even made it in. I told him you know what you might be able to scam others like that but you aren't gonna get to this guy...I had just replaced upper and lower ball joints on both sides THE NIGHT BEFORE. So yes you have really got to watch some of these shops around as they will try to get to you and make a buck
-
2 pointsOnly 92 hours on it.
-
1 pointI recently posted about adapting power steering to my D-180 using an electric power assist steering (EPAS) unit from a 02-07 Saturn Vue. I got one of the units in order to check if I would be able to 'stuff' it in under the dash of the D. You can get these things in different configurations, this one had the steering column attached (its not needed) With this and Sarges recent post on improving the axle and its components on the D's, the dang thing will steer itself!! After removing the wheel, I needed to try and get it to fit under the dash, with a bit of experimenting I found a near perfect spot! So next we have to get the EPAS to function - It will not work since it no longer has the cars computer to "talk" to it. To fix this a fella on ebay has a 'controller box' that when wired into our EPAS it can work. His link is: http://www.ebay.com/itm/Saturn-Vue-Ion-Chevrolet-Equinox-Electric-power-steering-controller-box-EPAS-/182283275302?hash=item2a70ee0c26:g:uVAAAOSw4GVYJv77 So then it was time to get the shafts cut to length and adapted to accept the shaft of the Ross system. The longer shaft is steering wheel side and is cut off pretty short to accommodate/adapt the D's wheel. I had a spare Ross steer shaft and cut the splines/threads plus about 1/2-3/4" excess and made an 'adapter' to mate it to the EPAS shaft using roll pins. The other sides shaft was already pretty short but I still lopped off about 3/4". I then bored out the square end of a 3/4" shallow 1/2" drive socket to fit over the other EPAS shaft, again using a roll pin to attach. This was in order to allow some leeway when I cut the Ross shaft to match up with the EPAS. Next we have to wire the controller box into our unit --- and this part is critical for it to function! (I know because I messed one up) Mounted on the unit is a metal box (ECU) containing the 'brain' for it. This will have to be removed and "remoted" elsewhere and here is where caution is needed - there are 4 very small wires from the motor to the box (2 white & 2 blue) these are hard wired and will have to be cut or de-soldered. Re-connecting the sequence is critical!! With the wires being so small and short and not having any experience with small wires I had problems here (this is where I messed up) Not a lot of room in the area under the hood - I finally figured out how to get the ECU mounted. There is hardly any visible alterations to the external appearance of the tractor - just under the steering wheel is a short section of the EPAS visible, and the gauge for the transmission oil temp will have to be removed but thats it. The ease of the steering on the D now is incredible, with the tractor sitting unmoving on concrete is one finger, and driving it is --- well, again, incredible! Course I dont have a FEL or plow, etc but I feel like this mod would also drastically improve the steering also. Am not familiar with the other big tractors enough to comment on this mod being possible but you guys sure ought to do a little research on it. I have a 4x4 Mitsubishi with FEL and thats my next venture with this, it doesnt look promising to fitting on it but it didnt look possible on the D til I got to tinkering with it!! edit to add a late suggestion-- When you get your EPAS and the controller box from Portugal set it up on the bench hooked to a battery to not only make sure it works, but also to get familiar with how to get a feel of what/how it it does. I didnt do this and I believe it would have benefited me a lot...
-
1 pointThe model # will be on the tag with serial numbers just ask for that. Or ask what the decal says on the side of the dash. That will give you what it is.
-
1 pointSome more interesting information about the Schnacke Recoil FYI
-
1 pointYes, the wheel weights are real wheel horse wheel weights. Nice job the way you did them. Stands out with the red button head. Glenn
-
1 pointThe most likely culprits are bad/loose connections and grounds. Print the wiring diagram for your tractor, then clean and reconnect all the terminals in the charging circuit. Don't forget to clean the grounds, especially the rectifier. If that doesn't fix the problem, then I would check the AC from the stator and the DC from the rectifier.
-
1 pointWell i got my 6 horses all nice and toasty warm in the garage, and there all getting along just fine. I even can park my truck in there with them. Now my conundrum is do i park the truck outside and if i see or have a horse trying to follow me home do i take it,or keep the space for the truck.Geez i hate to pass on a horse!! Anyone want to throw in their 2 cents?
-
1 pointThis rj35 was my first rj and also first round hood. Has the orginial clinton engine that came in it just missing part and I am looking for them would really like to put back to original. Very happy with the buy. This little will be my favorite for along time. I will be the 3rd owner and first out of the his family. I stated on taking the blue and black off it, it's going to take alot of time and alot of elbow grease will be worth it though. Also came with 2 front plows.
-
1 pointThis guy might have your pulley...you can make the bracket if nobody has one.
-
1 pointYou need 2 men and a boy almost to move it around Jeff !! . Yes it is well built.
-
1 point@TIGman good looking refurb looks high quality as always, think I might know where a black Simplicity version of that blade is hiding out at they for sure look sturdy,Jeff.
-
1 pointDon't mind at all. I am always amazed at what ideas a person can come up with while mindlessly riding back and forth mowing the lawn
-
1 pointNice seat! Whatever you do to it, don't lose that seat. Mike.....
-
1 pointActually, looks better than factory.
-
1 pointThanks all! Well today on this cold December day I tilled my garden and got it ready for next year.
-
1 pointBest investment ever and worth all the pain of paying almost $1,000 for mine , getting it apart and moved into the basement (1,200lbs, ugh) and despite the wear in it does a very good job with my limited skills running it . Thanks to a machinist friend I'm learning and needless to say - I do a lot of repairs on his equipment and welding without hesitation . Gotta have friends in the right places , lol . Yesterday , in the Off Season of Construction work he sends me a link for a sale ad - a nice single phase 110v Mighty MIte milling machine - nice compact unit that could be put in my current shop and seller is asking $2500 - I just can't swing it right now and I'd imagine it's already long gone . Stuff like that lasts about 5 minutes on the sale sites around here....gotta be quick . Sarge
-
1 pointThere should be room for one in the truck...leaving space for more in the garage 😃
-
1 pointColor that is most recommended is Rustoleum Almond.
-
1 pointIt used the air blowing over the head to blow into the cab so their is always fresh volume of air blowing in and I also did this on top of the cab on the back. It also helps the windows not fog up.
-
1 pointThe thick blocks are there to clear the manual transmission tractors, I assume it was designed for the 520-8 and probably included in all kits after that. I tried to fit a plow with extension kit on a C-145 8 speed last year (and I did not have these blocks). The extension kit bracket hits the drive pulley and you cant mount the blade. The blocks lower the rear of the blade enough to clear the pulley. Mounting any snowblower from 1973+ will work on the 520H, but there is a different lift rod that was used on the single stage units. There is a slight bend in all the newer lift rods (probably 91+) that allows it to clear the front swept axle when the blower is raised. Some people dont find this to be a problem and others and made minor adjustments to make a straight lift rod work, but just be aware that that could be an issue.
-
1 pointMaterials we used were 2 pieces of 1/4 plate 48" x 7" a few bits of angle iron and rod from the scrap bin and a mounting plate from an old mower deck Heres a few more Just takes a few minutes to fit and first tests were very successful, we can use the blade straight or angle it either way
-
1 pointGood idea!! Just make sure your careful about clamping onto the battery near open fuel containers...
-
1 pointVery cool! when's the top speed run? Callum
-
1 pointGreat pictures from everyone!!















This leaderboard is set to New York/GMT-04:00