
Leaderboard


Popular Content
Showing content with the highest reputation on 10/25/2016 in Posts
-
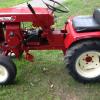
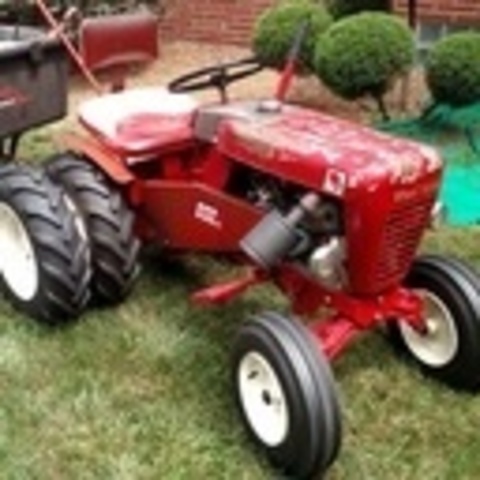
12 pointsFound some ag tires and rims at a old gas tractor show. I blasted and painted the rims and mounted them on this little guy. I kinda like the look. I'm gonna need a new place to house it though because she will no longer fit through the shed door.
-
11 pointsHere they are!
-
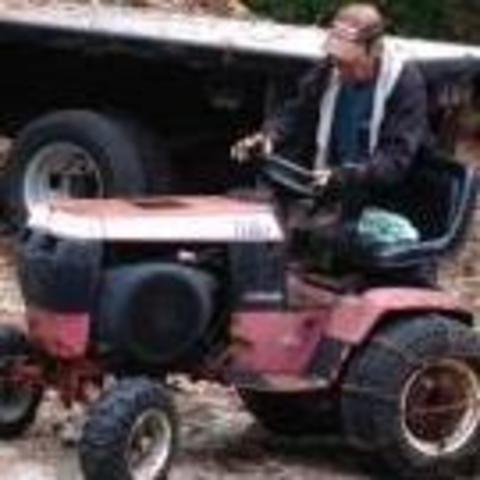
6 pointsSaw this at a new job today. It needs a hug... I may end up trying to buy it before I leave... I think I saw a deck in the weeds, and possibly a rear blade.
-
6 pointsGuys, I finally was fortunate enough to meet and spend time with19Richie66. He is an all around terrific guy and I encourage everyone here to introduce yourselves to him at the Big Show next year if you have not already met him. Richie is hoping to attend his first Big Show, and I sure hope he can make it happen. We did some horse trading and with the help of Richie's Son, hauled stuff off of Richie's trailer and into my shop and Wheel Horse rolling chassis storage building. Then hauled stuff out of my storage building and Wheel Horse Barn and into his trailer. Richie ended up with a complete rear end and hydro pump and tach and vacuum gauge from a 520H roller I had. Also my old 417Hydro rolling chassis that was in the storage building, and the KT17 series 2 engine that was being stored in the Wheel Horse barn. And maybe some other stuff that I can't remember at this time. I happily ended up with a 1989 312-8 that has a fine running Magnum 12. The tractor needs a fender pan, seat, clutch return spring, and some TLC to be a usable working tractor. Buts that's no problem as I should have everything needed right here in stock. The tractor came with a set of Firestone AG's which I've already removed to put on John Robert (my K powered 416-8). The bonus to this 312-8 is it has a stack exhaust complete with a rain cap. Next cool thing I got from Richie was a complete running 10hp K engine mounted on a shaker plate. This engine has a little stack muffler with a rain cap that I may put on the 701. That should make it look even more like a miniature farm tractor. I have a Blackhood roller that needs a shaker plate engine. Then a complete but at the present time nonworking 8 speed transmission that can be repaired or used for parts. We had to part company much too soon, but Richie had to get back home to Florida. Here is a few pics of the things I ended up with.
-
5 pointsFirst time I have had the stable out for some exercise and a photo shoot.They may not be to pretty but they sure work hard. Hope this satisfies the cries for more pictures.JAinVA
-
5 pointsWell, I made enough progress to warrant a few pic. I cut the bends off the 105 rocker plate to make a solid engine mounting plate for the 321. I had to shim the plate up 1/2" to get the dropped pan to clear the steering rod extension tube. Got the steering geometry worked out and the engine installed. And got some painting finished. Still have to work out the clutch and throttle linkage. and a lot of body work on the hood and seat/fender pan. Got the snow movers ready and snapped a pic for size reference.
-
5 pointsNice ...I got a door it will fit through...be right over to get it
-
5 points1980-1984 C-165 Automatic and C-145 Automatic are the only tractors that fit those specific requirements. However, if you are willing to look at the Kohler Magnums which were essentially the same as a K series but had a magneto ignition. That opens up your scope to include 1990 and newer 312-H and 314-H but some feel these engines are a BIT under powered running a Hydro with a big mower deck or snow blower. Also there are koher twins if you dont want to go Onan, like the C-175 Auto, 417-A, 418-A, 418-C. But in reality, the Onans are just fine for many people (and lots of people LOVE them!) They sound really cool, are VERY smooth running and have quite a bit of power. That will expand your search to all the newer 416-H's and 520-H's as well (of which there are very many of these around!) I don't know if you have a specific reason to be going hydro, but most attachments are not unreasonable to use a hand-lift with (and some are even preferred, like mid-mount grader blade). The 8 speeds are just about bullet proof and for ground engaging work cant be beat. The hydros are smoother for cutting grass and (for me) plowing snow especially when converted to foot pedal control. That will expand your search immensely!
-
5 pointsI don't know what kind of cast iron the Kohlers on those old 953's are made of but 953Nut recently brought one home that looked like it had been salvaged from the bottom of the Atlantic Ocean. He put a battery and gas in it and the thing started right up! Amazing
-
4 pointsThere are 2 bolts in the top of the trans that hold the lift cable tube on. Take one of those out and it will vent there.
-
4 pointsSundstrands all very durable and garden tractor manufacturers started using them over 50 years ago. Most are still in original condition. They are very strong units. The Magnums were starting to be phased out in the late 80s and early 90s. Most manufacturers have already started using the Kohler Command by that time. Toro was a bit behind in putting the Commands in their tractors. Nothing wrong with either the Magnum or the Command as both are Kohler's commercial grade engines. Onan is also a commercial grade engine and are built to last. Parts, though are a bit pricey.
-
4 pointsThe brake will slow it down but all of mine will turn if nothing is attached. It will stop when you attach the deck
-
3 pointsFuses are a good thing, lots of older didn't have them and should have. Presuming you have a battery ignition system with points and a coil the following simple diagram should be helpful. The wire sizes are not Gospel, if you want to use a larger size (smaller number wire gauge) that is fine. The second and third are for reference for other systems.
-
3 pointsDo these new tires make my butt look big.
-
3 pointsYes it was very nice to meet finally. You are a good man! Always nice to put a face with a name. Too bad I could only stay so long. I would have talked tractors and stuff all day. Glad you got the 312 fired up and was satisfied with it. I hope to get the 417 washed down and put back together here soon. As for the firewater, I didn't get to witness it's existence but did hear tales of it's power. Maybe I will witness that next year. The boom sprayer sounds like a good idea. Here is a picture of my load going home. Who says the beverly hillbillies are dead?
-
3 pointsAt least in my environment, near the Canadian border, both blade AND blower are required for snow removal! Blade will handle light storms and blade will cleanup after the blower moves the heavy snows. Point is that I most always use the blade for final cleanup! Wouldn't be without it! Otherwise the little bit that the blower leaves builds up, partially melts and refreezes and later turns into ice and causes me to fall and brake my ankle... really! So up here I like to try to scrape the drive clean and hope some sun comes through to "burn" off the remainder so I can start with a completely bare driveway again! I'm so serious about this (broken ankle!) that I also intend to add a Sweepster! But blower and blade is a very nice combo until then! Thanks for sharing!
-
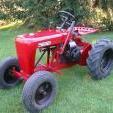
2 pointsPicked up this 58 RJ today! It has the shower head and the original heat shield and reel mower belt guard. Came with a deck, a tub cart, and a snowplow. Will get better pics later!
-
2 pointsI mounted this loader on one of my 520H's, it's a Sears Smipson made in Canada. They are a very good loader. I will post more pics later on how I hooked it up. The rims are altered , made extra wide.
-
2 pointsHeat. Preferably with oxy acetylene torch set up
-
2 points
-
2 pointsThanks ACman, I'm glad to have helped get you started into a great hobby. My shop also serves as my hideout, my get away. I get a lot of satisfaction out of being able to do so many different things right here at home. It's also pretty amazing what a guy can teach himself to do with the right tools at hand. Maybe I will posts in the new thread one day with a few pics of the shop.
-
2 pointsThink of it as having been an organ donor for other deserving projects.
-
2 pointsWhile I am glad to see a C-105 Black Hood gave it's life for a fellow WH, very typical of the breed I might add, my C-105 grieves for it's lost cousin... VERY nice build, by the way...
-
2 pointsI too have about a lifetime's supply of projects, but that won't keep me from looking.
-
2 pointsIf it's like my 312-H,I loosen the oil filter and it goes right in
-
2 pointsTHAT IS SICK! in a good way. Looks very clean Ed. Can't wait to see more.
-
2 pointsHeh Guys -- Be careful with the HCl (hydrochloric acid) -- Besides being corrosive/burning, HCl like all of those other acids is generating hydrogen gas (which is explosive in the presence of an ignition source) when they remove the rust -- With the slow rust removal (i.e. vinegar, phosphoric acid) the hydrogen is getting time to disperse into the air -- With the HCl and a closed up tank you could build up a significant amount of gas which would explode with a spark/fire (i.e. you are making a bomb) -- So the biggest watch out would be to use the HCl in the absence of ignition sources and vent the tank often (or don't close the tank) when using HCl
-
2 pointsAny engine, old or new, can backfire if not properly idled down for a minute or so after hard use. I get on my wife and kids for that all the time.
-
2 pointsSince this is turning into a study of tractors, I thought that I would add a few things. I have never owned a Sundstrand (yet!) but have a few Hydro tractors. Eaton only manufactured the transmission which was then installed on the three different transaxles made by Wheel Horse/Toro. Tractors with an -A (but not all) normally used the 700 series transaxle with a manual lift. Onan and Kohler engines were used. Tractors with a -H did use the 1100 series transaxle with hydraulic lift capability. Onan and Kohler engines were used. These can be plumbed to eliminate the lift if necessary. It would be best to take a chassis with a manual lift and install the 1100 if a manual lift was desired. The 5xi series all used the Eaton 11 with a re-designed 1100 transaxle. Kohler, Kawasaki, and Daihatsu engines were used. This transaxle added Hi/Lo gears as well as a neutral position along with hydraulic lift and hydraulic power steering on three of the five models. Regarding the 520-H gathering grass clippings while mowing, my 523Dxi with the water-cooled Daihatsu diesel does the same thing. But there are the three screens below the dash plus a removable fine mesh screen (last photo) in front of the radiator. My Kohler-engined 5xi don't have the same problem due to moving less air for cooling.
-
2 pointsI'm curious as to why you think this is a problem? On these tractors the hydro is not like a pressure washer, when you are idling in neutral they are running the fluid through the hoses and filter at a fairly low pressure (30-90psi). The fan keeps the motor/pump cool and everything is just circulating unimpeded. They are designed to work or idle all day long, so you should be good to go, don't worry about letting a hydrostat idle.
-
2 pointsI had quite a collection of different models, over 30, and started selling them a year or so ago. I sold most of what I had collected except a couple RL's, a couple suburban's, c-120, 520-H, 856 and a 418-A. Know I have my complete workshop back and don't have to move anything to work on a project. I miss some of them, but it sure is nice to work on something without doing a bunch of extra work to get at a tool.
-
2 pointsGot the power washer together this weekend and was able to clean up the 520h moderately. Can definitely see the engine and frame better. Was able to get a better look at the engine. Unfortunately when I was taking off the RH side shroud the bolts were brittle and I broke them off in the cylinder head. Contacted Boomer again. Hes sending a Head and the bokts along with a small gasket kit for the heads, intake and exhaust manifolds. Also got the oil filter air seal which I didnt have, a new (used) tested stator and newer starter drice kit in the mail from Boomer as well and he was even kind enough to send the starter repair manual with it. Got that installed in the starter after cleaning it all up. Brushed armature and all. Photos.
-
2 pointsOh yes! I uploaded some a year or so ago and Richard/953Nut commented but then I couldn't find them recently so I uploaded more in the Stevebo Meet and & Greet thread. Rough, sad and only a true Wheel Horse follower could appreciate her finer qualities. Alas I let her go to a better life, I'm afraid only her organs will be brought to life again... If only I had known her many years ago...
-
2 pointsVan was all this horse trading with or without your famous firewater?
-
2 pointsUsed to do 2 2.2 turbos a day along with countless head gaskets, cams, wristpins. We had 2 big binders chuck full with all the service bulletins just with the ones trying to get the Horizon's to run smoothly cold! The absolute best were the 2.6 Mitsujunki's. You had to install a heat shield under the carb to keep it from vapor locking in the summer month's and then remove it when it got cold to keep the carb from icing! You haven't lived until you worked on Renaults though. People say "Why don't you work on cars anymore" and I answer "RENAULT!"
-
1 pointThe C160 is a great machine I have 2 one I refixed I don't like to say I restored because I think of restored as like new condition. I use mine only for pushing stuff like dirt and snow. And I also run synthetic in the trans and didn't have any problems with the sundstrand trans last year with a slow lift. I couldn't tell any difference summer or winter.if you want to really fix them up it is a lot of work but you will have a wonderful machine. C160 is my favorite tractor. Here is a before and after
-
1 pointJD?...JD?...Oh...You must mean "Jack Daniels"..I store one of those in my WH battery compartment too! Sure don't last 14 years though...
-
1 pointDidn't get a great deal done today, but had a great conversation with @stevasaurus and got the transmission cleaned up and ready tp reassemble once the seals and gasket are delivered (Thursday, so they say). The inside of the transmission is pretty clean after a scrub down of diesel with a wire brush and elbow grease. Had a little time left so I cleaned up the block and got it painted. Since I have the block painted, I will probably jump in and blast the cover and tins and get that portion finished and ready to reinstall before attacking the next item, which will probably be the frame, or hood, or fender.....Depends on which the way the wind blows.
-
1 pointNo power to the switch. sounds like you didn't connect the red wire that goes from the battery to the "B" terminal on the switch. It could also have been connected to the + side of the solenoid.
-
1 pointThis tractor was painted a while back by the previous owner. It was a basket case that I pieced together. Belt guard from one tractor, rear fenders from another, hood and frame came together. If you're staying with Rustoleum, Regal Red is what I like. Otherwise, the early International Harvester Red is a close match.
-
1 pointHorse trading at its finest , sounds like you both had fun . Oh boy I'd like to join that party , I have my own cup for PA next year .
-
1 pointYou may want to try holding that idler pulley arm solid and then try moving the brake/pedal arm down on the other side. If there is play in there and it moves, you'll need to secure it. It just seems from the pic, the brake/pedal arm is off from the position of where it's supposed to be while the pulley is engaging the belt. BUT as always, pics can be deceiving. I'll see if I can get a pic of mine tomorrow to compare that arm position. Just be careful with that cast arm, they'll break. Guess how I know that?
-
1 pointLooks very complete and original, nice find. Buy it!
-
1 pointAlways nice to meet face to face with a member you have had lots of on-line interaction with.
-
1 pointShe won't admit it but I think she likes it.
-
1 pointMy favorite is the 854 And that's because I was born 8/54
-
1 pointIf you've never tried it... I gotta say, I was quite suprised today with my first time using the NAPA branded spray paint. Nicely priced, great coverage, and seems to dry to the touch almost immediately too.
-
1 pointHey guys! I wanted to bring up a show that will be happening in my area April 27-30 2017. Tri State Antique Power Association is putting on a show with garden tractors as their feature next spring. The show is near Johnson City Tennessee at the Appalachian Fairgrounds in Gray. I'm not a member, but my club does work closely with them and have several members who are in both clubs. They are a super group of guys and the fairgrounds are fenced with camping available. You can find more on their website: www.tsapa.com or by contacting Richard Shelton at sheltonpulling@yahoo.com or Paul Helvey at hokiecampers@gmail.com. Classic Tractor Fever did a feature on their John Deere feature show called Green up in the mountains - check it out to get an idea of show size and facilities. Bring out your horses and show 'em what real garden tractors look like!!!! Better yet, bring them to our show next july oldgladeantiquetractorassociation.com in beautiful Abingdon, VA.
-
1 pointHard to believe It's been 2 months since I worked on this project. I got the boat winterized and put away for the winter this morning so the low rider project got some attention this afternoon. I had bought a non runner C-105 a few weeks ago just for the 8 speed for the LRer. It actually had a K321AS transplanted that the PO said hadn't run for years. After chasing grounds or lack of grounds for quite a while, I finally got fire and got it running by hand feeding fuel in the carb. This is what I found in the totally plugged tank shut off valve. It has a Walbro carb, so I didn't even check it out...just bought a new one from the jungle for $35. I hooked up a high temporary tank and It starts and runs perfect with no smoke, so the 321 is going in the LRer So this afternoon, the transplant began... The first job ...not my favorite...was to remove the hitch from the 8 speed. Then remove the 8 speed. Fit up the seat pan and fenders. Then Pulled the engine out of the C-105. Man I hope I can stuff that under the hood! That's all for today folks....Mrs K is calling me for dinner.
-
1 pointI popped mine loose by making 4or 5 short jackbolts out of 3/8 bolts and nuts. The bolts have to be the correct length to just fit between the PTO and the drive pulley. Then using two thin open end wrenches, hold the bolt, and turn the nuts off to apply pressure on the PTO. Use this in addition to the 5/8-11 center bolt. Also, I put a 1/2" nut in the shaft hole under the 5/8-11 bolt. It gives the bolt something to push against with less torsional friction. Use grease on all the threads.
.jpg.143ef73c68074a16cedfbe4d7536dc71.thumb.jpg.4896fc9ab6394b781c1c5f6c39deb441.jpg)


(800x673).jpg.cc3aefcd170c6bab1f22408014a1eb53.thumb.jpg.37c62115dec7a1fc65b8e86afd6af643.jpg)


This leaderboard is set to New York/GMT-04:00