Leaderboard
-
in Posts
- All areas
- Markers
- Marker Comments
- Marker Reviews
- Articles
- Article Comments
- Article Reviews
- Classfieds
- Classified Comments
- Classified Reviews
- Wiki's
- Wiki Comments
- Wiki Reviews
- Blog Entries
- Blog Comments
- Images
- Image Comments
- Image Reviews
- Albums
- Album Comments
- Album Reviews
- Files
- File Comments
- File Reviews
- Posts
-
Custom Date
-
All time
November 28 2011 - November 27 2025
-
Year
November 27 2024 - November 27 2025
-
Month
October 27 2025 - November 27 2025
-
Week
November 20 2025 - November 27 2025
-
Today
November 27 2025
-
Custom Date
03/30/2016 - 03/30/2016
-
All time
Popular Content
Showing content with the highest reputation on 03/30/2016 in Posts
-
17 pointsHi Everyone, I'm new to the forum and let me start by saying thanks for all the great information available here. I have been able to get so much great information and tips from this site its amazing. I have been on here for a couples years getting info but this is my first real post. Brian A. Rehoboth, MA Mechanical Engineer Age 24 Currently own two WH tractors. a 1976 C-120 and a B-100. The C-120 is my work horse and the B-100 i tore apart a few years ago and am in the process of doing a complete restore on it. Attachments i have: WH Dirst plow WH Snow Plow Brinly Dirt Plow WH Snowblower single stage Original WH enclosed cab 48 SD Deck 36 RD Deck Tow behind electric sprayer Wheel Harrow WH 36 Tiller I had to rebuild my pto clutch and ended up relining it myself so i figured id post some pictures and part numbers for anyone else doing the same in the future. (See new post)
-
13 pointsMade an agreement on this 867 in Sept. The owner had it on the west side of the state and insisted on delivering it to me when he got time. It's been a long wait but it finally arrived today. I sure hope it gets along with the rest of my small herd.
-
8 pointsHere are a couple pictures of the 1277 I acquired from a friend the other day. We were talking about various lawn and garden equipment and the subject of Wheel Horse tractors came up. I mentioned that I have always wanted one and he told me to come by his house he had one in the back yard I could have just to get it out of his way. Needless to say I jumped on the deal...even went as far as building a trailer just so I could haul her home. This is my first one and I plan to restore it over time, so please be patient with me and some potentially dumb questions.
-
7 points
-
6 pointshi everyone, I have a wheel horse C-160 auto, I have been on the sister forum myoldmachine for about a year or so and thought it was time to join this forum as its a helpful source of information and help. I work on small engines from chainsaws to garden tractors and have many old brochures of many stihl chainsaws and mountfield and westwood mowers and many old parts, so if you cant find a part online ask me as all the parts I have are old genuine stock, that just hasn't sold over the years. I hope I can help! Regards Joe
-
5 pointsNew to the forum and just thought I'd share a pic of the 314 I just bought. It's a 1985 314-A with 446 hours on the clock. I paid $400 for her with the assumption I'd be searching for a new deck, but after getting it home I found that the reason it was not working properly was that the belt was on wrong and the front attaching bar was upside down. It has one rust hole I need to patch, but the bearings are all good an with a new belt and sharpened blades she mows great. I did all the maintenance that's probably never been done and got everything properly adjusted yesterday. Pretty darn solid old piece of machinery! Much more stout than the new ones I was considering. Anyone know what the original price may have been on a machine like this?
-
5 pointsI have a chance to get a perfectly running complete 701 with backrest for like $200. Would this be a good buy?
-
5 pointsI figured out some of the bearing issue. I had not observed that one of my hubs had a longer bearing surface than the other 2. The hub on the left uses the high shouldered bearing and the distance between the snap ring groove and the step on the shaft is 21.3 mm the bearing is 21.9 thick. Note the snap ring grove is wider than the snap ring was thick...makes up the variance. The hubs that used the 6207-40nsl bearing that surface is 16.8 mm the bearing is 16.9 again I guess the slop in the snap ring groove makes up the difference. The other news, today the bearings showed up and they are 6207-40nsl. Perfect match for the flat bearing. So if you have a hub with a 17mm +/- surface you can get a replacement. I noticed the TSB mentioned checking for shims behind the bearing ( I found none anywhere). i would think you could use the thinner 6207 bearing on the hub with the longer surface if you added a few shims. 6207-40nsl $18.00 6204-nsl $6.24 What I can't fathom is why all hubs have 5/8 NC threads but one uses a different bearing....
-
4 points3-30-1981 Ronald Reagan is shot by John Hinckley, Jr. John Hinckley, Jr.shoots President Ronald Reagan outside the Hilton Hotel in Washington D.C. just after the president had addressed the Building and Construction Workers Union of the AFL-CIO. Hinckley was armed with a .22 revolver with exploding bullets and was only ten feet away from Reagan when he began shooting. Fortunately, he was a poor shot and most of the bullets did not explode as they were supposed to. Hinckley’s first shot hit press secretary James Brady and other shots wounded a police officer and a Secret Service agent. The final shot hit Reagan’s limo and then ricocheted into the President’s chest. Hinckley’s path toward the assassination attempt began in 1976 when he saw the movie Taxi Driver. Robert DeNiro’s Travis Bickle stalks a Presidential candidate in the hopes that he will somehow impress and rescue a young prostitute played by Jodie Foster. Hinckley, who spent seven years in college without earning a degree or making a friend, added Foster to his list of obsessions, which also included Nazis, the Beatles and assassins. In May 1980, Hinckley wrote to Foster while she attended Yale University, traveled there and talked to her on the phone at least once. Soon after, he began following President Jimmy Carter. In October, he was arrested at airport near a Carter campaign stop for carrying guns. However, the Secret Service was not notified. Hinckley simply went to a pawnshop in Dallas and bought more guns. For the next several months, Hinckley’s plans changed daily. He pondered kidnapping Foster, considered killing Senator Edward Kennedy and began stalking newly elected President Reagan. Finally, he wrote a letter to Foster explaining that his attempt on Reagan’s life was for her. He kept abreast of the president’s schedule by reading the newspaper. After Reagan was shot and nearly killed, there was a great deal of confusion at the upper levels of government. In the most notable incident, Secretary of State Alexander Haig told the press that “I am in control here in the White House, pending return of the vice-president,” under the mistaken belief that the chain of command placed him in charge. Hinckley was later not found not guilty by reason of insanity.
-
3 pointsHi Everyone. I recently rebuilt the pto clutch on my 1976 C-120 and figured id post some pictures and part numbers to save other time who are doing the same. I have the 6.75" OD clutch plate and didn't want to spend the money to get a new one from Toro so i ended up doing some research and re-lined it myself. I wasn't sure on the material so i took some measurements it looks like the originals are .125" thick stock. Clutch Material: McMaster #60895K11 http://www.mcmaster.com/#60895k11/=11rane8 It comes in a 7.5 x 7.5" square so you also have enough to re-line your brake like i did. I found the easiest way to cut it was to trace the OD of the old clutch plate and for the id i found a 4" angle grinder blade was the right diameter. I used a set of snips to trim the OD and a jigsaw to do the ID and seamed to work well. Extra material: Thin jigsaw blade i used: Final product: Now i also increased the contact area versus the original. The old one only contacted about an inch in width this one i had full contact on the bell of the pulley. My pulley was scored so i face it clean on the lather removing only the minimum need to get a full clean. YOu can chuck the narrow end of the bell on the pulley, just make sure the face is true (axial run-out <.005") I now have 2" of width on contact, it should work much better now. I prepped my old clutch backing plate by removing the old work clutch and the worn out broken rivets. Using a die grinder with an abrasive wheel works good. I then used a rougher disk to make little rough grooves in the face to make sure the clutch adheres better with the epoxy. Note the old contact area. Once the backing plate is cleaned use air and carb cleaner to thoroughly clean the new clutch material and the backing plate. Now i used Loctite 380 Instant Adhesive. We use this at work for similar materials on clutches and brakes. its oil heat and impact resistant and is literally the strongest fastest drying adhesive i've ever used it really works wonders. It cleans up with carb cleaner (even on your hands) t available the cheapest from amazon: http://www.amazon.com/Loctite-135423-Toughened-Instant-Adhesive/dp/B000132VEE/ref=sr_1_1?ie=UTF8&qid=1459388480&sr=8-1&keywords=loctite+380 A zigzag pattern gives the best coverage to ensure it contacts and sticks evenly. Now make sure you just stick the clutch onto the backing plate and not the pulley I used the pulley as a plate to clamp the new lining onto the plate with the help of 3 clamps and left it there overnight. Just make sure the pulley is up so any drips don't stick the pulley to the other half. Now you can use those leftover pieces to also re-line the brake: same idea and process here... Since i had the whole thing apart anyways i decided to replace the bearings, they are a fortune from Toro and some aftermarket ones just didn't seem to be of high enough quality. I ended up finding a package deal on the originals on ebay so i figure did post the OEM bearing specs so you can find them yourselves locally or online its easier knowing the bearing manufacturers number than a Toro number. Ball Bearing (on the end taking the PTO thrust): Fafnir P204RR6 Alternative: http://www.amazon.com/Fafnir-P204RR6-Single-Ball-Bearing/dp/B00FAY909S Needle Bearing (on the inside of pulley holding the radial load): Torrington J-2420 Alternative: http://www.amazon.com/Koyo-Bearingd-8600rpm-Maximum-Rotational/dp/B007EDPF4C Grease Seal: CR 14810 (Chicago Rawhide) Alternative: http://www.amazon.com/SKF-14810-Small-Style-Diameter/dp/B00CLIVXNM/ref=sr_1_3?s=hi&ie=UTF8&qid=1459389503&sr=8-3&keywords=CR+14810 Locally here in RI/MA i always use Eastern Bearings in Prov, RI to get all my bearings and seals they have reat pricing and can get you anything you need but you can also find them online at many places. Just be careful the letters on the ends usually mean different seal types so make sure you look into the whole part number. Hope this helps! Good Luck! if you have any questions ill try to help.
-
3 pointsWell I have been busy resurrecting the GT14 that followed me home when I bought the Sickle bar mower I plan to restore for my GT14 restomod. It was a real basket case but the bones were good. In fact, if I was not doing a full restore already, This one would definitely make the grade. Rust is superficial. Good and tins straight for the most part and it has several things going for it that will mean it's going to stay in my herd. Pulled pics from from what's in my mirror thread: As such I have made good use of the wait time for painting weather by bringing this puppy back to life. First thing was to yank the blower off as it was impossible to move the thing otherwise. Then I changed out the wheels, bearings and tires. Monday I totally gutted the wiring and replaced with marine grade. Ran into. Slight hiccup troubleshooting with two parts DOA. Bad starter relay and a new rear lamp misswired from factory. Got those issues resolved after work yesterday. Tool another vacation day for warm weather to paint rims for my other project. Lots of down time so I made use of it. Other indicate their GT14 gas tanks never leak. Must be that I am getting all the bad tanks. This is third one iv'e initially fuels to test fire only to have fuel drain out onto ground. So inbetween painting the wheels, I pulled the nose off the beast, swapped the choke and throttle cables, modified the gas tank to grommet style, re ran all new fuel lines, filters, shut-off and reinstalled the nose assembly. Those who have pulled the nose off these GT14's know what a PITA it can be. The tractor had been used primarily for snow blowing by original owner. The front brace is a weaker link and the fellow ( at least I assume it was not factory) had welded angle iron across the front. Great for strength but it blocked access to the nuts that need removed to pull the iron nose. Took an hour or more to use cut off tool to trim it back so that it retained the strength intended by the modification and still allow access. Needless to say, it turned a PITA task into a Major PITA task. Took a bit of coaxing as Lazarus had been sleeping for at least 3 years based on what I understand but once I got it running, no smoke and it runs strong. I did use reuse throttle cable and it is going to need swamped for a new one. I had a spare dash board painted up that I picked up from our neighborhood RedSquare vendor so that went onto it today as well. The hydro on this this is stout! Needs a new throttle cable, a new seat and I am using the BKM on restoring the tunnel dash plate. The throttle linkage is funky so need to address that and I will need to drum up some attach-a-matic mid and front mounts and install. I am hoping this becomes my mower before first grass needs cut. Pics when I picked it up. Just realized I lost this pic. It's in the what's in my mirror thread though. Tires shot. It had sat in a field for 2-3 years minimum. Next shot is after retread but before pulling the blower off. Next as it sat with nose dissembled. Then two pics of it as it is currently. I'll update once I source throttle cable, seat and brackets. It even has a new cigarette lighter:-)
-
3 pointsFound this pic on the internet.....I was correct.....Warner Electric made them.
-
3 pointsThanks guys! I went ahead and got a supporter package im glad to keep this great thing going!
-
3 pointsIt's missing a few parts and has some bumps & bruises, but I did get it running by spraying gas in the carb. Plan on getting it to run on its own so I can see what else it might need mechanically. After that it will be tear it down and get it back to it's original glory
-
3 points
-
3 pointsThat Horse would get along just fine in anyone's herd! Great save! Thank you!
-
3 pointsI don't have my NOS electric clutches from 69-73 in front of me, but i recall the stickers on them saying "Warner Electric".
-
3 points
-
3 points
-
3 pointsI've loaded my antique vw tanks with fine gravel and water and given them a good shake. Really seems to break loose all of the crud and rust in there. I then let them dry and coat with a tank coating from POR 15. Stuff has worked really well and has held up to ethanol blended gases. Hope that keeps going - been there about 5 years now.
-
3 pointsHere's what they brought. Craftsman tiller 90. TORO push mower 40, WH blower (didn't run) 70, tires were sold per pair 10 -20 pair. All I got was a new Craftsman tractor lift.
-
3 pointsThe last and final update on this year long saga. Good News. I have been cleared for take off. Starting tomorrow. I have learned alot this year about how our company works. Both from the Labor and Management sides as the company had me do light duty as a parts runner, Quality control and other customer relations duties. They also had me work at the Salvation Army store for a couple of days. All was interesting work. It has been a long year. Shoulder is about 90% use and that is about all it will be. That is OK. The older I get? Seems like alot of things are working with lower percentages than I remember. Thanks for all the support from all you out there. I really appreciate it. Be careful out there. Believe me. Between the pain of injury? Dealing with work comp? It really s---ks. Thanks again all. Pat
-
3 pointsFlange edge to edge 4-3/4" outer pulley 5-1/4" inner pulley same as manual PTOs I would think they bought them since some other Garden Tractors have almost identical units.
-
3 pointsI have similar fittings on the loader hoses on my big diesel tractor. These run at 2600 PSI no issue. these are swagelok SS fittings swaged onto the factory steel lines. Been this way for a few years now.
-
3 pointsHave you seen the lines at the big show's ice cream social??? I'm thinkin'...that thing is gonna get a work out.
-
3 pointsFound this site. https://www.lehmans.com/p-3228-portable-ice-cream-trailer-literature.aspx
-
3 points
-
3 pointsdoes the idler pulley have a good spring on it to keep tension? Is the belt lined up good and straight from front back to tiller? Using the tiller to break ground for the first time can be hard on them lots of jumping around. I prefer to break the ground up with a single bottom plow first. It seems like im killing my tiller when trying to break through the grass and rocks for the first time.
-
3 pointsI've been fighting a sinus infection all week so I haven't felt like going to the shop until today. I did get the tires mounted and had to set them up to see what it's going to look like. Still no bearings or new lug bolts.
-
2 points
-
2 pointsOh, and take a look at what can out of the tank when I pulled it....
-
2 points
-
2 points
-
2 points@stevasaurus, can this thread be pinned as a tutorial so us old fogies can find it again when the need arises?
-
2 points
-
2 pointsI wished I had them in Brass . . . What I still have is a few of White Plastic-Epoxy Horse Head Ornaments. These are available for $10 (w/rubber pad), plus $3 shipping. Are not shown in listing, but like in photo above. They can be cleaned, primed and painted just like you would metal, and they will take a spray Chrome paint, and lastly a clear coat . . . then they would look almost like Chrome. I have to make some more of the black rubber pads to go under them, like was shown, will start that immediately. Glen
-
2 points
-
2 pointsLoad 'em 1/4 with shot, bungee to a wheel rim... then, drive a mile down the road. Clean as a whistle.
-
2 pointsJoe. Many years ago I worked at the Ffeistiniog Hydro Plant in NW Wales. Beautiful country up there.
-
2 pointsTake a look at this product, Eastwood Co has really good quality products. http://www.eastwood.com/ew-gas-tank-sealer-one-pint-16-oz.html
-
2 points8 speeds I do not think ever get hot enough to smoke. i would more suspect the belt and its pulleys. i am not sure the metal flecks in the gear oil are related to the smoke and smell. Is the oil other wise clear or is it like Chocolate Milk? The lurching would again make me suspect the belt. Take the belt guard off and inspect the belt and spin the idler pulley to listen to its bearings they frequently are a fail point. Is the belt an WH belt or after market??? I use after market belts on my horses except for the stick shifts. There I use OEM as they are not prone to the jerkiness I have seen with Gates.
-
2 points
-
2 pointsShuboxlover comes from my love of the tri 5 Chevy (55,56,57) oft called shoeboxes...it seems there are a number of car styles called that. I have a 56, my dad has a 55
-
2 pointsi mow about 2 acre with one, it is a 1276 there cant be too much different so i can reference mine if you have any questions i call it big red and my snapper little red.
-
2 pointsI don't care what they were made out of, I think they look great on a hood of a Even if they were plastic, they could be painted what ever color you'd like.
-
2 pointsA double duty... nice set up but probably still couldn`t keep up for this crowd .. And it`s the wrong color .. and RedRainman
-
2 pointsNext step is to separate the pulley from the hub. I have both 1" and 1-1/8" PTOs The only difference is the hub. They use the same bearings Field coil and Clutch plate. EDIT:: First you have to remove the two snap rings inner and outer. See last picture I forgot this step. Inner is an eaton and needs the special pliers or 4 letter words and some luck. The outer one you can pry in and off with a screw driver. END EDIT This time thread the pusher bolt in from the back of the unit. Again make sure to fully engage the threads. Again slam the unit down on the anvil until the pulleys drop down (some Kroil PB blaster Between the inner race and the hub may help Picture 1. Picture 2 shows them apart. You can now press out the bearings if you are replacing them. The small bearing in the field coil is readily available for about $8. 6204 is bearing size you want one sealed on both sides. On one of my units they staked it in so it will come out hard. I used hydraulic press. I guess you could use a hammer and appropriate arbor but I would be afraid of damaging the field coil. Picture 3 shows the old and new bearing. I inserted new bearing with a hand press. After break we will remove the big bearing which may or may not still be available (I should know in a couple of days). In any event you could always clean and repack the original after you get it out.
-
2 points
-
2 points
-
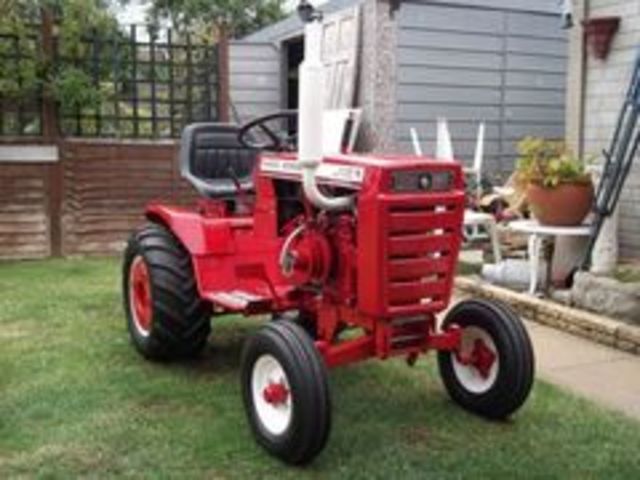
2 pointsWell guys I finnaly got a chance to get everything finished up. Got all the decals on and they look great. I have the deck finished and ready to go on. I didn't get any pictures of it yet. But here is the finished 854


