Leaderboard
-
in Posts
- All areas
- Markers
- Marker Comments
- Marker Reviews
- Articles
- Article Comments
- Article Reviews
- Classfieds
- Classified Comments
- Classified Reviews
- Wiki's
- Wiki Comments
- Wiki Reviews
- Blog Entries
- Blog Comments
- Images
- Image Comments
- Image Reviews
- Albums
- Album Comments
- Album Reviews
- Files
- File Comments
- File Reviews
- Posts
-
Custom Date
-
All time
November 28 2011 - November 27 2025
-
Year
November 27 2024 - November 27 2025
-
Month
October 27 2025 - November 27 2025
-
Week
November 20 2025 - November 27 2025
-
Today
November 27 2025
-
Custom Date
02/15/2016 - 02/15/2016
-
All time
Popular Content
Showing content with the highest reputation on 02/15/2016 in Posts
-
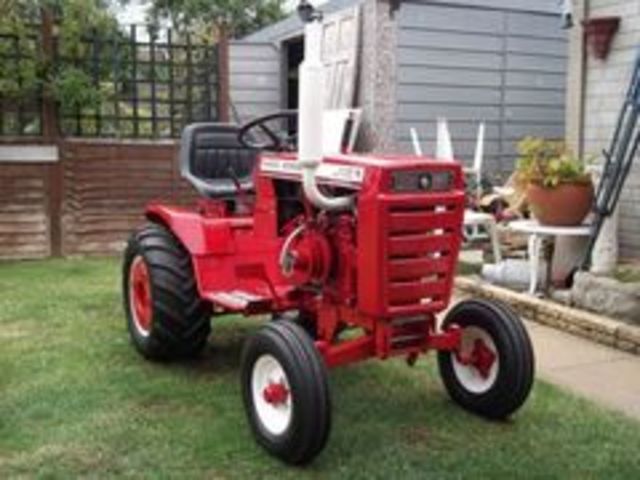
8 pointsMy 1964 /604. Still trying to find the correct seat,and steering wheel. I'll find one someday I'm sure. And my 1964 lawn ranger that haden't ran in yrs but she's running like new now!
-
7 points
-
7 pointsThe 857 was my Dad's and I think it was his go to horse. I like that the hood lifts up, unlike the Round Hoods that use the thumb screws. The 8 hsp Kohler will start just by looking at it and will run all day on a tank of gas. Cornering is hard to beat...almost zero turn. This tractor has not been OSHA'd yet...easy wiring and electrical maintenance, and no fuses everywhere. I really like the rear discharge 36" mower decks for these horses...gear driven. And I pick up more chicks riding around the block with this horse, and any of the others that I have...it is a chick magnet.
-
6 pointsI alluded to this tractor in my other project tractor thread but figured it should have it's own to for future reference. What I started with was a D200 that I was told had a locked up rear end and no engine. Turns out the parking brake had been set and there was enough play in the motion control lever to allow it back into the forward/reverse space. Undid the parking brake and there is no more grinding noises from the rear end. I'm calling this a win. Ag rear tires 3 point rear PTO Spring assisted seat Seat with arm rests and slider to accommodate different size drivers without unbolting anything. Looked like this when I picked it up: The steering was worn out to say the least. The front axle was also missing many bushings so that is why the front tires look like they have so much camber. I decided that I didn't want to rebuild or reuse the ross steering column or wheel horse front end. From my experience with my D160 is it takes a parking lot to turn it around in. I wanted something tighter and a bit more nimble on the steering front. Enter John Deere and Cub Cadet parts. Picked up a cub cadet super steer front axle. These have a 3/4" front mounting hole where the wheel horse one is 1". Leaves a few options: 1. Bore out cub axle to 1" for wheel horse front axle pin. 2. Make the wheel horse axle pin 3/4" on the lathe 3. Combination of the two which is what I did. I turned the wheel horse pin down enough to ensure it was round and I opened the cub cadet axle up to match what I made the wheel horse pin. I believe it was 15/16". If one wanted you could easily just bore/drill the cub axle out to 1" and stuff the wheel horse front pin in place. The cub axle is also a bit narrower so a spacer was required to prevent the axle from sliding front to back. I used washers as a temporary solution until I determine exactly where I want the front axle to sit. Wheel horse wheels on a cub cadet front axle is a no go. Different length spindles. Opted for some new high speed 1" spindles/bearings and trailer wheels with lawn tires mounted on them. This cub cadet front axle is also designed for power steering. I figured as long as I was doing this, might as well go for broke so to say. Picked up a 5 port John Deere power steering column and steering cylinder. Mounted the steering column as many others have. Decided to put the power steering cylinder on the left side (by the clutch pedal). I'll get pictures of this and the mount once I finalize engine placement. I removed it all to avoid unintentionally damaging it moving the engine and such around. Which brings us to an engine and where this project currently sits. I searched for a kohler single cylinder or a twin of some sort. Couldn't find anything I was willing to pay for. Things that needed rebuilds were more then a new Harbor Freight 22hp twin or the same price with low hours. People have been having good luck with these HF twins in the John Deere world so figured I'd give it a try. Test fitting a few things here to see where they need to be lined up at Adapter from SmallEngineWarehouse for a Honda GX630/660/690 to Kohler flywheel adapter. For the electric PTO I used a clutch from kohler twin with dual pulleys. I had to use a sleeve adapter to get from the 1" shaft on the predator to the 1 1/8" on pulley. For the pump (mine had no splines and already had a key and key way cut into it) coupler, what I had originally planned was to use a stub shaft from a kohler engine mated to a jaw coupling. However, that won't work now that I slid the engine back farther to the rear to line up both of the PTO pulleys. So, I'm going to have another piece added onto the SEW adapter that is a piece of 1" round stock with a key way cut into it. Probably won't get to that this evening but hopefully soon. That's as far as we have things.
-
6 points
-
6 pointsI might as well throw the wrench in this. The guys above are correct...but if you want a really easy starting, better gas efficiency and sharper turning...with all of the above and about a 4" shorter frame...you want a short frame. square hood. 1965, 1966, 1967. My B-100 is sitting out the winter in the garage while my 876 and 857 are doing snow duty this winter. The 8 hsp Kohler has plenty of power to tackle any chore. If there is a down side, they do not have the 8 speed transmission, but the hydro solves that issue. Of course...there is no issue when you have one of each.
-
5 points
-
5 points
-
5 points
-
4 pointsWill anyone have an RJ-58 or an RJ-59 for sale at the Big wheel horse show in Arendtsville, PA this year? If so let me know, I'd be interested. And if you have any other wheel horse stuff you're bringing down to the show to sell or trade, any wheel horse stuff, post what you will have for sale in the comments with the price! thanks
-
4 pointsJust got in from the first round of plowing. It was about three inches with a total forecast for maybe six inches in areas. Now the forecast is revised for up to eight inches. An hour later and it doesn't even look like I did anything! I have a feeling that I will be making one more trip to my four neighbors and my driveway. The bad part is that it will move to freezing rain tonight as it warms. Up to 1/4" for that part of Olympia so tomorrow might be dicier than today. The new Kenda K502 Terra Trac tires worked great even without the wheel weights but with the four suitcase weights on the back., It walked right up one neighbor's steep driveway. There are photos from todayof the tires' tracks in the snow to show how aggressive these tires are in my original tire install posting. I am pleased with the UHMW edge as well.
-
4 pointsLove the 12 hp, 14 hp's and the 16 hp Kohlers. All easy to service and rarely need it much. Great garden tractors.
-
4 pointsPretty much what Dennis said is what I was going to say. But if you are looking for something simple to service, powerful enough to cut grass, push snow, and other chores, and is a good looking rig, you can't beat the 1976 or 1977 B-100 or C-120 8-speeds. And it is all metal!
-
3 pointsso i figured since i see all kinds of people with projects so since i'm in the process of restoring am a-100 i thought you guys it like to the progress. ill get some pictures of it later today to post.
-
3 pointsLet's see some snow removal pics from this snow storm Olympia ! We did not have much here in Greencastle, Indiana yesterday but it snowed from about 12:30 to 5:00 PM. We received about four inches of snow but I did get out about 5:30 and cleared the drive. I used the 314 Wheel Horse ! Let's see some more photos of your equipment!
-
3 pointsDidnt know how else to post these pics of my tractor so im trying it here.. Except the seat which im getting a new one in spring these seem to always rip.. A cloth one this time, but anyway this is my baby !! The cloth in front of the engine is a heating pad to keep the engine warm,, it is 3 degrees right now so have to keep her warm and snuggly !!
-
3 pointsHere are a few more pictures. I made a few modifications to the engine mount square tube to make it easier to access the hardware on the inside. Power steering stuffs Brake pedal isn't attached with a roll pin. It's just sitting on there with a cotter pin to make sure nothing is going to hit each other. I have another piece made up to go from the top front of the steering column to the cross piece for the rear of the hydro pump. I'm thinking that I'll end up replacing the hard lines with some soft ones to make it easier to get the column in/out if I ever need to. I don't know if I have any more ability/skills then others do. I am very fortunate that I own (cnc plasma table, bridgeport vertical mill, lathe, some welders and a warm place to work) and have access to some useful tools thanks to some of my friends professions. I didn't go to school for any of this stuff, just something I started doing because I thought it was fun.
-
3 pointsI just got done with the snowblower. we got about 2 1/2 inches. The minute I started the snow changed to sleet. thats ok. wasnt deep enough and with the new bearings the snowblower sings. did a great job. sorry. I only got a couple night pictures. Its will turn to rain later. but at least had some fun. she did the wheel horse job. like its supposed to. Glenn
-
3 pointsThis is for single stage blowers: This year, I bought one for $250. It needed $130 in repairs/parts to put it into good reliable working condition. Last year I bought one for $400 (with tire chains). It needed a bearing for $30. So you have a range; $380 to $430 after repairs, about the same as the numbers Tim told. These are prices in MA/NH. Also, any blower you find must have the lift spring, lift tube, crank, and flag. If is missing those, deduct at least $75. A word of advise, even a good looking unit may not have been properly maintained. Belts, chains, bearings, idler and drive sprockets rarely get replaced until after they are failing. Racking up $100 in parts is pretty easy to do.
-
3 pointsSo now that you've brought up the B-100 which I know is your favorite WheelHorse, what is the difference between a B-100-8 speed and a C-101-8 speed of the same years? Other than the obvious that yours is immaculate and mine is less than stellar!
-
3 pointsHere's my neighbor on his horse as I post this. We got about 3 to 6 inches here in northern Indiana.
-
3 pointsHere's a few pics Serial number is 3114k802. 20497 The guy I bought it from was selling it for his father. He said his dad bought it new in 77 or 78. Just don't think it's that old. Anyway of finding out
-
3 pointsI drove (hand on the throttle) my D160 in the rear of my 1996 Dodge van, here's pictures
-
2 pointsIt's silly and fun. I'm sure as kids we all dreamed about being a super hero or something.
-
2 pointsjust picked up my first wheelhorse. its a 414-8.. not familiar with them at all until recently. ran across one local and thought what a neat little tractor. bought it for yard work and small food plots etc on my hunting land. original one owner , ill get pics up asap..looking for a tiller if someone ccan point me in the right direction
-
2 points
-
2 pointsFor my K341 in the old Ford I had, setting the point gap with the feeler gauges was just a preliminary. You then hook up a timing light and looking through a hole in the blower cover with the engine running, fine tune the adjustment until the timing marks line up. This sets the timing exactly and the engine will run at it's best.
-
2 pointsMy choice would be a Black Hood. What the heck, just go big!
-
2 pointsHere is an update on the K502 tires. I feel that they are a nice compromise to a turf with chains and ag with chains in the snow. A bit more aggressive in spacing between the blocks for snow but able to bite on ice as well.
-
2 pointsMy experience is that the reproduction heat shield are just as good if not better than the originals. Less pitted rust marks in most cases. Several being made by Red Square members. The original belt guards are hard to find unless still with the RJ. However, I have seen reproduction belt guards that fit better and when the drive belt ran thru it were less noisy etc. The originals usasully have a lot of wear ! I have also used a Harley Davidson Soft tail chrome heat shield on my 1958 RJ when going to some shows -as it adds a little bling to the tractor and fits perfectly (just slightly smaller than original RJ heat shield)
-
2 pointsAll our Horses get some snow pushin' duty. One grandson loves the 416-8, another the Work Horse, I prefer the '90 520-8 but would rather pick bananas in Key West.
-
2 pointsThanks to Aldon's help and guidance, I finally found the rear axle seals for my GT 14. The original WH OEM part # 6449 (described as Seal, 1 1/8 I.D.), is no longer available. Fortunately there are modern conversion cross references which focuses on duplicating original seal dimensions. Its my understand almost all seals (and bearings as well) are standardized in sizing and dimension so they can be used for a multitude of different applications for long periods of time. I'm not sure when industry standards were established for common items like these, but thank goodness a standard was established, meaning modern replacement components can be utilized in most instances for mechanical and machine devices decades after the original item was manufactured. That's good for us WH folks restoring or simply trying to keep things running on tractors which may go back nearly 70 years. So here's the basic info to replace a 6449 Wheel Horse oil seal: Wheel Horse Part Number: 6449 Bore or Outside Diameter: 1.624 - Reference (1.625 = 1 5/8") Shaft or Inside Diameter Range: 1 1/8" Width: 0.256 - Reference (0.250 = 1/4") Construction Description: Dual Lip Spring Loaded Seal Lip Material: Nitrile Rubber Type of Product: Oil Seal Here are a few direct replacement oil seals I located. The common auto industry conversion number for this 6449 seal is 11124. My guess is any major auto parts chain supplier has this seal, and it may in fact be made by the same manufacturer. A common manufacturer seems to be SKF. In a search for the seal, individual suppliers may attach their own prefix code to 11124, but it will be the same seal. This is what I got from NAPA. http://www.napaonline.com/napa/en/p/NOS11124_0338963144?interchange=1 $8.29 EACH ______________________________________________________ Here's a couple of additional sources: https://www.motionindustries.com/productDetail.jsp?sku=01296558 $5.43 EACH Type of Product: Oil Seal - Inches Shaft or Inside Diameter Range: 1-1/8 in Bore or Outside Diameter: 1.624 in Width: 0.256 in Lip Material: Nitrile Rubber Construction Description: Dual Lip, Spring Loaded Without Inner Case Typical Application: Engines, Axles, Transmissions, Pumps, Motors, Speed Reducers, Many Other Industrial Uses. Continuous Temperature Range: -40 To 250°F Maximum Shaft Surface Speed: 2,000 FPM Misalignment Tolerance: Size Dependent "Refer To The 457010 Catalog" Synonym: Radial Lip Shaft Seal For Oil Or Grease; Barrier; Type / Style Construction: CRWA1 Weight Ea. (Lbs.): 0.030 Pressure Tolerance: 90 PSI @ 0 FPM Type Series: 1-1/8 in Catalog Feature 1: Nitrile _____________________________________________________ wheelhorsestables.com/index.php?route=product/product&path=63_68&product_id=69 $5.45 EACH Wheel Horse Stables also carries other oil seals applicable to Wheel Horse applications: wheelhorsestables.com/index.php?route=product/category&path=63_68 _____________________________________________________ I also located a helpful tip sheet for oil seal installations: http://s7d9.scene7.com/is/content/GenuinePartsCompany/1358554pdf?$PDF$
-
2 pointsIs this your doing? http://www.engadget.com/2016/02/08/world-s-fastest-mobility-scooter-hits-record-107-6-mph/
-
2 pointsneed some help identify what I have in the below pictures. From looking at other threads on the site I have it narrowed down to a 61 suburban 401 with a replacement tescumseh hs40 engine. Just want to see if I am correct or not. I just got the hs40 back to life, fits tractor quite well and would like to keep it on there, my issue is I have a 9 year old son that is getting more anxious by the day to get on this thing and drive, before that happens I need a belt guard, right now the transmission pulley to the engine measures around 9 1/4" and the clutch to the engine around 5 1/2", there are a couple advertised on ebay and just wondering if would be lucky enough to get one that would bolt on. I was hoping that once I confirmed it is a 61 401 someone could measure to see how close this set up is.
-
2 pointsi had my first plowing competition last sunday. ended up in last because i had to plow with the big boys anyway here's some pics of the day the first one of the day: my try on a opening furrow then i had a little hickup with the engine suddenly shutting down on me, wouldn't restart at first but after a couple minutes it started back up and ran strong the rest of the day don't have much to say about this one, just looked nice and here's me plowing
-
2 pointsback when i was a kid i was driving my dad's D200 down the driveway when the infamous pinon bolts snapped and came out through the bottom of the housing. now the tractor had the cast iron 50 lbs wheel weights and 180 lbs of calcium in each rear wheel. dad called his dealer and he came down and picked up that D200 and loaded it in the back of a Datsun pickup, when he pulled out of the drive the rear bumper was all but touching the ground, lucky for him he only had to go about 9 miles up the road. the 1 st three pictures are of the tractor the day i dug it out of it's 19 year storage and the last 2 were taken last year eric j
-
2 pointsBoy! This is going to be fun and take a bit of time but others will chime in and help. Just a quick comment or two: For the longest time I thought the B series was just a smaller than the C series tractor. Nope! The early Bs, like the B-60 & B-80s were the same frame as the Cs but without some options. Later the Bs went to vertical engines, weaker trannies and were no longer really a garden tractor. Indeed the D's are big boy tractors but also keep a keen eye out for 953s, 1054s, GT-14s, C-195s and the newer 5XIs! The C, 300s, 400s and 500 (not the 5XIs!) are the same frame sizes and have plentiful choices of attachments, unlike the more limited D series and the 5XIs. If I had to limit myself to one WH I would cry, but then I might oddly enough look for one I don't even have! The GT-14s and C-195s have become very appealing to me! Oh my 5XIs are bigger and in several ways better, newer and more advanced but the larger wheels, more common attachments (though some are different!) and 3 pt hitches are really desirable! Realize that a big book would need to be written to fully address your short question!
-
2 pointsI've had three miniature ponies and two Llamas in the back of that van as well, piece of advice, don't go through the Dairy Queen drive through to get them a ice cone, or the girl at the window will run away and not come back.
-
2 points
-
1 point
-
1 pointno snow up here,we have received a few inches the past few days,not enough to blow,heres the snow herd that hasn't been used this year,weird winter for us,not one storm worthy of a thrower
-
1 pointI know it's a little OVERKILL, but I wanted to try the snowthrower on today's 3 inches of snow. I ran the C-120 (saved from a junkyard) in 3rd gear high, and did the whole driveway in five minutes. Took longer to shovel around the cars than it took to snowblow.
-
1 pointI actually got on some ice in the one neighbor's driveway. Stopped as I didn't want to stick it - but was able continue to keep pushing.
-
1 pointLooks like a very productive day, and some wonderful soil to work. We don't see very many of the plows that flip over here in the states.
-
1 pointAldon, I've been thinking about your statement of your situation removing your hubs. Reflecting on that, I would say you were at a distinct mechanical disadvantage trying to remove hubs with the wheels (front wheels included) off the machine and the entire tractor frame on jack stands. Decidedly so. You were essentially operating on stilts. I have my rear on two 3 ton stands and the front wheels are on the ground and chocked. Having the front end on the ground improved my leverage because I had something stable to work against. I can assure you the way my hubs were stuck, I needed every advantage of leverage I could muster. If I understand how you finally got your hubs removed with the hydraulic puller, I can now understand why you had to resort to the purchase and use of that specialized tool to achieve your goal of pulling the hubs. It's still a handy/dandy tool to have around however, and I'm sure you'll find other specialized uses for it. If your front end had been on the ground, I'm guessing you could have done what I did with more common, readily available tools. Another advantage I probably enjoyed was other than the rear wheels being removed, my tractor is complete....tranny, engine, front weighed grill, and all the body work, even the mower deck is still mounted. The GT 14 weighed 840# new. I may have eliminated 40-50 pounds taking off the rear wheels. I had a lot of mass in place while pulling my hubs, while you had very little. And what mass you did have, was up in the air on stilts (jacks). If I had been you, attempting what you were doing, I definitely would have lost my cool. You found a work around though (the hydraulic puller), and that's a great thing. Everybody's situation is always a little bit different. All of us get a little bit smarter discussing our different circumstances doing the same job or procedure.......thanks to this forum! Regards, Steve
-
1 point
-
1 pointI got a bit more involved playing with a couple of tractors that were given to me and not staying with this one. I got the crankshaft replaced in the K91 and the tins painted. As I've said many times, I'm not a body man and I really struggle with it. I wanted to put one more coat on the hood but the weather wasn't cooperating until yesterday. Sunny, 70's, low humidity and light winds. Just as I was rushing to get it in the screen room after spraying it one little green bug landed on it. It's barely stuck by his feet and I think I'll be able to buff it out. You can see him in the pictures if you know where he is. Zoom in and he'll say 'Hi'. The hood straps are way thicker than normal so I extended the gas tank filler neck. I enlarged the hood hole and will put in a gasket like what the Lawn Rangers used.....I think. Some drying time, paint the letters, decals, finish the motor and I'll be set for a picture to send Terry for the big show banner.
-
1 pointI used to run mine on about quarter choke so it would quit surging. After I cleaned the carb the problem went away. Not sure if you can rebuilt the fuel pump but look a lot like newer briggs ones. No you don't have to remove the carb to clean. Just take off the air filter box and some of the parts to the choke. Think about 5 or 6 screws in carb just don't want rip the gasket so be easy. I didn't try taking any of jets out just used compressed air and carb clean.
-
1 point
-
1 point


