
Leaderboard


Popular Content
Showing content with the highest reputation on 08/26/2015 in Posts
-
6 pointsThis $5 48" blade followed me home from the auction this morning. No frame, just a blade that needs a new scraper bar. It'll replace the 42" on the Yammy and give me the width I need when angled.
-
6 pointsHoward did they look like these? Bud Makes these. He's working on a Hot Rod Horse now but when he's done I hope to get some from him when he makes more.
-
5 pointsBecome a supporter, and you won't have to worry about the photo limits.
-
5 pointsAll good methods listed here. Just do yourself a favor, and exercise some common sense. This is a touch-and go feely kind of thing.Tapping doesn't mean BFH. Slitting doesn't mean cutting thru. Heat can be good, but there might be a cost for that transferring a bunch of heat to the block. I wouldn't be surprised if you needed a new head gasket from doing this method. (they are known to go because of exhaust heat as it is.) Just take your time, go easy, and it can certainly be done.
-
3 pointsI bought 2 sets of 8.5 wide rims from a 520 and a workhorse 1800 this weekend, and tonight I was looking at how clean rust wise one set was well I should say no rust, then I saw a scrape in the paint and it was shiny under it so I grabed a rag and some thinner and cleaned the paint off, mind you it took a hour to clean what you see trying not to scratch the chrome yes I said chrome, they look to have been painted when new primed and painted silver I think these are 420LSE wheels, now if I had the fronts I ask the seller if they have them. I guess buy enough junk you get a prize now and then.
-
3 pointsJust want to thank you all for helping me out with the questions on my commando 8 with the wiring, starting and all of the other tractor questions i have had with other horses. It is so great to be able to have a place to go. And get good solid answers that you can trust. But to get back to it I got her fired up this morning and the little 8 horse kolher purred like a kitten. All the lights work, cig lighter, gen light. Thank again
-
3 points@kudzu3 Are you going to measure that crank journal and cylinder bore before ordering parts? Kohler engines will allow up to 0.003" of wear to the bore, and you can get over-sizes rings in +0.003, +0.010, +0.020, and +0.030", also the crank journal cannot be more that 0.001" too small without having it turned. Crank journal can be turned down up to 0.010" under and a 10-under connecting rod can be had rather easily. Since it's already open, you might as well do it right.
-
3 pointsDon, if the deal is right I'd suggest just buying it. RJ's are getting hard to find and if it's got a cast steering wheel it's likely a goodie. Deal with the details when it's yours. By the way......
-
2 pointsMy granddaughters came over today to celebrate Papa's birthday and brought a little something with them. What a great day. Thanks girls.
-
2 pointsThat's a great looking rig. Every since you posted the first pic of this truck I find myself cruising Craig's list hoping to find my own back to the past rig. Dang I need to stop viewing your boat and truck threads! Lol
-
2 pointsI took the truck to a few area exhaust shops to get a few estimates on a dual exhaust system... The last time I had custom duals put on it set me back 350 bucks. That was quite a while back though. I took it to one shop and they were giving me the run around, he really didn't want to give me an estimate because he didn't know how long it would take. The second shop the owner looked out his office window to peek at the truck and told me 1400.00. No thanks. On my way home from work i stopped at one last shop and he told me 500 if I supply the mufflers. I told him they were already in the bed of the truck and if he could do it right away he had a deal. I couldn't stand to drive it another mile with it sounding the way it did...I've also since added a trailer hitch and hauled my first small load of wood...
-
2 pointsOh sorry. well the manual that i down loaded for the electrical did not have the generator light or the cig lighter in the schematic. But then was sent one that did by the red square members. Then when i tried to start it. I had good spark, fuel, but just would not fire up. Come to find out my float was stuck open. So it would just flood out. Fixed that and she off and running great.
-
2 pointsNever emailed. Just used the ole telephone. Had many good experiences with companies where others had issues using email. Emails easily get missed. Always happy to help even with my old cab they haven't made in years. Had the material in a few days to boot. There accounts receivable must be terrible though. I got a call months later saying my card declined. I had changed my billing address and that's what screwed up the transaction. I laughed and said your just charging me now lol
-
2 pointsIt worked! The muriatic acid removed it all with a just a few minutes brushing it on. I was able to polish the bearing up pretty good following a "how to" on you tube. The previous owner said that the engine smoked some prior to it breaking, so I plan to replace the rings, rod and all gaskets and put it all back together. I think it will work. Thanks all!
-
2 pointsThe Resto: It will be a little strange writing this part of the story since we have finished the resto already but I will still write it in the present format. Hopefully it will be easier to keep straight from the past story part of this thread. There are many more stories to come and still a few more old photos and slides. I keep "unearthing" them as I search through hundreds of old photos in my parents basement! It should has been a ride down memory lane. I know it is mentioned here on this site many times over but make sure you take lots of pictures before you begin an every nut and bolt disassembly of your tractor. Especially if you have never done it before! You may think that you could NEVER forget how it goes back together, BUT... I will make some casual observations about some of these prerestoration shots: Notice the duct tape holding the SR handle to the steel lever. Dad didn't want to lose it and so it was a quick "temporary" fix that went on in about 1995! Notice the "boat" light attached to the back of the tool box. I remember after we sold the IH Scout in 1992 (a decision that we all regret to this day), dad needed to place the Horse back in primary snow removal duty. Much of that is done in darkness, either before or after work. So, we went to our local store and picked up a fog light kit for the front and this light for the back. The switch to operate it was drilled into the tunnel cover. Here you can see the effects of 25 years of hard use by two boys! The tractor was always stored inside and well maintained. I wish I could say that we never abused it but that would be a lie! I'm pretty sure that all the while we cut the lawn with it, my brother and I went from full reverse to full forward in one simple motion. It was worked! Here you can see the bite marks on the steering wheel from the only other owner this machine ever had and that would be dating back to the early 70's. The switch where the cigarette lighter used to be is what operated the fog lights They don't build them like they used to! This is the original delco-remy SG. Up to this restoration it had never been rebuilt and was still doing its job. Dad replaced the regulator back in the early 80's but this thing had never been serviced during the last 50 years! That 875 decal is the original and in great shape. We are going to tape it off and keep it! A keen eye will pick up Cub yellow under some of the parts. Dad worked at the IH dealership and so there were times that he was able to get a necessary part from the used stash there... That old Sundstand is a great hydro! I can't say enough good about it! Not a big fan of the Fram "oil filter"! We will replace it with a correct Hydraulic filter before the restoration is finished! A discerning eye will notice the cast stamp above the pulley on the engine. Dad repowered this tractor in 1979 with a 12hp K301 designed for generator usage. That enormous oil pan holds nearly 3 quarts of liquid gold to keep this engine lubed and running cool! The original exhaust elbow that dad made to hold his "then new" IH Cub muffler. It served the purpose for 30 years plus but that will get discarded and a new one made that is cleaner looking and promotes better exhaust flow! These detail shots show you our starting point but every scuff and scratch tells its own story and we will continue to cover some of those along the way. Stay tuned in...
-
2 pointsThis will be my second one with a deck and loader. Hope pics are coming. I run the pump off of the left side of the Kohler and it runs full time, like live hydraulics. the deck mount was place far back of the tack matic as to not effect it. and it works great and the deck also acts a low wt. balancer for stability Here are pics of the new messed loader I found
-
2 pointsI am using the same thing, works great. The only thing that will not fit is a hood, frame and c series seat pan.
-
2 pointsIf you don't have a pipe tap, take a cut-off wheel or hacksaw and cut a vertical slot down the threads in a new 1" pipe nipple, then screw this in like you were tapping a hole. Half to one turn forward, quarter turn back, using cutting oil. It'll act like a pipe tap to clean the threads. Not as elegant, but it'll do in a pinch.
-
2 pointsIf the pipe is still there, cut it off with a hacksaw or sawzall about 1/4" from the block. Take a small chisel and hammer and collapse the pipe toward the center. Grab it with a pair of pliers and pull it out. I've done it that way at least 4 times.
-
2 pointsI've had a few where the nipple was broken off right at the block. I carefully sabre sawed a slot inside the pipe but not deep enough to slice the block. Then with a drift pin, tap, tap, tap on the pipe until it started to collapse, then when I was able to grap the pipe with vice grips, turn the pipe (it was curling inward) until it collapsed enough to draw it out. Half hour at the most. Clean the threads, vac'd out the block. All is well.
-
2 pointsI just recently removed one from a K181. The 1" collapsed and broke at the threads when I tried to loosen it with a pipe wrench. Then I used a small chisel to remove the remaining pipe thread from the block.
-
1 pointWheel Horse B/C/D Tractor Dash Panel Restoration Tutorial How to properly restore a Tractor Dash Panel Wheel Horse Dash Panel Restoration Tutorial Originally posted by: MikesRJ - 03/06/2010 Click any picture in this article to view a larger version of the image Restoring old tractors (garden type or full-size farming equipment) presents the restorer with many challenges. Not so different from automotive or aircraft restorations, certain little tricks-of-the-trade are learned along the way which every restorer should have in their basket of tricks. The older a restoration subject is, the harder at times it is to locate a suitable "show-quality" part to complete the restoration. Sometimes you simply don't have a choice but to restore the part you have in hand because a replacement just simply does not exist. This how-to presents one of those tricks. The best part about this particular restoration technique it that it can be used on any part made of plastic, PVC, vinyl, leather, cloth or wood. The images above are of the Dash Panel before it was removed from a Wheel Horse C-160 Tractor, and after this restoration process was performed. Yes, boys and girls, that is in fact the same dash panel shown in both pictures. Excellent results can be achieved if you remind yourself to be patient, take your time, and follow the process presented here. Practicing the method on anything with raised letters beforehand also greatly enhances your chances of success. Simply follow this process on a "scrap" item and you should be ready for the actual piece in no time. PROCESS OVERVIEW: As restoration quality and New Old-Stock (NOS) Wheel Horse Dash Panels are harder to come by, it becomes necessary to restore what you have rather than replace the part entirely. This page is dedicated specifically to the restoration of an otherwise "good condition" dash panel that has been time-weathered, and return it to its original luster. Before moving on to restore your tractor restoration Dash Plate, it is HIGHLY SUGGESTED that you read through this entire article and perhaps try this method on a spare or "sacrificial" part beforehand. You only have one chance to do it right on your final piece, and a million ways to do it wrong along the way. As a side-note: This process can be used with very little variation on any tractor part which is made of vinyl, plastic, PVC, cloth, leather, or rubber. The VHT line of products is extensively used in the automotive/aircraft restoration worlds for returning anything made of these materials back to near original appearance. See more details concerning VHT Vinyl Dye products at this website: http://www.vhtpaint.com TOOLS REQUIRED: 1. Small bristle brush and Dawn Dish Detergent 2. 1/8" Metal punch and heating source (if making repairs) 3. 800 grit Wet/Dry Sand Paper 4. 0000 (fine) Steel Wool 5. Common Automotive Brake Fluid 6. Paper Towels 7. VHT Vinyl Dye, Gloss Jet Black (p/n: SP941) 8. Elmer's "Painter's" Opaque Paint Marker (fine & wide tip) 9. Dental Picks, Tooth Picks, and/or Exact-O Knife PAINTING TECHNIQUE: The white borders, letters, and symbols on the dash panels were originally manufactured using a screen printing roller technique. This method produces an extremely thin, opaque layer of material which is extremely strong and relatively long lasting. Since reproducing this technique is far more difficult for the "home restorer", the method presented here is relatively easy, and mimics the original process quite well. The technique I use is pretty straight forward and quite simple to do at home. In order to apply the thinnest coat of paint the tip of the paint marker should be as "dry" as possible, but still contain enough material to deposit on the surface. This technique is called "Dry Brushing" and is used by painters and modelers as a method for adding subtle details to whatever they are painting. For the purpose presented here we are using this method to apply the thinnest coat of material we can, in each successive pass over the surface. Once the paint marker is prepared for use per the package directions, the tip of the marker should be touched to a paper towel and dried off as much as possible before touching it to the part to be painted. When moving to the next paint area on your subject piece, re-load and re-dry the tip, then proceed. When painting with the white paint markers, insure the tip is about as wet as when using an artists "dry-brush" technique before touching it to the part. Apply the paint so it thinly "flows" over the surface, and use a paper towel to keep the tip "almost dry" of wet, runny paint between individual characters on the plate. Apply the paint with a very light touch in single passes only. Don't cover any more than a single pass at a time, building layer thickness with each additional coat. As always, follow the package directions for all of the products used in this process. When applying the paint, you are NOT wiping it onto the surface like a paint bush. You are also NOT trying to cover the surface completely in a single pass, rather you want to build successive layers, allowing each layer to completely dry, until an even and completely opaque coverage is achieved. If you attempt to wipe the paint onto the surface, you will produce "edge roll-over" and the paint will either bulge over the side edge of the surface, or run down the side, both of which conditions are undesirable. You should apply the paint in a very light tapping, or patting, manner where the tip is ever so lightly tapped onto the surface, moved over half of the width of the paint marker tip and tapped again; and the process continues from one end of the detail to the other. The only exception to this is when you are applying paint to long, continuous details such as the two border lines around the Dash Panel. These features should be lightly glided over using the dry brush method, from one end to the other end, and the tapping method is applied to finish the strokes at the very tips of these details. Aside from the method of application, the most important factor to keep in mind is that you are NOT trying to completely cover the underlying black dye color in a single pass. What you ARE trying to do is build-up multiple, very thin layers of paint until the white completely masks the black underneath. If done in this manner you are left with very sharp, crisp edges and an overall very thin opaque paint coverage of these raised dash panel details. The second most important aspect is that you insure your panel is well supported, i.e.: will not move during the painting process, while the heel of you painting hand is firmly planted on the work surface as you apply paint. This will insure the steadiest hand, and you will therefore have better control of the paint marker tip and where it touches while you apply the paint. Of third importance, as in any paint application process, starting off with a well prepared surface ALWAYS results in a higher quality final appearance. Complete and thorough cleaning, drying, repairs, and re-cleaning are all painstaking and necessary steps before applying any dye or paint to the surface. The instructions below go into greater detail where necessary, and if followed closely will result in a "better than new" looking part for your tractor restoration. Step 1: Thoroughly Clean the Dash Panel Here's where it started! Once removed from the machine, the entire dash panel should be thoroughly cleaned of all dirt, grease, oil, and old marking paint on all sides. Automotive Brake Fluid is a good paint and marking ink softener, but care must be taken to insure the brake fluid does not "melt" the plastic. I normally test the brake fluid method on the back side of the part, or on any surface which will not be seen when the part is re-installed, in order to insure the brake fluid will not attack the plastic material. Use the brake fluid sparingly, and allow it to sit on the surface at least 1/2 hour, to "loosen" any foreign materials (paint, ink, or hard stains) from the surfaces. Then with a combination of 0000 steel wool (try not to scratch the plastic), gentry scraping using the edge of an exact-o knife, and/or dental picks and tooth picks, you can easily remove all of the unwanted debris. Once all of the foreign matter is removed, the plate should be thoroughly scrubbed with a small plastic bristle brush and Dawn Dish Detergent. This will remove any remaining oil and dirt from the plate, the corners, and the edges. Rinse with warm water and allow the piece to thoroughly dry before continuing. Once it is completely cleaned it should look similar to the image below. Starting Point Step 2: Repairing Surface Blemishes This is the tricky part. If any surface blemishes exist, you need to make a choice whether to make a repair or leaving it as-is. Obviously, starting with a high quality unblemished panel is more desirable, but you may not have a choice but to use a "less than desirable" piece due to replacement part availability. Attempting to repair any surface issue may only result in a far worse appearance than leaving it alone. Choose wisely based on your abilities. Only one surface blemish was corrected on this example (the second "N" in "IGNITION"), the second blemish (the "wiggle" in upper left corner of the Electric Clutch "OFF" arrow-bracket) was left alone as it was too dangerous to attempt repair without further damage. The right side of the "N" was smashed down and the right "leg" of the "N" was partially split in two. A small round punch was used to "re-form" the letters edge by heating the punch tip to just below the melt point of the plastic, and "pushing" the letter back into shape. The split essentially closed up and re-bonded to the adjacent part. Care must be taken to not overheat the punch as you do not want to melt the plastic, only make it soft so it will "move". Once repairs are completed, re-clean the part as you did in Step 1. Step 3: Restore Plastic Color and Shine Many products exist which are designed to restore vinyl and plastic to their original luster. I have used many of them with varying results. VHT (A division of Dupli•Color, Inc., a Sherwin-Williams Company) produces a vinyl dye which comes in several colors, and in Gloss and Flat finishes. The product is NOT A PAINT, it truly is a dye designed for vinyl, plastic, cloth, leather, and wood. The vinyl dye, when applied to plastic, forms a polymer on the surface which actually transforms the plastic material surface into a new material matrix. I prefer the look of the hi-gloss finish as it makes plastic parts look more realistically like a "new part" than does the satin finished dye. VHT Vinyl Dye, Gloss Jet Black (p/n: SP941) in the 11 oz. aerosol was used to treat this Dash Panel, which only required a single, light coat to restore the dash panel to its original appearance. NOTE: Allow the dye to absorb and surface-dry at least 4 hours before proceeding to the white painting process. Step 4: Applying the First Coat of White Paint Applying the white paint is rather easy, but does require a little technique and a steady hand. For this step I used Elmer's "Painter's" Opaque Paint Markers (available in most craft and hobby shops). The markers come in several tip-sizes, I used the fine and wide tips here, and is composed of an opaque acrylic paint. The acrylic paint bonds extremely well to the dyed plastic, and holds up to temperature variations and the weather quite well too. LARGE PANEL DETAILS: When using the paint markers, do not press down with any significant force while painting. The driest tip (artists "dry-brush" technique) and the lightest touch (the least amount of downward force) on the plastic produces the best results. Using the wide tipped marker, dry the tip on paper towel and very lightly cover the large borders with a single pass. DO NOT go over them a second time, as doing so will leave "brush marks" in the paint. The result should be an almost see-through appearance of the white paint. Several coats will be necessary, so if the black shows through, leave it alone. Also, "paint" any large details on the face area; such as the choke symbol, large letters, rabbit and turtle; using the wide tip paint marker, but use the "PATTING" paint method described below for these smaller details. SMALL PANEL DETAILS: As before, you are applying a very thin coat, so make sure the marker tip is almost dry and apply only a very thin coat on the first pass. Using the fine-tip paint marker for lettering and small details, use a patting (or tapping) technique to apply paint to the tops of the letters. Begin at one end of the letter and overlap your taps, moving toward the other end of the letter. Don't wipe the paint on, PAT it on! Especially at the ends of the letters. This keeps the paint from "rolling over" the edges of the raised detail. Dry the tip on your paper towel frequently, and between every new detail painted. NOTE: Notice the black showing through the white in the image below. Keep the first coat VERY, VERY light. Step 5: Apply Additional Coats of White Paint ALLOW AT LEAST 4 HOURS BETWEEN COATS The application of paint continues as described in Step 4 until all of the painted areas are completely opaque and covered well. With each pass you will see the paint begin to almost "pool" on the top of the surface. As the paint dries it will flatten out to a nice even coat. The desired result is normally accomplished in just two to three coats of white paint. If you have blotchy or spotty coverage, you can use 800 grit wet-dry sand paper to lightly sand the white faces flat and even the paint coverage, then apply a final top coat after re-clean and dry the part. Make sure you allow the paint to dry thoroughly before sanding, and re-clean the part before applying the next coat of paint. Make sure all surfaces are evenly covered without brush strokes. The image below shows good coverage with very little over-painting or edge "rolling" after only two coats have been applied. Some letters and small details will need to be scraped and cleaned up prior to applying the last coat of white paint. Step 6: Finishing Up The final step in the process is to clean up any mistakes or over-painting (edge-rolling). This step is normally done BEFORE the last coat of white paint is applied, so that any scrape marks or edges can be covered on the final pass. I normally use dental picks, tooth picks and/or the tip of an Exact-O Knife to clean any edges which were over-painted or where errant paint has been deposited between letter lines. Any over-paint on the panels surface can be covered up by spraying some of the VHT dye into a small cup and using a fine tipped artists brush to "dry-brush" the paint drip into oblivion. Once the final coat of white marker paint has dried for at least 24 hours, crumble-up a piece of regular kitchen paper towel and buff all of the white painted details. The paper towel material is just course enough to polish the top surfaces and burnish the edges of the white details, giving your panel a "finished" look. The polishing will also remove any specs of dust which may have settled on the surface during drying time. Your piece will now be remarkably similar to an original new part, and is ready for installation on your pride and joy machine. The completed piece is now "Show-Ready" and looks like the images below. My thanks go out to Bob Maynard ("RMaynard"on the Red-Square forum) for the use of his B-80 dash panel in the creation of this How-To. Bob mentioned somewhere on the bulletin board that he was in the market for a NOS Dash Panel for his B-80 restoration. He also mentioned that he had an old usable one in-hand, but did not think it was show-quality enough for his restoration. I offered to restore his old panel for this tutorial, with the thought that he could perhaps use the result on his B-80 should he not find a suitable replacement. I hope you enjoy the tutorial, and Bob; Thank You for allowing me to use your panel for this example.
-
1 pointHello everyone, First time wheel horse owner and thought I would introduce myself. Just bought a C105 with mower deck, wheel weights & chains, and snow blade attachment. A great do all tractor for my property. Runs like a top, but thought it would be a great fall/winter restoration project. I am so glad I found this forum. It is full of great information and knowledgeable individuals. Thank you everyone! Bacdo.
-
1 pointHi, First off, thank you for all the great info here! I found this place looking for manuals online and have been here nearly nonstop since. These things are addictive! I inherited my fathers C105, next thing I knew I had a 68 raider 12, and a 77 C160 follow me home. I'm a retired Navy guy that liked it out here in Washinton, so I stayed. But I am envious of you folks back east when I look in the classifieds, these things are scarce out here. I just did a quick refresh on the 160, thanks to the help on here. Here is a few pics from before and after. It will be a worker, and I still need to do the deck. It also has a tiller and a blade.
-
1 pointI would like to sell one of my tractors to purchase another but am not sure the exact year or model. So not sure what kind of value to put on it. I was told it could be a 1960 based on the serial number. It has a 3.5 hp Clinton. Can anyone help. Thanks
-
1 pointI don't think $700 is a bad price for a new cab. I paid $125 for the used cab I bought at the Big Show two years ago. It was all there and in fair condition. I did paint all the framework. I modified the right front side to collect the heat from my vented belt guard. I would not have been able to do this to a new cab that I paid $700 for.
-
1 pointYou'll probably hear me coming...
-
1 pointHey !!!!!!!! i ask first.!!!!...... But seriously......i did see them at the show...Bud was off the front desk ,,,,,i walked away...my memory being Schnizzle...( i forgot to go back...3 days !!!!!! and i forgot ??? Not sure there is a pill for this.. they look very cool.....and perportunal to a small tractor.........
-
1 pointMy cab is a 520 cab going on a 73 12. They bolt on. Lots of parts but if you take it apart in sections it isn't too bad. The worst is the front frame. Once it's together a few bolts and it's off. The whole cab in one piece isn't terribly heavy but it's big and bulky. I have the roof and panels up on a shelf. The front frame, roof frame and rear brackets hanging on hooks. Now that all of my holes are drilled and located. I could get the cab back on in an hr.
-
1 pointNow thats a truck!
-
1 pointWOW! you got a whopping deal!
-
1 pointMy 1988 520hc has a lot of rust on the rims, so I doubt they would even look good even if they did. But hey, I dont have to feel bad about rubbing a little paint off, right...
-
1 pointDon, If you haven't done so, be sure to educate yourself prior to buying it so you don't get fooled. I have seen lots of Suburbans and others passed off as RJs on C's list and Flebay. Take a look at lots of RJ-35 postings on here so you know what to look for.
-
1 pointLots of good advice and I think Coadster32 summed it up well. I would try red heat first, if that fails slit the pipe with a saw and then with a small chisel and medium hammer tap from all around the outside to the center to gradually collapse as much of the pipe as you can. Then even try to unthread the pipe with the hammer strokes. It might not be instant but you will be able to do it with some patience.
-
1 pointWe need to know .....what was the problem?
-
1 pointharbor freight $150 and buy 2 tubes of calk some new door seals and a led light for inside and you got yourself a cheap inexpensive cabinet. I uses walnut shells for thin stuff and aluminum oxide for other stuff.
-
1 pointnot as yet, I've been doing the wiring recently while i mull over various ideas. I've got the horn, cig lighter and headlights all wired in and the plough light just needs refitting along with the seat pan to be completely wired in. callum
-
1 pointI added a dust buddy cyclonic catcher. Use my shop vac. 50 bucks and works great for filtration and keeping the visibility higher in my HF cabinet. If you use the HF much, your wear out the gloves. I am not keen on reaching into the cabinet to swap the gloves so I reversed the glove collars to the outside and bought slightly longer gloves. Now I can easily swap when necessary. Pics on my GT14 restomod thread.
-
1 pointSearch the number on Ebay. I just bought 6 SKF 9815's for $15.00 shipped.
-
1 pointI think SaveOldIron just photoshopped (painted?) that display to represent what a display might look like if it were implemented. I have not had a chance to do anything with my ideas yet. I have two little ones running around taking away much of my project time.
-
1 pointMike, welcome to red square. Dont forget pics when you finally get your horse. Re hours, high hours scare me, ck engine oil and rear fluids for cleanliness, all my stuff except the 854 are low hour units with good maintenence being done. There, now that I said it, something will blow up. Lol best of luck. Edit: my 520 has about 260 hours on it. glenn
-
1 pointHoward, Bud Andrews Makes those stacks. I'm not sure if he is on this site or not. I know he posts in the facebook tractors groups quite a bit. Should be able to find him on there, if not let me know and I'll hook you up with him.
-
1 pointJust note that even Black Diamond at 8.00 a bag can add up if you are blasting with a can or outside and not capturing/recycling the media.
-
1 pointThat's a great way to strengthen the herd!
-
1 pointCopy a picture into Paintbrush and play with it a little...save it and then copy and paste. I know it is not that easy, but pretty close.
-
1 pointSparky, you had to go and ask Mike for a story; when will you ever learn? But, Mike had a real good story so I guess it's OK. Thanks Mike.
-
1 pointThe Story: After a winter and summer of the straight pipe, dad decided he had had enough of that and bought an IH Farmall Cub tractor muffler. Remember, he was working for an IH dealership as a technician and received a price break on all IH parts. Coming from a farming family, he liked the "tractor look" more than the original canister look. Amazingly, this is the muffler that is still on it today! I'll have to take a close up picture of the embossed IH logo pressed into the rim of the muffler. He just cut the straight pipe down to the correct length and clamped the new muffler on. Here dad is plowing his garden in the fall of about 1977 and this is also about the time that I was born. He said he would've loved to have a set of AG's for plowing back then but money was in very short supply for them. One thing I love about my dad, is his willingness to find a way to make something work with the resources at hand. He already had the chains for snow blowing and that would give him the grip. He now needed weight for traction and so he located a used flywheel laying out back at the dealership and was able to acquire that very cheap! Now he had a 75 lb weight for the landside wheel. Here you can see a better picture of the "wheel weight" and the heavily modified Bolens plow. The plow itself has an interesting story. It was a trade in unit with a Bolens tractor and they were going to scrap it out. Dad asked if he could have it for his garden. Obviously, the Bolens attachment system was totally different than the WH sleeve hitch and so more modifications were necessary. Dad cut the long mounting frame off and welded on his own flat stock "tongue" to adapt it for use on his hitch. The only major downside with this plow set up is that, unlike a Brinly, the Bolens plow has no adjustment for suck on the plow beam. All the adjustment came from the frame that dad removed. He must've done a pretty good job when he welded the "tongue" to the beam or got really lucky, because the plow does a decent job as you can see in these photos. Remember, he is plowing here with an 8hp engine, belt primary drive tractor! I love that! In this picture, you can also see that the tractor didn't come with the SG belt cover, dad found one of those later on and installed it. Another thing I just remembered while looking at the first pic, dad would take the RD deck and back over the whole garden, kinda like a stalk chopper and chop everything up to prepare it for plowing. That deck was so tough and still is to this day. Dad said that he always wanted to make a disc harrow for cutting up garden stubble in the fall and knocking down the lumps in the spring but he never got that around to it. So, the method that he chose got the job done and the Iron Horse was built strong enough to handle it! It's funny to me that I plow with my garden tractors today for recreation, dad did it back then out of necessity. I'm sure he looked at it as a chore in those days but now we occasionally go together to a plow day where we are plowing a field for "enjoyment and relaxation" for the better part of a day! It will be so much fun to get the horse back out in a garden or a field, hook up the old Bolens one bottom, and turn some earth just like dad has been doing for over 4 decades--that's a well built machine!!!
-
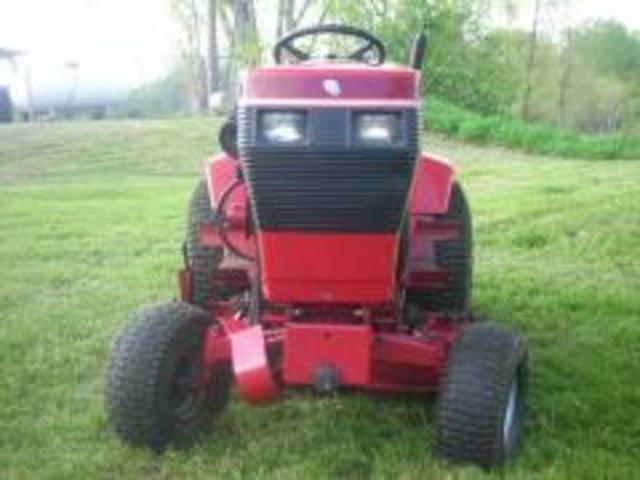
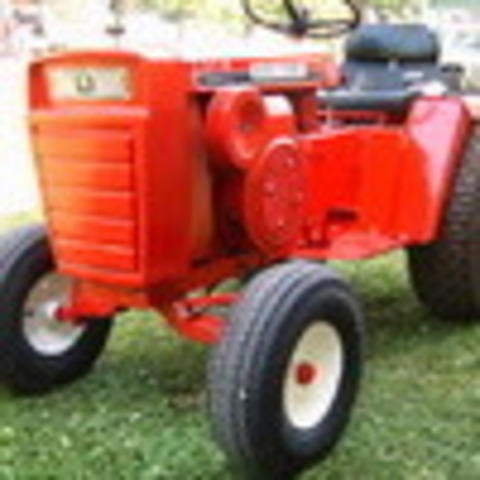
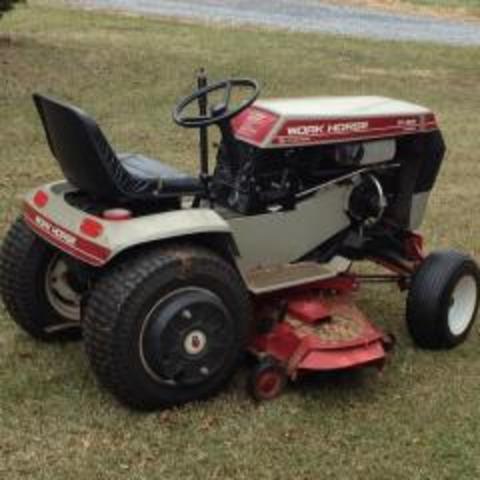
1 pointI can now say it's completed! Even cut the grass with it today.
-
1 pointWell these came off a 520-HC not sure on the year.
-
1 pointhi and welcome to my wheel horse tractor forum i hope you all enjoy it and would like any suggestions you have to go on the suggestion board and would also like you to keep it clean or you will be suspended from my board thanks and have fun chris :P


This leaderboard is set to New York/GMT-04:00