
Leaderboard

Popular Content
Showing content with the highest reputation on 05/15/2015 in Posts
-
10 pointsIn a previous thread, several folks asked me how I painted my rims with tires already mounted. I recently did another set, so I illustrated the process as I did it. Typically, I like to paint the rims after they are mounted anyways, because inevitably when you have tires mounted on painted rims you’ll always scratch or nick them somewhere. I like to get the rims all cleaned up, blasted and primed, then mount my tires. Here’s my process: 1) Rims were sandblasted and primed with self-etching primer. Tires and tubes were mounted. Everything was wiped down with a pre-kleeno wax and grease remover prior to taping. 2) Using blue 3M tape, I go all the way around the rim slipping the tape between the rubber and rim occasionally tucking it tight with a very small standard screwdriver. 3) Then I create a wider tape ring a few inches out from the rim lip. 4) Slide the whole thing into a kitchen garbage bag. 5) Cut a hole in the bag revealing your tape ring below. 6) Tape the bag to your tape ring previously created on the tire. 7) For silver rims, I like Eastwood Silver Argent rally wheel paint and I use a Rust-Oleum Crystal Clear. http://www.eastwood.com/silver-argent-rally-wheel-paint-set.html 8) I wipe the rims down a few more times with a pre-kleeno wax and grease remover, blow them off with the gun, then shoot two coats of color and two coats of clear. I find that the Rust-Oleum clear holds a much better shine if you don’t let it set long between coats. As soon as it flashes, hit it with round 2. I do all four coats in about 20 minutes.
-
8 pointsI don't think I've shared this as I've been pretty scarce on forums since it happened.... but I pulled the trigger on a new trailer. I had the Wheel Horse two-place snowmobile trailer for several years, and while I loved it and had many fun conversations at shows while showing it off, I needed a better trailer to be able to haul to shows and for general use around the home. After long consideration regarding the need of a substantial trailer and the desire not to let this collectible un-restored metal trailer sit outside and degrade in another Minnesota winter I decided it was time. I'd have loved to be able to justify keeping both, but it wasn't a good fit for me. I never officially advertised it for sale publicly, but had told a couple people I was considering letting it go. There was one collector whom I knew was legitimately interested in making an offer if I was ever ready to let it go. We agreed on a price and one of my prize pieces headed for a new home. If he ever decides to speak up on it, I'll leave that up to him, but know that it is in good hands and will be meticulously restored, I have no doubt. This picture really highlights just how small even the two place snowmobile trailer is. With that part of the deal done, I began seriously looking for it's replacement. I wasn't in a hurry as show season was over and I didn't have any immediate hauling needs. It was likely going to just sit in the driveway over winter anyway. I had some bad experiences with a couple dealers along the way, but eventually landed with this 14 foot PJ Trailer built how I wanted. They had trailers in production, and I was able to get a change order done specifically I was able to get the bi-fold gate, removable stake pocket spare tire carrier and color I wanted. Sides are completely removable so if I need to run just the flat deck, I can. I like that because the trailer's stability isn't dependent on the sides keeping it from being wobbly like a lot of them you see. Pretty happy with this, it pulls nice and smooth. Looking forward to some nice trips to shows with it!
-
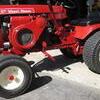
5 pointsHere are some pictures of the Wheel Horse representation at the Little Guys Show today., Friday 5/15 In no particular order.
-
3 pointsNice job Matt.I also do mine this way. I laughed when I once read some comments that its not a full restoration if you don't dismount the tires to paint them. If you know how to do it right you will save yourself a lot of disgust when you go to mount your tires back on your freshly painted rims and inevitably scratch them up.
-
3 pointsYou forgot step # 9 .... stepping back and grinning ear to ear ......
-
3 pointsI AM PLANNING TO GO TO THE BIG SHOW... I AM BRINGING MY 401.. A FEW THINGS I NOTICED ON MINE... 8 SPEED TRANSMISSION...23X10.50X12 REAR TIRES ON 10" WHEELS.... 2 HP BRIGGS.....WRONG FRONT RIMS,,,,WRONG HOOD.... THIS WAS MY FIRST WHEEL HORSE,,,I NEVER SAW ONE BEFORE....PUT IT TOGETHER BEFORE I CAME TO MY FIRST SHOW....I EVEN MADE A BRACKET TO ADAPT THE TRANS TO THE 401 FRAME HOWEVER,,,IT IS SHINEY,,,IT IS A HORSE, ,,,,REMEMBER,,,IT SHOULD BE FUN SEE YOU AT THE SHOW
-
2 pointsTook some time today to shine up the 55' Crestliner and load up 4 outboards to run at our first antique outboard meet tomorrow.
-
2 pointsIf your on mozilla firefox go to the top right screen settings (3 lines) click on options then click on the security tab then click on saved passwords and then click show passwords.
-
2 pointsThanks guys. That was one feature I really wanted. I don't know how long they've been making them with that as an option. I don't remember ever seeing any others around here with the option, but I had conceived that idea several years back, and thought if I ever got a trailer with a gate that's what I'd do. Several dealers tried to talk me out of it commenting how it doesn't really save you gas mileage or anything... which I contend is a moot point anyway. From my perspective, the gas mileage thing only becomes an issue when pulling an empty trailer allowing that whole gate to provide wind resistance, and I don't make a habit of running around with an empty trailer. Besides, they just wanted to sell me what they already had on the lot, which was full, non-folding ramp gate stock models. Another nice benefit is that when I'm pulling it, I don't have to look through the mesh gate to see behind me. The bi-fold lowers the view obstructing gate for a cleaner view of following traffic! Shopping around makes a difference. I was able to get what I wanted, in the color I preferred for less money than settling for something closer just down the road.
-
2 pointsHere is a picture of 857 horse's (Howard) 401 with the 8 speed transmission.
-
2 pointsRIP The King. This will be on repeat all day for me.
-
2 pointsExcellent write up and pictures Matt. Definitely first class results. What I do is cut several pieces of light card stock to the radius of the rim. With the tire deflated I slip them around the perimeter between the tire and rim. It holds itself in place. Finish off masking and spray away.
-
2 pointsHi Callum, while WN is apart the chassis will be getting cleaned up and sprayed with red oxide to add a bit of protection for now. She won't be getting the full paint job until any bugs have been ironed out and any tweaks that need tweaking are tweaked I'd hate to have to cut into nice shiny fresh paintwork.. The colours will be standard Wh colours body and wheels, gloss block engine and maybe rear axle... And a few polished ally bits No roll cage as it would only make the center of gravity a lot higher.. Morning all, a bit more progress for you.. Starting at the top... Brake fluid reservoirs mounting bracket.. Only tacked on at the mo. Middle... Bonnet hinges... Bottom... Two bit's of box welded to the engine frame... These will bolt to the chassis and will add vital strength to that area.. Getting the engine out was interesting, slide it forward and lift at the same time! Engine frame bolted back on to help keep things in line during welding... Plenty of surface rust to be cleaned off! A view you would only normally get if you were lying on your back and had just been run over by WN I did make a good start on the cleaning up and welding yesterday, lot's of joints like this needed welding up.. A few more parts have turned up.. New front tyres, sorry for the rubbish photo.. And some shiny stainless pancake air filters.. These are for a 1098cc MG Midget engine so two of them should flow more than enough air.
-
2 pointsBeen pecking away at the new one. Got the firewall, most of the steering and 90% of the frame is done. Still waiting for some sprockets and a new carb for the M8 to show up.
-
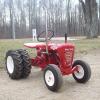
2 pointsMy 3 favorites of mine. Sorry,got a little carried away on pictures. My 57 I just got back together a month or 2 ago My 55 that I believe is still in its original paint, also has the cast iron nose weight And another 57 I have
-
2 pointsThis was my last custom build and since it was sold, I've been wanting to do another build but just haven't got around to it. Decided to do a copy of this build and the plan is to try and have it done for this years big show. The lowered front axle is done, welded some frame parts and collected most of parts needed. Had to buy new front fenders and will use a cut up old RJ hood I got from AMC Rules that came from Stevebo at the show a couple of years ago. Finally found a use for it! I'll try and post some build pics as it progresses. I do have another build in the works too but doubt both can be finished by the end of June
-
2 pointsEvanescence - Bring Me To Life: LInkin Park - Numb:
-
1 pointAt least I think it's fixed! Long story. I bought my 704 at the show 4 yrs. ago. It barely ran enough to get it to the trailer. Got it home and had to put points and cleaned out the carb to get it to run. Ran decent but then it quit.No fuel. Had 1/2 tank of gas. Had to repair fuel pump. Now it runs pretty good but a bit erratic. Take of carb and install throttle shaft bushing. Runs great for a while but gets real erratic again. I think it's fuel and go through it again but find out the mag ground wire is worn thru and rubbing on steering shaft. Fix that. All is well. Take it to a show 2 years ago. Starts running like crap again. I have to pull the hood to richen the mixture. A week goes by and now it wants the mixture setting back to where it was. I figured maybe a little bit of bad gas. Go to the WHCC show last year. Get 2 laps into the cruise and guess what? It wants a carb adjustment again. I 'lose" 6 laps in the pits removing the hood and adjusting it. (By the way it was so loud I couldn't hear my engine to adjust it good! ) Of course it needs it set back again later. Now this summer I'm using the tractor to pull the sweeper. It act's up again and I decide to figure out what's going on. I determine it's a fuel problem. Carb is clean,screws are tight and carbs don't go in and out of adjustment by them selves so I rule that out. Tank is venting ok. Could be the pump again and I'm ready to pull it but I think IT HAS TO BE SOMETHING STUPID!!!! it is I replaced the leaking fuel sediment bowl long ago. It put in an elbow,a shutoff and a filter in it's place. It hit me THE FILTER! I installed one of those clear plastic inline paper filters. I have used them for years. Every time I installed one I would have to leave the outlet side unhooked and purge out the air to get fuel to flow before connecting it. I wonder if it's getting air locked. I remove it it is not plugged but I install one of those little red B&S filters in it's place. Burned thru a gallon of gas and the problem is gone. Used to take about 15 min for the problem to show but it's been about 2 hrs. of run time. Should I put the hood back on?
-
1 pointWell after a year of farting around with the little Tecky. I got it running. It had some real issues with electrical. It was left out side a lot it was rusted in a lot of areas like the engine shrouds. Possible reason for the electrical issues. So after putting a few coils on it and frying them. I strip it down. A friend had a snow blower engine [good for parts] so changed it all out to a pull start. Need to find a S/Blower starter for it at the show this weekend. I know you guys want pick`s but it is not much to look at. I am just happy it is running. So that is why I am posting. Enjoy the ride. Gary B..
-
1 pointI'm still perk'n, but now I use an electric farberware unit. nuthin beats the perk.
-
1 pointJason, I didn't know you had involvement in those manuals groups. Neat! CDM started a lot of resource sharing groups over there and I just assumed the manuals groups were part of his initial effort. It's been so long I don't recall who did what. It's amazing how long some of us have been screwing with this junk. Jim, I should take your lead. I keep saying I'm going to do liquidate, but I just don't make the time. I'm hoping that this will be the year that I finally start moving some things out the door. I have a few "keepers" that will never leave (Lever, Senior, Rj35, 420LSE) but I have generally lost interest in having so much stuff. I'm in the 40's too. Want to make it more managable. Problem is, I think guys have gotten cheaper! Hate to take big losses just to make room, but might do it. i also added some other colors to the fleet and find I like some of them as much as the horses. Steve
-
1 pointI took a video of my 656 after I got the techy running good the other day, but since that day, it hasn't run more than 5 seconds at a time. I'm glad I got the video while I did.
-
1 pointI did the same when I got my 502 running
-
1 pointThanks Steve! Yes, today is the last day. I voted on wifi then it let me vote again on cellular data lol Gonna fire up the PC and vote on it too.
-
1 pointI've been able to vote for the last 3 days...is today the last day Ben?? I did try to vote twice in one day, but this is not like Chicago, they would not let me.
-
1 pointThe more I look at the brake/clutch pedal, I agree. I think somebody made it. You may be right on the hood stand too. But why would they go through all of that effort? Wish these things could talk. What's the story?
-
1 pointHere's a pic of a 401 cast pedal. That pedal isn't an RJ pedal either. The RJ has a small tab welded on it for the rod connection which is above the foot peg and pulls on the rod vs pushing it, plus does not have anything below the foot peg. I'm going out on a limb and saying both the pedal and hood stand are homemade by a good craftsman.
-
1 pointI heard he was driving a black Ford!
-
1 pointGood grief, don't you guys have anything better to do than talk about how you make your coffee? This is one of the most inane threads I think I've ever seen on any forum, anywhere, and ... Here's my preferred setup: This is from our place in Virginia, where I escape to be at one with my C-105 and assorted other friends whenever I get a chance. The coffeemaker is an old drip unit, don't even know where I got it. It's made by Comet ("The Popular Aluminum", "MADE IN U.S.A."), and makes about 5-1/2 cups of coffee, just enough to keep me from drinking too much in any one day. There's also an automatic coffeemaker thing there, I've never used it. The brand of coffee doesn't matter to me much any more, all the major brands taste great in the right setting. This one is the house brand from our local Giant supermarket, but I like Folger's and Maxwell House as well. Back when A&P was around, I used to love getting a bag of their coffee beans and having them grind them for me right at the checkout. Supermarkets are too busy handing you discount gas coupons these days to care about grinding coffee for you.
-
1 pointI guess I am lucky. I have over 8 stations within 5 miles that sell non-ethanol gas. I use it in all my tractors, 2 strokes, boat and my cars. Costs more , but works fine lasts a long time. I use to travel alot and would fill up with real Hi test gas and get 33 mph interstate. I noticed on the return trips after filling up with 10% ethanol Hi test would only get 29 mph and have to down shift on hills due to lack of power. This is a great site to get the locations of about 10,000 stations that sell real gas. http://pure-gas.org
-
1 pointVery good. I would suggest the true problem is corrosion within the fuse holder and the holder should be replaced with a 30 amp version. I will put together an explanation on why we were fooled by the voltmeter readings and post back later this weekend.
-
1 pointLooking good!
-
1 pointsteve k, here is a video of me driving around, i was being quite cautious here as the pulleys are still quite pitted which makes the clutch quite sharp! http://s896.photobucket.com/user/callummcgrory/media/shortened%20_zpstkf2z5bu.mp4.html like I say i will get a better video when i can open her up a bit at the allotment rather than my tiny garden! enjoy, callum
-
1 pointGuess what Steve, I just found out my house was hit by a drunk driver in 1964
-
1 pointmy guess is a 35-36RL03. To confirm, go here and enter that model number EXACTLY as shown. go here: http://www.toro.com/en-us/parts/Pages/PartsDetails.aspx?mybeid=19820&serialNumber=39000001&modelNumber=35-36RL03&searchTerm=9lzIRv+p5zfA2FTEmNX5NkVuWnkIw4gI30XQyChuVhA6r5rZPQf9eLmKLr6e22pvXKICUdw6qMk=&defaultTab=parts#toro-parts-lookup-tabs
-
1 pointThe answer is most likely "ghost voltage". This curve ball can be thrown at you if you are troubleshooting power circuits with a multimeter or an LED test light A multimeter or an LED test light draw almost no current thru the wiring under test so they will indicate voltage present under a "no load" or "non-burdened" condition. A corroded terminal can still allow enough current flow to fool a multimeter or LED test light.An incandescent tester is harder to fool. The actual electrics of the tractor will not be fooled - and that's why "good voltages" go dead under real life use conditions. We are gong to be heading back to the fuse / ammeter / PTO wiring connections to find out where it "goes dead" in the RUN position. I will wait for your answer as to what type of tool you have used so far to check for HOT wiring.
-
1 pointI just bought a 1969 Wheelhorse Model 7245 Electro 12 about two weeks ago. It has a rototiller,runs good but needs lot's of repair and paint. I just bought it to rototill our home garden garden. Then I stumbled on to this website and after reading many of the articles on this site I am hooked on the wheel horse and very interested and hope to restore my tractor. It's my first one. I'm 68 years old. I'm excited about starting this project.
-
1 pointHow come I do not see any grease on Vin's prototype? Lol
-
1 pointmy original 1956 Brian
-
1 pointMy tire changing tools are the guys down the street!
-
1 pointIan, do you need a clip on roll cage for that chassis?
-
1 pointThat is crazy Steve....how much you want to bet she was texting while driving. Glad everyone is ok..........the old Dino can't be taken out that easily!
-
1 pointI expect pics from some of you folks!
-
1 pointBrought Two horses home from their winter pasture. Changed oil in the raider and put him to work mowing the ranch.
-
1 pointI got fed up with fighting them and got one of the Harbor Freight changers. Low cost and it works great.
-
1 pointIt probably sounds like a Nissan truck hitting a brick wall!
-
1 pointMoving the Christmas tree. lol
-
1 pointI believe they're exactly the same tractor, and they're not necessarily less expensive at the big box stores. I don't remember if I've told this story here before... Several years ago, the engine on my 310-8 was going bad, smoking, losing power, leaking and burning oil, etc. Money was tight, and I actually considered replacing my beloved Wheel Horse with a cheap Deere or Cub Cadet just to get by for a while. My local Deere dealer had a good selection of tractors, ranging from inexpensive to very expensive. Lowe's and Home Depot carried the inexpensive models, at exactly the same prices the Deere dealer was asking. And then one day I overheard a Lowe's salesman talking to another customer, and he actually said that one of the great things about buying a Deere product was that you could get parts and service at any Deere dealer. And I thought, if the price is exactly the same at an authorized dealer, and Lowe's doesn't generally carry parts, and they certainly don't service tractors, then why in the world would I buy a Deere tractor from them??? I kept my 310-8, had the engine rebuilt and found RedSquare all about the same time. I like the way things turned out.
-
1 pointBeing new to the Wheel Horse world, the following these tractors get amazes me. It seems many of you on this site have many in the herd and you buy more. I'm just curious why you buy more and what you guys do with them??? Do you use them all, fix them and sell them, just add them to the collection to sit around, flip them, etc. I got into this because my pap passed and I wanted a sentimental piece.
-
1 pointI bought my first WH in 1978. Sold that one and bought a new one in 1996. Got tired (actually too old) of pushing the snow with a plow and bought a used one in 2011 with a blower and then sold the 1996 model. In 2013, I came across a 1978 C-series just like my first one I foolishly sold in 1996. So I bought it and restored it. Then, I had to buy my wife one just like the 314 I sold in 2011 so she would cut the grass. Now, I have blowers, tillers, mowers, plows and a FEL to keep all my horses exercised. Yes, it is an addicting hobby, but one filled with great satisfaction if you can keep an old machine from going to the scrap heap. My latest challenge is to work with the teen down the street try to get a C101 running again and to teach him about tools, engines, and restoration...and then give him the tractor. I am hopeful that this will continue to pay dividends long after I am gone. As you can see, everyone has different reasons for getting into this hobby.


.JPG.9f2ecb26065c66527b0730084ab7fc7a.thumb.jpg.7dc8a04d9a53d44ee2b23f26ee94496f.jpg)







This leaderboard is set to New York/GMT-04:00