
Leaderboard

.JPG.9f2ecb26065c66527b0730084ab7fc7a.thumb.jpg.7dc8a04d9a53d44ee2b23f26ee94496f.jpg)
Popular Content
Showing content with the highest reputation on 05/12/2015 in Posts
-
10 pointsLet's get this party started
-
8 pointshere's a 1956 Brian
-
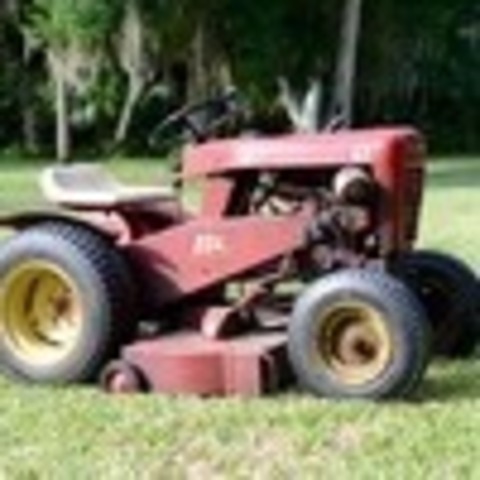
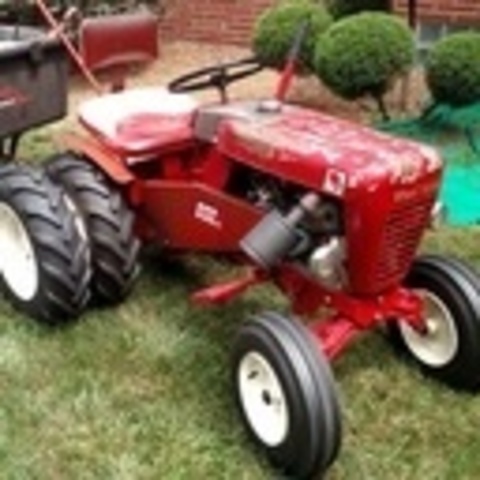
7 pointsHere we go... The intent of this thread will be for members to post pictures of they're 1955 to 1957 RJ 35 model tractors. There will not be any voting, winners or losers just a thread for everyone to see pictures of this model. Please post your pics.
-
7 points
-
6 pointsHere's mine it's a 1955.
-
4 pointsThis is a 1957 RJ-35 project which is patiently waiting in the haymow, lots of rust, but lots of potential too.
-
3 pointsNo offense meant Dad, just a humorous picture. You do realize that as a Browns fan I have to have a sense of humor just to watch em. lol
-
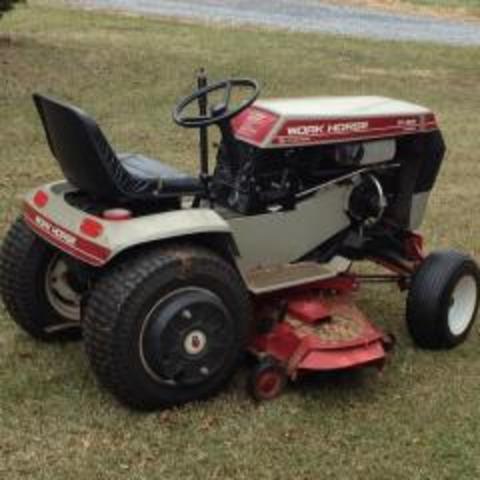
3 pointsI figured since the rest of the Work Horse got new tires the mower deck deserved some new gage wheels. I'm guessing the old ones were original from the looks. Couldn't bring myself to pay $23 each for the wheels from Toro so I hunted around and found some at the local True Value. These were Arnold 6x1.5 steel wheels with an offset hub and a diamond tread (http://www.arnoldparts.com/equipment/arnoldparts/490-320-0001). I could have picked up a ribbed tread but it had a centered hub. Beggars can't be choosers. Also got some 1/2 shoulder bolts in a 1 3/8 length, nylock nuts, and four 1/2 washers to shim in case. Got the old wheels off and measured them at 5.5" OD. The old shoulder bolts were wrecked too. These wheels had almost 3/4 inch of play at the outer edge. New wheels mounted with the new bolts, needed two washers each on the inside since the shoulder was about 5/32 longer and the thread was the same amount shorter. I ended up using the old 3/8 nuts on the new bolts with a drop of red loctite since the threads just barely protruded from the nut. Looks good, no more wobble. Total was around $19.
-
3 pointsBetter watch were you park the lawn chair!! :laughing-rofl:
-
3 pointsThanks dude. Thanks Mr Ranger. Thanks Callum. By the end of today I hope to have WN stripped down to the bare chassis for final welding. So yes, pavement pounding is not that far away now Morning chaps, yesterday's progress for you.. The expansion bottle is now fitted in the only place it could go.. It's a bit tight in there! The bottom of the bottle may look rather close to the prop shaft but the is a good inch gap between the two. The carb tube air filter thingy now has a couple of tabs to bolt it to the hood stand.. The carbs now have extra support which they never did on the SilverWing but did on earlier models! The battery box is now mounted although I need to add a little extra bracing.. The battery comes out through the top. And playing around with hood hinges..
-
3 pointsI'm happy everyone is ok and the damage wasn't too bad. The last time it was the ice age that took out the Dinos. Now it looks like traffic and women drivers are out to get you.
-
2 pointsDid I hear Florida!?!? Brandon is right, there's not a lot of us down here. Doug, we're a bit apart with you being in the Miami area and me just north of Orlando. I don't know what you'd like to discuss that can't be posted here but I'll send you a quick email so you'll have mine as well. Just know that all the folks here are great and not only love Wheel Horses but love to help others. You found the best forum there is for our beloved little red tractors.
-
2 pointsstd tubes for RJ's have tr15 stems miller tire sells a round spacer to take the difference Brian
-
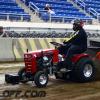
2 pointsHave tried unsuccessfully now to upload videos 3 times of the difference between the Gates 6686 BR 1/2 x 141 3/8 and Gates 6652 BR 1/2 x 139 5/8 on my tractor. The short answer is that 6686 work for me - had play in both the idler arm and plenty of slack in the belt itself. Worked like it was designed to. Obviously couldn't have done this without the Wheel Horse Community. You may regret it, because now, I have to get to getting the rj35 up and running. Cheers, John
-
2 pointsI've got some covers but they are just a stainless sleeve for looks. You might try tubes with a TR-4 or Tr-6 stem. They are the type with nuts and I used them on mine.
-
2 pointsJust heard weather alert. No snow for the next two season's because off, Lack of Interest! We can only hope
-
2 pointsImagine being on Skype and have this red truck come roaring in behind you! Of course you'd keep talking and just think Chris was running the vac or something!
-
2 pointsLikewise, and if you don't like the way she drives, stay off the sidewalk!
-
2 pointsIn my wonderful days of youth, I wanted a Muscle Car. Nothing else would do. So at the age of 16, my dad signed for a loan, on a 1971 true numbers matching, SS Nova. Color, hood exactly like what is in the photo. 1 owner car, with all the documented up-keep. True 10 bolt posi, 350/275hp. Bench seats, auto. That was right around summer time when I got the car..... Fast forward 3.5 months. Now fall is setting in. I am not liking the fall weather and dad is starting to snicker a little about the Nova.... I believe his comment was something like "well, if you get up early enough in the morning, there is this big yellow thing that will pick you up for school". I certainly did not want to drive the Nova in the fall, winter months, and I was not about to ride the bus..... SOOOOOO, I devised a plan. Once day after school on a Friday, I went and picked out a 1978 Chevy 3/4 ton Scottsdale 4x4. Photo attached also. The story behind me getting the truck is to looooong to type, but the shortened version is this. I went to the dealership, let them know I wanted the truck, salesman said you are to young to purchase without a parent signing. Gave them the number and name of person at the bank I banked at and walked out with the truck. Salesman was dumbfounded and was still trying to pick his chin up off the floor when I drove away with the truck.... And they say farm boys are slow and ain't got a clue... I worked 3 jobs and still had a full schedule at school. However, I had enough credits my junior and senior year that I did not have to stay for the last 2 periods of school. So that got me some extra hours at 1 of my jobs to help pay for (2) vehicle payments, insurance, gas, maintenance, and storage for the Nova for the bad months......... Rob
-
2 pointsWhat... no curb feelers?
-
2 pointsGlad your alright and there is not a lot of damage on the house which is good too.
-
2 pointsStill running great, can't wait for my V-treads to get here.
-
2 pointsLooks like she was zeroed in on the DINO. Ya sure it wasn't an upset EX.
-
1 pointBefore I post, would like to know if this forum can be used to possibly sell old Wheel Horse Tractors? Our family has 4 of them with many parts too. If not, can someone direct me to the proper forum/website. Thank you, Doug.
-
1 pointLast time I put tires on my 211 I ended up just changing the tire on the wheel while on the tractor......It was easier than getting the wheel off!
-
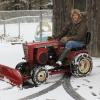
1 pointBrought Two horses home from their winter pasture. Changed oil in the raider and put him to work mowing the ranch.
-
1 pointYes, it is. Wouldn't mind having one.
-
1 pointThat picture sums it up.......that's what it's all about....horse, cart, working!
-
1 pointAKA... cheater slicks.
-
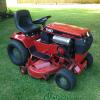
1 pointMade my decision and have no regrets. Sold the John Deere via craigslist (what a PITA) got my money back plus a pinch extra. At 800hrs the Horse is 10times what the JD could ever hope to be brand new. My neighbor(30yr heavy truck mechanic) even said it sounded pretty damn stout as I was mowing, quite the compliment from him. I sanded down the rust and rattle canned it. You know the saying 10 footer...... Well my job is a 20 footer if you are blind in one eye and have cataracts in the other😄. Still it is a working tractor and my goal was only to spruce it up and use it for its intended purpose. Here are a couple of pics...... A couple of questions too. My tranny fluid and filter was changed 2 years ago and still looks really clean. How often is it supposed to be changed? And I believe I used 10w-30 motor oil last time, is that correct to use? And how many hours can you expect out of these onans if oil is changed each year and cleaned after each mow so cooling fins are clean. Not sure how well it was maintained prior to me, but I inherited it with 710hrs on it and prior owner used it for his own lawn.
-
1 pointYep, I recently found out that there are multiple sizes of valve stems. Was a pain and surprise.
-
1 pointI like the simplicity of this idea its got written all over it! I think your idea of reversing the motion is the way to go and then the only thing you may need to add is a way to quickly lock the adjustment lever in position, maybe a small plate with notches cutout? The force of the snow will keep the cable taught in the reverse setup but might be able to overcome the lever tension and still move the chute. I may have to borrow this idea Ed!! Hope you don't mind I have thought about adding the rubber flaps to the auger multiple times so maybe its something ill get around to before this winter. Do you have any experience ever doing that before? Now that I cleaned up my blowers and got some fresh paint on the chutes I made I didn't have to many clogging issues, only with the really nasty wet stuff at the very end of the driveway a few times. Did you put much thought into the smaller diameter pulley or just figure its something to try? Im wondering how much it will change the rpms and wondering more so how it will act when it starts to slow down from being loaded up with a lot of snow? O and by the way I have changed a few belts without removing that pulley, its takes some finagaling but it can be done And considering you have such a bada$$ snow removing beast you need to drop those standard bungees on the tire chains and get some of these ttp://www.amazon.com/Security-Company-QG20030-Traction-Tightener/dp/B002KQ86EY/ref=sr_1_13?ie=UTF8&qid=1431438790&sr=8-13&keywords=tire+chains yes regular bungees work but these are the real deal for a legit snow machine!!
-
1 pointI wish my pictures did your show justice. Very nice show. Thanks
-
1 pointHere is my first car, still have it. Owned it for 28 years. My Dad owned it for a few years before I bought it off of him. Although he used to tell me I ruined the car when I started modifying it. Until he drove it one time, I thank that changed his mind lol
-
1 pointMy Son made some Wheel Horse decals at school. They're a pretty good match to earlier originals. The r and s are slightly different. Finishes it off IMO. MU
-
1 pointGlad everyone is a-ok Steve. This seems to be happenin quite a bit these days...
-
1 pointjust don't light any matches glad everyone is OK
-
1 pointMy first car was a 73 Chevell Malibu with a 350. 4 weeks later I bought a mountain bike as the Car met its maker around a tree. Can't count all the vehicles I have owned, but miss the 70 Roadrunner 440 the most! Why oh why did I sell that car!!
-
1 pointUncle Jim on a roll, must be feeling good! She split the uprights with the bushes. We've had 2 close calls in 27 years. First a tractor-trailer lost a wheel about 200 yards from my house. It got off the shoulder onto my neighbor's side walk. Hit a bump and got airborne. It made it between a tree and hydrant and hit my front porch square on a double floor joist. A foot to the right and it would have gone thru a beveled glass door and probably thru the whole house. A few years later, some drunk jabrone stole a car, drove thru my bushes and sawed off that hydrant
-
1 pointGlad you are OK, but from now on keep your house out of traffic.
-
1 pointBigger metal piece on the chute front contorl and xtra control for the top of chute deflector chute throat primed / or differant paint center of auger in middle xtra steel reinforced did you modify the chute turning control? Not sure,,,,,,,,,,, Ok, I put the magnifying glass away. Good custom touch. Glenn
-
1 pointI guess the "look" will be a nice bonus.
-
1 pointAgree!
-
1 pointprobably not going to chop that one , but i am in the process of chopping the top on my `30 ford coupe project
-
1 pointJust recently fully restored my 1987 Bervac two stage blower. This blower did come with the white discharge chute. This blower never broke down and was always reliable.. even in 30" snowfalls. .you just could not stop it.. Behind it is my 1985 416-8 which was restored last year. Both tractor and blower were fully restored, sandblasted and powder coated. Hopefully to last another 30 years...
-
1 point
-
1 pointok this is my unfinished commando v8 now V16 project i hope to have it done for the big show! it has a 16 horse brigs twin costom louvered hood, piston shift knob , stainless twice pipes, ford truck hubcaps, cool hood orenament, & a custom black & white tuck & roll seat
-
1 pointI guess I'd better post my Raider 20 6X6 here then You all know the story by now.. It's been dragging on for long enough She started life as a humble and very worn C-125.. A body swap soon had her looking like this... Enter Garry and some beer.. And the idea was born Over four years later she looked like you know her now..
-
1 point
-
1 pointhere's my RJ58 custom stainless Brian


This leaderboard is set to New York/GMT-04:00