
Leaderboard
.JPG.9f2ecb26065c66527b0730084ab7fc7a.thumb.jpg.7dc8a04d9a53d44ee2b23f26ee94496f.jpg)


Popular Content
Showing content with the highest reputation on 05/09/2015 in Posts
-
12 pointsMy new building arrived almost a month and a half early.Good thing I've been preparing for about 3 weeks.I had to get rid of about 7,000 pounds of scrap metal.Cut down 4 trees and take out 2 of the stumps,take down my garden fence,move my chicken coop,and spread and roll 90 tons of crusher run.The three guys who built the building rolled into my back yard about 9:15 this past Thursday morning and unloaded their truck and trailer and started working.5 minute water break in the late AM.Half hour pizza and wing break about 4 PM.Building was done,mess cleaned up,tools and equipment loaded back up,and they left about 8:30 PM.I never saw 3 guys work so hard and fast.The building is all steel construction,30 ft by 30 ft.12 foot high walls.Two 10 by 10 roll-up doors,36 by 80 inch personel door.I'm going to use the building for equipment storage and to store some of my Horses that have been living outside.I'm going to put some metal shelving that I bought about 10 yrs ago along the side walls.No electric power,no heat,no insulation,just a crusher-run floor.Plain and easy storage.Here's some pics.
-
8 pointsI have one of those 17 cu ft yard trailer/carts from the big box stores and that thing is worth its weight in gold for doodling yard refuse, but I've always wished it had a bit more capacity.... Sooo since I have had it several years and it was needing a 'freshening', I figure while I've got in the 'repair shop' I might as well try and add some to its capacity ability. Of course since it was needing paint it naturally was gonna some RED! put on it! I went to the H depot and looked at what was available, wanted something that was treated because the cart has to live outside and settled on round nose decking, a 2x6 for the uprights. and 6 of those handy support thingys. Construction was pretty straight forward - a drill, handfull of deck screws and a few lag bolts and --- by golly the dang thing looks pretty good! (Course that RED paint is what makes it look REALLY good) Think I just may have to get me a couple 'Wheel Horse' decals from Terry to top it off with.... Thought you guys would like it too and maybe get ideas for your cart....
-
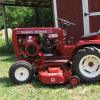
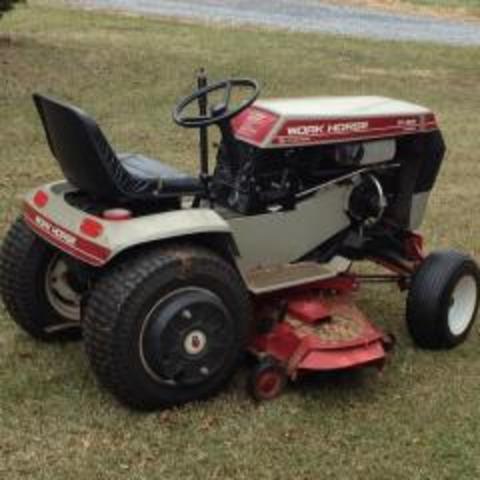
8 pointsI had a listing on ebay for my 96' 520 with 60" deck. Got to taling with a potential buyer and he offered up his C160 plus some cash on top. He is from Rochester NY and I am in CT. He made the trip out to my place today to make the trade. I would think it is about 5 1/2 hours each way...He is a really nice guy and knows his horses for sure. He has traveled around the country buying out many Wheel Horse dealers back in the late 90's. He went to the 2nd annual Wheel Horse show in PA but then life got in the way of his hobby so he sold a lot of his stuff and lost interested. He did manage to restore this one back in 07'. Did a nut and bolt restoration including rebuilt motor and tranny, auto paint, upgraded front end to the HD spindles and all new wiring. Since his restore he tried not to really work it. He also has a 520-8 that he uses as a worker. He and I are both happy and I got some parts to boot. I am not thrilled bringing a tractor to the big show that i did not restore myself however i think this one will be there for sure. I plan on pulling the wheels tomorrow and painting them the correct white. Has a few touch ups to do no the rear end and throw on the wide 10.50 on 520 rims to give it the look I want. Here she is...
-
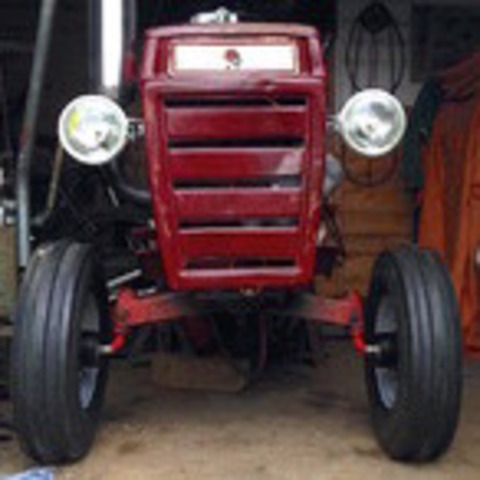
6 pointsCraig, you just needed to find one like I have. A '74 C-160 with a OHV HH160 Tecky. Its got power, class, fuel economy, sound, etc. Can't go wrong Never had a 520, but this thing works hard and loves it.
-
5 pointsNew here from Mi. bought my first rounded nose WH around 18 years ago or so because I thought it was cool looking has been in storage ever since and got buried under stuff and forgot about, last year bought another for same reason and now this week bought this lawn ranger to actually use to mow with to replace my old craftsman, has a newer motor but works great so guess I'm hooked now need to dig out the others for pix
-
5 pointsFor a better idea why a starter relay can intermittently work and then sometimes cause issues, the following are a few images of a dissected relay. If you are interested in more detail, search for "relay autopsy" and it should take you to my original thread posted a few years back. The copper "disk" is forced into the two copper studs when you engage the START switch. After years of use, the disc and the studs become pitted and less conductive. Sometimes the copper disc can be flipped over for a new surface and the terminal posts spun around 180 degrees to use new copper on the bottom of the terminals where they contact the copper disk.
-
4 pointsI know I'll get flamed but I'll take a C-160 over a 520 any day.
-
3 points701 Went to its first show in Jackson County, Indiana - The 6th Annual Jackson Co. Antique Machinery Association Show held in Brownstown , Indiana at the Jackson Co. Fairgrounds . We were asked to be the second garden tractor in the 2:00 PM Show Parade held on Saturday May 9th.
-
3 pointsHumm...I'm thinking the eight foot bed... makes the new decal look too far away.
-
3 pointsFriday features the evening cruise... which makes for an incredible sight to behold. Then Saturday is our parade day.
-
2 pointsPart 1 I rewrote the parts list from an 18 Automatic Parts Manual because it contained errors, and I wanted it to basically be used as a simple checklist. I also began {term used rather loosely} to make what I am referring to as an Assembly Order List. Essentially a list of how I think my tractor should be reassembled in a logical order. In this first part I will commit to complete steps 1-23. The edge trim on the axle openings is my addition not OEM. What I started with, Pics 1-4. The frame, Pics 5-8. Assembly Order List, 9. The front axle, 10-11. Grease fittings, 12-13. Axle Pivot. 14. Washers, 15. Lock-nuts, 16. Hex-Bolts, 17. Edge trim, 18-22. Thrust washer (upper), 23. Thrust bearing, 24. Thrust washer (lower), 25. Left spindle, 26. Left "E" clip, 27. Right "E" clip, 28. AO page 1 Complete, 29. Next update may be awhile as I need to have both some machining and welding done before I can complete AO page #2. P.S. The frame pictured is not original to this tractor, but it is from an 18 Automatic, even though this frame is not equipped with the seat mount spring. I removed it, in order to add a hydro fan. The axle and 1" spindles are from a different tractor as well, and consequently Item # 17 and #22 both have part #'s for the 3/4" "E"-Ring clip. This should be replaced with the part # for the 1" "E"-Ring clip. I just didn't have that part # readily available when I made the AO list. This list also has the part #'s listed for the 3/4" parts in steps 2 and 13-21.
-
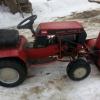
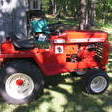
2 pointsso, coming back from fishing this morning, saw this with some other steel piled in the front of an old house with a free sign. asked if I had to take it all and was told no, pick what you want. now the question, What do I have? I already have figuered out that it probably is not compatible with my 414-8
-
2 pointshi all, even though this has been done for quite a while now it occurred to me that I haven't actually got a video of my new stack! please excuse the poor quality filming, i was more concerned with getting good audio really. sounds even better in person, far better than the verging on offensively loud stock exhaust. I drew quite the crowd in the end, notice the VERY life-like gnome and his bears stat on the flower bed! http://i896.photobucket.com/albums/ac161/callummcgrory/th_IMG_1557_zpsppzus58b.mp4 hopefully the video has worked, callum
-
2 pointsI got the rear tires mounted on the 520 rims today. Plan on bringing those to the sand blaster this week then I can paint them. The fronts are all done. I used Navajho White I had mixed. Could not find canvas white at the store. I like the stance...I was able to buff the paint and then wax it. Came out real nice.
-
2 pointsMike must be trying to win the "Husband of the Year" contest; A plastic shed for Mother's Day, such a romantic,
-
2 pointsBet my wife could find it.
-
2 pointsWell, nothing went bang so out came the grinder.. Strange baffle thingy.. I guess it's there to stop dirt from entering the carbs.. About to go under the knife grinder After fuel tap pipe enlargement surgery.. I had to lower the fuel tap to give me a fighting chance of getting some sort of air filter fitted! Yes the fuel tap outlet is lower than the carb fuel inlet, but as the tank is above the inlet gravity should still do it's thing and fuel the carbs up. The old fuel tap hole was blocked up by screwing in the end of this bolt and some welding. I still need to make some brackets to bolt the tank down but as it will need to go in and out a lot while I sort the induction side of things out that job can wait a little while.. Speaking of induction, this was the carbs to air filter box pipework.. I only needed the carb ends.. Which were a perfect fit over this 2 inch diameter pipe, or part of a Reliant prop shaft to give it it's full name.. The plan is to plumb this pipe into both carbs and stick and air filter on both ends.... This time I will make sure I get the right size filters
-
2 pointsbeen listening to the Word. killer funk/rock/gospel fusion. https://www.youtube.com/watch?v=mD5vGSLYtyE
-
2 pointsI can't honestly say I have scrutinized the "build quality" as the tractor has had zero failures. The front axle is cast iron, tires are Carlisle, fuel line Goodyear, engine Kohler - all familiar names without any penny pinching seen. All maintenance points like grease fittings are readily accessible.The only items I will have to address are lifting paint around the foot pad area and fraying of the seams at the top of the vac collection bags. Other than that, just 2x a year oil changes and the occasional thorn in the tire, but the build quality has been sufficient to enable what I consider above average homeowner use without experiencing any setbacks. Every time I go to start the thing - it does. When I engage the PTO - it does and provides a quality of cut that surpasses anything I have every used before. Just wish the dang thing had a mower deck larger than the 42" on there now! So figuring purchase price divided by 12 years usage - that equates to about $2 a week for reliable turnkey performance. I'm not a Deere fanboy or a WH detractor but I sincerely cannot understand the "big box" bashing that goes on. It's great to have the talent to troubleshoot a broken wire and tackweld a broken joint on demand for a 40 year old garden tractor, but to give someone with modest lawn care needs the impression they are "throwing your money away - you will be sorry" - nah !
-
2 pointsWow Ian !! Your videos amaze me. I can't wait to see this monster when you get it finished. Thanks for keeping us updated.
-
1 pointI worked this afternoon on the 1961 Wheel Horse 701 tractor ! I installed the lift arm piece (bought a broken one and had a new one welded as a replacement) I had made for the Hein-Werner HY-2 Hydraulic Pump/Lift Unit I bought last Fall at an auction. I had to drill three holes in the tower of the Wheel Horse to install the hydraulic pump support plate, installed the lift arm piece in the rockshaft for the hydraulic cylinder and tested it all out with my mid-mount grader blade that also has a tongue on it to install in the Wheel Horse rear slot hitch. These old HY 2 pumps have no large fill ports like the Wheel Horse 953/1054 pumps. It tool me 45 minutes to fill the hydraulic pump through the small fill port on the side of the pump! All in all it works well -no leaks on a 52 year old HY 2 Unit (was on a 1963 753 Wheel Horse but removed at the auction I bought it at and fully complete which is why I paid $90 dollars for it. It works great as a lift and I am going to use this with my two piece cultivator attachment in the vegetable garden this summer! I have a horn to install and lights before this 701 is ready to start rolling ! I also have to bend the shifter arm tomorrow to allow me to shift into 2nd and third gear! That reverse and 1st gear is just not enough for this 701~! This is really quickly starting to be my favorite tractor ! Pics from the install
-
1 pointThought I'd post some 'before' and 'so far' pics of this British Mower here as well seeing this section is underutilised (main thread on MoM link), and on the basis that there may be some U.S. interest in this type of mower. I know there were several similar makes and designs in the U.S in the 50s like Toro and Jacobson. This one was so close to complete scrap, but I think I've got the better of it to date- As found- 24" cut for coarse grass like Paddock or Orchard (I thought it was for finer lawns originally ) Engine is pull start 2 cycle 98cc Villiers with Oil Bath Filter. Single Clutch Plate and power drive. Lot of work to date, but have reached this point of near completion. Was hoping to finish by winter, but have failed in that plan. If interested in the rebuild etc, here is a link - http://myoldmachine.com/topic/726-yellow-mower-challenge/ Regards.
-
1 pointThe 2015 LGS is coming up fast they moved the show days this year from sat.- sun. to fri.- sat. 5-15-2015 thru 5-16 and wheel horse is the featured tractor Mrs rancher and I will be there Thursday 5-14-2015 to set up hope too see some of you there Brian
-
1 pointAfter several years I will make it to the big show! What are you looking to sell? I am looking for a nice 520h or newer 416h. I have a 1990 416 h I'll probably bring as trading Stock that is a nice looking worker with 700ish he's as well as a nos clevis hitch, cast wheel weights and Brinley Coulter plow. Plow.
-
1 pointHere it is on my 73 along with the std. tongue hitch. I use it for my single bottom plow
-
1 pointWell, I knew it began with an "S."
-
1 pointIt's part of a sleeve hitch. It's an older version of a clevis hitch. Still good though!
-
1 pointLooks like the tiller for a B-165. Vertical shaft tractor.
-
1 pointThat one is a factory welded cylinder and you'd have to ...on a lathe...cut it open, vey close to the circumference weld. You should then be able3 to replace the internal O-rings, as well as the o-ring seal at the end of the shaft. Once O-rings are replaced, weld it back together with the assistance of a PROFESSIONAL welder....not someone who makes boat anchors. OR... buy one that has replaceable o-0rings. I have two of that kind in my shop that should suit your needs. for more info and details...contact me at this email address: daveoman@windstream.net
-
1 pointMT Wolf,PA
-
1 pointNice trade Steve. I'd love to try out a 520 but I had an off brand for awhile with a Briggs twin and it didn't take me long to appreciate the fuel economy of my single cylinder Koehlers.
-
1 pointCraig , You like POWER!!
-
1 pointLight the stogie off of the muffler!
-
1 pointLooking at a parts list the item #37 is part number 32121-94 spiral pin. A little digging reveals this is a 5/32"x1" spiral pin. You should be able to insert a 5/32" drill bit in the holes and nothing larger or this pin will be loose. Garry
-
1 pointI'll second that!
-
1 pointThanks Glenn, I really do not consider it anything that is beyond what any other member could do if they simply try. I failed to add a picture of the area of this frame that was pitted from rust, so bad that I had to do a little bodywork to it. I also took a just for fun picture of the "LSE" style steering wheel mocked up on the frame while I had the bodywork finished, Mark.
-
1 pointI don't think a safety switch would stop the lights from working. Thanks for the good news!!!!!!!! Should I jack up the seat and drive a new tractor under it???????
-
1 pointVery nice. The 7-2211 was produced 1968-1974 and they made so much product those years that they used the 493435 serial number in each of them. The 1971-1974 models would have had a -6, -7, -8 or -9 suffix following the model number. That leaves this one a 1968, 1969 or 1970 model. Garry
-
1 pointBad corrosion = high resistance= High amperage = hole blown through meter. Chalk up another one for the old timer squonk!
-
1 pointWas at Steve's house today looking for some RJ parts. He had a guy coming 5.5 hours to do some horse trading. Just as he was about to leave, Steve remembered he needed to get a picture for this thread but his phone was down in the barn so I took it for him. Steve got a very nice restored C-160 and the other guy got one of his 520s. So here what was in his mirror on the way home:
-
1 pointYou can get a 3/4" OD woodworking router bit replacement bearing that works wonders for balancing the blade. The lubrication used in the bearing is light making it very effective. Hanging a blade on a nail works to a point but the nail not centered in the hole leaves a good percentage of the blade's weight acting as a pendulum which masks a good portion of the unbalance condition. The ball bearing eliminates that. Get one with a 1/4" ID so you can slide a 1/4" bolt into it and clamp the bolt in a vice or mount it on the wall. Best to do this inside because the slightest breeze will windmill the blade and defeat the purpose. Sharpen both ends of the blade and check balance. Then sharpen the heavy end until balanced. You deck will really appreciate it. Any place that stocks a good selection of router bits should have a bearing. See if this link works http://www.leevalley.com/en/wood/page.aspx?p=30124&cat=1,46168,46180,30124 Garry
-
1 pointYou'd be surprised, as long as you don't spin the ags (hard to do if you're paying attention) they're very gentle on the yard. I talked a coworker into putting 20x10-8 Super Lugs on his lawn tractor to get up a few hills in his yard and he hasn't had a problem either.
-
1 pointI got a call from The Cleveland Clinic this morning. My latest bone marrow biopsy showed no signs of leukemia. I am officially in remission. Still a long way to go in the treatment regimen but taking things one day at a time. This is a good day for sure. Thank you all for your prayers and good wishes. He is listening.
-
1 pointI have an electric lift on the sweepster used on my C175. It is heavy and i use the lift frequently to adjust for grade changes as i sweep...Never had any issues with it.
-
1 pointGroovy.
-
1 pointThanks mate Only a small update guys.. Happy that my strange braking system will work, today I started to refine it a bit. New connecting lever on the left, prototype on the right.. As you can see I decided it needed a bit of shape to it Here it is fitted.. The handbrake lever looked like it had been pulled from an old Marina or something, so I gave it a "Wheel Horse" make over. The bottom half will be covered by the side panel.. I think it looks more the part
-
1 pointThanks dude.. Yep, there will be a big battery kill switch. Also like the racer boys I will be fitting a plug kill switch that clips onto the driver. If the driver comes off, the plug is pulled and thus the electrics are killed. Oh, and the fuel tank will be fitted with the bike vacuum fuel tap.. Engine stops the fuel stop flowing... Plenty of safety features me thinks I'm on the look out for a high backed seat that wouldn't look out of place This morning while looking at the photo's of the master cylinders I had a flash of inspiration as you do.. This won't hit MooTube for a little while but I thought I'd give you a sneak preview.. This is the prototype so it needs a bit of refinement, but you will get the idea Click on the link below. http://i212.photobuc...zpsgirdmxlk.mp4
-
1 pointLOL! Baught a ford .
-
1 pointHere is the most recent new owner of my C195. Kenb is very happy with this bad boy. I know he will take real good care of her. I say it will have a complete Kenb restoration by the end of May. Good luck with it Ken!
-
1 pointEvanescence - Bring Me To Life: LInkin Park - Numb:


This leaderboard is set to New York/GMT-04:00