
Leaderboard


Popular Content
Showing content with the highest reputation on 12/21/2014 in Posts
-
6 pointsHere's a little update on the 59. Started painting some stuff on friday, got some done, but not everything. Also reprimed the other parts and got them sanded and ready for paint. I'm going to merge the 57 with this thread for now, as its all getting painted together at the same time. Today I put the 57 frame back together and glued some tank straps in it. Anyways here's some pictures of whats been painted, and the stuff that was reprimed/sanded. Hope to have most of this stuff painted by the end of the week. Gear case cover back on These were painted, but got messed up a little bit, so they were scuffed and will get repainted The tank straps glued in, I've done this on several tractors now, and it has worked well. And some shiny red parts(In case your wondering, yes this is my closet. ) The top 2 pictures are for the 57 and bottom 2 or for the 59 Will add more pictures as more stuff gets painted
-
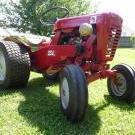
3 pointsThank you for letting me join! I recently bought a 1970 Wheelhorse GT 14 with a frontloader. It is my understanding that the loader is a fairly rare early model. The machine runs but looks like it was stripped for parts once; the dash, hood, firewall, console plate and other parts were gone, but the previous owner had ordered many of the missing parts. I have found a lot of maintaininace items, loose bolts and the like. The 3 point works. I am a bit surprised that there are no brakes, and was wondering if anyone had added brakes to their GT 14's.
-
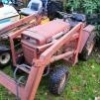
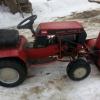
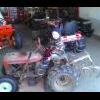
3 pointsNo I didn't give my little boy his snow plow yet. Instead I treated myself to a Christmas present. . Though this one needs a little TLC, I thought it would be another good conversation piece for the collection. From my understanding these were promotional tools for the dealers if they wanted to purchase one. They did not originally come with an engine but many had an engine dropped in them so they could be sold. This one has an engine that needs some wiring help. Hoping to touch up the paint in a few places and just have fun with it. It is about time to reorganize the barn once again!!!
-
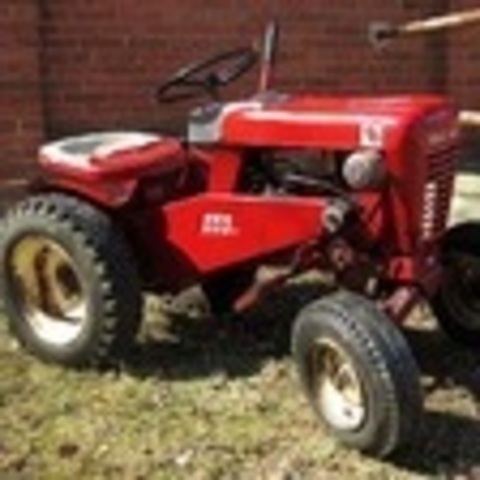
3 pointspicked this commando 6 up because the price was right [ CHEAP] .it has a tucky on it ,what is the correct engine for it.not really sure what i am going to do with it yet.
-
3 pointsGet yourself a left-handed nut slightly smaller than the buggered portion , tap it on while turning & should lock on .
-
3 pointsThere is a snow maker available for sale, from one of the ski hills in the area. I am thinking of buying it...the horses are restless.
-
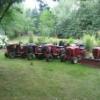
3 pointsSo a couple hours ago my phone rings ... hearing Geno's Ringtone I knew it was gonna be good ... Apparently he purchased a large group of Horses and wanted me to get the work truck & Trailer (for those who don't know, I drive a tractor trailer for a living at the moment) and come help him get his purchase home ... He offered to pay for fuel and time. Sounded like he was pretty excited to me ... Since I Hit a deer with the truck yesterday morning (that sucker exploded - the deer - my truck is out of service) so I can't help him out ... I logged on here and see this and putting two and two together ... I think Geno really DID purchase the lot of 30 ... WE WANT PICS GENO!!!
-
3 pointsI have been all day yesterday and today learning Corel X7 and trying to get this thing to suit me. You guys wouldn't believe how my head hurts. It's very close but not complete yet, there's still centering to do and I'm still playing with the B to L connection in Stable. We are also trying to do the phone # in a home made WH font to match the rest. These will be decals I put on things, ideas are appreciated.
-
2 pointsThanks to M_Bailey for furthering the cause of investigating repair of the 300 - 400 series WH indicator boards. The question was asked "can you save this" the answer is .......... yes! clean up the burned area and fill with an epoxy gel a little trimming and smoothing and Viola and we have a decent base to apply copper foil to restore the additional two contacts lost to this burnout. Major, I installed a blinking LOW OIL circuit and all the protective upgrades to keep you happy for years to come. Let me know if you would like LED's installed onto the circuit board. I am currently investigating 2 options. The first option is to install smaller LED's which will fit directly into the red lenses mounted on the tractor hoodstand, and the 2nd option is to install larger LED's which will be able to protrude directly out the holes in the hoodstand and allow the owner to remove all the lenses on the hoodstand. So if you have all your lenses and prefer that look, smaller LED's are the choice. If you are missing some of the red lenses and would like a larger red LED mounted directly in the hoodstand hole, I am looking into 10mm sized LEDs to fit directly in the hole w/o need for lenses.
-
2 pointsGeno you on your way ? Craigslist links are not allowed (deleted)
-
2 pointsIt is about a month late but last tree dropped most of those leaves so had a job at hand today with my little helper....
-
2 points
-
2 pointsHere is the promotional poster........
-
2 pointsCant help on the plug, but can give some oil change advice. I gave up the mess and fuss years ago with this unit. http://www.amazon.com/Mityvac-7400-Liter-Fluid-Evacuator/dp/B000JFJM14/ref=sr_1_5?ie=UTF8&qid=1419201466&sr=8-5&keywords=oil+change+pump
-
2 pointsWhen I saw this, I knew if was for me. Take a look at the sign, although it isn't wheel horse, it certainly fits the bill. It will look good in a wheel horse display!
-
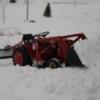
2 pointsI have pushed more dirt with my blade than snow in the past twelve months and that is fine with me!
-
2 pointsWreath holder!
-
2 pointsThe transmission is all back together now (whew!!) and everything looks good. The only issue was with the axle bushings which were slightly undersized and required honing (.996 ID) but not a big deal. The axle seals are the same ones taken off which have been soaking in brake fluid for the last month and are now soft and supple, they really grip the axle. Time will tell how well they hold up. A couple of pics - No binding at all and no leaks so far so the next step is to resolve the steering issues followed by paint prep. A special thanks again to Stevasaurus for posting the MI part numbers which was a tremendous help!!! More to come.
-
2 pointsCalcium Carbide Bob, it is calcium carbide, make's acetelyne when wet
-
2 pointsYep that was a hell of a Game, Was talking To Koen on Skype keeping him up to date.. He kept giving me links of his pals blowing stuff up with calcium chloride I guess thats all they have to do over there!
-
2 pointsHey Geno.If you're ever in upstate NY , stop by my place.You can pick out any 30 Wheel Horses in my collection for that guys asking price.I'll even load them for you with my fork lift.Heck,get rid of 30.I'd still have about 50.Maybe then I could work on a few.
-
2 pointsSo, could someone PM me the Craigslist ad so I can see what Geno is after? OK, no need...It is a member here that is in Nobelsville Indiana....Geno is North of the Ohio River.....again!! Someone needs to revoke his Pass-Port!!
-
2 pointsGeno did you buy a Kenworth to haul that load ? Glad you got 'em!
-
2 pointsHey Mike.............you noticed Geno didn't answer you. He is already heading north. That is interesting. You can tell the pictured tractors are dry and have been kept that way. That is all I can ask of a person regardless if a WH runs or not. If it was kept dry, chances are, it will run and it will be worth restoring or using as is.
-
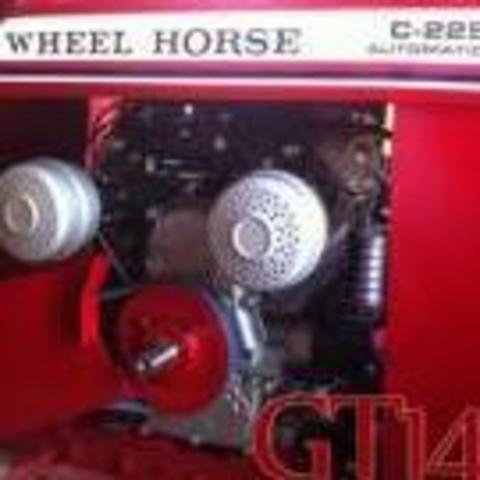
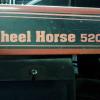
2 pointsI believe that decal was on the GT 14 I had.
-
2 points
-
2 pointsMade some progress in the shop today After some careful thinking this week I found the perfect solution for my tower extension, I took another hood stand that was busted up and used the top 3 1/4". I flipped it upside down so it would match up my tower and this way the tower comes back to the driver so the engine doesn't loose space (cant afford that!). I now need to drill holes for the gas tank mounting tabs. Here is an overall shot of the tractor so far. I got the fenders cleaned up today also. welded some cracks, did some straightening, and had to remove the word COW somebody welded on the fender (kind of wished I took a pic before removing). Next week looks busy, might not make it into the shop, but we'll see! ENJOY!
-
2 pointsNope. Had to cross three state lines so had a little bit of a ride. Here it is. It's going to work with me and gonna fire up our steam Jenny and give it a proper cleaning. Then when I get home it'll get some compound and wax to see how it really looks.
-
2 pointsYou are going to like using that loader. Make sure you have enough weight added before you lift anything to heavy.
-
2 pointsThanks Bob, and yes I had it turned .010 under and bought a .010 under rod for it. Put the engine back together today, went pretty well. I also, tore apart and siliconed the trans last night, that went well too, but it should of for being the 7th or 8th time I took it apart. lol I hope to get some stuff painted this week, but I may end up priming and sanding some more stuff first so I can spray it all at the same time. These are all ready for another coat of primer And these aren't the best pictures, but what you see here is ready for a coat of paint along with the engine,frame, and hood for my 57
-
2 pointsOne thing to consider on your 5010 rebuilds is the differential carrier is riding on bushings and not bearings. While the carrier spins freely when test fitting what needs to be considered is after years of rough riding is the possibility of the axle housings not being square to the side plates. That folks is my .
-
2 pointsHere's what we have so far with the transmission. The brake shaft was known to be loose and here's why. There is no sign of the missing needle in the case and no metallic shavings. Left side axle bushing and seal removed. And some internal shots. All of the gears look good at this point. Bushing removal tool.
-
1 pointThe suspense builds....
-
1 pointmight have to tack weld a nut on and turn her out
-
1 pointThere's nothing wrong with a cast iron Tekky, they are great engines, just a little finicky.
-
1 point5 games Dec 20 (yesterday) winning teams...Louisiana Lafayette, Utah St., Utah, Air Force, Bowling Green 4 wins and 1 loss....RMCIII, Brandonozz.. 3 wins and 2 losses...Koen, RacinBob, Squonk, Stevasaurus, Brrly1, Horsefixer 2 wins and 3 losses...JimD 1 win and 4 losses....Jackhammer The Bowling Green game ended at 1:00 AM EST and could have gone either way...the last 4 minutes were un-real.
-
1 pointThere is a 237259 decal listed with the Kohler ignition parts for the breakerless ignition but no illustration. Garry Adding - did find it described as a warning decal
-
1 pointThanks for all the replies. Good news I was digging thru my box of spare parts and found a fuel pump with a 90° bent lever put it in a it works.
-
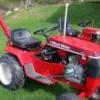
1 pointIt's a real clean 2 owner 1976 C-120 Hydro. Came with 42" side discharge deck, snow plow, chains, and cast wheel weights. Once I finished restoring my C-160 I really took a shine to this vintage Wheel Horse. This one is so nice I couldn't pass it up!
-
1 pointI've got the same loader but mine also has the independent three point. Mine is on a 69' GT14. I have taken the 14hp off and put on a 16hp. Love the tractor. Nice piece to have around especially when you don't feel like pushing a wheelbarrow. Good luck
-
1 pointVery nice. I don't have a gt14 but sure would like to! Not sure of model on the loader , looks like a 500 ark brand. Loader and 3 pt hitch can't get any better on a gt14.
-
1 pointI HAVE DONE 2 DIESEL SWAPS. ONE IN A 417-8 WITH 10 H/P AND A 1054 WITH A 6 H/P. THE LAST ONE TOOK 6 HOURS TO DO. IF I CAN HELP CALL 203-846-0755 RUSS
-
1 pointSent from my iPhone using Tapatalk
-
1 pointOr - Kicking Grass and Taking Names.
-
1 pointThanks Glenn! They are fun tractors to restore, not too many parts on them.
-
1 pointPicked the engine back up from the shop. It ended up needing the crank turned as well. Cost me a little more than I was hoping to spend on it, but it will be a really good motor now. Also, ended up finding another NOS carburetor for it. I also had a set of crank bearings I bought at PA I didn't plan on using on this engine, but after all that has been done to it I figured it deserved them. Everything is ready to go together now, hope I can put it together tomorrow if I have time. Got this head out a PA too, it is NOS Also about a week ago I recieved a package from a member here, I can't thank them enough!
-
1 pointI agree ol550. The same goes for the axle bushings. I had the binding problem that was driving me nuts. I isolated it to the differential/axle assembly and confirmed that it wasn't the sides squeezing it. All four bronze bushings were new as well as having brand new axles so the tolerances were as close as they ever would be. Sliding the assemble on each side plate separately and they were free as could be. But not when I snugged up both covers. I had to emery the axle bushing a fuzz more and all was good.
-
1 pointWorking with fiberglass is over rated... if you can machine a stainless tractor you can mix epoxy and watch it cure... Hell I used a trash bag as a release agent. There is not one hint of filler on this hood, just a coat of primer surfacer, base coat red and unwet sanded or buffed clear.
-
1 pointMY STEERING WHEEL IS GARBAGE The original wheel is made by a company called SHELLER after some searching on the net I found one I could use as a replacement also made by sheller with a slight difference the new one is for a 3/4" tapered spline shaft and the original is for a 3/4" tapered key shaft found this NOS military surplus wheel on E-Bay vintage WW2 looks to be a exact match to the original First thing I did was use a tapered 3/4" pipe tap reamer to remove the splines then I made a small fixture and tapered broach guide for a 3/16" broach to cut a new key way the small alum fixture is to hold the wheel at the correct angle so the broach is straight up and down after cutting Brian
-
1 pointI think you are pulling our leg about using the tractor. That's what they looked like when they came out of the crate. NICE job. Marvin


This leaderboard is set to New York/GMT-04:00