
Leaderboard



Popular Content
Showing content with the highest reputation on 09/05/2014 in Posts
-
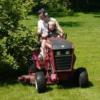
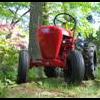
18 pointsI got home from work early today , it was glorious September sunshine so I wheeled out the two ponds to do a little dusting around before I put them back in the stable to cozy up for the winter. While they we out I thought it was a good time for a photo shoot.
-
10 pointsWas going to do an around the neighbor hood video but it's over 100 on the Tarmac! Had to settle for a few poses.
-
7 pointsKarl I am 100% in agreement. After prior Comments made earlier today MJ was wanting to quit the forum and the whole ball of whacks. I at that point wasn't going to post this Graphic that I created 3 days ago but now that things have straightened out I will post it. This is how I truly feel about our hobby and who it has touched in our world from sea to shining sea. This will be available in a T shirt and also in a Multi Color LED back lighted display that will have a remote control. This is the best I can do on Short notice but you prolly can get the direction I am heading with This. Thanks Duke & MJ
-
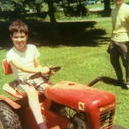
5 pointsIn 2005 my oldest son got his first wheel horse. Below is a photo of him that day. Now cycle starts again with his son getting his own tractor. Those smiles look very similar.
-
4 pointsHi all, Biddenden Tractorfest was once again a great show and unlike last years there was no rain Woo Hoo Here's the first 3 of my Tractorfest video's, there will be a few more once I have edited them.. Enjoy
-
4 pointsWhy not just ask your questions here? While Bill is well known for being the face (and voice) of the Wheel Horse Collectors Club, he is but one man with one man's knowledge and experience. There are many, many people here who have been far more active lately and are always up on the newest discoveries and observations. In this hobby, a lot of what we have to go on is undocumented, we have to rely on what people have seen and researched. Post up your questions. If the answers are out there, the membership here is happy to help you or direct you to someone who can. That's the best part about the fourm... the vast knowledge and experience of people willing to share.
-
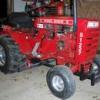
3 pointsBeen messing with some of my 953 parts the last couple of evenings. Here's where I'm at so far..... Nowhere close to perfect...but I like it! I'm definitely going to order some new lenses from Glen soon! These are in bad shape!
-
3 pointsWell some of you know that KenB is big into vintage boats and outboard motor collecting and restoring. He got me hooked... Here are two of my boats before and after pics. I want to thank Terry for all his help in making the decals. He made a set of reggie lettering and Crestliner side decal that is being shipped now for the aluminum boat. I love the horses but as Ken says it is a nice change to have another hobby.
-
3 pointsRichie, I'll bet Jerry is looking down and sharing all this with you now.
-
3 pointsHey I'm impressed that a couple of Michigan fans could spell Ohio State right Good luck with your new endeavor
-
3 pointsSometimes the insulator is stuck to the back of the module when you pull the module off and you may not see it. I believe the insulator is on there to dissipate heat build-up in the module and not to stop current. I couldn't say why one would not be on those and the module may not last long without one. I have replaced several modules and I always make sure it has a good insulator before I reassemble the timing cover. Cheap insurance! Pinning this is a very good idea since there are many owners who have never dealt with these engines. Onan's have an undeserved reputation for being unreliable and mysterious. That is far from the truth and if you own one you definitely need the service manual in your hands. These engines brought Wheel Horse from the 1950's into the 1980's in terms of power and reliability.
-
3 pointsLove the old pics ,,takes ya right back .
-
3 pointsThose are some really slick items, it's so cool to be able to do that. On a side note: I removed some posts from this topic. I'm not sure what the objective of the post was, but to keep this on-track they've all been removed.
-
2 pointsGot my W.H. Push mower out today taking it to the big Mansfield,Ohio show this weekend (Sept 6&7) featuring Wheel Horse...
-
2 pointsHeat it up with a torch and then touch it with wax. The wax will melt into the threads and "lubricate" it so you can turn it out. I recently welded a nut to a broken stud and then did the wax trick. Used a 3/8" drive ratchet and backed the sucker right out!
-
2 pointsFirst hi all, glad i found this site had no idea anyone else was interested in these wonderful pieces of equipment. On to the reason I am here. Back in 1971 at the ripe old age of 3 I was allowed to tool around the sidewalks on my Grandfather's wheelhorse, a 1967 Lawn Ranger. Of course he would walk along beside me, ever ready to step on the brake. Later I was allowed to mow and pull the lawnsweeper around behind it. When he took with lung cancer and later passed from it, I went to stay with my Grandma on weekends, and helped her care for the lawn, carry groceries, etc. Later, when we all moved to Arizona, the wheel horse came along (less the snowblower) and began it's duty mowing 5+ acres of awful weeds (later replaced with rye grass), in about 1992 or 1993, I had noticed the little Tecumseh engine was getting noisy. One day it ejected the connecting rod out the rear of the engine. I made the mistake of buying a new mower, and retiring the awesome little tractor out behind the garage. Fast forward to 2 days ago... I found a H60 Tecumseh on ebay, no carb, good compression, came from a rupp go kart. $65 buy now... engine is on it's way! So I ask, should i go for a full resto on this little tractor, or just throw some paint and decals on it? Are rebuild parts still available for the engine? I am thinking maybe throw rings and bearings in it, lap the valves and run the engine? do they even have replacable bearings? I have done engine rebuilds from small block chevys to 3406 caterpillars, but i know very little about small engines. T.I.A. for any insight, Wayne P.S. photos of current condition (well patina'd) to follow
-
2 pointsReceived the decal set today. Wow are they neat. Even my wife was impressed and she scows at my addiction to these tractors. Thanks again for a job well done.
-
2 pointsThanks Nick I appreciate the kind words.
-
2 pointsThanx for the kind words chaps, here are a few more pics I took, I would love to have one of these pics in this years calendar
-
2 pointsMike, thats beautiful!!! These pics get my vote for calander material You must have the day off too??? No workie for me today.
-
2 pointsSimply... AWESOME!
-
2 pointsDoc I didn't forget you here is a personalized Coffee Cup I made you earlier today, Just PM a Addy and it is sent to you 100% on my dime. Burrly1 and I didn't forget you either WAHH WAHH WAHH. Look earlier in the thread and you will see I made a Hawkeye decal and posted it on a White Coffee Mug. So Quit your Whining. Jeesh.
-
2 pointsAnd Andrews "all in one" Garden Ranger set-up. All in all a Great show Looking forward to next year!
-
2 pointsAll due respect to those who run less than full throttle, but every small engine manufacture states in their literature that it is to be operated at full throttle at all times. Many of these engines do not have oil pumps and get lubrication from a splash. The faster the splash the more lubrication. The faster the flywheel turns the more air circulates to cool the engine. When you turn three blades as fast enough to cut grass it takes a lot of horsepower. Remember that the blades have an upward curve which uses energy and causes air resistance.
-
2 pointsWell I get to update one of my Dad's threads. For those of you who were not familiar with my Dad, he posted this back in 2010 but never got a chance to enjoy the fruits of his labor. The gentleman that he fixed up the C175 for passed away four months prior to my dad. His wife had been cleaning up around the house and remembered that they had promised dad the tractor if something happened to her husband. She had no idea that dad passed away also. So one and a half years later, she found my dad's phone number and called for him only to find out she was too late. So I ended up calling her to find out if she would sell me the tractor and she said no. She said she would give it to me as she had promised dad. So, today I brought her home. As of right now all I know is it is a C175 auto with the KT17 series one motor and a Sunstrand 90 rear axle assy. Dad had posted it being "rough" so I had plans on using the rear axle setup in my ratitude tractor. When I got there and saw it, those plans changed. It needs some tlc but it is all there. She even has the original paperwork somewhere that she will give me when she finds it. She also has all the pics and emails my dad and her husband sent back and forth during dad's "restoration". Kind of a happy ending, just wish dad was here to share in it. Thanks, Richie
-
1 pointI work in a automotive parts store and this old guy senior citizen has been talking to me for 2 weeks about a riding mower he's working on for a friend. It's an MTD something. It won't start. I gave him all kinds of suggestions of things to look for. And he had other people helping him. I told him you need power from the battery to key to safety switches to solenoid. He said he had the seat switch zip tied down. Told him that only cuts off the fuel ... nothing to do with cranking. The other day he was on his way to get an ignition switch... I told him I doubt if that's the problem. He put a solenoid on it with the same results. It would start jumping to the starter. I said sit on the seat, foot on brake, PTO disengaged. He stopped in this afternoon ... "Nobody can figure it out". I said "NOBODY?". Well, after supper I went over ... checked for power starting at the battery. And that's another story. No power thru the PTO switch. WHY? IT WAS ENGAGED! Decal on dash was rusted off. OK... now the starter wants to turn, but like a dead battery. He had a car battery connected to the tractor with 18ga jumpers. I moved the battery around on the fender and got the cables attached. He put his foot on the brake, turned the key and VROOOM! Another MTD still running. 15 minutes diagnosis, 2 second repair... engage brain ... disengage PTO.
-
1 pointSo what does everyone think about these? I've only seen them mentioned every once and while?
-
1 pointThat is a very interesting loader configuration. And Squonk's use of the word "scary" may sum it all up.
-
1 pointIs this right?? -- Did Toro have Wheel Horses at the 2001 Indy 500? -- I lifted this pic from an Indiana CL ad
-
1 pointI ended up getting factory size....23x9.50-12 for the back and 16x6.50-8 for the front. I got a helluva deal on Amazon because I'm a Prime member....$168 for all 4 to my door in 2 days
-
1 pointThanks again Nick. I'll watch your restorations with interest. Best of luck with the 520; I'm sorry to hear someone's been so ham-fisted with the loom. Great score with the replacement! So.. I spent a bit of time with the wiring diagram. The 9-pin engine multiconnector has to be able to pass a maximum of 30A to the fuses via the red and white wires. I haven't found any multiconnector with this specification. The highest I can find is rated to 20A and looks pretty darned similar. Given the fact that this connector seems a weak point, I can't help wondering whether once connectors start oxidising or corroding, the resultant current increase means the multiconnector ends up acting as the fuse. I did a bit of lateral thinking and realised the connectors I use on my RC heli and multicopter are rated way beyond 30A and I have a stack of them sitting in the drawer. So... I plan to use a pair of these for the two high-current connections and push the rest through a 20A mate-n-lok. By doing this, I reckon I'll be rid of any electrical issues. I know there's talk of the relay locations, there's Glen's relay hood and some people have moved the mounting location, but in the several years this has been sitting exposed, the relay block land connectors look to be in good condition. The tractor's always going to be garaged so I don't see a problem. The wiring overheats on this tractor appear to be the rectifier, as a result of the multiconnector pin deterioration and the rear loom where the lighting circuit has shorted due to abrasion. We'll see, I guess..
-
1 pointLooks like you're ready Ed, if that doesn't do it nothing will.
-
1 pointI would probably buy it...$200 would be a nice deal with the bagger on it. I have a small lawn also and I have kind of been waiting for one to cross my path. Nothing wrong with a Briggs also.
-
1 pointWow, so many friendly replies and so much useful information in less than 24 hrs.! Thanks all! I think I will like it here... guess i better go get a pic. or 2 of the various parts in the car port . poor old tractor really needs some tlc. I have decided for right now, I am going to install the new engine, make it run and get to mowing. I plan to tear it down,remove dents, and paint it this winter, but right now i need it to work (mow)
-
1 pointNeil, there is at least one calendar shot in there...could do a whole calendar with those pictures really. Very Cool!!!
-
1 pointThat's right N3PUY because I found the spring under the battery tray. But can you be more specific regarding that notch or even provide a picture if there is enough room to actually see in there?
-
1 pointAnd 10 are 10 times as much, and so on, and so on, and so on.
-
1 pointI have owned at least five FeatherCrafts. The one you want is a Vagabond. A Deluxe Runabout will do as well. The Vagabond is 14ft.7 and the Deluxe is 13. The Vagabond can handle some rough chop really well. It is built extremely well. I really wish I had kept these two boats. The first pic is of my Vagabond I restored and the second of a Deluxe Runabout I restored. I restored both motors as well. The Lark on the Back of the Deluxe Runabout is a very rare motor. I bought it at a outboard swap meet in piece's in a box. I went thru everything and repainted it in the correct colors. I love the Wheel Horse hobby and especially the guys. BUT... While I find alot of enjoyment riding a Wheel Horse I'm a speed junky. I would still have my race boats If my knees and back were in better shape. Nothing is more fun than doing 50 plus in a 10 ft. boat...For me it has always been boats and outboards in the summer and busting out the tractors in the fall. I might be in trouble with Steve's wife for getting him into this second hobby because Steve has already told me he has told her its all my fault! Take the plunge Craig, you won't regret it, blame it on me! I got Steve to join the Antique Outboard club and he really seems to be enjoying it, a bunch of great guys in that club just liike there is on Redsquare. There are a ton of very cool looking runabouts out there that might be a little easier too find and cheaper to purchase than a FeatherCraft. F/C's have a huge following and good one's command top dollar. Your wife can enjoy it with you as well, my wife isn't really into boating.
-
1 pointAnd this little guy was built with a hit and miss engine.....Really cool to look at...
-
1 pointLookin good Steve. I'm still undecided about which boat to bring to the meet this Saturday. One yr. I was so undecided It came down to this..
-
1 pointThis show also has a very cool small scale train set-up you can actually ride on for free...
-
1 pointOkay, here are more pix , after the action was done . See below. Sorry this took so long to post. A storm this morning caused a few branches down and I needed to clean them up.
-
1 pointWell I did build a dump truck when I first got into the hobby and was doing a lot of fabricating. I didn't us a Wheel Horse though because I had quite a few 'FREE' Craftsman's around here. I used two frames mounted end to end and overlapped. I did a lot of work on that project and learned a lot by building it.
-
1 pointHere I go for this week: Penn St, Purdue, Rutgers, Nebraska, Wisconsin, Illinois, Iowa, Maryland, Minnesota, Northwestern, Oregon, NOTRE DAME , Ohio ST.
-
1 pointAnd my picks in the right format the first time! Penn St, Purdue, Rutgers, Nebraska, Wisconsin, Western Kentucky, Iowa, Maryland, Minnesota, NorthWestern, Oregon, NOTRE DAME, Ohio St.
-
1 pointI will be there Friday eve with Six horses,, looks like your going to have a good show,,, maybe a Ohio chapter Wheel Horse show of the future!
-
1 pointLooks like you are off to a good start MJ. I am already working on a design for a couple coffee mugs so warm up the mug press. Looking forward to seeing your creations. This looks like ta good place to share the story of the C-101 that changed everything. 14 years ago in my old sign shop a customer brought in a Wheel Horse hood and sat it up on the counter. He said it was his Dad’s old garden tractor and he was restoring it for him for a Birthday gift. I had no real knowledge of them other than the neighbors little round hood I remembered from my childhood. So I began recreating the hood decals for him out of traditional computer cut vinyl (had not gotten in to the large format printing yet) My customer was happy with the results and I never gave it another thought. Fast forward 6 years and having sold our sign business we purchased all new equipment and turned our garage into a home sign shop. Soon after we opened a feebay store online. Then something amazing happened. We were selling novelty parking signs, banners and graphics on-line and I happened across the c-101 wheel horse file so I made a set and listed them wondering if maybe someone out there could use them. Of course they sold within 10 minutes and within the next week I had at least a hundred questions about other models. Of course I didn't know a C-101 from a pedal tractor. I had the skills but needed educated about Wheel horse. The next miracle was a phone call from a young man in PA. We've had several enjoyable phone conversations over the years about everything Wheel horse. I refer to him as the walking Wheel Horse encyclopedia. But we all know him as TT. He told me about red square so I signed up on the forum (member # 75 or so) and the rest as they say is history. TT and several other forum members are why I have been able to recreate such a large catalog of graphics over the last eight years. I’m no genius, far from it. Heck, 17 years ago I couldn't even spell computer graphics. But I was determined and continued to improve my skills over the years. A huge thank you to TT for all the help with so many models. To KJ4KICKS for sharing his vast knowledge. Anytime I had a question he would quickly respond with an accurate answer or he would refer me to the person who would have the correct info. To Marvairplanes for helping me perfect the PAIN IN THE A@@ front hood decal template for the 300 400 and 500 series tractors, brrly1 for driving across three states to bring me a tiller decal to scan. That's when I realized most of you are truly Horse-a-Holics. To My Illinois buddies also. Martin whose dedication to detail and never ending research has helped me improve many items. To Sarge who sent me his charger dash so I could develop an acceptable chrome dash decal. Stevasaurus for always finding the best places to dine at the Big Show. And thank you to the countless other members that have shared knowledge with me on this journey. Our first Big show appearance was in 2013 and it was awesome to see all the tractors there with fresh paint and decals. It is truly a blessing to be able to provide that finishing touch to so many beautiful restorations. As I have heard so many times, without decals they would just be red tractors. and that my friends is how the C-101 EIGHT SPEED and RedSquare changed my life. “Knowledge should be shared†that is exactly what RedSquare is and has always been about. So in the true spirit of RS and the Wheel horse family I am happy to share my knowledge as so many of you have shared with me. Good luck MJ and enjoy. Go Hawkeyes!!! Sorry Duke
-
1 pointgot the harness all installed and everything works. even changed out headlight/taillight bulbs and now have lights too..... but most importantly now the wiring is safe..... bit hard to photo the harness under the hood stand but heres the rest of it installed. had a + wire to the area where an hour meter would go so i might hunt one down and install it...
-
1 pointwire came in yesterday. very nice wire and worth the trouble of buying online and waiting for it vs picking up the cheap generic stuff at the local farm and fleet..... also picked up a 5 terminal ignition plug from napa...(sme7016034) got onto starting the new harness. first of all cut all the different wire colors i needed to length. following the harness and the wiring diagram i worked out what lengths and colors for the different circuits. i used 14 ga wire for all lengths. i also bypassed the seat switch by running the black from the ignition switch directly to the coil + instead of to the pto socket. this gives power straight to the coil when the ignition is on rather than having to prove closed through the seat switch first. i still ran the red wire to and from the pto switch and will eventually use the original type switch at the brake pedal. (for the moment i made up a small piece to bypass that wiring and the switch as i dont have a switch at present... this way the pto still needs to be off to crank the engine and once the brake switch is installed the wiring for that will plug into the harness and connect to the trigger stud of the solenoid. see the wiring diagram above to see the routing of wires.... heres some pics..... wiring all cut to length... ready to start crimping the terminals, crimper and insulation stripper.... sample of crimped terminal. all wiring that goes to the ignition plug terminated and in plug. the light circuit will be added when the wiring is installed in the tractor.... basic harness temporarily taped together to check on tractor. needed to make sure that all wiring was the right lengths and positioned correctly. i made the harness a little longer in some areas to make a neater installation under the hood stand. i wanted to keep the wiring further away from the lift jackshaft and needed to add a couple inches to the length.. completed harness next to the old one, the additional length can be seen if you look closely... ammeter/ rectifier and pto switch end showing plugs.... small bypass wire for the brake switch.... next up will be the final installation on the tractor.....
-
1 pointSounds like a nice deal, and will be a kind deed, helping the old guy out and God will bless you both :D



.JPG.9f2ecb26065c66527b0730084ab7fc7a.thumb.jpg.7dc8a04d9a53d44ee2b23f26ee94496f.jpg)









This leaderboard is set to New York/GMT-04:00