
Leaderboard



Popular Content
Showing content with the highest reputation on 09/03/2014 in Posts
-
7 pointsI was doing some random Google searches this evening and found this nice woodruff key size chart and a pdf link to another one. I thought it might be of interest to all you members who are delving into these transmissions to repair them. It could help you identify what size new keys you need to replace. It's even Stevasaurus Approved! And the pdf link.. http://www.stdsteel.com/wk.pdf You can print this out to have on hand if you want also. I hope this will be of some help to you all. Jim
-
7 pointsJust got my new decal set for my 310-8 from the vinyl guy. Wow!!!! Very nice job Terry, You are awesome to say the least. Thank You!!!!
-
6 pointsWell there is one thing about it, Yesterday I told MJ YOU JUST WATCH The Ole Dino is gonna get pissed cause I dint post his Team yet! Well sure enuff he didn't Disappoint. So I made him up one special I was thinking this Is Perfect. It will be blasted Tonight!
-
4 pointsHere's a couple I wouldn't mind seeing!
-
4 pointsWhat...no Illinois stuff. WTF, I would think that would be the first things you would come up with...many more Illini fans out there then Michigan.
-
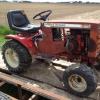
3 pointsSeveral years ago I bought this Squire Applegate Lambert and shortly thereafter sold it. Last year I tried to track it down to no avail. A month or so ago it amazingly popped up on CL in Rhode Island. The funny thing is, a guy I know in Kansas sent me the link. He had no idea what the tractor was - he thought I might be interested. I couldn't hook the trailer up fast enough. Originally they came with 6x12's on the rear but I've since put 23x8.5x12's on it, fixed the seat and a few odds and ends. The Tech H60 is the best running, smoothest H60 I have ever seen. Coincidentally, I got a lead on the red one last week in Wisconsin and just bought that one too. I want to stuff 23x10.5x12's in the red one. The crusty, orange-ish one pictured is not mine, but illustrates the fit of the 10.5's.
-
3 pointsThis thread is cracking me up.
-
3 pointsI'm thinkin a nice mug with a Cigar Store Indian?
-
3 pointsI am sorry I stirred up so much discussion on this topic. I reacted a little too strongly. I will try to get a few more photos this afternoon and post them. If I still get an error that they are too large, I will reach out to one of several of you who offered to help.
-
2 pointsIt will prob be worth every Penney lets see..... Geno is a salesman I got messages to prove it lol
-
2 pointsI cleaned the housing and made the lens .... total "$0.00". Total invested in tractor so far is $65.00. I had to buy some bushings and a belt and ignition switch. BUT... I sold an extra part for $14 so invested is now only $51.
-
2 pointsWow, Really nice stuff there. I'm just a few miles to the east. When I have a hole burning in my pocket can I come shopping. Im sure I could burn through most of it at your place!!
-
2 pointsWell guys here are some Pics of some of the GOOD STUFF. We aren't taking orders yet, as we have only been doing this for a little over two weeks, and we are still in the experimental stages and are still learning. I am sure over time like anything we will get better and more efficient at it. Once she start's selling we will let you all know. All I can tell you is that she is a SLAVE DRIVER and this week I have been off on vacation hasen't been much of a vacation. Ya see I am the Computer Graphics and cutter guy. I design and Cut what she tells me she wants and she pretty much takes it from there. These long hours are taking a toll on me. Anyways tell us what you think. Thanks Duke & MJ
-
2 pointsI wouldn't trust that. Mine showed green on the charger as well... was still shorted out. No matter what it ends up being, you know you're in good hands to get it sorted out with the forum.
-
2 pointsso you replace the module, hook it back up together and it still doesn't spark. so now you think, well must be something else, hey? and you go on to looking at other components. at this point, are you calling the module you pulled out good and you now have a spare? what if the module and coil are bad? what if either one are still good? you will never know if you don't test the parts, thats why i go to the trouble of finding the relevant parts of the manuals to help out. if you don't test them how do you know they are good or bad? just because you replace with new, doesn't mean the new parts are good, doesn't happen very often but new parts sometimes don't work for any particular reason. the service manuals are very simple to understand and with basic tools all these parts are able to be tested, good or bad. also its rare, but if the rotor was bad, you didn't replace it, you got everything back together and then the ignition doesn't work, it will all have to come back off again. please do yourself a favor and test the individual components you have, even though you bought a module, keep it on the shelf and use the old one if it tests good. check out this thread on testing, it adds to what i already provided you with above.....
-
2 pointsThanks for the help everyone. Remarkable wasn't a great choice of words although it is to me. I thought it was going to be dust.
-
2 pointsAnother beauty there Gary.... Craig, you sure that's the best plan? I always thought skinny, hungry dogs make the best guards?
-
2 pointsI am going to put the plow on the RJ 58 again and have it ready this year for the early snows! I used this a lot two years ago and not much last winter . I really always like the way this tractor and snowplow performed in moving snow and having fun doing it! The 1967 Lawn Ranger with the STR-324 Snowthrower will be the backup !
-
2 pointsNothing custom or fancy about mine. They get used, generally hauling precious cargo.
-
2 pointsMember posts are celebrated in 1K intervals here Geno... we'll see you in a couple weeks, OK?
-
1 pointI went to buy a D250 plow today from a guy on craigslist today and also check out this sweet custom loader he built for his D250!!! Awesome D250
-
1 pointI bought the snow thrower at the sale in pa this was when I first got it home I've got wheel weights and chains on it now missed out on a snowcab
-
1 pointWide open, 3600RPM
-
1 pointDoc's right about the cooling part......and full throttle is better for your splash lubed motor. Mike............
-
1 pointWide open. Remember, you are not just cutting grass, you are cooling the engine as well. These engines are designed to operate at WOT.
-
1 pointLooks like someone (maybe your husband) fabricated a foot operated control for the forward/reverse motion control. This will really help while operating the loader. I agree, start at $2000, but paint those Yellow (John Deere ?) weights...
-
1 pointThis is excellent and about time...this needs to be pinned..
-
1 pointNeed pictures for sure, but the dealer service replacement hood for Suburbans and RJ's had the slotted grill. This fine example belongs to member fireman
-
1 pointI wouldn't ignore anybody. Everyone has something to offer at some point or another and everyone is entitled to an opinion. I probably answer you more than anyone on the forum AJ.
-
1 pointWait a second... So this is why Steve and Geno never answer me!! You guys ignore me!!
-
1 pointWe wouldn't lie to you guys, it is worth every penny!
-
1 pointAnd....you just picked up one more! :-P
-
1 pointGuess we would have to discuss what you mean by durable. If you want a shiny trailor queen that only sees the light of day a few times per year, durability is defined by how shiny and scratch free the tractor stays. If that is your intention, look for a high UV resistant top coat or clear coat and a tarp to keep it covered 350 days a year. If you wish to actually work the tractor, hook accessories to it, wrap a link chain around the axle to help pull another tractor out of the mud, then to me, durability means easy touch up of the inevitable scrapes, dents and dings the tractor will see as it earns its keep. If the cost of powder coating the frame is out of the question, POR will work. If once a year quick spot touchup seems like it will work for you, professional version black rustoleum is actually quite durable and very easy to touch up. I have no experience with EASTWOOD chassis black but it sounds like it may be similar to POR.
-
1 pointI get tired of trying to clean the back of the heads and cylinders on my 520xi. It needs it a couple times a year, so as soon as I get time, I plan to use an air powered cutoff wheel to cut a square out of the blower housing behind each cylinder. I'll just make some sheet metal covers to cover the holes and use sheet metal screws to hold them on. The fine stuff gets pulled through the screens by the fan, there's nothing you can do to keep it out, all you can do is make it easier to clean it out once it's in there. I've used bent wires and an air hose with a flexible nozzle attachment, it works, but it's time consuming and not as effective as being able to take a cover off so you can actually see what you're doing.
-
1 pointHence the steak Jason... too busy eatin' to notice what I'm droolin' over.
-
1 pointNice videos Lane! Rob
-
1 pointThanks for posting the information Martin. I purchased a non running 520H a few months ago which I haven't had a chance to look into yet. I will post up how it goes. By the way I wish all of my 3/4/500's typically looked like yours.
-
1 pointTiller? You have to post that picture!
-
1 pointAcrylic urethane will give you a higher gloss than acrylic enamel. It is also more expensive. But if you are going for the show queen look without clear coating, that's the way to go. Acrylic enamel gives you a finish closer to what the original paint looked like, shiney but not mirror-like. If you are painting outside, you will never acquire the mirror finish without sanding to get the dust nibs out, then polishing to bring back the shine. My first four paint jobs were done as follows The frame, engine, and most structual parts were painted outdoors. The show parts like hood, fenders, belt covers, etc. were painted in a friends paint booth under controlled conditions. Three medium coats and the finish was as you see it. The last one that I did, the 857, was painted with acrylic enamel. All of it was done outdoors due to the fact that my paint shop buddy went out of town just as I was ready to paint the hood and stuff. So I painted all the show surfaces outdoors with three medium coats. Then I sanded the dust and bugs out with 1000, then 1500, and finally 2000 grit wet sandpaper. Then I used Maguires polishing compound to bring up the gloss. As far as recoat time, there should be a data sheet available for each type of paint. The recoat times are based on weather conditions. Typically, your can lay down a coat, then another in about 5 to 10 minutes. I allow about 15 minutes between 2nd and 3rd coat. I wait at least 16 hours before sanding and polishing.
-
1 pointI would try the rust eater of your choice to see if it will free up and move. If it frees up you can pull the shaft out a little (up position I think) and take a little emery cloth to it and see what it looks like without taking it apart. If there's not a lot of pitting it should be ok.
-
1 point
-
1 pointTheroundhousemr _ I bet you could get about three Lawn Rangers and or a couple and an RJ if you did trade in your 520 H ! Rob: If you want videos ( Some in HD too) I have about 50 on YouTube of some of these things moving snow etc. https://www.youtube.com/user/LaneRanger
-
1 pointWhen I ordered paint from my PPG jobber, I specified Wheel Horse red. That is a stock color. The PPG number is 72034. That's all you need. That code can be mixed in their OMNI or Shop-Line series. As stated before, I used a 1.4 tip for both primer and top coat. Here is my Commando painted with single-stage acrylic urethane.
-
1 pointCheck the wiring to and from your ammeter. Problems there wll cause a "no start or run" situation.
-
1 pointDoes a leaf cart count?
-
1 pointHoss - HDPE (High Density Polyethylene plastic), or your basic material that is used to fabricate cutting boards.... Someone else had showed, in a thread, how to make your skids last longer.... Use your skids as a template on some HDPE, cut out the HDPE, and bolt onto the bottom of your skids. Makes them last twice as long as normal, maybe even longer. I used an old cutting board, and got 6 templates, out of the board. 3 for the right skid and 3 for the left skid. I have (2) templetes left for each skid to start my season out..... One of the best ideas I have seen to help the longevity of your skids...... Rob
-
1 pointIs there a tractor ramp on the grounds. I am planning on being there Friday, just not sure I will be bringing a ride?
-
1 pointCool nights and leaves turning. Started me thinking. I wanted the weights out of the shed and Elvis needed something to do, so I made a place in the garage to store them and moved them while the gettin's good!
-
1 pointGENO...don't stop posting...you are doing fine and I for one have been enjoying your contribution. Just so you know...there is an ignore function here on Red Square...I use it on a couple of guys and it works great.
-
1 pointAlso, I use PPG Shop-Line single-stage acrylic enamel or urethane as my top coat. No clear coat needed. The primer that I use is Kustom Shop DTM epoxy. http://www.tcpglobal.com/KUS-KEP505-QT_2.html?sc=115&category=2396227#.VACGjNKwI3g












This leaderboard is set to New York/GMT-04:00