
Leaderboard

Popular Content
Showing content with the highest reputation on 04/25/2014 in Posts
-
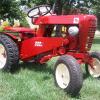
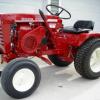
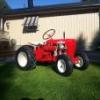
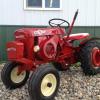
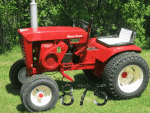
8 pointsYou all may remember previous posts a few years ago about the rebuild of this particular 1955 Pond RJ-35 by RedSquare member fireman, aka Jeff. I purchased this RJ-35 from fireman about three months ago on February 1st. Jeff had done an absolutely fabulous job of making this tractor mechanically sound including new rear hubs and a complete engine rebuild by Charlie Pitcher. Since I bought it, I have repainted the rear wheels black, painted the rear tires with Miller black tire paint, and touched up some of the red areas Anyway, I still need to paint the front wheels silver which would be correct for a 1955 Pond RJ-35 and touch up some more red areas. This tractor is really nice and I mean really. The engine starts on the first pull and purrs like a kitten. Very proud to be the new owner of this one. I am so looking forward to bringing this guy with me to the big show in Arendtsville, PA this year.
-
3 pointsJust received a slot to sleeve adapter for my Brinly plow.
-
3 pointsSo I recently picked up a 314-A that was in need of a serious cleaning and also a little rust fix. The worse spot was at the base of the hood where it attaches to the hood hinge. It was completely rusted through and the hood finally fell off after I opened it a few times. Below are some pictures of what it looked like when I took it off the hinge. My plan is to cut it back a bit to get away from the rusted areas then weld in a new plate with a little reinforcement to fix the hood. Below are some pictures of replacement laser cut plates I had made for this fix. I made some measurements and drew up the plates in cad and kept fitting till I liked it then sent it out to get laser cut. I added an extra plate like what was in the hood for more support. I had two 1/4" holes cut so I could bolt the plates together for welding and once I am done with the welding I will remove the bolts and they will function as drain holes to prevent water build up from rusting it out again. hope to get to trimming the hood and tack welding it up this weekend and see how it fits
-
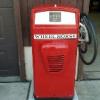
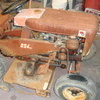
3 pointsJust Finish up my Wheel Horse pump. I like the patina look but this will do. Sent from my LG-D800 using Tapatalk
-
3 pointsCultivators are a tool designed to hook up to the tractor so that you may spend even more time on your Wheel Horse. Seriously, cultivators were considered absolutely indispensable in farming until the advent of chemical herbicides such as 2-4-D, Round-Up, etc., during the 1950's. The drill began for the farmer every spring with plowing, then disking, then planting. Depending on the crop and weather, Mr. Farmer would cultivate at least two times before harvest. The tines or shovels on the cultivator were designed to be adjusted to the row width of a specific crop, such that when it was pulled down the rows, the tines/shovels would glide between the rows, cutting the weeds off at the root. Some designs also permitted the shovels to throw dirt either toward the crop row, or away. Again, dependant on what type of crop you were growing. In the past 15 years or so, cultivators have made a resurgence in popularity, mostly because of the increase in demand of organically grown foods. I remember back when I was a kid, my Dad would hook up the cultivators to the old Farmall H, and drag them around the fields. He called it "worrying the weeds". Although a properly set up and operated cultivator did a pretty good job, you could never get all the weeds. Still, for a garden plot, a set on the back of your Wheel Horse will spare you a lot of hoeing.
-
3 pointsUpdate - I'm a big ole dummy.... I went out and pulled the tarp off my poor horsey. I was about to push it down to the barn and shoot it. Then I noticed something hanging down. My blankety-blank belt came off. The cheapest fix I've ever had. Still embarrassing to think of all the time I dreaded going out to look at it. Go ahead, laugh! I did.
-
3 pointsI plow, disc, then cultivate. Plow to turn it over. Disc to beak the dirt up. Cultivate to break it up even more and level it out. I plant my garden so that I have 30-36" between rows so that I can fit my tractor down them. I usually cultivate the rows to keep the weeds down. I have 3 minions, errrr kids that HAND PICK the weeds from around the individual plants. Unfortunately my oldest and best helper will be going away to college in the fall. I already told the other 2 that they have to pick up the slack!
-
2 pointsA friend asked me about doing a custom tractor for his daughter. She came up with the idea of a fish tank tractor and this may be a custom that hasn't been done to a Wheel Horse before. It started out as a beat up Lawn Ranger but now has a C hood to completely cover the tank. Runs with a starter generator motor to keep down vibration. You can kind of see the horizontal tube inside the tank which a strong LED light shines through. Mirrors on both ends really reflect the light and it's even visible in the daylight. Air bubbles use a 110v pump powered using a small inverter. Clutch pedal will loosen the belt like normal operation and when pushed all the way, it will shut off the motor. Didn't get any pics of the top of the tank but it's rigged so the water will not splash out but also allows access to the inside. I don't know how long it will drive using the large capacity deep cycle battery but I'm sure she'll find out tonight after they get home. They plan to have it at the Zagray show in CT next weekend, complete with the tank decorated and live fish. Here's a couple pics of the Wheel Horse Sea-01 and the new owner.
-
2 pointsThat's what I keep explaining to Mrs Funengineer. Sent from my tractor seat using Tapatalk 2
-
2 pointsOh yeah! Hood turned out awesome!!! Sent from my iPhone using Tapatalk another shiny shot for you Craig......
-
2 pointsAlong with the cultivator I picked up Tuesday, I also picked up a C-160 Auto roller...decent seat (with arm rests ) and decent all the way around. He also had 2 A-100's that I needed to buy if I wanted the cultivator....kind of package deal. If anyone needs any parts off either of the A-100's, let me know....send me a PM...if not, those two, with the exception of a few parts will be going to the scrapper... I also picked up a really nice 1999 314-8....800 hrs....42" SD deck. It runs like a top!!! I'll get picks later...still trying to recover from getting back to my house at 3:30AM
-
2 pointsIf kids kept my weeds down I can guarantee you one thing, they weren't my kids.
-
2 pointswhat about one for every 4' x 6' space in the garage?.........
-
2 pointsI welded a long bolt on top of the larger HF tire changer...2.small disc blades (same size to fit inside 8" rim) put one blade on bottom, then tire and rim, then another blade on top...run nut down on bolt to hold rim in place.....and you are ready to work on the tire...works for me..poor guys have poor ways!!!
-
1 pointA few threads ago in the Implements and Attachments forum 'Sybesma07' posed a question about dating a 10 cu. ft dump cart / trailer. Despite the low res photo from an ad I guess, I recognized it as looking remarkably the same as one that I’m restoring at present, the thread is here: It also made me think of the research I’d done into dating carts like this which I thought I ought to complete and share so here it is. The information was pieced together from the Toro Lookup site, the Wheel Horse Interchange document, and cart manuals from the RS repository. If you have any corrections to make or have photographs to offer then please do chip in. --------------- In 1976 the range of WH trailers available was expanded from just the 5 cu ft dump cart and four wheel wagon to include 10 and 18 cu ft dump cart models. The 1976/7 10 cu ft model (10DC01) is distinguishable by the fact that it had a tubular draw bar. It had the red / white WH decals (large on the sides and small on the rear panel) and I strongly suspect the loading decal (21) was also red / white. -------------- Literature for the 1978-80 models (also designated 10DC01) shows that the tubular draw bar had been upgraded to a C section rail. Despite a new decal design having been introduced for the 1978 range of tractors like the C-121, the diagram shows that the red & white WH decals were retained certainly for a time. I suspect that this was a way of using up old stock. The example that I’m restoring has a large WH decal on the tail panel rather than small but does have the newer style black loading warning sticker. --------------- The 1980 – 85 model was designated 10DC02 and incorporated a further change of design in that the draw bar spacer (12) in the previous diagram which bolted to the tub bed was redesigned and now bolted to the front panel of the tub (see below) This diagram shows the new C-121 style decals for the sides. The fact that no decal is shown for the rear panel is probably an omission from the diagram as it is shown on the 18 cu ft model. The catch has also been redesigned to suit the new spacer bracket. ---------------- Attachments and accessories lists for 1986 model tractors indicate that WH dropped trailers from its range completely at this point as manufacturing of them at South Bend had ceased. I suspect that pricewise they could no longer compete with third party manufacturers. Although trailers are not listed on the Toro site for specific tractors from 1986 the Interchange document shows that during 1985 WH started buying in trailers from Ohio Steel (who continue to make attachments under contract for well known names today). Trailers listed from 1985 onwards included the following dump carts: a 4 cu. ft., two 7 cu. ft. (one with a sloping back), a 10 cu. ft, a 17 cu. ft. and an 18 cu. ft. I guess that this represented the Ohio Steel range at that time. These were given simple product codes like WH4 (4 cu. ft. cart) and these codes are not recognized by the Toro site. There were no four wheeled wagons. Out of interest, 1985 also saw WH start to buy in various other attachments e.g. sweepers from the Lambert Corporation and the 10†Moldboard Plow from Ohio Steel. It is possible that there was some kind of collaboration between WH and Ohio Steel in terms of carts prior to 1985, I say this based on the fact that the Ohio 7 cu. ft. with sloping back (designated WH7-1 in the WH range) has a pretty much identical trip lever to my 1978 WH 10 cu ft cart. Looking at this photo posted in another thread by 'varosd' it also seems likely that the first Ohio Steel 10 cu. ft. carts made for WH would have been welded rather than bolt together construction, perhaps the tooling was transferred. --------------- So where do the 10 cu. ft. WH carts that look like the Agrifab bolt together models fit into the story I hear you ask. Well, a search of the Toro website for ‘carts’ brings up some models for which no years are given and no diagrams are available. A complete list can be found in the Interchange publication where they are listed as: 79900 4 cu. ft. Cart, 79901 10 cu. ft. cart, 79902 14 cu. ft. cart, 79903 17 cu. ft cart These are also listed by Toro as being manufactured by Ohio Steel so I think one can guess who still makes the 10 cu ft carts for Agrifab. Trawling through the compatible tractor models listed in the Interchange document it would appear that Toro WH did not introduce matching tractor models to specific outsourced products (like the Ohio Steel carts) in all of their documentation until 1993. . 1990s WH 10 cu. ft. cart by Ohio Steel - photo from a post elsewhere by 'AMC rules' There are marked similarities between this tub design and other generic carts were badged up for a number of well known names; examples I’ve come across include ‘Lambert’ and ‘Husqvarna’ though there are other differences. Could this just be the evolution of the cart by Ohio Steel or are these carts by another manufacturer? Knursen has suggested to me perhaps by Lambert. Does anyone have a Toro / WH badged trailer exactly like the one above? Out of interest the Toro Lookup site’s list of the later ‘bought in’ carts includes a 10 cu ft ‘poly dump cart’ – has anyone seen one of these? Anyway, hope all of this may help others date one of these carts. I don’t imagine there are many good examples of the 1976 – 1985 South Bend produced examples around anymore, certainly here in the UK most that have come up for sale in the last couple of years (only a handful at that) have been the later Ohio Steel type. Sorry for not including much about other sizes of carts in this potted history but this took long enough - perhaps some other time when I'm feeling inspired. To conclude for now a couple of pics of the 14 cu. ft. cart made for WH by Ohio Steel and posted elsewhere by 'wh5208speed' Andy (obsessed, or possessed perhaps, by carts at the moment)
-
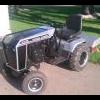
1 pointAnyone know much about these? Value? This has a Briggs 14r6 engine. Sent from my tractor seat using Tapatalk 2
-
1 pointI just bought this 'Horse last Saturday. It's a Raider 12 and a 7-1252 tiller. The tractor starts and runs, but needs at least a set of rings (lots of blow-by and smoke). All the gears work, and the rear end is nice and quiet. Came with a 42" deck and what are supposedly pretty new blades. The tiller has all the needed parts (belt, mid-mount idlers, axle-mounted hitch, and helper spring) except for the idler spring, which I ordered today from a local Toro dealer for $6 and change. I gave $100 for the tractor and $75 for the tiller. I don't know anything about WH serial numbers, so I could use your help in dating the tractor. The plate says: 1 6241 611970 Thanks for looking!
-
1 pointThe 414 is still outfitted for Winter duty and a quick look at some parts of the lawn today showed that it REALLY needed a mowing. Thankfully the 416 was just waiting for the chance to come out of the shed. While it's quick to change over attachments, it's even faster having more than one! So guys, if you only have one, you need to start looking!
-
1 pointHey All.. well i have been doing a littel work on my trailer.. it was White like this And i wanted it to be red.. so ill started to tear of the old paint like this And got it primed But i hate that it didnt dump high enugh so the load get of it.. so i started to mowe it forward on the axel.. like this Then i have to built a new frame to it that is longer then the old one.. and built me one like this and i forgot to take pict of the new frame.. but i have painted it ones like this to get the color on it And i took of the plane and painted it under.. and i have now put on the final coat whit paint..And i think it went out good.. The only thing im missing to built is the dump tower on it.. Pict will come later Thanks Lars
-
1 pointI'm ready...got my lawn chair, camera and the home made wine...life is good. Really looking forward to the start of the show season...be nice to see you guys again.
-
1 pointIn addition, you may have it overfull, or the breathers may need servicing. An to avoid a flame war, walmart does sell some good oil. And their supertech line is very acceptable. However the brand of "non detergent" SAE 30 oil is very poor. It is not thermally stable at all, and will leave a ton of deposits on the bottom of the piston and in the ring lands of the piston, clogging the oil return capabilities.
-
1 pointSeriously clever, very nice job!
-
1 pointHi Mark, thanks for the suggestion. I have seen the turning brakes setup and one of those pedals would be ideal though I have not seen them around for sale. I would imagine them to not be cheap if they can be found but I have not looked into it. Fabricating a pedal will be fairly easy for me to do. The linkage to the forward/reverse control is very simple for this tractor so it is just a matter of the pedal and a mount and I would like to keep it as off the shelf as possible so that I can post what I did so that others can copy it for their own tractors. If I can name specific parts and where they can be purchased rather than people having to cut, bend and weld it will be a change accessible to a larger number of people. I could put together a conversion kit like the Darling kit for the non-Sundstrand transmissions but I would probably not be able to meet his quality and free time is such a short commodity these days to take on projects like that. I am more than happy to share what design I come up with though that others can replicate.
-
1 pointJust a thought on lubes for the tranny. Many of these old cast iron transmissions go for years, if not decades with oil that has never been changed. Almost all of the ones that I have found have some amount of water in them. So my theory is, ANY new lube, whether 75W or 140W, cheap or expensive, has to be better than the crap that came out when you drained it. I use the cheap stuff from Walmart and it works just fine.
-
1 pointI have a gas boy gas pump & have always been interested in doing something like that with it thanks for sharing it with us !
-
1 pointFrank, really like your idea.
-
1 pointThats real cool . i like it alot. i want one
-
1 pointUse Lucas heavy duty oil stabilizer 1/4 to 1/2 of what ever the amount the engine holds and fill the rest with a good 30wt oil and you will be amazed by how much less oil will be used and by how much better the engine will sound I have a c-85 that I filled halfway with Lucas and rest with 30wt made huge difference
-
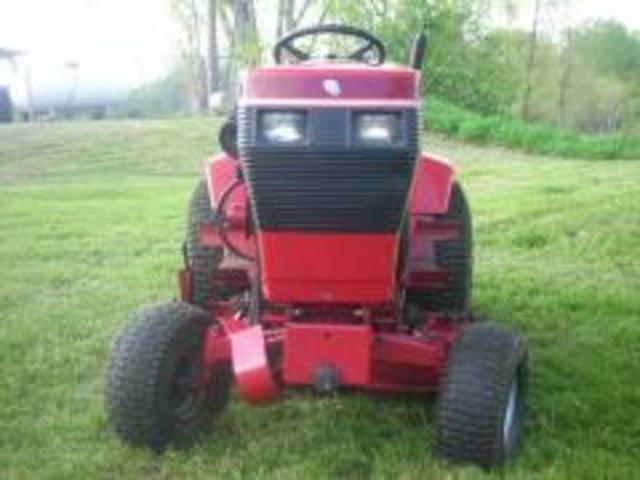
1 pointEarly production 953s have the smaller headlights, the later ones have the larger ones.
-
1 pointHad a big project to do. This was all an overgrown yard that hadn't been tended to in 10 years. My brother in law is flipping the house and needed me to till the yard to restart the lawn.
-
1 pointHere are some pictures of where we left off..... We also received a very nice surprise last week as Hoffman's Outdoor Power Equipment in Etna Green, IN donated a C-120 for the kids to work on next year. All I can say is WOW! We are truly blessed. We are hoping to acquire another machine next year so we can really get some things done. Here it is in storage at the school. So as of right now we are putting together a C-120 and a C-121. This has been a blast!
-
1 pointSorry everyone for no update last night. We have been very busy in trying to get caught up. We are waaaaay behind schedule and have to make up some ground quickly on this thing or we won't meet our deadline. I was the only adult at club last night so I was hopping back and forth between the two tractors trying to keep all of the kids busy. By the time club was done I remembered I forgot to take some photos of our progress. I apologize for that. At the end of club last night we tried to tidy up the barn a bit as the local newspaper, school officials, friends, and family will all be attending next week to honor the kids for the hard work they have put in this year. We wanted the barn to look presentable as the kids are excited about having an opportunity to be in the paper. I will definitely get pictures next week and share them with you. Should be a very memorable experience. In the meantime I will try and get out to the barn and take some photos for you. Thanks for following along!
-
1 pointAnother option is to fill it with inexpensive gear lube, none of it is cheap anymore and then add some butyl cellusolve and run it for half an houf to get the moisture In suspension in the oil before you drain and refill for use, then replace the shifter boot. butyl celusolve is one of the ingredients in oil based paint and should be available from a real paint supplier, not your local hardware or big box store, you may have to sign a hazmat shipping form to get it.
-
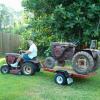
1 pointLoading the trailer today. Can't wait to escape the northern Michigan cold. Staying in a heated cabin at Broken Arrow Campground in Winamac See you there.
-
1 pointYep, you will need to fill with kero or diesel but do limit the amount of driving. If possible just jack it up and run it a bit without a load on the wheels. Just use a cheap gear lube, almost any will work from 75w-90 up to 75-140, and even the 80w-xx and 80w-xxx. My beleif is to use a less expensive gear lube and change more often than to go with syntetic. Also the shafter boot should be replaced.
-
1 pointRunning it around with some diesel fuel or kerosene is fine. As Garry said, when you drain it again, try to lift the front end while it drains to get all the oil out. Refill with the proper gear oil and you should be good.
-
1 pointMy new C-175 came home with me this past fall. Was out aerating today, appears he was pretty happy to be doin' it too.
-
1 pointtilled he garden yesterday. Still a little wet yet, kind of clumpy. I guess the rumors of a blizzard were just a rumor. Thank god. Going to till again this week, then I can get planting.
-
1 pointworked on the hood. stripped the paint in our strip tank at work. then spent nearly 4 hours removing all the dents. after quite a bit of dent removal, lots of small ones all over, couple in the front right on the edge of the front and side were a bear to smooth out. also had one in the ribbed part of the front which i made up a flat bit of steel with a slightly curved edge to use as a mandrel to get out. smoothed all the worked metal with a 60 grit pad on a small angle die grinder. then 120 and 220 on a da sander..... then it was off to the blast cabinet to blend all the sanding. just a scotchbrite and should be good to go......
-
1 pointThanks for the nice words guys. We are definitely having a lot of fun with this project. It is hard to believe everything that has been done and accomplished this year. What a great FIRST year for the club. My 603 has now been put on hold and it doesn't look like I need to even bother with having the kids mess with that as we have enough things to do to keep everyone busy. It is now a race to the finish line as we only have 7 more club meetings left!!!!!! Now I am getting a little concerned. It looks as though a Saturday morning work day will be in our near future. We don't have a choice......we have to be done with at least the club tractor. I think I can, I think I can, I think I can............we are the little club that could! Stay tuned as the wrenches will be flying in this mad dash to the end. Thanks again for following along!
-
1 pointMade this mount for my harbor freight mini tire changer. I hope its as easy to change tires as it looks in the videos.
-
1 pointwe tilled and set up the garden fencing this weekend, we were going to do some planting but have some heavy rain in the forecast. we'll most likely plant this coming saturday. the garlic is 5 inches tall though, woo hoo for november planting. lol
-
1 pointWe got the old girl out of the shop for a little exercise, seemed to run well. The fuel sending unit will have to be replaced, an air filter fabricated and the goofy square lights replaced. Other than that it's done.
-
1 point7 is far better than vista. Might be cheaper to replace it, than upgrade at this point. I would not try to load 8 on an XP machine. Your XP machine will not suddenly die, it just means that Microsoft will no longer support it, meaning security patches and such will not be available.
-
1 pointI learned a trick from the local atv shop when mounting tires that come in like that. Cut yourself 3 pieces of 2x4 a little bit longer than the rim is wide. Put them in the tire to hold the bead apart and set the tire in the sun til it regains its shape.
-
1 pointThanks All for nice feed back.. Have painted the traile innside to day using only black.. The reason i do that is because it is easy to fix on later.. But the plan is to add on alu plates on the innside. But im not sure yet..
-
1 pointLooks good lars Jake
-
1 pointI like it painted RED! I have a trailer that I pull behind my motorcycle, and it has the same type of swivel hitch.
-
1 pointVery nice!! I like that swivel hitch idea!! Where did you get it? I have been looking for something like that.
-
1 pointLooks awesome Lars...great ideas. :bow-blue:











This leaderboard is set to New York/GMT-04:00