
Leaderboard


Popular Content
Showing content with the highest reputation on 04/04/2014 in Posts
-
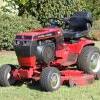
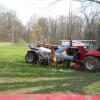
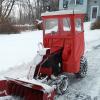
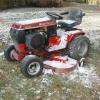
4 pointsI used a 48" side discharge mower deck on my 520H all last winter and it didn't miss a beat. I do have a 60" deck but the ground I cut is a bit rough - grass as opposed to lawn, and the 48 is a bit easier on the tractor. I am currently cutting around five acres which takes roughly four hours and two tanks of fuel. The mower didn't miss a beat but I was expecting the belt to break towards the end as it had lots of chunks out of the rubber. I managed to wrap up some fence wire a couple of times, mowing areas I hadn't been before but no major issues. The RH deck spindle has developed about half an inch of vertical play, but no wobble. I realised that I would need to do some work before next season, which is suddenly nearly here. The grass here greens up in autumn and grows strongly over the winter period before dying off in late spring. It normally doesn't require mowing from November until May, unless we get summer rains. This is the deck I used last year; I had four of the 48" SDD's and dismantled three of them for rebuilding. I picked up another 520 last week and so now have five 48 decks, in addition to the 60 and a 42" RDD as well as a new 42" SDD. I want to refurbish one of each for my WH collection as well as setting up two for use. That way if I have problems during mowing season I can just swap decks and keep on going. As another home project I want to make up some raised garden beds for growing vegetables in the back yard. I came up with a design and made some corner brackets to bolt sleepers together. When the brackets were done I decided to galvanise them so they will outlast me. This was just after Christmas and I was thinking I needed to get on with the mower deck. When I built my trailer a few years ago I had the rims, tailgate hinges and catches, and a bar inside the tailgate for the loading ramps to hook into all galvanised. They are not showing any wear after more than ten years. So far with my tractor rebuilds (416H and 520H in progress) I have had everything powder coated. I want durability rather than originality with the working mowers and thought why not get the parts for the decks hot dipped at the same time as my other garden brackets. They turned out great! I hadn't done anything with the deck shell and wasn't sure of the best way to treat it. I want something durable but low maintenance, so was leaning towards sandblasting followed by a couple of coats of POR15. However, when I got the galvanised brackets back I started thinking, I wonder if the shell could also be galvanised? Initially I was hesitant for fear of warping the shell, but when I was scraping the worst of the crud out from underneath the steel was thicker than I expected. I decided to take it to the sandblaster and call in to the galvanisers on the way and ask them if they thought it would handle the tank okay. The chap I spoke to assured me it would be fine so I decided to give it a try. The reason I was hesitant is that I made up some sump covers at work many years ago and when they came back from being galvanised they were all bent up like bananas. At the time I was told it was due to stresses locked up in the steel from welding. Anyhow, I thought it would be worth trying. I also took in the rear height adjuster bar, and a pair of 12" rims. The back rims on the mowing tractor seem to cop a lot of the grunge. Picked it all up yesterday and 100% success! You beauty. This one is going to outlast me. Bearing in mind that these decks are all over twenty years old, with a bit of care they will last for many more years. and the rims;
-
2 pointsHello, I've been looking over the fence for quite a while so I'll thought I'd stop skulking around and join. I own a 72 Bronco 14 that has been rode hard and put away wet to many times. The funny thing is, if still runs great. I'm looking forward to receiving good advice, I have a lot of question!
-
2 pointsWhat we are dealing with is trying to get is Efficient Heat Transfer as Ed and Kyle mentioned Dirt and Blocked Fins grass clippings or whatever is the NO #1 thing that causes heat build up. You can do all the Lover cutting fabrication or whatever you want and that stuff is miniscule and secondary if you cant get the air across these metal parts. After your engine is clean Yes by all means vent the Belt Guard with a louver. I have delt with Heat Transfer for 36 Years now as an HVAC contractor And the main thing we stress is Equipment being Clean whether it being a Condenser Coil, Evaporator Coil, A Blower, Or heat exchanger. Any part that comes in contact with heat that needs to be transferred away internally or externally needs to be clean these same principals apply to our engines. All the Engine tins that direct airflow over the heads need to be secure and in place along with the Gasket around the oil filter. ~Duke
-
2 pointsThis "Grass Printer" is an artistic lawnmower, it can vary the height of the small blades while mowing and follow a computers directions, just like a 3D printer. http://www.gadgetreview.com/2014/03/the-grass-printer-is-an-artistic-robotic-lawnmower.html
-
2 pointsAnd she is a runner, smokes a tad, but then ago so do I
-
2 pointsI'm gonna do what they say can't be done... I've got a long way to go, and a short time to get there... I'm east bound, just watch my run.
-
2 pointsHere is a pic from my rear view a couple months ago, but its not a . Its been a fun project anyway. Its a Case 444. Matt
-
1 pointHey- my parents had Wheel Horse since I can remember. The last one was a B-80 I believe. I loved that thing. I would help out by mowing the lawn after my dad passed, but I really enjoyed burning the tires and driving fast. Then I discovered popping wheelies was easier without the mower deck on. It was alot of fun, and I took care of it. I now have a 314-8 with the bagger and plow. It was mint when I got it a few years ago. My mother bought it new and did not get much use out of it, and eventually gave it to me- very generous. I found out how to fix my shifter on here a while back, which was greatly appreciated with all of the snow, but an electric lift would be a nice improvement. I saw a hydro somewhat close to me for sale a while back, but it was too nice for my bank account. I never understood why they stopped making these- was it really just too costly to make a quaility machine? Did Toro have high hopes? Oh well, its nice to belong to a forum of helpful, knowledgeable people. Sorry, no pics. Matt
-
1 pointI'll tell you how it happened....I was in my shed tonight, a guy who bought a tractor of mine a couple years ago brought it over so I could tune it up and give it the once over....I started counting my tractors....and I was a bit shocked to realize how my heard has ballooned!!!!!!! As some of you know, I worked on a 69 Roadrunner all winter a year ago, and now I'm finishing my basement. Well, I haven't had time to sell many horses, but have kept collecting. My herd has quietly (depending on who you ask ) grown to 23. Hopefully this summer I can thin it out to a bit more manageable number like 15 or so....we'll see. Never been addicted to anything like this in my entire life....other than my wife!!!!!
-
1 pointAerated yesterday with my IH Cub Cadet, tonight broke out the 314-8 and over seeded and fertilized. My Wife/Boss like it because it makes for a lush green yard, I like it because it makes for more seat time... I bought the Scott's spreader for a few bucks at a yard sale a few years ago, but it works like a champ! Gear drive is nice for consistent spreading of grass seed and fertilizer.
-
1 pointSo, Today was a nice day, So i figured I would take some time to fool with the 's As of today I own a 1988 211-5, a 1986 310-8, and my newest addition, a 1982 C-105. I love all three tractors, they all have their own special things about them. I hope you enjoy the video and pics I have! Thank you all! -Tom (Click these pictures to make them bigger)
-
1 pointHello My name is Shuboxlover ... and I have an addiction & need all your help
-
1 pointYea, no grass visible here either, just snow. My sump pump has just started running quite often so the frost must be breaking under the snow however. It's raining hard here now but supposed to clear up and be sunny and warm this weekend (+10C or +50F) so that should knock the snow down. Adding to the fleet this weekend, more on that later. Cleat
-
1 pointThanks guys. The Mrs came home. I am still alive. Lol. She said to me was this planned? I said no. It just happened. Like when we met hon. She left the garage. I was safe. And in case you guys where wondering what was going on with the 854...ta daaa. Just need to keep working on it. Glenn
-
1 pointReal nice looking tractor! Good find bro!
-
1 pointNot high tech, but my vented belt guard really throws some heat. I plan to box it into the cab next winter. This is what I found under the tin on my 1988 520H.
-
1 pointBy happenstance I found and bought a 1980 c-125 complete with a OEM hydraulic loader bucket (07-40FL01). I was driving thru a neighborhood and saw it in a yard. The owner (old timer) was outside so I stopped to talk to him about it and ending up buying it. I have fooled around with craftsman tractors, my favorite being an old gt6000 with a Kohler 18hp engine. You couldn't give me a new EPA ruined tractor if you wanted to. This is my first wheel horse and would appreciate any opinions, criticisms or advice regarding this tractor. Is it a diamond in the rough? Or did my $900 go to waste? It is completely functional and well maintained. It has sat outside for a long time so the Arizona sun did a number on the paint. I can't seem to shift it into low range though. Is it an easy fix? Any input from anyone out there is appreciated.
-
1 pointHey Don, thanks for the photo. I love that mod and I have been trying to contact Jay to see if he has any of those guards or if I sent him mine , would he get me fixed up? No luck in getting a response. Is this something he has shyed away from? Thanks Kyle
-
1 pointFrom what I gather. These engines run hot from grass clippings and gunk built up in the coolings fins and flywheel screen of these engines. This is first and foremost and will lead to quick failure , more then likely, a valve seat. If this is all kept clean , you should be ok with average use. However , things do block the airflow across the rear cylinder , like oil filter , belt guard and lack of oil filter gasket where air makes its way past instead of through the cooling fins. Things have been done to help remedy these areas from easy to more involved - Order a new oil filter/shroud gasket - drill holes or louver the belt guard around rear cylinder area - relocate oil filter All these mods are focused around the rear cylinder because this is where most problems turn up. I found when cleaing my newly purchase 520h engine shrouds , most all grass clipping where found in the rear cylinder. I beleive this is due to the air blockage of the above mentioned areas and causes a dead air space where grass settles. Also didnt help that I had an oil leak and was acting as an adhesive for the grass to cling to. Kyle
-
1 pointHere is a mod done by Jay in NC. It works great on my 520 and would like to do one for the 416. some folks have just taken a bimetal hole saw and gone to town!
-
1 pointHave a 520xi and it's a beast and nothing less. I use the cruise when clearing the alley of snow. Love the two speed rearend. Works awesome for pulling trailers and pushing snow. Mine will be one that hangs out for awhile. Easy on and off. Don't really think they missed alot when they put these tractors together. I do agree a three point would be nice. So other than that, what are you waiting for?
-
1 pointThats a very nice tractor!
-
1 pointHere it is as a photo. Looks great! Welcome to the forum. Justin
-
1 pointi did have the 416 family out while there was some spring cleaning going on last weekend.....
-
1 pointEast bound and down, Loaded up and Truckin!! I'm going to record that song on my phone and play it on my road trips!
-
1 pointSorry U Buck...but if it was sitting in my horse barn I'd probably pay YOU just to get rid of it!!!...then you would have TWO good deals from me.
-
1 pointGlad to see you got the booth finished Martin. While it may have you exhausted right now, I'm sure it will prove to be a great asset to both your employer, and yourself, not to mention your horses in the future. Good job. Matt
-
1 pointTook this the other day!
-
1 pointJust starting to green up here, can't wait to get back out there too.
-
1 pointI haven't seen green grass in over 6 months.
-
1 pointExcellent tractor, congrats. I noticed you were looking earlier. Glad you found one in that cond.
-
1 pointNice find Glenn. Looks like it's right off the showroom floor!
-
1 pointTop of the line. Close to new. Great addition. When you get a chance to run it around let us know what you think.
-
1 pointcongrats on the nice tractor
-
1 pointWelcome and I second Van's motion for pics!
-
1 pointI always knew it was a bigger machine, but i NEVER had any idea it was that big! Thanks for the info! Thats awesome!
-
1 pointDuke, any chance you can move the spokes on the front hub to allow for a wider tire?
-
1 pointThanks guys! I'm just hoping everybody enjoys looking at my stuff as much as I enjoy looking at everyone else's stuff!
-
1 pointOriginal owner. 221 hrs. Glenn
-
1 pointI have gotten that call more than once - and I just tell them I don't have a computer, but I have several windows in my house.
-
1 pointStarted in welding on the worse rim so I fired up MR.TIG and first started with the holes that were seen in the rims. Next were the large craters caused by the chloride (that's stuff should be outlawed) after that I went after all the small craters. Before I finished I used 5 sticks of filler rod. I ran the tig torch slowly over all the bad areas and a couple burn through's occurred so I filled them. I feel confident that I have enough material and have brought the rim thickness back up where it should be. I then spread in some Lab Metal time will tell how this product performs so far I like what I see. Here are some pics. ~Duke
-
1 pointI was tilling a customers vegi garden, and the guy told me, his dad had a big garden, and he and his brother, would take the Troybilt Horse tiller, like mine, and he would set it going in a crop row, and his brother, 100+ feet away, would wait for it, then turn it around in the next row, and send it back!
-
1 pointShorts. Yeah I remember you telling me about them. Thanks for the Reminder and Well yes I just called them told them what I need and they Reffered me to ME MILLER TIRE. I cant find a Major American Tire Company that Makes a 4X12 Tri Rib Front and a 8X16 Ag Tire Rear! and I dont want to put Shing Lee Flooey or Shlimp Flied LICE on my ride! ~Duke
-
1 pointCecil Pond could learn from Martin, Imho. I dont know the words to really describe that work. Its so over the top. Dont take offense Pond people. Glenn
-
1 pointHere is my 1966 Case 190 with Johnson loader. I am waiting for Spring to tune-up and use this tractor.
-
1 pointmore progress.... clutch, brake pedals and linkages on and got the brake band lining stuck in the brake band....... heres how i did the brake band....... brake band ready to have lining glued on. it was previously blasted and yellow zinc plated. lining purchased through mcmaster carr, http://www.mcmaster.com/#6175k813/=r94hwf the lining needs to have two holes put in one end to clearance the rivet heads in the band... hole positions marked. the lining was easy enough to drill with a drill bit so thats how i made the holes. i picked a drill size just slightly larger than the heads of the rivets. holes look positioned ok around rivet heads..... then i needed to cut the lining to length, i marked the side of the band where the old lining ended and then marked the new lining the same. squared of mark and cut to length. the lining cut easy with a large sharp pair of scissors.... i used the brake drum as a mandrel to clamp the lining tight to the band. i smeared black silicone on the lining and using a battery clamp bolt and spacer, drew the band together tight around the drum. the band and lining needed a couple bar clamps as well to keep pressure all the way around. i will leave it for a good 24 hours and see how it worked out. i haven't done one of these before but heard others on here use silicone to glue the lining. i guess i will find out how well it sticks.....
-
1 pointMan a cultivator set, a mid grader and a tiller! Looks like the holy grail!
-
1 pointRed paint in spray cans can cover all types of sins!
-
1 pointUpdate your profile already!
-
1 pointI have found the best for freeing rusted parts is e-tanks. For. Something like a steering wheel alot of times I will make a temporary use tank. I have even used a cardboard box with a trash bag. Few hours of bubbling and the parts are freed up, no damage!!


This leaderboard is set to New York/GMT-04:00