Leaderboard
-
in Posts
- All areas
- Markers
- Marker Comments
- Marker Reviews
- Articles
- Article Comments
- Article Reviews
- Classfieds
- Classified Comments
- Classified Reviews
- Wiki's
- Wiki Comments
- Wiki Reviews
- Blog Entries
- Blog Comments
- Images
- Image Comments
- Image Reviews
- Albums
- Album Comments
- Album Reviews
- Files
- File Comments
- File Reviews
- Posts
-
Custom Date
-
All time
November 28 2011 - August 25 2025
-
Year
August 25 2024 - August 25 2025
-
Month
July 25 2025 - August 25 2025
-
Week
August 18 2025 - August 25 2025
-
Today
August 25 2025
-
Custom Date
02/22/2014 - 02/22/2014
-
All time
Popular Content
Showing content with the highest reputation on 02/22/2014 in Posts
-
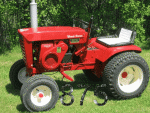
6 pointsTime for another SUPPORT MEMBER raffle. The following 15 inch neon clock will be raffled off and all you have to do is go to the raffle area and grab a free ticket. Drawing to be held March 15th but don't wait too long as there can be an instant popup mystery prize drawn at any time till this raffle ends. NOTICE! We will not ship these clocks out of country so if one of our international wheel Horse brothers should win they will rec a $75 store credit at redoyourhorse.com Which can be used when purchasing any decals I have listed. I can ship decals first class international. If the winner is in the US they can choose this option if they so desire. Basically you could trade for whats behind door # 2. the winner of the clock can contact me and let me know how they want there clock to look. A picture of your favorite tractor or what ever you want. well almost what ever you want. The raffle opens as soon as Coach gets it going. Thank you all again for your support of the forum. I am just using my good friend Martins C-125 as an example of what you might want on your clock. The clock will actually have hands on it when it comes. Varosd will vouch for that. Yes Don you can actually win again but it is not likely. And Bob don't worry I am bringing one for the big show raffle so you are sure to win that one.
-
5 pointsI just saw this ad. Love these old ads, almost like a Pond ... Mighty Mite Ad.pdf 1.19MB And also this video, "Crazy things people do at work" (5 min) . . . http://biertijd.com/mediaplayer/?itemid=44930
-
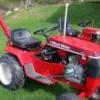
5 pointsSomething a little different. Still need to add some pieces, brackets, etc. figured id take a picture of her current state. and hope for fire in the hole next weekend. The Almond looks whiteish in this light but it is Almond.
-
5 points• I put colored electrical tape on every-other size socket; like Green for 1/2", orange for 3/8", blue for 5/8", and the in-between sizes I can guess when they are all lying there in order. The tape does get nicked up and needs to be replaced every few years. • Stopped at a print shop and got a damaged box of big paper, 23x35"; always keep a 2-3" pile of it on the work bench and I work on that, it's whitish, can write notes on it, it's coated but reasonably soft and absorbs spills. When messed up, just discard it and have a clean new area to work on. • Mounted a small $10 fan near the ceiling, blowing down on my work bench, warm air down in the Winter, a breeze in the Summer and dries & moves fumes away, turn on-off by plugging in-out the plug, low speed, just noticeable, not fast.. • Mounted several of those 2' magnetic strips, on the wall in front to hold tools temporarily while I'm working, rather than leaving them on the bench and in my way, then they're put away when I'm all done. Also use a bunch of those magnetic trays to hold screws & small parts while working. • Got a adjustable pull-out 30" work-light mounted on the wall behind the workbench, with a bright 100w bulb, great for angling to look horizontal into something. • Put some electrical outlets just under and in front of the workbench, keeps the cords of my tools off the workbench & out-of-the-way, can leave them plugged in and just under the bench for quick access anytime. (Got 4 cheap $10 small 4x4" sanders, one for each grit that I most use). • We use the large heavy-duty Wastebasket on wheels, and put a 3/4" board on it with a triangle hole (dust pan just fits in it, to dump), the board is the same height as my workbench and the whole thing is very mobile and still a handy wastebasket 'right there" (board lifts off to empty). RL] • And then, my Hoist. Securely bolted on 24' of square Barn Door square Track into the ceiling joists, hung a '$79 Harbor Freight' electric hoist on a bar with the barn door wheel hangers, and for electricity, used a ceiling mount re-coil cord (just cut the light off). It can lift 750# easily, for engine onto bench, tractor up, or hanging anything heavy.
-
5 pointsDoes that threadlocker release with heat, or do you need to use EXLAX ? I can't help myself.
-
4 pointsTerry, if everyone bows out, I may stand a chance. I was at a union meeting one night, and they used to raffle off things. They had 50 prizes and 51 members present...and you could only win once...guess who went home with nothing. I'm in...Thanks Mate. I was thinking of changing my name, but "rmaynard" is already taken. BTW...so is "Buckrancher".
-
4 pointsprotect your work from scatching by making these vice jaw protectors , normally made from Aluminum but these are made from sheet Lead which is much softer than Aluminum & are much easier to make & are much softer than Ali
-
4 pointsGood info! I like the white paint for the sockets idea, my sight is going down hill fast. My garage tip is to keep it stinking of PB Blaster and gasoline plus very messy, that way the wife won't go in there!
-
3 pointsI wired an old 120V. thermostat up to a light bulb in one of the cabinets under my bench. When it gets real cold the light keeps things stored in the cabinet from freezing.
-
3 points
-
3 points
-
2 pointsThis is what I use I insert the valve in the block like this I spin the valve while slowly grinding material away You can take off too much very fast if your not careful
-
2 pointsfor all those complaining about no updates, heres one........ got the wiring harness all sorted this morning. it had the typical problems for these models, burnt terminals in molex connectors and the 30 amp fuse terminals were also burnt into the plastic fuse block. so purchased a new fuse block (del city part #73895 $4.14ea) and i used a few molex connectors from the kit i purchased earlier on for 416#1. i went through one area at a time, pulling and cleaning all the terminals or replacing if they were corroded or burnt. the ignition switch plug was also changed out for a good one as it wasn't holding the terminals correctly. all the wiring and plugs that were reused were given a good scrub to get them looking better...... heres a typical problem with the fuse blocks, too much electrical heat causes the terminals to burn or melt into the holder. I've had fuses welded to the terminals as well. new fuse block i used just about all the standard harness, cutting off the terminals that were bad and crimping new ones on. here the old fuse terminals have been removed and replaced with new, pushed home into fuse block. the factory fuse holder has the same bridged terminals as the replacement. the 30 and 25 amp fuses are both fed by a bridged terminal with one wire from the starter. i thought it would be better to run two independent wires from the starter to each fused circuit rather than run all through the one. the 1995 416-8 harness only runs one wire oem, but i noticed that my 1991 416H has two wires....so they did do it at one stage. i just think that running all the current for these 2 circuits through one wire is why this area has a problem in the first place.... this is the two wire fuse bridged terminals, the single wire bridged terminal fell apart from corrosion and being burnt. these are the replacement ones, they come in a strip of 4 but i already cut them for this application. since i changed my mind and went with single terminals, these weren't needed anymore. the strip also makes it impossible to crimp with the tool i have so the two wire single method worked better for me. since i wanted to run two wires to feed two circuits here i needed to use a circuit through the engine harness connector.... there are two spare so that is no problem. i picked the one that the engine harness side of the plug has the white wire that runs to the starter. this wire isn't needed on this model, so i will leave this one out and replace with a red power wire. the empty position is in the middle. this is the tractor side of the harness and not the engine side..... the engine side has a white wire from this center position. so this plug was swapped out, terminals cleaned or replaced and the red wire added..... this is the white wire at the starter end of the engine harness..... typical reason why checking these terminals can avoid future problems..... harness getting there. made up the pto safety switch assembly, two new switches and replated bracket with new fasteners..... harness taking shape on hood stand. also started to clean up the engine ready to go back together. also got some more parts painted.....
-
2 points
-
2 pointsAlso Get some large heat-shrink tube & put it over your ratchet handle . Keeps your hands comfy & buffers those over-tightening mishaps better than Nerf Wrenches .
-
2 pointsClick and Clack were the best!! I listen to them every day on XM. I love the endings "The head of our overworked mother dept. is Erasmus B. Dragon and our seat cushion tester is Fitz M'Tush"
-
2 points
-
2 pointsI recently picked up a B & S service and parts book from a fellow that used to work on small engines. Although most of the information only goes back to the middle 80's I did find somthing I found very interestion. A B & S service bulletin #367 and dated 5/10/60 explains that the factory has received several engines that had premature failure. The engines had been on snow plows and the engines had been run with the choke mostly closed resulting in fouling of the spark plug. The spark plugs were removed and cleaned in a spark plug "blaster" with abrasive material. The plugs were then cleaned with compressed air, re-gapped, installed and used. The engine failure was from small particles of the abrasive material still on the spark plugs and ending up scoring the cylinder walls and the crankpin journal. B & S repair shops were instructed to NOT use the abrasive blasters and to clean the plugs with solvent only. I was thinking, just throw the plug away and replace it...duhhhh In 1965 a gallon of gas cost $0.31 so a spark plug was probably $0.50 or less, but the income was only $7500 so that is why people cleaned and re-used their spark plugs! Man I must be bored to be reading a repair manual for NOTHING I even own!
-
2 pointsMight start a new fashion trend here. The perfect match for Steveasaurus' bandana
-
2 pointsJust wondered if the KT17 Engine details can be dated to '80'. May give an idea that it was fitted at the Factory. Jeff, Belgium Built numbering has no standard system. Here is a link to an example Thread about them- There are many more if you search for the word Belgium in the Euro Horse Forum. The differences in Model Specification and Numbers started in 1969 and went on right to the end. Like Andy (wheeledhorseman) , I was lucky, my 2 are/were correct to US Tractor Spec and Model Numbers. .......I would call it a C175 anyway. At least you know why it is not correct, so it makes the Tractor Unique until another is found the same.
-
2 pointsFirst of all, since most of you are in the US. I just want to wish you all condolences on your olympic gold medal hopes for men's hockey I don't know why the best hockey players come from Canada... maybe its the 8 or 9 months of winter! Go Canada Go! That being said, we will take Kessel and Vanreimsdyk back after the tournament to play for the Leafs. Okay, back to the C160. Last night I managed to have a fairly good night and everything worked well. First cleaned out the lift cylinder and all of the hyd lines THe rest is kind of a blurr. My youngest son - 15 years old came out to help me get the transaxle mounted and the hydrostat mounted back on that. Everything went back together really smooth and we were working so well together that I entirely forgot to take step by step pictures. The only other one I have is this one: and the other side: This is back on all 4! It performed amazingly! No leaks, Lots of power and speed in forward and reverse and no strange noises! We did get the weather that they were predicting last night including a Thunder snow storm so I didn't get a chance to run it hard for any length of time so that will be the job for this weekend. I plan to put a plow on it and give it a work out either tomorrow or Sunday and I will let you all know how it goes when it warms up. I'll also try to post a video of it working when I get there. So, thanks to everyone who contributed to this post and gave me advice along the way, This was probably the most complicated project I have ever done and I am very gratefull for all of the help. Oh and by the way, this is my first auto tractor and I like it!
-
1 point:thanks: 57" blade that I picked up from a RS member that was nice enough to bring it to Kellys Charlotte show was the start of this idea. I wanted to make my favorite worker, my 95 417A, a v blade. Last winter the 48" blade didn't slow it down at all and worked like a charm! My 48" dozer blade is way too nice to cut up, so I looked on CL and came up with a 57" dozer blade for a buck fifty. Then my favorite tool of destruction came out and cut it in half The Saw Zaw The the tape measure and some figures started to run through my head and the two half's came back together with a hinge between them. The blade is know 58 1/2" wide know. I also made the mount for this blade for the A frame and the ware bars, but I forgot my camera last week as I was very busy with the Spook Train thing I do every year driving my 1/3 scale mini around at Junction Vally Railroad. Any how I used a BOSS v blade as a model for this project, and alot of your ?'s will be answered with the next pic's I will take on Sat. More to come...........
-
1 pointI found a new in the box 520H anniversary model. What should I offer to pay? Are implements that fit (snow blade snow blower) hard to find because of the swept front axle? The fact that this tractor has been sitting so long going to have issues such as bad seals, fuel pump diaphragm failure rusty internal parts such as engine cyclinders and bad oil?
-
1 pointI was prohibited to start a new topic in the " FAQ & Tips " area so i thought I'd start it here & let a mod move it as it progresses . I thought it would be neat to share some helpful things we've learned over the years to make our life in the garage / shop easier : After I hit 45 , my up-close vision is starting to fade & stumbled on this little trick to make the sizes easier to read on my sockets . Take some white paint & smear it over the stampings , then wipe off . Some paint will stay in the depression & helps you to see the size . These flavor injection syringes are available for around 4 bucks in the kitchen utensil aisle at Wal-Mart . They come with a hose that screws on the end too . I use this from priming my hydraulic brake systems to adding / removing virtually any liquid from nearly anything . Most of us know the double wrench trick but for those who don't : When theres not enough room for a socket & and a breaker-bar . two combination wrenches can be intertwined when one needs that little bit of extra leverage : Lastly ( & I'll shoot up more as I think of them ) the foil trick can save your garage floor when draining a seemingly inaccessible diff or tranny plug . Just take a piece of tin-foil & form a trough around a broom handle or something & place under the drain plug . Sooo...c'mon boys -n- girls , if you have any tricks to share , post 'em up !
-
1 pointFound a nice little RJ 58. It was still owned by the original owners family. So I guess I'm the second owner? It has not been used for 20years but stored in an old wooden barn high and dry away from pickers till I come along. I do believe the only thing missing is the serial # tag. Shields are all accounted for. I did get the mower deck and snow plow with it. Just thought I'd share, so excited to have another one.
-
1 pointIn what forum would it be best to upload a short tutorial on how I repaired an OEM K-301 Nelson muffler. It came apart at a great spot to show how they are assembled, and how they operate. Please bear with me, as a "tutorial" has never, ever escaped from this PC. But I have gotten so much knowledge from other's, here at RedSquare, I feel its time to try my hand at it. Pictures always help, which I have. Wow, what a winter this has been so far.
-
1 pointThanks Terry ....Guess I'm all ready hooked . Had it running this afternoon while spraying fuel in the carb. Gas was running out of the bottom of the carb., but she wouldn't draw fuel in on her own. Next step ...carb redo. But I ran out of time and had to run for another B-Ball game....BTW, the boys won all 3 games today.
-
1 pointmaybe at idle its borderline too low oil pressure and the light is working fine,maybe the filter you used doesn't flow quite as good as the oem,and the light is sensing this?
-
1 pointGlenn, its all trick photography, smoke and mirrors. you should see how it looks without all the photoshopping and special effects....... and if i miss any bad spots, Terry comes through with some great decals strategically placed to cover them up......
-
1 pointDidn't have a lot of time today but did get the bucket built. Just need to weld the inside and make new attachment plates to mount it to the loader.
-
1 pointI installed a 4 X 4 electrical box with 2 duplex outlets on the front of my workbench. I used a 12 gauge cord about 10' long with a plug to energize the 2 duplexes. I can plug multiple tools into the box without worring about overload, as I don't/can't use more than 1 (electrical) tool at a time. The main reason I made it this way is because when I build the bench, I wasn't positive it would be setting in the same place all the time. This gives me some mobility with the bench.
-
1 point
-
1 point
-
1 pointI am really looking forward to seeing this tractor at the big show in June , seeing the tractor will be one of the highlights of my visit to the US , so june cant round come round quick enough, I also hope top see some more of Bobs artwork . John , Owning a tractor that someone has created for you must be a real heart warming feeling, but also a difficult one too , in so much as , How do you ever part with something that has been created for you . ? for me it would be an easy answer , i would never part with it as it would be tooo special .
-
1 pointabsolutely awesome, bob is a articulating god i'm amased by how he builds these beasts, gotta have some real fab and imagination skills, top job to say at least. Koen
-
1 pointNice find Van , i wouldnt mind that lot for one of my horses.
-
1 pointI told you Matt! A Home Run! I knew everyone on RS would want to see this plow! You have something very rare and I am glad you are going to take care of this one! Like TT 's information -it appears to be a transition plow setup between the SPR-42 and the later Suburban plow set up. RJ Plow - SPR-42 Suburban Plow - HD-42
-
1 pointI didn't say this was a WH plow, only I had a RJ with the same mount on the tractor, I did not have the blade, only the mount, but it was the same as this one, I thought mine was home made but now seeing a second just like it I will say it is a factory item.
-
1 pointThose holes are for the rope that you would angle the blade with from the seat.
-
1 pointFinally got a motor for it. It is still not a k90 but probably as close as I can find. Its a k91 with the 3/4" exaust. I will put a 90 serial tag on it. Does anyone know if if would matter if I change the head? I want it to look right, but don't want it to not run right lol. This will get a complete rebuild probably in the summer when I have some money to put into it. Thanks, Jake
-
1 pointWhen changing any fluid that my run down my arm I take an old sock and tie it around my wrist. It keeps fluid from running past my wrist down to my elbow!
-
1 pointMy 99 was a major pita when it came time to get parts. It seems gm was using up their supply of old body style parts to build them I think there was a choice of six different size ball joint sizes , I had to change the trans but only Trans from 98.5-99 would work, silly stuff like that
-
1 pointBrendan-just my 2 cents- but take it slow-I agree try the coil- but hold off pulling the head-put a little "Sea Foam" in the tank-warm it up-then richen up your high speed screw- try it, drive around a little and give the Sea Foam a chance to work. Then-if no cigar- Pull the head off-Good Luck-Al
-
1 pointJeff, I think your tractor is complete off the line as is...the hood and the engine do not match (what is in the states), but I have a feeling that is the way your horse left the line. You could change one or the other to make it match what we have in the states, but you are not going to change that serial number...it is what it is and that is OK. You have a 1980 C-165 auto with a KT17 engine ser # 01-16KS-91...Mark is right...may not ever be able to make up a list of what happened over there...just so you know...some of that happened over here also. The lists are kind of correct, but it has some variants. Personally, I would not change a thing. If a list does start to get made, the serial numbers of the tractors could help to put this into context. BTW...your English is a ton better then my Luxembourgish.
-
1 pointI buy most of my WH/Toro stuff from a local old time WH dealer, he knows me, even send business my way, he cuts me a deal on most items, but yes the prices have went up over the last few years. As for the tensioner I know a guy that made his own from hard wood took him about 20 min. that was after he bought the new plastic one, then returned it, he did pay a 10% restock fee.
-
1 point
-
1 pointWell some of you might know how difficult it is in finding the Gt14 muffler, vitually impossible right. I got lucky and have come across two NOS GT14 mufflers in my time. Sold one and kept the other. There were a few other NOS parts that I threw at this bad boy. A fuel tank that had never seen fuel, electric clutch, a two piece seat w/ arm rests, headlight lense with the chrome horse, I won a fuel valve on ebay from across the pond. I saved big bucks on that they go for around $40 bucks plus shipping and handling so you end up right around $50, got it for $20 plus $7 shipping. So all in all pretty happy camper. It will be painted within the next month depending on weather. Decals have arrived so theres not a whole lot left to do. I've got a really nice steering wheel to pick up and other than that, I can't wait to be cruisin in style or at least in the GT14 style.
-
1 point
-
1 point
-
1 point


