Leaderboard
-
in Posts
- All areas
- Markers
- Marker Comments
- Marker Reviews
- Articles
- Article Comments
- Article Reviews
- Classfieds
- Classified Comments
- Classified Reviews
- Wiki's
- Wiki Comments
- Wiki Reviews
- Blog Entries
- Blog Comments
- Images
- Image Comments
- Image Reviews
- Albums
- Album Comments
- Album Reviews
- Files
- File Comments
- File Reviews
- Posts
-
Custom Date
-
All time
November 28 2011 - November 26 2025
-
Year
November 26 2024 - November 26 2025
-
Month
October 26 2025 - November 26 2025
-
Week
November 19 2025 - November 26 2025
-
Today
November 26 2025
-
Custom Date
10/29/2013 - 10/29/2013
-
All time
Popular Content
Showing content with the highest reputation on 10/29/2013 in Posts
-
7 pointsI've been using vinegar to clean rust from the inside of gas tanks and it works very well. Since the vinegar was just sitting in a bowl after recently doing a tank, I decided to throw in a rusted pulley which shows the results much better than trying to get a pic of the inside of a tank. These 2 pulleys looked just about identical before soaking one. I let it soak for 2 days and wiped it off with a cloth. Using baking soda afterwards will neutralize the vinegar's acid. There are quite a few other posts on the subject, just type "vinegar" in the search feature.
-
5 points
-
4 points
-
4 points
-
4 points
-
3 pointsFigured I would throw this one out there for consideration. untitled.bmp
-
3 pointshttp://www.youtube.com/watch?v=Roz22ku5OuY http://www.youtube.com/watch?v=pu48aGgLkzw
-
3 points
-
3 points
-
3 points
-
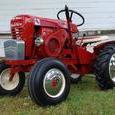
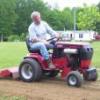
2 pointsThis is my new to me and my first Wheel Horse. Its a little dirty I had to mow the grass with it even though the grass was wet. I couldn't resist. I also have a tiller for it.
-
2 points
-
2 points
-
2 pointsForgot where I heard or read about it but I remember it as cider vinegar working the best but any type will probably do. I do like the rusty stuff Steve, just not inside my gas tanks. Or on pulleys LOL For cleaning out gas tanks it helps to add a handful of screws or two, depending on the size. I use sheet rock screws because they have sharp edges. Shake and swirl them around every once in a while to scrape the rust off too.
-
2 pointsAlso when draining the trans, lift the front of the tractor as high as you can. There is a boss around the middle bolt that traps oil in the front part of the transmission. Raising the front of the tractor will empty a lot of that oil into the section with the drain plug. This is a hydro, but the pic shows the boss that acts as a dam to the front part of the case draining.
-
1 pointMorning all, I hope I am putting this in the right section here... Although it's to do with a Wheel Horse's, it's not a Wheel Horse build.. So why have I been so quiet? Well, the build itself hasn't been too taxing.. But the filming and editing has. With so much footage to sort out I knew that if I didn't edit every evening I would never get it done... So has the time spent been worth it?? I think so.. Hard work but very enjoyable Let me know what you think Guys 'n' Girls, because your views and opinions will help me decide in which direction to take my videos in the future...
-
1 pointHello all, Does anybody know if there is any of these left, I'm over here in the UK, how do I go about getting one, there is somone selling them on ebay it says they have 5 available, however it says item doesn't ship to the United Kingdom, I have sent them a message.. And on the Wheelhorsestory.com when I add it to the shopping cart, I can't pay as it won't let me select country as UK, only USA, I really want one of theses if there is any left, so the question is, how? Many thanks
-
1 pointsince i got it running good last night, i really wanted to run it for a little bit tonight. i even thought about a video around the neighborhood for the other thread going on here at the moment. that will need to wait as it was getting dark, but heres two videos....... running at idle....... full throttle........
-
1 pointThanks so much for the veteran edition lawn ranger decals terry! My Dad surprised me with them tonight, I was so happy. He told me we are going to restore my tractor in the spring because we can't have new decals on an old rusty tractor. I plan on keeping this tractor forever so we must do this! Thank you again!
-
1 pointI wasn't going to post this idea because I felt it was kinda hijacking a cool thread but I can't resist now that it's been running a while. As Fordiesel69 mentioned, there is a 18hp K361. It's the same bore and stroke as the K341 but apparently the OHV and maybe carb tweaks gave it more horsepower. Even at my over ripe old age I keep learning. But it would require more clearance like the Tecky on bowtiebutler956's. Now, wouldn't it be cool to put a K361 on the star tractor here? A C180? I'll bet most folks here know where they could get the decals made.
-
1 point
-
1 pointFor those bearings Jake? Remember..no naughty, all nice. Xmas is just around the corner.
-
1 pointSteve, I've been looking forward to retiring and I think you may have just found the cure for my narcolepsy.
-
1 pointOk it was almost like gall bladder surgery (which ain't pretty sometimes -at least in my case it was not) but I finally got the Wheel Horse 42 inch snowplow/dozer blade pivot pin to work properly again. The pin has a cotter key in it about one inch from the outside end of the pivot pin. In the old snowplow/dozer blades (like the BD-4264 I have) the plow pivot pin is exposed and open so you can easily change the compression spring and/or cotter key that holds it in place. The pivot pin when moved by the plow handle ( or foot pedal in the case of the BD-6261,62, 63 and 64 plows) moves the snowplow right to left to center position. Here is s good picture of that set up on the BD-4264 plow : A snowplow I bought which sat outside several years at the previous owner's place had a problem. The pivot pin did not return into position and I had to determine if the spring and/or the cotter pin holding the spring were rusted away. I finally figured out the compression spring was still good and the cotter key had largely rusted on each end of the pivot pin. However the pivot pin would not come out of the frame and all I could work with was two holes on each side of the front end of the Snowplow/Dozer blade frame. I had to move the pivot pin back and forth quite a few times to wear down the remains of the cotter key to get it out of the holes the pivot pin rests in in the frame. The compression spring stayed in place without the pivot pin inserted in the frame. There are small indentations for the spring to rest in place. Here are photos of the pivot pin removed from the plow frame with cotter key remains in pin, cotter key remains removed, new cotter key inserted in pivot pin cotter key hole -one inch from the end , etc. To install new cotter pin it has to be inserted in the cotter pin hole at the end of the pivot pin through the hole in the frame of the Wheel Horse Snowplow/Dozer Blade with the compression spring held back (to the wider end of the Snowplow/dozer frame). You only have two approximately 1 1/8 inch holes on top and bottom of the snowplow frame to work in. You need good light to see , something to hold the spring out of the way of the cotter pin hole and a way to insert the cotter pin in the hole. Also the cotter key also has to be opened up the other end to keep the compression spring in place which holds the pivot pin in place on the frame. I used a high intensity flashlight, a screwdriver and a pair of needle nosed pliers to do this. Here are some photos of that operation: Now I have never seen another pivot pin have this problem before and hopefully it does not happen to many folks but I think it explains why greasing a plow should be done to keep the pivot pin, compression spring and cotter key that holds the spring in good working condition. Water and rust are the enemies of this type of equipment but not using proper maintenance like greasing can also lead to repairs.
-
1 point
-
1 pointDon't forget to change your clocks sunday!!! Welcome to share this on your facebook to remind every one you like Wheel Horses and to change the time, LOL
-
1 pointThat sounds good now Martin. You are making some serious progress here. Bravo!!!
-
1 point
-
1 pointMy plow tractor, the wife wanted it blue because the C160 is red so now we have a red and a blue horse
-
1 point
-
1 pointwell i got impatient waiting for the sea foam to do its job and tore into the carb tonight. i read a few posts on here about just cleaning the carb on the engine and thought id see if that would help. heres one such post…. I've been inside nikki carbs used on performer engines before so i knew what i was going to see when i pulled the top off. the main running problem was at idle and mid range. well it had no idle at all so that was where i started looking. besides a whole bunch of junk in the bowl (which the sea foam wouldn't have got out in 1000 hours of running) the removable slow idle jet was blocked in the bottom 3 holes with junk. heres a pic of that brass jet and where it goes…... then i blasted carb cleaner in all the passages and bowl, cleaning as much as possible. removed the mixture screw and cleaned through as well. removed the main jet plug and jacked up the back of the tractor to allow all the junk to flow out into a rag and container to stop making a mess all over the engine. re assembled the carb and primed it with gas ( using the mouth blow on the gas tank opening……. ) and she fired up and now runs nice and smooth…... thanks didn't run it with the air cleaner and breather was a little noisy at idle………. take a look at the video…...
-
1 point520H with 44" two stage blower if it get's real bad a kubota L3400 with bucket loader Brian
-
1 pointYes thanks Craig........ No problems at all, slept right through it. Didn't even get to use the Chainsaw. Other people and areas in the South of the country didn't. Unfortunately about 4 deaths caused by fallen Trees and a lot of damage and disruption.
-
1 pointI'll use a 74 B-100 Automatic, with a 37" snowthrower. Also I'm going to use a 75 B-80 4spd. with a 42" blade as a backup.
-
1 pointAsk and you shall receive. These are the pics from the listing online. I will post more once I get it.
-
1 point
-
1 pointOnce again, thanks for all the great responses, and that a great looking C-120 you have there ekennell. I got the stack built for it today, although its not done yet. The muffler is only tack welded to the 1" pipe, and the hose clamp won't be staying on there. I will get an exhaust clamp for it, and when its finished, it will get a coat of silver header paint. I also posted a video of it running. As you can probably here, it needs the valves adjusted, and as soon as I find the clearance specs for it, I will adjust them. I love the way this exhaust sounds! I'm really am enjoying working on this beast, and can't wait to start buffing the paint to see if I can make shine! Thanks Matt Here is the Youtube link http://www.youtube.com/watch?v=S78kXv0Elg0&feature=youtu.be
-
1 pointI just got home, and I am whipped! That's a lot of driving for one day. I took a couple pics when I was at a gas station, and thought I'd post them. In the pics the owner sent me it looked like seat was a little tor up, but that was not the case. The stuff around the bottom of the seat that made it look bad was actually the original clear plastic that came on the seat when new. This seat is beautiful! Anyway, here are the pics. Matt
-
1 point
-
1 pointwell I don't really have a wheel horse tractor, but I do have a couple of these Ponds!
-
1 point
-
1 pointI was just thinking it's calendar time. I will be checking on the cost of professionally printed wall calendars for those that are interested again this year. I sent out close to 40 calendars last year. I will make the cut off day for ordering a week after Justin's file is out so those lucky enough to be included in the calendar can get one if they wish. Look for a separate thread about calendar ordering! THANK-YOU JUSTIN FOR ALL YOUR HARD WORK!!!! Here are me "entries" 1964 704 with sweeper "Marvin" 1981 C-145 Custom 76 C160 73 12 8 spd
-
1 pointUp for humble consideration is my 1973 18 Auto. Completely redone by me in 2012. Pic show winter and summer. I reworked a 60 inch deck from a 520 to make the ultimate big mowing machine. Hopefully 1 pic will be considered good enough. Thank you very much for your consideration.
-
1 pointA fun tractor for consideration... here's my dual agged, early '58, #1188.
-
1 pointLike what was said above, I have found that "SEA FOAM" mixed in with the gas, works as a great stabilizer. Leave the tank full and run out the carb after shutting off the gas pet cock. I am in northern Illinois, so I run them until the end of November and get them going again in March, so they are only sitting about 3 months. Two of the four horses I have are used during the winter months...that is the best thing to do. Use them...I have found that they love the snow...if you do not get snow...run them around the block and take some videos.
-
1 pointAnother "classic" video from a great talent. Your fab skills continue to amaze us along with your creative knack for finding a solution to a problem. All that, along with the perfectly placed chuckle are what makes me watch your videos, but when you went upside down and dropped out of frame I found myself fighting to keep from spitting my drink out all over the screen. You are an exceptional talent on so many levels and an inspiration to us all. Love the projects and videos Ian, thanks.
-
1 pointGreat production Ian , very enjoyable & entertaining . Great soundtrack . As for the acting i think you deserve an
-
1 pointHad my arm twisted by a couple of you guys so here's my D-200 in the UK Just finished it in time for the first wheel horse round up over here back in 2012. This is the task that it spent most of its time on this summer - getting rid of weeds in the grazing. To save picking up the 'What deck's that?' question - I modified a NOS 500 series deck I managed to find over here. The tractor was a bit of a wreck (understatement) when I got it and certainly would have been parted out on your side of the pond but they're rare here in the UK so I had to work with what I could get. Many thanks to all the guys (you know who you are) who helped in so many ways during the resto process. Andy
-
1 pointThere are some really fine tractors here. I thought I'd add to the fun. Here are my pics:
-
1 pointThanks for the input Slammer and Ken! I think I am going to go ahead and do a preservation instead of a restoration as there are just so many benefits to doing it this way (some mentioned above), plus, I do like the original look...Be sure to keep checking back for updates on my preservation! By the way, nice tractor there Slammer!


.JPG.9f2ecb26065c66527b0730084ab7fc7a.thumb.jpg.7dc8a04d9a53d44ee2b23f26ee94496f.jpg)


