
Leaderboard


Popular Content
Showing content with the highest reputation on 07/30/2012 in Posts
-
2 points
-
2 points
-
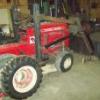
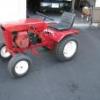
2 pointsOne more from Smokin'Joe.
-
1 pointClick Link Below To Go To Dukes Show Pictures Page (2) SUNDAY JULY 29th BEFORE SHOW We arrived Sat at 2:00 pm and thought we would do some camping early. Well as it turned out they were haveing a 4H Horse Riding Contest where we all usually camp. Well where there is Horses there are road apples, and where there are road apples there are flies (I think you get the picture) Anyways yesterday there had to be a Zillion at our campsite So Luckily I brought some potenet spray I got from Orkin and Dave the campsite host fogged the whole campground for us (I wonder if MJ's Baked Goods had anything to do with that?) Anyways we shouldnt have any problem with skeeters between both of our spraying like last year. And the weather..... Well it has been just fantastic and looks like it will be all week. Im looking forward to you all getting here and if any want to come early Im sure I can fire up the Ole Grill and break out a Qt of apple juice. Here are some pics, brought my RJ-58 and 702 this year. All of you drive safe, and see you here. ~Duke MONDAY JULY 30th BEFORE SHOW Well I waited all day for you guys and finally cooked dinner we waited and waited and none of you showed up so we dug in and well the rest is history! After dinner I cut up some fire wood. Here is a before and after shot of the Pic Nic table. Later a Horse of a different color showed up He was looking kinda Jealous! ~Duke BEFORE AFTER WEND'S AUG 1st PICS BEFORE SHOW Well had Martin his lovely wife Jeanine and his son Kent over for dinner tonight earlier I had cooked some of Duke's Special Grilled Baked Beans with plenty of sweet onions and bacon along with brats that were a big Hit. Later by the campfire we were up till 1:30 a.m. time flies so fast when yer havin fun with great friends and sippin apple juice! Tomorrow is Dukes BBQ Chicken, Spicey Grilled Potatoe Wedges, and Grilled Corn. and of course some apple juice Cheers ~Duke THURSDAY AUG 2nd PICS BEFORE SHOW Here are some pics from thursday tractors and around the Camp Sites. ~Duke The Duke got busy on the grill again and made some BBQ Chicken and grilled tater wedges along with grilled corn we all sat down and had a might fine meal with Jeanine's Martins Wife Braccoli Salad And Jo's Brian's Wife Vegtable salad no one went away hungry. later that evening here are some pics around the campfire. ~Duke Saturday AUG 4th Show Pic's Click Link Below To Go To Duke Show Pictures Page (2)
-
1 pointRecently Terry in in MO had asked about what snow plows fit what. I took some pics & some measurements & hopefully help those who don't know along. Also sorry about the bad pic quality & the rusty plow frames. In this first pic you see the 3 common sizes of snow plow frames. (1) on the left being a "short frame" (2) in the center being an early "long/large frame" (3) on the right is a current style "long frame" Plow (1) measures 56" from the mounting pin to the pivot bolt at the top. Plow(2) is 61" from the mounting pin to the pivot bolt. And plow (3) is 64" from the mounting pin to the pivot bolt. Since all these plows use the same angle for the blade they all measure the same from the pivot bolt forward. Now if the long frame (3) looks funny...it is ...It's actually a copy made by New Vac MFG. but has the same dimensions as the Wheel Horse brand plows minus the angle lever on the side. Also the newer style "long frame" snow plows have 2 holes at the end of the frame allowing you to move the mounting pin in order to fit a long or short frame tractor. Plow frames (1) & (2) use an older style mount that bolts up on the forward facing side of the uni drive transaxle. The mounting pin area on (1) & (2) measure 15" across & the mount grabs it from the out side of the frame. This same type of mount will work on the newer long frames to if the mounting pin is long enough. Plow frame (3) uses a newer mount that measure's 11 1/2" across. It hangs off the bottom of the uni drive transaxle & grabs the plow frame mounting pin from the inside of the frame. The newer style rear axle mount also will not work well with plow frames (1) & (2) The one at the front of the picture would be the newer style. The one at the back of picture is the old style mount & is used on short, long & large frame tractors The "large frames" are the 953,1054,1054A, A GT14. The C195, D series & the 520 with the forward swept axle do not fit in the above descriptions.
-
1 pointWondering. Has anybody tried sandblasting and painting wheels with the tires on them? I am thinking the big thing would be painting without getting paint on the tires. Marv
-
1 point
-
1 pointOK...do that thing with the volume again.
-
1 pointThank you all for your input. Since the 26 X 12 X 12 are quite expensive I think I will go with leaving them mounted. Marv
-
1 pointR.I.P. http://youtu.be/mEV4Tov1GBM
-
1 pointhttp://youtu.be/-XyTpENuoCI
-
1 pointHow about this one. None of my friends had heard of her. The guys in canada might have cause thats where shes from http://youtu.be/aUCzDuQcBM4
-
1 pointhttp://www.youtube.com/watch?v=Mzy_BEzlHWI
-
1 pointhttp://www.youtube.com/watch?v=sMKzTJeXQ7o
-
1 point
-
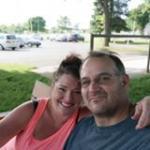
1 pointJust a couple of average Joe's...
-
1 pointThat's exactly what I'm doing. Blast them, then I completely mask the rubber off with masking tape and newspaper. Since my tires are from '68, I didn't even want to risk damaging them by taking them off the rims.
-
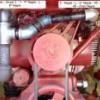
1 pointHad a busy day today, first thing this morning we had to load up for a parade we took 4 tractors, had a great time. When I got home from the parade, I set everything up to paint, and I think I got everything sprayed, the weather was nice to paint, but the bugs were out, so I have a few critters in the paint, but it is a worker tractor so they can stay, I'm still getting the hang of using this paint, it runs easy, and is hard to get smooth with out heavy orange peel, but I think I have it, lots of thin coats, with out waiting much between coats so it melts in but is not to heavy, I did run the hood in two spots trying to get it to flow out, they with the bugs will be staying, adds character to it, then right after cleaning the gun, putting stuff away a BIG fly does the back stroke on the fender right over the side where all will see it, not in the middle where the seat will cover it, I pulled him out but I still have one or two legs left, and a nice spot where it spun in a circle it did flow out some but what do you expect for painting outside in the driveway. Another thing I don't like about oil base paints is the mess, I was red from head to toe, had to wash my arms in lacquer thinner, I did think to put Nitrile gloves on so my hands stayed clean. I need to spray the sulky in the morning, more red all over everything, but I think I will be done spraying all the red after that. Fender not looking to bad, right before a sqaudron of bugs hit it. Parts hanging, these got no bugs Hood and more parts got the top of the hood pretty smooth, with the thin coat trick one of the bugs, right after this pic is when the BIG fly landed almost the same spot
-
1 pointhttp://youtu.be/Wa7Q1zl0A1I had to include this one
-
1 pointTry this one... http://youtu.be/dscfeQOMuGw
-
1 pointhttp://youtu.be/R2yb4zR2cYM did this work???
-
1 pointhttp://www.youtube.com/watch?v=iLddJ1WceHQ
-
1 pointI go for the keeping them on the rim Idea. Let the air out and tuck something under the rim. Playing cards were mentioned by a member on here. I like that idea. I really don't have the cash for what some of you guys do nor the skill. My tractors work just as good though..... I don't mean anything by that comment. I only mean that if the tractor is rusty, dusted off and rattle canned, or fully restored it is all good.....I admire everyone's Wheel Horse!!
-
1 pointhttp://www.youtube.com/watch?v=d1j9SR2S6H8
-
1 pointThese are from Smokin'Joe...
-
1 point
-
1 pointMy philosophy is a little different. If you don't take them off, you paint them, they look great, then you get a flat tire or a slow leak, you will end of having to take them off anyway. Also, if you don't get all the rust that is under the rim where it meets the bead, it will eventually work it's way into your nice fresh paint, and you will have to paint all over again. So if you take them off carefully in the beginning, sandblast the rims, paint or powder coat and get a nice tight seal at the bead, you will be ahead of the game. I have had tires that have been on a rim since 1970 come off easy, and some come off not so easy. But in all cases I was glad that I took the extra effort to do it right.
-
1 pointI've done wheels this way because of the same reason - I was fairly sure I'd destroy the tires while taking them off the rims. Several years later I did dismount them, and yes I did damage the beads doing so.
-
1 pointBob, I was thinking about this because the tires have been on the rims since 1977 and I thought they might be "seized" to the rims and damage the beads. Marv
-
1 pointVasoline will repel the paint an hose off later, just don't get it on the rims.
-
1 pointThat's why were here Kelly...great minds think alike.
-
1 pointhttp://www.youtube.com/watch?v=rnUfQy0FGMg
-
1 point
-
1 point
-
1 pointSteve.....This is my favorite Neil Young song
-
1 pointheres a few of my horse stable, built from 5 shipping pallets!mandoor open.front side closedtractor doors open. then this is where i park my pickuptrucks wheel-n-it came over today to pick up the parts i got for him at the big show & we rode tractors to the backyard tractor shed as a side note all these buildings were built by me out of recycled, reclaimed materials


This leaderboard is set to New York/GMT-04:00