
Leaderboard


Popular Content
Showing content with the highest reputation on 07/08/2012 in Posts
-
3 pointsThe bottom gear can be removed without breaking it. The top gear only needs the lighter portion broken off to clear the crankshaft. I place a chisel between the teeth and (normally) just a bump with a hammer will cleanly break the cast gear. I have never had one shatter into tiny pieces, but if you're worried about shrapnel, wrap a rag around the gear.
-
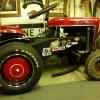
1 pointThis Speedex FG was added to my collection today its from the Pond Bros days
-
1 pointHere is the painted 520-H belt guard modification painted with Majic IH-Red rattlecan. still need to wet sand it out but had to post photos. Thanks to Jay in NC for all the great fab work!!! love how the louvers echo the hood louvers some folks were concearned about hot exhaust blowing down on your toes but no issues noted! Jay has more beltguards for sale!!!
-
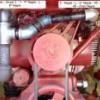
1 pointSome pics of my lapping process on the valve plate of the motor. This is what I started out with. Notice the scratches were between the oil holes. In order to get a better hold on the valve plate, I found a scrap piece of wood and countersunk two finish nails below the plate, but sticking out enough that is gripped it. That way, I was able to put more pressure without doing in my fingers. Finished product Ready to reassemble with a homemade gasket.
-
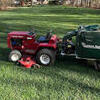
1 pointWell the day came for the D to go to its first show and as I couldn't use the Jeep Cherokee to pull the box trailer and our caravan, a rental van was used. The loading ramp was a bit Heath Robinson but the D managed to climb the ramps (a 30+ degree incline) with no trouble at all so it kind of confirms that there's not much wrong with the pump or motor - the reversing issue just has to be the check valve. It was in and ready to be strapped down. At the show ground the real challenge was to get it out again but we managed as it kind of tries to go backwards when asked so with a bit of a push as well it came back down the ramp. and was soon on display in the area set aside specially for Wheel Horses. The weather was good enough on Saturday for us to cruise some of the the horses down to the arena for a drive round and then cruise back again along with the other tractors and walk behind machines in the Horticultural section. The D attracted quite a lot of attention from both the WH guys who had never seen one in the flesh so as to speak and from visitors to the show. One guy came over and told me that he had a D-200 and for quite a while we dicussed things like the problems he was having with the PTO bearing, where I had got the vinyls from etc. His wife who had listened patiently to the conversation came up with a most wonderful one liner to her husband when we had finished - "Is this what your tractor should look like then?" I took that as a complement! So thanks to all who have helped in one way or another with this resto, particularly those in my extended 'family' on the other side of the pond. We had a great time at this first UK WH roundup despite the weather and I have a strong suspicion that it will become an even larger gathering next year. Sadly it was time to load up and head home all too quickly. Andy
-
1 pointNow go back in the house and spend some time with your wife and son before we see all your hard work in a craigslist ad. Mike
-
1 pointbit more done.... cleaned up a 8 speed i had laying around and rattle canned it black. the 8 speed that came with this has some serious leaking from seals, so rather than pull it down and rebuild it, i substituted the other one, which i know is good to go. since the engine is black in these tractors, i decided to go with black for the trans too, i think it will look ok, plus i have plenty of rattle can black and only one can of resto red that i want to use elsewhere..... also pulled the engine down to have a peek inside. carb was broken at the flange so im not sure how well it would have run. will need to use a spare carb that will get rebuilt...... looks like somebody has been messing with it as theres other damage too, bent choke plate, broken off choke shaft screw, bent idle speed screw, plus the side of the carb looks like somebody hit it with a hammer...... pity about the damage, throttle shaft is tight and looks really clean inside, how can people be so stupid..... not sure what this carb is, looks almost exactly the same as the carter except for the extra raised up area between the aircleaner flange and high speed needle, has the '26' inside the venturi though.... muffler still looks good, from the date on it looks to be the original one, doesnt rattle or sound loose inside, so i will glass bead it and paint it high temp black... engine itself looks to be in good condition, looks like standard bore, no ridge to speak of and not much carbon buildup, the bore has no unusual scoring or marks, looks maybe just a little glazed, but i think it will be fine for a good runner, turns over with no out of the ordinary noises, will check out the bottom end and put a set of gaskets in it, then some black paint.... also got the tires off the rims so i can powder them. theres a bit of cracking on the sidewalls, but they still have more life left in them, some millers tire paint made them look a lot better.....
-
1 pointMounted to the tractor through clean metal to metal contact is grounded. Star washers help cut through any oxidisation too. Once the r/r is properly earthed you can use the heatsink case or battery ground terminal. I actually always use the battery as its the best point of reference. mark
-
1 pointThat what I was thinking " been rolled". Like a black hood, but I would put a C-style rear fender on it. Don't like the looks of the plastic rear fender.
-
1 pointYou can also just attach them to your post. Click the "more reply options" at the bottom right of the reply box next to the "post" button. You will see the "attach files" option at the bottom. Upload them there. Once uploaded you can use them anytime using the "my media" option at the top of the reply box and selecting attachments.
-
1 pointCant keep ME away from rusty red!
-
1 pointi did say that the next pics might be of it all apart. so here you go....... this is all that remains of the tractor from when it was pushed to this spot the night i got it. at the moment theres parts everywhere, i went in to work at 4 am friday and spent 2 hours blasting and painting the frame and most of the small stuff. im going to do a quick job on this one, not replacing every single part that isnt as nice as it could be. as long as individual parts function how they should, there just getting cleaned up and painted, no worrying about smoothing cast surfaces or filling rust pitting. the most amount of time im going to spend will be on the sheetmetal, getting the hoodstand fitting right and the hood straightened. the powdercoat is a no brainer for me, its quick and easy..... the sheetmetal is much easier to work on when its clean and not covered in oil, grease or lawn cuttings/dirt etc. so im stripping everything and blasting, then straightening and paint. i decided that rather than just paint the pieces that need fixing, and have patchy looking new/old paint, i would just paint everything. the frame was done friday as i said earlier, but the hoodstand and a few other pieces that still needed reworking were just blasted and brought home to get better for paint.... heres a few more pics..... i spent roughly 5 hours today on the hoodstand and related sheetmetal, the before pics showed how badly it was fitting, so i had to get the panel joins all sorted, and weld up some cracking, damaged ends where the fuel tank/seat bracket bolts on and the broken lower piece that holds the two sides together. the dash and belt/side covers were beaten and straightened to fit the hoodstand side pieces. the biggest problem with the hoodstand sides was the bends werent anywhere near 90 degrees, once that was taken care of, things started to fit with each other again. all nice and straight now and stronger too. added a couple extra holes to bolt up the belt guard and left cover firmer to the hoodstand, also added two lower holes in the i.d. cover plate. the holes are already in the flange on the hoodstand sides but not used on the cover plate. i thought the extra fastening might stiffen the assembly up a little more.... frame with hoodstand sides bolted on, getting them looking better..... put two extra bolt fixings here (bolt head on the left of pic, and drilled hole on right), to strengthen the whole assembly some. these and the extra two bolts in the i.d. tag plate panel should tighten things up nicely.... the ones in the pic below are a little hard to get to if you need to remove the belt guard or left cover, but with a socket extension from underneath should be easy enough. how often do you really remove these covers anyway?..... getting close now, just a bit more welding. the dash was fitting great by this pic too, not sure why i didnt get a pic of the whole assembly, brain fart maybe.... i think i assembled and disassembled the whole thing at least 10 times getting the panel joins right between the hoodstand/covers/dash/foot boards..... still needed the rear of the hoodstand where the seat bracket/gas tank bolts on repaired in this pic..... all ready for paint.... then i turned my attention to the bracket that bolts to the trans and supports the seat pan. this thing was twisted, leaned over, out of square and cracked in the bottom too. got the bends back square first, then straightened the bottom and then welded up the crack, which with all the beating getting done was getting even bigger...... this box has about 50 pounds of goodies all painted up and ready for assembly, most of the tractors smaller brackets and parts i just blasted and painted and boxed them up together ready for reassembly...... i just feel really blessed to be able to powdercoat at work, its not a 'show' quality finish, but has a nice gloss and is durable. what other paint type is there that allows you to take a freshly blasted part, paint directly to metal, and be fully cured and at almost max durability within 2 hours of painting? if i was better organized, i think i could paint every piece of this thing, if it was already blasted, and have the parts cool enough to start assembly within 3 hours of starting to paint the first piece. masking of the smaller pieces is what takes time, you dont want to have to be spending time grinding this stuff out of anywhere you dont want it. after my next batch of parts i should have only the hood and some engine parts to paint. its going to be fun just assembling one piece after another.......
-
1 pointMiller tire sells them new, but I;m sure some one here could sell you a used set. Put a add in the classifieds. I like the rear fender and tire mod! Gives me some real good ideas for a future project!
-
1 pointWith one of these: :eusa-whistle:
-
1 point
-
1 point
-
1 pointThis brush guard was on the tractor when i got it. it's an especially cool feature here because of the plastic gas tank which is disguised as a grill. i've been looking at it and thinking it wouldn't take much to add some weights in case i need them. it's really stout and should look good in chrome with some red weights hanging on it. hope i find out by spring.


This leaderboard is set to New York/GMT-04:00