Chuck... 83 #1 Posted April 14, 2016 (edited) Well I brought another project home I don't have time for. I rented a trailer and drove about 900 miles round trip to pick up 2 1998 toro wheel horse 520lxi tractors, cab, 2 stage snowblower, 60 inch mower deck, extra tire, debris blower, tire chains, 4 suitcase weights, and 2 wheel weights. Here it is loaded up almost home Unloaded kinda a mess I only had the trailer for 24 hours so I straightened up later I new they needed work when I bought them but I figured I could make one nice one and sell it making some money off it then still have the 2nd one and have a parts machine for my 99 520lxi or sell it or whatever. Here they are all set up to teardown. They both had holes in the muffler and the transmissions both leaked bad the axle seals where out and so on. Oh and the previous owner had 84 pound wheel weights on the tires so the hubs where wobbled out. But we will get into that stuff later. Edited April 14, 2016 by Chuck... 4 Share this post Link to post Share on other sites
roadapples 6,981 #2 Posted April 14, 2016 Nice haul and nice shop too.. 1 Share this post Link to post Share on other sites
Chuck... 83 #3 Posted April 14, 2016 (edited) I had an issue with my 99 520lxi where the axle bearing slid out or the housing so I had to tear the hole tractor down to fix that. I think the bearing was undersized from the factory because the new bearings I installed was .0005 bigger than the one that fell out. At the time the tractor only had 254hrs on it. Anyways I was pretty sure I could fix these to tractors that I bought being as I already did it one time. So I can do it 2 more times lol. Here it is with the fenders and rear tires off. Draining the oil. It holds like 7.5 quarts not bad for a mower lol. It seemed like I took more pics then I ended up taking. I took more during reassembly. I figured I would do this little write up being as I couldn't find much information on these as far as taking the transmission apart. This is pulling the transmission out. This thing is heavy. I downloaded the service manual from toro and followed it. It was pretty helpful. You can see how dirty is was. There was like an old mouse nest or something by the break drum it was packed with dirt and there was like a bunch of hersey kiss tinfoil wrappers in the dirt. Up on the bench I used the cherry picker to lift it up That's when the real fun starts Edited April 14, 2016 by Chuck... 5 Share this post Link to post Share on other sites
Chuck... 83 #4 Posted April 14, 2016 38 minutes ago, roadapples said: Nice haul and nice shop too.. Thanks it's kinda a work in progress 1 Share this post Link to post Share on other sites
Chuck... 83 #5 Posted April 14, 2016 Well got it up on the bench. Here is the first issue. Both hubs where wobbled out pretty bad. You can see when the jam nut was wearing into the axle and the keyway was really loose from the axle hub moving so much. The guy I bought it from had 84 pound wheel weights on each rear tire so I am guessing that had alot to do with this issue. I will get into the fix that I used when I reassemble it To get the smart steering assembly off you have to take the control arm off the hydrostatic pump. I broke that when I was trying to get it off. I was like crappie I hope they still make that part. So the 1st thing I did was stop what I was doing and look up to see if they still made that part lucky they still do it was like $27ish bucks. Anyways after this point I didn't break anything else. Here is a peak inside the transmission where the hydrostatic pump bolts to it. Some serious gears for a lawn mower lol Then here is right after I got the transmission case opened up. Thanks for looking 4 Share this post Link to post Share on other sites
WHX?? 46,780 #6 Posted April 14, 2016 Nice haul, gotta like the snowblower & I think I am in love with your lathe! Tranny internals look good, did you have to split it to repair the axles? I don't think it was the wheel weights fault ...looks like PO abuse and p poor maintenace with all that dirt & crap in ther. Thanks for the pics and BTW Share this post Link to post Share on other sites
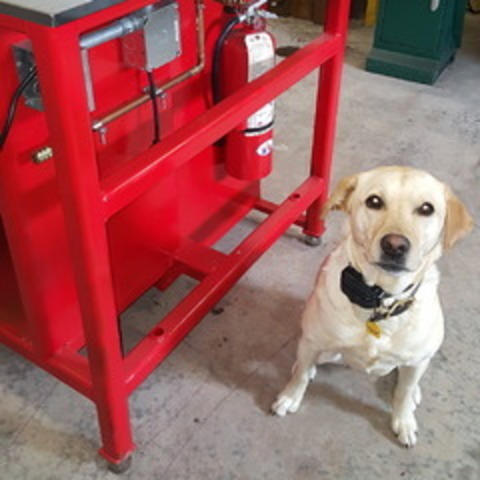
Chuck... 83 #7 Posted April 14, 2016 8 minutes ago, WHX61/3 said: Nice haul, gotta like the snowblower & I think I am in love with your lathe! Tranny internals look good, did you have to split it to repair the axles? I don't think it was the wheel weights fault ...looks like PO abuse and p poor maintenace with all that dirt & crap in ther. Thanks for the pics and BTW Thanks I thinking I should come out ahead on the whole deal. I have been wanting a lathe forever finally bought one a few years ago. Grizzly G4003G lathe 12x36. Works well here is the latest little project I turned with it. A brass hammer for the father in law. I tried to make it kinda fancy. Anyways back to the 520lxi I guess I just assumed the wheel weights had some affect on the hubs being wobbled out. The case was leaking so I wanted to put a new gasket on it and I had to get the axle for the fix. One thing that amazes me is how much money people spend on buying a new tractor like this and do zero maintenance on it. But I guess that's why I got a deal on it (I think lol) 5 Share this post Link to post Share on other sites
WHX?? 46,780 #8 Posted April 14, 2016 Almost too nice to use!! Share this post Link to post Share on other sites
Chuck... 83 #9 Posted April 14, 2016 2 minutes ago, WHX61/3 said: Almost too nice to use!! Yeah that was what he said. I asked if he used it the other day and he said "not yet I don't want to scratch it" lol I made it to be more of a decoration that anything. Maybe a record for number of pieces that it takes to make a hammer. 17 pieces to complete it lol. 27 minutes ago, WHX61/3 said: Nice haul, gotta like the snowblower & I think I am in love with your lathe! Tranny internals look good, did you have to split it to repair the axles? I don't think it was the wheel weights fault ...looks like PO abuse and p poor maintenace with all that dirt & crap in ther. Thanks for the pics and BTW Oh yeah the snowblower works very well I have used one for the last 3 years on my driveway it's a blast. Works way better than you would think I wish I had a bigger driveway. Lol 1 Share this post Link to post Share on other sites
Chuck... 83 #10 Posted April 14, 2016 (edited) Well after I opened up the transmission I took the gears out and looked over everything. The oil I drained out of it was pretty dirty prolly hasn't been changed in a long time. I say that because I have changed the oil in my other 520lxi after like 100 Ish hours and the oil was still clean. The oil that drained outa this was very dirty. But after looking over everything nothing really looked bad I checked all the bearings and they all seemed to operate smoothly. Here it is all apart. It's a pretty straight forward gear box. Nothing was really to difficult compared to some other ones I am sure. After that was apart I took the rock shaft reassembly and other linkages apart to clean them. I don't think this thing has seen a grease gun since the 90's lol. Pretty dirty Here was after all that stuff was out. Kinda wish I took a few more pics during the teardown Edited April 14, 2016 by Chuck... 1 Share this post Link to post Share on other sites
Phatboy 565 #11 Posted April 14, 2016 I really dont think wheel weights had anything to do with hubs being loose ,, as they dont add a single ounce of weight to the axels..it is mearly rotating weight,,, i would hazard a guess that the keyway was the culpret,,and loose set screws in the hubs,, but it wasnt the wheel weights... Be cause of my recent bought with a left wheel hub on my 520 i have done tons of reasearch on just this subject ... I finally got mine fixed yesterday,, i repalced hub,, and keyway,, didnt work so i replaced the wheel horse set screws with regular grade 8 bolts and nylon lock nuts , with teflon tape on the bolts torqued to 40 ft lbs,, and re-plowed all my garden plots this morning and it is perfectly tight,, so thank god that fixed it,, thanks to the help and suggestions of the fellas here ,, hopefully same will work for you .. Share this post Link to post Share on other sites
Chuck... 83 #12 Posted April 15, 2016 (edited) I am sure it was a combination of things that caused the hubs to wobble out. I am not saying I am right or wrong or even know what I am talking about but the reason I thought it was part of the problem is starting and stopping. I get that once the wheel is spinning it prolly don't matter but every time you take off fast or stop fast I just assumed all that extra rotating weight that has to start spinning and stop spinning must put strain on something. Although once the hub gets a little loose that prolly gets worse fast. Anyways part of the reason I took the transmission apart was to get the axles out. My plan was to cut a new keyway on the axles themselves. I did that at work although I didn't take any pics of that. The hub itself has a keyway that goes threw the whole bore. And the axle only has like maybe an inch or so of keyway on it. So I flipped my axle over 90 degrees and cut a keyway in it from the tip of the axle to almost where the axle seals is. That way I could use the same hub using the good part of the keyway and still use the original axles without buying anything. It seems to work well so far. I also bought new toro wheel horse set screws and torqued them down. I had a nice tight fit with the new keyway and I didn't have to buy anything besides 12 inch piece or .25 key stock was like $3.00 ish With this fix there is actually more keyway engaged on the hub and axle tha the original shorter key This keyway was really bad both sides where like this. I will have to take some pics on the next one cause I don't feel like taking this one back apart Edited April 15, 2016 by Chuck... 2 Share this post Link to post Share on other sites
Phatboy 565 #13 Posted April 15, 2016 Good idea buddy !! I never understood why they didnt key the whole axel either,,, that is a real good idea ,, glad it worked ,,,more talented than me lol mine would look like a snake that got run over with a steam roller Share this post Link to post Share on other sites
Chuck... 83 #14 Posted April 15, 2016 2 minutes ago, Phatboy said: Good idea buddy !! I never understood why they didnt key the whole axel either,,, that is a real good idea ,, glad it worked ,,,more talented than me lol mine would look like a snake that got run over with a steam roller Nice yeah it seems to be good as new. I made the keyway a little tight I figured the tighter the better. I also put a .004 shim from a feeler gauge set in there that way there was no movement before I tightened the set screws. The other 520lxi that came with it I will have to do the same thing to I will take some pics of it finished before I put it back together. I think a splined shaft would be the best but that prolly would add a bunch of cost to it. 1 Share this post Link to post Share on other sites
Chuck... 83 #15 Posted April 15, 2016 Kinda jumping ahead here with the differential but I was as careful as I could to keep it clean when I was machining it. After I was all finished I saw that I had gotten a few metal chips in the gears now sure if it would mater to much but I decided to tare it down all the way to clean it. I took it apart and cleaned it all up making sure to keep those 8 pinion gears in the same spot they came out of. Not sure if it would matter but I put it back how I found it. I also had the new keyway cut in on this pic but they are both facing away from the camera One other thing I learned about the differential when I had it apart was if you change even 1 of the pinion gears it locks the differential. If anybody was wanting to have there differential locked without like welding it sold or whatever that might be a thought. Share this post Link to post Share on other sites
Phatboy 565 #16 Posted April 15, 2016 2 hours ago, Chuck... said: Nice yeah it seems to be good as new. I made the keyway a little tight I figured the tighter the better. I also put a .004 shim from a feeler gauge set in there that way there was no movement before I tightened the set screws. The other 520lxi that came with it I will have to do the same thing to I will take some pics of it finished before I put it back together. I think a splined shaft would be the best but that prolly would add a bunch of cost to it. How did you put the shim in there ? Did you slide it in long ways with the length of the axel ? Or did you wrap it around the axel at the end ? 1 Share this post Link to post Share on other sites
Chuck... 83 #17 Posted April 15, 2016 (edited) 9 minutes ago, Phatboy said: How did you put the shim in there ? Did you slide it in long ways with the length of the axel ? Or did you wrap it around the axel at the end ? I was just able to slide it in between the hub and the axle the long ways. I think it will help alot just to take some of the slop up. I figured the tighter the better. I was able to slide most of the full shim in and I just cut off the rest that was sticking out. Then again I don't know either way if that will help but in my head it did lol. I put the biggest shim I could fit in it. I would think the thicker the shim the easier and farther you could push it in. Edited April 15, 2016 by Chuck... 2 Share this post Link to post Share on other sites
Phatboy 565 #18 Posted April 15, 2016 (edited) 8 minutes ago, Chuck... said: I was just able to slide it in between the hub and the axle the long ways. I think it will help alot just to take some of the slop up. I figured the tighter the better. I was able to slide most of the full shim in and I just cut off the rest that was sticking out. Then again I don't know either way if that will help but in my head it did lol. I put the biggest shim I could fit in it. I would think a to the thicker the shim the easier and farther you could push it in. Yes there was another gentleman who did the same with his hub also on a GT14 and he said it has been 3 years and it is still like "New" tight,,, so apparently from what i have read that is a good and commonly used fix if the axel or hub has some wear from being ridin while loose.. I wasnt sure on the best way to use it was,, i guess it all depends on the shape of the axel or hub and if like the wear goes around a larger portion of the axel or not,,, nice job buddy,, from what i have heard that is the best way to repair worn axel parts.. Edited April 15, 2016 by Phatboy Share this post Link to post Share on other sites
Chuck... 83 #19 Posted April 15, 2016 That's good to hear cause I was planning on selling it after its finished. That was the best and easiest idea I came up with to fix it. I thought about Welding it up and returning it but that would have been a pain. And I didn't want to buy new hubs and axles that would have been like damn near $700.00 Share this post Link to post Share on other sites
WVHillbilly520H 10,369 #20 Posted April 15, 2016 (edited) Chuck, seeing that you are a machinist or darn close (my job is a machinist without the papers lol) wondering if your shop has a keyway broaching set and an arbor press? that way you take the hub(s) and rebroach them also 90 or 180° and or redrill and tap to the next thread size up on the set screws for better hold/bite and maybe machine/mill a flat for the lock nut to locate on... if and when mine loosen and waller out that's the route I'll go on the hubs...just thinking out loud...BTW excellent work, way to just jump in and go for it man,Jeff. Edited April 15, 2016 by WVHillbilly520H 1 Share this post Link to post Share on other sites
Chuck... 83 #21 Posted April 15, 2016 44 minutes ago, WVHillbilly520H said: Chuck, seeing that you are a machinist or darn close (my job is a machinist without the papers lol) wondering if your shop has a keyway broaching set and an arbor press? that way you take the hub(s) and rebroach them also 90 or 180° and or redrill and tap to the next thread size up on the set screws for better hold/bite and maybe machine/mill a flat for the lock nut to locate on... if and when mine loosen and waller out that's the route I'll go on the hubs...just thinking out loud...BTW excellent work, way to just jump in and go for it man,Jeff. That's a good idea too. I thought of that also but but the place I work doesn't have any broachs at all. I sorta half way looked at buying a broach set but I didn't. Also the way the keyway wore on the hub itself it only really wore out like not even half of the keyway because the hub has the keyway threw the whole bore. So when I put the longer key in it I was actually using like a brand new keyway on the hub because the original keyway was so small. If that makes sense lol I never got into writing that much lol. Thanks for looking 1 Share this post Link to post Share on other sites
WVHillbilly520H 10,369 #22 Posted April 15, 2016 Hey man just be careful even a chinese made set of broached cost mucho and most of ours are dull or missing the shims it's like they want the shop to disappear, good luck with the Xi's ,Jeff. Share this post Link to post Share on other sites
Chuck... 83 #23 Posted April 15, 2016 (edited) 9 minutes ago, WVHillbilly520H said: Hey man just be careful even a chinese made set of broached cost mucho and most of ours are dull or missing the shims it's like they want the shop to disappear, good luck with the Xi's ,Jeff. Yeah I wasn't to sure about those cheap sets I was looking at that also why I did it the way I ended up doing Well after I jumped ahead to the axle repair I will get back to the teardown. Here is a pic of the hood all stripped off bumper off side panels off and the muffler heat shields are off reveling the hole in the muffler Overall the machine is in descent shape no just needs a little tlc Edited April 15, 2016 by Chuck... Share this post Link to post Share on other sites
Chuck... 83 #24 Posted April 15, 2016 Well I realize I might be opening a can of worms so to speak about the wheel weights. Today at work I talked with the engineers about that question. I am not saying they are right or wrong either but I thought I would share what they thought. So basically they told me that it depends they said that if the hub was splined that it really wouldn't matter and that would be the wright way to do it. But being as there was only one key on this set up they said that having all of the extra rotating mass would probably over time cause the hubs to wobble out. This was the reason they gave. It was more weight to start and stop. So basically starting and stopping fast and being jerky with the hydro pedal was what would put all of the extra stress on the keyway. So basically it depends on the set up of the tractor axle if it's splined it would matter so much. But having 1 key on the axle could pose and issue. And once it got a little loose even with out wheel weights on it, it would keep getting worse I really haven't worked on any other brands of garden tractors but I wonder if they any of them use a spline or if they are all keyed. Anyways that's just what a few engineers thought so it must be right lol 2 Share this post Link to post Share on other sites
doc724 924 #25 Posted April 15, 2016 Your engineers are indeed correct. The single hub key is the weak link in the motion transfer system. You will notice that the axles have splines where they enter the differential carrier-and they look perfect. The key is likely hardened and the axle is not. All the rotational inertia will eventually cause the axle to get wallowed out around the key. 2 Share this post Link to post Share on other sites