bmsgaffer 2,071 #101 Posted August 31, 2015 Your diagrams are fine! I've never owned a vertical shaft of any kind, so it is just hard to turn it in my head... Share this post Link to post Share on other sites
callum12 257 #102 Posted August 31, 2015 i know what you mean! you should have seen me trying to figure out if i needed a reverse direction or same direction 90 degree gearbox! i find it hard to spin things around in my head but then all of a sudden it just clicks and its so obvious (once you've done a drawing you're proud of and have to rub it out and start again usually)callum 1 Share this post Link to post Share on other sites
callum12 257 #103 Posted August 31, 2015 a little update with pictures!random scrap of Nylon:in the lathe and turned to size, using carbide tooling isn't the best for nylon, you'd want something with a more aggressive cutting angle:center drilled to take this ground 8mm bar salvaged from a ink jet printer. cut off and faced off, my roller is complete. if it worked well i will go back and make one out of steel and add bearing:i didn't take photos but the 8mm bar was cut the threaded to allow the roller to be mounted. I'm not sure how well the nylon will wear, it will be interesting. i also made the transaxle bracing kit, the long bar runs under and will be welded to the 90 degree bracket, the sorter pieces are welded to that and bolted to the chassis while the triangles are gussets to brace it all.thanks for looking,Callum Share this post Link to post Share on other sites
callum12 257 #104 Posted September 1, 2015 and a video for you, i hope this system will work, I've just got to make some belt tabs, get the belt and brace the tranny and we should be good for a test. oh and change the tranny oil, it looks really good through the shifter hole but better safe than sorry. i will consult the manual for details... Share this post Link to post Share on other sites
Bliksem 23 #105 Posted September 2, 2015 Following this with interest... How well do you think the nylon will hold up? Is your plan to press a bearing into the nylon at some stage? Sent from my A0001 using Tapatalk Share this post Link to post Share on other sites
callum12 257 #106 Posted September 3, 2015 i'm not sure about the nylon, i believe it is used as a bearing material in some applications, usually as linear bushings though. but since it is quite a large surface that will increase life. yes my plan is to bore it out further and install ball bearings if all goes well. callum Share this post Link to post Share on other sites
Bliksem 23 #107 Posted September 3, 2015 Sounds like a plan, I work as a design engineer and have worked with UHMWPE (ultra high molecular weight polyethylene) which has very low friction coefficient and would be better suited long term than the nylon. But since your long term plan is to go with ball bearings I'm sure you'll be fine here Sent from my A0001 using Tapatalk Share this post Link to post Share on other sites
callum12 257 #108 Posted September 3, 2015 it will be interesting to see how it wears against the belt as well. if not very well i will make one out of steel. callum Share this post Link to post Share on other sites
callum12 257 #109 Posted September 7, 2015 (edited) I've been working a bit on the hitch lift, video to come but for now here's some pictures:starting with a big lump of steel, this is part of the stub axle that i didn't need, knew it would come in handy one day!the engineering technician at college always says "leave it as long as you can for as long as you can", with this in mind i drill the hole and cut out the bit in the middle without cutting it off from the stock:after drilling i tapped one side the M10 and drilled the other side to just over 10mm to allow a pin the go through and thread in:I then cut it off and drilled and tapped the back:I then cut and filed some radii to make it look nice and give the necessary clearance.here is the part installed before adding the outside radius:the reason for this part is so I don't need a chain, instead I've got something (that i think is called a barrel strap) but it allows for fine adjustment of the hitch lift:I've got some other stuff to show you but i'll put that in a video for you,callum Edited September 7, 2015 by callum12 3 Share this post Link to post Share on other sites
meadowfield 3,028 #110 Posted September 8, 2015 good work - turnbuckles are the usual term, bottle screw if they are enclosed... Share this post Link to post Share on other sites
callum12 257 #111 Posted September 8, 2015 thanks for the correction meadow field, the drive belt arrived today, i ordered one the size that i measured and one an inch smaller. but it appears they are too big, it was hard measuring as you have to pull the split belt tight, push in the cutch to where you want it to rest and mark the belt! oh well, still one step closer though,callum Share this post Link to post Share on other sites
meadowfield 3,028 #112 Posted September 8, 2015 thanks for the correction meadow field, the drive belt arrived today, i ordered one the size that i measured and one an inch smaller. but it appears they are too big, it was hard measuring as you have to pull the split belt tight, push in the cutch to where you want it to rest and mark the belt! oh well, still one step closer though,callum I cut the belt to where I think, drill a hole in the ends and join with a zip tie. If you get it wrong cut more out or add back in. Theres usually just enough strength to let the clutch out and get the length correct. Then take it off and measure inside length and outside and get the average. 1 Share this post Link to post Share on other sites
callum12 257 #113 Posted September 24, 2015 sorry for the lack of updates lately, back to sixth form an all!anway, drive belt is on and as far as i can tell without running the engine all is good, the clutch works as it should. before i run the engine i would like to brace the front of the transaxle and double check everything like the chain tension and alignment. since it is quite a short chain if it was to jump a tooth or something it would definitely break something!thanks for looking callum 2 Share this post Link to post Share on other sites
bds1984 1,511 #114 Posted September 26, 2015 I was just about to ask how your project is coming along. Will you be running the engine soon to test it out? Share this post Link to post Share on other sites
callum12 257 #115 Posted September 26, 2015 hi,its going really well, slow progress though. I will be running her as soon as the transaxle bracing is complete, to do this i need a welder which i don't have! I'm going to speak to my neighbour to see if i can borrow his, other than that i'll hire one. i also want to double check everything including the chain tension. pulling it over with the pull start shows the clutch works, the belt slips on the engine pulley which is good. hopefully it does the same and engine speed!callum Share this post Link to post Share on other sites
Jparkes43 329 #116 Posted September 30, 2015 Sounds like good progress Callum. I know what its like having a project and going back at school, keep at it and i look forward to hearing more.James Share this post Link to post Share on other sites
callum12 257 #117 Posted October 25, 2015 Hi all,finally got together an update, i'd actually filmed this 2 times before but be the time i'd got round to getting it off my phone it was outdated and no point putting it up! hahaanyway, here is an update: i've decided to redo the bracing that i had made as it was only 20 x 10mm steel, this would have done the job but it might have looked a bit weedy, so I brought some steel that is only 80x10mm! that should look a bit more heavy duty! i didn't foresee that it would need to over lap the bolts holding on the 90 degree box, this would have been fine but the bolt holes were actually slots so i have had so spend a while drilling the holes and filing between them, a job that i had thought i'd left behind with the 90 bracket, oh well. so that's all ready to be welded (for the second time!)I have set my self a target of getting the transaxle braced and tested before the week is out, maybe even a driving test, i probably won't get the hitch lift done or the weight bracket but you never know...callum 2 Share this post Link to post Share on other sites
callum12 257 #118 Posted October 30, 2015 well then, the bracket is being welded! the test run is coming ever closer. will the clutch work as desired? will the chain drive preform well? will the belt slip? all of these questions only one way to find out!Callum 3 Share this post Link to post Share on other sites
Jparkes43 329 #119 Posted October 30, 2015 Sounds great! i'm very excited for this! lets hope it works well and if it doesn't lets hope you can work it out.James 1 Share this post Link to post Share on other sites
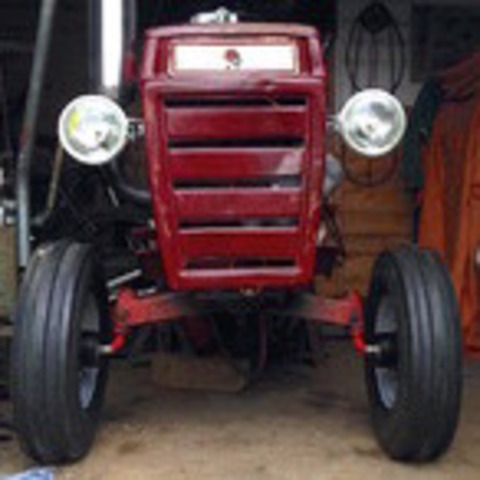
callum12 257 #120 Posted November 1, 2015 (edited) well damn it! i got the oil, but stupidly i didn't check the amount it takes before buying it. turns out the tranny takes 2 quarts (about 1.8L) i only got a litre. oh well these things happen.anyway, I've made a belt capture for the nylon idler:I think i may have gone over the top with the front weight bracket! I can't believe my first plan was to use 20mm by 10mm steel with 2 bolts!! this seems much better 50mm by 12mm with no less than 6 bolts.the bracket with bracing is installed, using a drill with a at least a 5 year old battery that's been abused (not by me) is not fun, i can just about drill 4 holes through the chassis. most people would think to recharge after the 3rd, but what's to lose? that battery is already 'beeeeped'! hubs and wheels installed, plenty of grease on the shaft to prevent all the hassle years down the line.back on all fours after so long, one of my neighbours has offered to load the wheels for me that will help with the ploughing to come. thanks for looking, i have got some videos of the progress but i think i will incorporate that in with the test drive. Callum Edited November 1, 2015 by callum12 1 Share this post Link to post Share on other sites
Jparkes43 329 #121 Posted November 1, 2015 Wow she looks really great! ah well about the oil it happens. i did the exact opposite i bought two litres and i only needed one h aha. cant wait to see it working, it looks very thoroughly done and will defiantly last a long time.james Share this post Link to post Share on other sites
callum12 257 #122 Posted November 1, 2015 how perfect is this? my birthday is next week and a family member came over early with a B and D corded drill as a gift! no more recharging after 6 holes. so i've got the other side of the weight bracket mounted, now I've just got to prepare the front section for welding. I can't wait either james! to be honest with you i got over excited and attached the plough just to see what it would look like haha. hopefully i will get the oil on monday. Callum 1 Share this post Link to post Share on other sites
Jparkes43 329 #123 Posted November 1, 2015 Oh wow thats great! yay ha ha i know what you mean about battery life but thats amazing! and happy birthday to you! sounds greataha i know what you mean but its ok to get over excited ah that sounds great!james Share this post Link to post Share on other sites
callum12 257 #124 Posted November 4, 2015 thanks james! I now have the oil and i was going to do a test but the weather was far from inviting! very soon though, very soon! Callum Share this post Link to post Share on other sites
Jparkes43 329 #125 Posted November 4, 2015 No problem. Ah yes we haven't had a many dry days here! its still raining now and your not to far from me so i assume the weather is pretty much the same. i think tomorrow might be alright.James Share this post Link to post Share on other sites