Jump to content
Sign in to follow this  
varosd

520-H Beltguard Mod

Recommended Posts

varosd

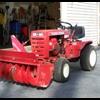
Here is the painted 520-H belt guard modification painted with Majic IH-Red rattlecan. still need to wet sand it out but had to post photos.

Thanks to Jay in NC for all the great fab work!!! love how the louvers echo the hood louvers

some folks were concearned about hot exhaust blowing down on your toes but no issues noted!

Jay has more beltguards for sale!!!

photo1-1.jpg

  • Like 1

Share this post


Link to post
Share on other sites
 
Hydro

I'd sooner have a hot foot than a cooked engine. :deadhorse:

Share this post


Link to post
Share on other sites
 
Fun Engineer

Looking sweet Don. Great idea Jay.

Share this post


Link to post
Share on other sites
 
rick

are you able to feel much air flow trough the louvers? I am planning this mod for my 416H.

Share this post


Link to post
Share on other sites
 
varosd

It's working great. not sure if Jay in NC's other lattice style mod kicks out more CFM. my question is...does the unlouvered hood on the 520-HC and other Onan WH make the heat issue worse? is there a venturi effect with the louvers?

short of just leaving the belt guard off completely or do a mod like below:

772px-1986_Wheel_Horse_520-H_garden_tractor-s.jpg

I'm OK with the PTO belt being exposed but the drive belt is a little to close for my toes to get caught in like when I look behind as I'm driving, my feet are shifting all over the running boards.

Share this post


Link to post
Share on other sites
 
sorekiwi

I havent managed to stick my toes into the belt yet:

IMG_3738.jpg

  • Like 1

Share this post


Link to post
Share on other sites
 
AMC RULES

Louvers? We don't need no stinking louvers...or toes either. :)

  • Like 1

Share this post


Link to post
Share on other sites
 
varosd

Update: since the belt guard is done (also rust free compared to original) I have to do the opposing guard and the running boards.

PO had the unit in a dirt floor garage and rust is on bottom of exposed metal.

mat peeled right off and lo, 1988 paint prisitne. I'm saving big chunks of it for possible future paint mixing?

I should be able to reuse the mats with clean up and new contact cement.

I plan to construct E-tank and try it out.

Don't laugh at my temporary running boards!! :rolleyes:

post-4079-0-10657100-1342435624.jpg

post-4079-0-87782900-1342435644.jpg

Share this post


Link to post
Share on other sites
 
Raider12

How do I get a hold of Jay? I would love to have one of these for my 1997 520.

Share this post


Link to post
Share on other sites
 
Hydro

He's right in the membership list Jay in NC

Share this post


Link to post
Share on other sites
 
Raider12

I located him, thanks

Share this post


Link to post
Share on other sites
 
varosd

Updated photos! I finished repainting the running boards. Majic rattle can. I reused the original rubber. I did make the OEM 1 piece rubber into a 2 piece unit. I found that the the factory glue was pulling up in 2 locations, 1 at the bend near the heel portion and the 2nd at the smaller bend at the toe portion. So, I trimmed the toe portion and then cut the heel portion into 2 parts. . I got some vile smelling contact cement from the local Ace and sticking great. forget that water based contact cement. still need to get a replacement Triangle sticker

photo3-1.jpg

photo4-1.jpg

Deck: next on the To Do list!! :D

Share this post


Link to post
Share on other sites
 
Fun Engineer

Looking good Don. What do you think of the Majic paint?

Share this post


Link to post
Share on other sites
 
varosd

still just rattle can, havent stepped up to a spray gun. I think the color is spot on.

Share this post


Link to post
Share on other sites
 
Todd

My 2 cents about the paint .The color is good but the dry time sucks.Ive had a work lamp and heater on in my shop for two days and the foot boards are still not dry.I'm not sure about the cure time on it ,i'm sure its a week or so.Anywho,i guess thats what happens when you need a thick coat on thoses beat up areas.Next in store lay it on heavy on the 60 inch deck ...Wish my cheap china nikon lens wasen't busted so i could post some pic's...

Share this post


Link to post
Share on other sites
 
Save Old Iron

If you want enamel to dry quickly (at least as fast as chemically possible) SPRAY IT ON AS THIN AS POSSIBLE. Technically, enamel doesn't dry - it cures. Curing takes place in the presence of oxygen. If you spray on a thick coat of enamel, the top part of the thick coat (exposed to oxygen) starts to cure. The paint underneath this curing "skin" is not exposed to oxygen and cures much , much slower. Weeks, maybe months. Spray on thinner coats, let dry a few days, rough up the thin coat and spray on another thin coat, etc. Chemical hardener works to accelerate the curing process. Heat has some effect on the drying process but may not speed up a thick coat due to the lack of oxygen under the top cured skin of the thick coat. Rattle cans tend to dry faster as they put down a much thinner coat of material (lots of oxygen available to a small amount of paint, so curing is fast). HVLP guns can lay down much more material in one pass. Thick layers look better but dry slower. Go with several thin coats. The first coat from either a gun or a can should be a light "mist" coat to dry as quickly as possible and form sticky surface for the next "wet" coat to cling too.

That's it - all I know about about getting an acceptable finish without waiting weeks to dry.

  • Like 1

Share this post


Link to post
Share on other sites
 

Create an account or sign in to comment

You need to be a member in order to leave a comment

Create an account

Sign up for a new account in our community. It's easy!

Register a new account

Sign in

Already have an account? Sign in here.

Sign In Now
Sign in to follow this  

×
×
  • Create New...