Jump to content
Sign in to follow this  
condo630

Raider 9

Recommended Posts

Rooster

between you & donamy you are building a fire under me to do my raider 9 , hope it looks as good as those two tractors. jay

Lol..I am right there with ya!

Share this post


Link to post
Share on other sites
 
condo630

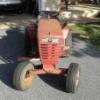
Looks like you are doing good. I worked on my Raider Nine a couple of years a go thought you might want to see.

I added a 14 hp Tecumseh trans plant.post-1304-0-45519600-1330004301_thumb.jp

Is that an overhead valve Tecumseh???? Nice touch on that tractor. I love little things that improve upon, but pay homage to the original design. Very nice.

Lol..I am right there with ya!

I think from here on, I'll always have some restoration in the works. I plan to send the PO a picture once it's finished. :)

  • Like 1

Share this post


Link to post
Share on other sites
 
Olratlr

between you & donamy you are building a fire under me to do my raider 9 , hope it looks as good as those two tractors. jay

Lol..I am right there with ya!

Share this post


Link to post
Share on other sites
 
Olratlr

Well that last post didn't work as planed lol.

Yes it is a overhead valve

post-1304-0-81648200-1330111450_thumb.jp

  • Like 1

Share this post


Link to post
Share on other sites
 
AMC RULES

Looks awesome, gonna have some custom decals made up for it too? :teasing-poke:

Share this post


Link to post
Share on other sites
 
Rooster

I think from here on, I'll always have some restoration in the works. I plan to send the PO a picture once it's finished. :)

WHeel horses are a "second Hobby" for me, and I work 60-70 hours a week, so they get just a smidgen of my time...I have enough Horses to work on right now to keep me busy until retirement, lol!

Share this post


Link to post
Share on other sites
 
condo630

WHeel horses are a "second Hobby" for me, and I work 60-70 hours a week, so they get just a smidgen of my time...I have enough Horses to work on right now to keep me busy until retirement, lol!

I know that feeling...gotta pay the bills!!

Looks awesome, gonna have some custom decals made up for it too? :teasing-poke:

Not sure what I'm going to do about decals yet. It's not really a Raider 9 anymore so that's out, I don't think I want Raider 12 decals either, and I'm also contemplating an 8 speed swap someday so I'm hesitant about the "six speed" decals...any thoughts???

Yes it is a overhead valve

Very nice tractor. Thank you for sharing! :text-thankyouyellow:

Share this post


Link to post
Share on other sites
 
condo630

Shortly after the one year mark for this project, I've got it mostly together, except for tying up a few loose ends.

DSCF0009.jpg

DSCF0008.jpg

DSCF0012.jpg

DSCF0011.jpg

DSCF0010.jpg

DSCF0016.jpg

DSCF0015.jpg

i got the runs in the hood fairly smooth...you can still see them if you look hard enough. The paint didn't quite get the way I want it either, so I would like to re spray it at some point...but that will have to wait.

The motor is running pretty well...still dialing it in and working the kinks out of the whole thing.

I do need a headlight socket, or the whole assembly. I finally took the time to look mine over...one side works, the other is shot.

Any ideas for decals?

Share this post


Link to post
Share on other sites
 
jay in nc

chris, you can get bulb socket springs & other replacement parts at any good truck stop. redoyourhorse.com for decals. it's looking good! Jay

Share this post


Link to post
Share on other sites
 
condo630

Quick update and some problem solving...

She ran alright for a while, then started flooding and leaking fuel from the carb, which led me to recall that it did the same thing when I tested the engine last fall. So I bought new needle/seat and gaskets, installed them and it ran great. That was several days ago...this morning I walk out into my shed to grab some tools I needed at work today, and when I open the door, I smell gas. There is a trail of blistered paint on the air cleaner base where fuel had been dripping down out of the carb throat, so I'll assume the gaskets were doing their job, and the needle and seat are not.

I have not yet taken it apart, but I was a little leery about the way the seat threaded into the carb body while reassembling. How tight should it be? Is there a trick to installing these? I (more or less) was only able to tighten it with my fingers, as there is no room to get a wrench or socket onto the base of the seat where it is like a hex nut. I will not be surprised to find that it rattled itself loose, and is dumping fuel and overflowing the bowl.

I know it could also be some dirt caught in the seat, or an improperly adjusted/bad float, but I thought I'd ask how to do it right since I'll have it apart soon anyway.

Share this post


Link to post
Share on other sites
 
Stigian

Outstanding work there Sir, she looks great now :bow-blue:

Love the "washing line" paint spraying photos :D

Share this post


Link to post
Share on other sites
 
Anglo Traction

Photo12231530.jpg

I do have one shim between the camshaft and block, opposite the gear end.

This "washer/shim" type thing that I found in the oil pan measures 3/8" ID, 11/16" OD, 1/32" thick. Does that help?

Hi , Just read your whole Thread on this project and a really impressive job you have done too :bow-blue: .

Just to look back at the issue of the Shim washer found in the Pan. the only place a 3/8" bore shim washer is used in your engine is on the Governor Shaft (also in a tight space to get at).

If it is unworn, then the assumption of it being dropped during assembly as mentioned is most likely. It is hoped they actually placed one on the shaft. The spinning Governor Gear is pushed against the Washer when running at Full Revs.

I have not yet taken it apart, but I was a little leery about the way the seat threaded into the carb body while reassembling. How tight should it be? Is there a trick to installing these? I (more or less) was only able to tighten it with my fingers, as there is no room to get a wrench or socket onto the base of the seat where it is like a hex nut. I will not be surprised to find that it rattled itself loose, and is dumping fuel and overflowing the bowl.

I know it could also be some dirt caught in the seat, or an improperly adjusted/bad float, but I thought I'd ask how to do it right since I'll have it apart soon anyway.

You can grind down the outside of an old Socket that will fit the Flats of the Hex on the Valve Seat. I had to do this and I keep the socket with my Carb Kits/bits. If you have a bench grinder, then your set. Just push it onto your socket wrench and rotate it slowly until it fits with clearance. It only needs to done up to about 3 ft lbs and seals against the washer. Hope this helps.

Share this post


Link to post
Share on other sites
 
condo630

Thanks guys. I took the carb apart and put it back together again...a small amount of dirt in the bowl, other than that I have no idea what caused the 'flooding while sitting' problem. Hasn't done it since. The seat was not loose either.

The shim didn't look worn. I'm not going to worry about it at this point. Unfortunately, all the tags were ripped off so I don't have much history on this motor. I do wonder if this is a rebuilt engine...no oil burning whatsoever. One of these days I'll pull the head just to check things out and see if the piston is oversized.

Can anyone with a little experience tell me how the clutch should act on these? Mine seems to grab all at once and practically throws you off the tractor. That's with the clutch rod in either hole at the pedal. Is this common, can i adjust it some other way, or is my belt worn out??

Share this post


Link to post
Share on other sites
 
Anglo Traction

Can anyone with a little experience tell me how the clutch should act on these? Mine seems to grab all at once and practically throws you off the tractor. That's with the clutch rod in either hole at the pedal. Is this common, can i adjust it some other way, or is my belt worn out??

Only thing I can think of is the Finger Tabs on the Belt Guard. In your 2nd Pic from the 27th June Post, it look's like they need a small adjustment. There should only be 1/32" clearance between those Tab faces and the Belt surface for the Clutch to operate properly without it snatching.

Regards

Share this post


Link to post
Share on other sites
 
condo630

Only thing I can think of is the Finger Tabs on the Belt Guard. In your 2nd Pic from the 27th June Post, it look's like they need a small adjustment.

Wow...that's precisely the answer I wanted. Never would have guessed it myself. Thanks!

Share this post


Link to post
Share on other sites
 

Create an account or sign in to comment

You need to be a member in order to leave a comment

Create an account

Sign up for a new account in our community. It's easy!

Register a new account

Sign in

Already have an account? Sign in here.

Sign In Now
Sign in to follow this  

×
×
  • Create New...