ebinmaine 62,973 #26 Posted April 5, 2019 Those look great. That's one of my experiments I need to do. I don't have a lathe. Stand up commercial drill press. I'm hoping to be able to clamp a piece of straight rod in such a position I can use the drill press to put the hole there. What size Rod did you use? Share this post Link to post Share on other sites
bellevillerod 834 #27 Posted April 5, 2019 Well I was trying to do the updates on my phone from work, but my eyes and fat fingers make it to hard. I was also starting to make up some am co bronze bushing for different places on the tractor. I think I got lucky in the fact that my axle ends show no wear. My pivot pin tab was broken off and the pin shows wear. No worries, I am making a new pin and that should take care of that. I do have some extra space in that area where the pivot pin goes, .055 to be precise. So I did make up a .050 bronze washer to fill that space. That should take up the extra play in the axle. The bushing under the fan gear was really worn so I made one of those also. 2 3 Share this post Link to post Share on other sites
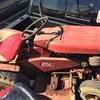
bellevillerod 834 #28 Posted April 5, 2019 Started to lay down some paint and the dash and odds and ends. 1 1 Share this post Link to post Share on other sites
bellevillerod 834 #29 Posted April 5, 2019 Lets see what else was done last night...oh I was able to get some other parts sandblasted. Ready to lay down some of my favorite color. RED 3 1 Share this post Link to post Share on other sites
bellevillerod 834 #30 Posted April 5, 2019 1 hour ago, ebinmaine said: What size Rod did you use? Let me double check for you but off hand I think it was 5/8. Hey eb let me know the sizes you need, I would be happy to cut face and drill and tap a set for you. Most I have done have a nominal size of 9" center to center line of bolts. I would install grade 8 fine thread bolts in the ends. Pay shipping to your door and you got em. Let me know Rod 1 2 Share this post Link to post Share on other sites
Racinbob 10,264 #31 Posted April 5, 2019 Outstanding work Rod! I just found this thread this morning. FYI, those rubber bumpers mentioned in post #8 are also available from Glen Pettit. I picked some up from him at Mentone and hope to get a few more this year. For those who don't have the equipment to make those nifty tie rods (like me) here's what I've done several times. I use 3/8"-24 threaded rod and the same tie rod ends. I then cut a piece of 3/8" ID steel tube (Lowes) to length and slip over the rod. Works great. 4 Share this post Link to post Share on other sites
ebinmaine 62,973 #32 Posted April 5, 2019 2 hours ago, bellevillerod said: Hey eb let me know the sizes you need, I would be happy to cut face and drill and tap a set for you. I would be absolutely ecstatic if you could do that. Let me double check the sizes of the rod ends that I ordered. I am actually going to produce a set of heavy-duty ones for the Cinnamon Horse as that is going to be my primary heavy load moving tractor. I'll send a PM to you sometime in the next few days. 1 Share this post Link to post Share on other sites
bellevillerod 834 #33 Posted April 9, 2019 So just plugging along with some of the little things that need done. The pivot pin was made heavy duty so as not to break on the tab. The wheels were sand blasted and painted. I couldn't find the off white I wanted so I went with a white sand. Little creamy but it will do, think it will look ok against the red. Starter gen was painted black, will see how it looks in there. Pic worth thousand words so... 7 3 Share this post Link to post Share on other sites
ebinmaine 62,973 #34 Posted April 9, 2019 Nice looking dash plate. Is that going to get a sticker set from Terry? I like the contrast of the black S/G. Remember to scrape the paint a bit when you mount the regulator. I found out first hand they need to be grounded. What paint system are you using? 1 1 Share this post Link to post Share on other sites
bellevillerod 834 #35 Posted April 9, 2019 Thanks for the heads up on the grounding of the gen. Paint is rust-oleum and am adding a catalyst hardener and reducer. Then paint brush and let it dry and even out. The bigger stuff hood fender center are getting spray bombed. I really like the mix and brush, stuff drys fast and hard. I bought a set of spray guns an the next one will get the full mix all over. Can't spray in plant with guns because the need for breathing protection for all. Soon as weather warms I can spray outside. 1 Share this post Link to post Share on other sites
bellevillerod 834 #36 Posted April 9, 2019 Oh yes, ordered from Terry the full set of decals. He does do some top notch work really finishes the job off. Share this post Link to post Share on other sites
ebinmaine 62,973 #37 Posted April 9, 2019 Just now, bellevillerod said: Oh yes, ordered from Terry the full set of decals. He does do some top notch work really finishes the job off. Agreed. I really like the new multi-piece Dash sets he's started doing. Share this post Link to post Share on other sites
bellevillerod 834 #38 Posted April 9, 2019 Oh and the wheels were spray bombed also..lol. I seem to have more things going on at the same time than I can remember. 1 Share this post Link to post Share on other sites
ebinmaine 62,973 #39 Posted April 9, 2019 1 hour ago, bellevillerod said: seem to have more things going on at the same time than I can remember. Now there's a sentiment I can well relate to. Share this post Link to post Share on other sites
bellevillerod 834 #40 Posted April 9, 2019 Ok I got the tires mounted on the rims with tubes. What a pain in the ..... but with two big screwdrivers and a little muscle I got it done. I know that the 68 commando 8 ran a 5.5 x 8 front tire. But I really like the look of a thin tire on these tractors. So I got a set of 4.8 x 8 and stuck them on the rims. I think that the smaller the rim size the tougher it is to mount. I dread the day that I have to change out the fronts on my 416H with the 6" wheels. Might just have to buy a set already mounted. 2 1 Share this post Link to post Share on other sites
ebinmaine 62,973 #41 Posted April 9, 2019 Trina bought us a Harbor Freight tire changer for the rear tires. Like you, I used two Big screwdrivers and a lot of irritation and several expletives to change the fronts. 1 Share this post Link to post Share on other sites
bellevillerod 834 #42 Posted April 9, 2019 I have the HF changer but it seems to work great on the 12s. On the 8s not so much, I may have to attach the changer to something lower and more stout. But on the 8 the ground on my knees and a large vocabulary works best. 1 Share this post Link to post Share on other sites
ebinmaine 62,973 #43 Posted April 9, 2019 (edited) 8 hours ago, bellevillerod said: attach the changer to something Do this. That was probably the biggest piece of advice or requirement or whatever you want to call it when I was researching those changers before we bought it. I didn't even try to use ours until I had carriage bolted it into a cross beam in the floor of our shed. Edited April 10, 2019 by ebinmaine 1 Share this post Link to post Share on other sites
bellevillerod 834 #44 Posted April 10, 2019 (edited) Got the hood sandblaster and primed, tonight looks like some wet sanding prep for paint. Made up the bushing for the hood hindge set up on these tractors, 3/8 ID x 7/16 OD with a small collar to keep in position. Edited April 11, 2019 by bellevillerod 4 3 Share this post Link to post Share on other sites
bellevillerod 834 #45 Posted April 11, 2019 How do you know when good is good enough? I have my hood ready to paint and I see some small imperfections in the top of the hood. This is not a show tractor, it will be a regular worker around here. But for some reason it's bugging me something fierce. I will try and get a pic but it's just little pits that the primer didn't fill. At what point do you all call it good? I know it's a personal thing...i may never get paint on this hood...lol. 1 1 Share this post Link to post Share on other sites
bellevillerod 834 #46 Posted April 11, 2019 Ok looks like I'm not getting aggressive enough with my sanding. I went back over it again with 400 and most of it came out. So i guess it on off repeat until its right. I never had the patience for bodywork. Paint doesn't hide anything it shows everything. So I'll just keep it up until I'm happy. Starting to be kinda therapeutic in a way. 3 Share this post Link to post Share on other sites
Achto 26,505 #47 Posted April 11, 2019 54 minutes ago, bellevillerod said: How do you know when good is good enough? Here is a trick that I use. If I'm using a light color primer, I will mist a dark color over it (dark primer use light color mist). Usually just use a spray bomb for the mist color. Then I will sand the primer until the the mist color is gone. This method helps you see your imperfections while your sanding and lets you know when the entire surface has been sanded. 3 Share this post Link to post Share on other sites
ebinmaine 62,973 #48 Posted April 11, 2019 5 hours ago, bellevillerod said: Starting to be kinda therapeutic in a way Now that's the spirit... Share this post Link to post Share on other sites
Sarge 3,462 #49 Posted April 12, 2019 When priming - you'll save a lot of time filling imperfections with high-build primer versus the cheaper stuff. Primer isn't very expensive, which is good since you'll end up sanding off 80% of the stuff. Sarge 3 Share this post Link to post Share on other sites
bellevillerod 834 #50 Posted April 14, 2019 Oh boy getting close to putting it back together. Got to paint the rear end and thinking about a coat on engine. 5 3 Share this post Link to post Share on other sites