
Leaderboard


Popular Content
Showing content with the highest reputation on 02/21/2019 in all areas
-
10 pointsGot a positive call from NC yesterday.
-
10 points
-
9 pointsHi all! New member from Sweden here. Picked up what i think is a Raider 12 just the other day. It had not been running for many years but some new fuel and a new sparkplug and battery and it fired right up! It is meant to be used mostly for snow-blowing and plowing, but after looking around i really felt like it deserves a restoration (didnt think they where this popular mostly bought it because it looked cool and something for my 3y old son to ride around the yard on) After some test runs in the snow i am really impressed by the little beast. The son was happy too! So after trying it out we took it to the garage and started taking it apart... Did get the motor of and the frame off the axle and put some paintstripper on the frame but have no pics of that. Did order some 3 ribbed front tires and tractor type rear tires to make it look more like a tractor than a lawn-mower. Will try to post pictures as the restoration progresses if you guys find it interesting.
-
6 pointsAnother good day at Florida Flywheelers! SmRodney started working on the Shaw-Du-All R6 Wisconsin twin motor! Talked George Ivanoff (svir handle on Red Square) to drive a RJ yesterday! He and I had trouble shifting gears! Early today I found out no gear oil in transmission! Filled and works great! Shorty George! I saw the 141 Cub Cadet Tractor Show set up but I asked about one model I did not see the Spirit of 76 model from 1976 USA Bicentennial! None there! My buddy Earl Lauder had one with a Lister Diesel engine so I was surprised to find out not all Cub Cadet models were there! F7DFE4BD-4427-4CB7-ACE4-810F0DCDCA4B.MOV
-
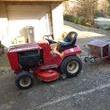
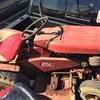
6 pointsThis is the original engine of my wheel horse 212h (briggs & stratton 12 5 hp) Unfortunately, the previous owner has invested little time in the care of the tractor. I then found a used reserve engine and I bought this and a new carburetor. I've rebuilt everything else from the old engine (stator, fan, exhaust, gas rods, pulleys, starter, etc.) now it's running perfectly again
-
6 pointsLet's see... My 150, your Blue, Eric's Cummins, Maybe Jay's FEL..... we got us a convoy.
-
6 pointsThought he was having troubles hooking up. Title is catchy.
-
5 pointsA few years ago I picked up a nice hitch, my old one had a lot of pock marks from rust. I also turned a new stainless pin to mount the hitch. This morning I added grease zerks to the bushings that I had installed in the spindles and steering block.
-
5 pointsHa, someday the vultures will be out doing the same thing for my collection. Hope they all get excited and enjoy getting my stuff to sell, swap, restore, and or use to fix their other tractors and projects. If you get this stuff Ed, can you post the collector's name? Just to give him some credit.
-
5 pointsgas tank started with straps and filler neck installed into hood drilled hole in frame for steering shaft Mock up to check fit and size
-
5 pointsNo worries. I just guessed and then changed my mind what I was doing anyhow. I was looking at how the hood wouldn't tilt forward with the correct 857 front hood hinge. I remembered I still had the raider hood sitting out back so I went and swiped the mounts off of that and drilled a hole in the frame to get this: Ended up using the rod that was on the raider hood for the hinge and it works out alright. Still have to modify the lower hood mount some to get more open out of it but that is minor. Also noticed that I need to cover the front of the tractor with something and well the raider hood is getting cut up to make that happen. So that's the update for now.
-
4 pointsHappy Birthday @bottjernat1 and @Rob R, we are all glad you were born!
-
4 pointsCool! Thank you all! The tractor is almost complete i think. Dont think i will be using the muffler that is on it hopefully i will find something better looking... I currently have some parts that i have had the paint stripped off and are currently in a bath of cictric acid to remove all rust. Looking forward to paint some primer and paint. The rims will be Wimbeldon white but the body i have choosen Ral 3000. Might not be a perfect match but we did happen to have some 2K paint leftover of ral3000 and i cant tell the difference and it will save a couple of $$$. Also i did notice that there is no solenoid for the starter just a real big button under the hood to start but that will be a later problem to look into. got some paint on the engine fancover with Ral 3000 does it look terrible?
-
4 pointsWhen we (I mean you) hitting the road? I’ll get Blue ready (I mean I can’t wait to see your loading technique!)
-
4 pointsWill you let them know... I've got dibs?
-
4 pointsRodney Burger and I are set up at row 63 and spots 26 through 30 at the Florida Flywheelers Showand Swap Meet. We will be. Here through Saturday February 23rd! Had a nice visit with svir Wednesday (George Ivanoff) who recently redid a B-80 Wheel Horse Tractor. Rodney’s R6 Shaw- Du -All and 1956 Bolens Ride-A-Magic were hits too!
-
4 pointsI've got one of my own, I do like the narrow front on yours though. I only have a 10 hp in mine for now, have a 14 & 16 I'd like to stuff in but don't think they will fit. Can't wait to see the finished tractor you come up with. Gotta love the customs.
-
4 pointsMy original gas tank filler neck was not in very good shape and a member here was kind enough to send me a new one that he had. I got it soldered in today. Thank you Cas!
-
3 pointsa 1957 bolens super ride a matic. why is it super? because it has the k160 in it not the k90. I purchased this a few years ago been always wanting any early bolens. I bought basically sight unseen by a few photos. a friend of a friend etc.. had it and we purchased a few tractors that day. I was committed to buy it and as soon as I saw it I knew I was in trouble. I have a tendency to buy the worst possible project tractors and this definitely is one of them. once I got it home I cleaned did a really good inventory of what I needed, partially dissassemmbled it for storage and searched for parts which is a nightmare for one of these. the k160 is in great shape however it needs a coil, a rare bendix style $$$!. the biggest hurdle is the missing belt guard which are non existent. a true 57 style would be near impossible to repro without certain skills and stamping skills. I designed a simple style one more of the looks of a 58 but will work on mine. which i decided now it's time to start on. this week I reassembled it decided it's time to start again getting this project going. I love a challenge this definitely one.
-
3 pointsHeading to Florida Flywheelers Show again this year . Show/Swap Meet is February 20 thru 23rd. Always a fun time and great bunch of old motors, vehicles and nostalgia! flywheelers-feb-events.pdf
-
3 pointsSorry, didn't know you then. Made that trip in 2017. I spent a week down there for work, went down town every night while I was there. I prefer to drink during the week, don't wanna be hung over on my time. Work helps support this by having me work 6 days a week.
-
3 pointsWhat? Fish are you nuts? You know how we love pics. This way it showcases all of the detail and work that goes into making it look sooooo goooood! Keep em coming!!
-
3 pointsFront axle with retaining nut preped. It will end up thinner than pictured here but really want the hood on and the tires made to size it. It will swivel when done. And the dreaded tire assembly is preped.Making the tires is tedious and time consuming. Not one of the favorite things to do.
-
3 pointsYuengling!!!
-
3 pointsJust sandblasted these wheels today at work and I'm ready for some almond!!
-
3 pointsThanks for all the nice and encouraging comments. It's certainly something different than the usual tractor build but in the same family. Anyone can do this stuff with a little practice and you always figure out better or simpler ways to do things as you go along. different techniques and tools make it so each time there's a bit more detail. For those following along that have interest or haven't seen this before, here's a link to a thread on some other things which were done and if you scroll through you will see what my first stuff looked like. Big difference from those to to the new stuff. By the way, check out the forum MoM while you're there and become a member if you haven't already. https://myoldmachine.com/topic/20-toothpick-art/ So in the interest of a attempting a little more detail, trying to see if I can actually make the brake band to act like a spring as well. Doing so will allow the pedal, the linkage and associated parts to actually move and spring back. Sometimes there's too much ambition but any moving parts adds to the art of the final product. Not sure this will even work and this is the type of stuff that causes road blocks and frustration but it'll be worth it if pulled off. It's more than likely the parts will be glued in position but this is how to progress with new and better things. Always learn from mistakes and something done wrong. No one really learns much when things go perfect! Thanks to @bcgold for posting that wood bending stuff, I gave it another try but with my own twist. Shaved the wood down to a very thin slat then took @squonk 's mention of "soften them up". Put it in my mouth for heat and dampness and used my teeth to bend it in very short sections a little bit at a time. Unfortunately the fibers still split a little and most of the bends are still actually breaks in the fibers but it did allow for a very tight bend on a very thin piece which is difficult to achieve without the need of glue to hold it together. (like the thin bands on the gas tank are done with glue holding it to the tank) Ice outside today caused a work cancellation so worked on this again. Cas @formariz understands when doing this type of creative stuff you can get lost in these things and time passes by without any notice of it. Here's the damp chewed up band clamped for drying over night. Did that last night. If it doesn't work I'll chew it up again and send it to Squonk!!! removed and seems like it might do with some adjusting, sanding and a little glue Made and attached the brake drum. It's attached with a dowel through holes drilled. Shifter handle lathed out on the dremel tool as well. It's not attached permanently at this point as it will certainly get broken if it was. (Should've made something inside the trans to hold the shifter and allow that to move as well but too late now unless there's some kind of catastrophe and the trans needs to be made again. Just need to open the band up a little for the spring effect and try to get some attachment point on it for a rod linkage. It seems springy but not sure if it will really work as a spring. It won't work at all if it isn't at least a little bit durable. That's another thing. People are always surprised how much these things are NOT as delicate as they may appear to be. Off to try and get more done!
-
3 pointsIf I could get my hands on some that's exactly what they are. It's pretty expensive to buy that large diameter pipe and even more so if you can find a shorter piece. There was a bunch of road work going on by me a couple years ago with a bunch being replaced. The guys wouldn't let me take any or even let me buy it and it was all going to the dump anyway. Stupid company regulations which I'm sure was created because some retard abused the system somewhere along the way. Used to work on new built Target stores and SO MUCH extra material would have to go into the dumpsters and no one was allowed to take anything. Some idiot was doing it and also helped himself to some needed material which was not in the dumpster but said it was. So to curb any more BS and help stop stealing, NOTHING was to be touched and it all went to the dump. Once I saw 25 pieces of 8' x 4' x 3/4 premium birch plywood just get tossed. Broke my heart not to recycle that! I wanted it bad too. That type of spacer can be built outta pretty much anything so let your imagination figure something out.
-
3 pointsto @LennieM! Great tractor project, and you’ve got some fine help in the garage! My kids enjoy their Wheelhorse tractors too! Here’s some inspiration from the left side of the pond... The little one in the fuzzy pink outfit isn’t mine, she was just riding along for the day.
-
3 pointsYou might have to buy this one from one of my grandsons, Craig. They've already claimed it.
-
3 pointsDecided to add some custom touches to this one, one of which was flipping the front spindles to lower the front end. Got it all done a few nights ago but didn't take into consideration the change in geometry in the steering, all of a sudden it would turn almost 90 deg to the left, but cut the wheel all the way to the right and it was going straight. Spent two hours trying to engineer an adjustable tie rod for it, then it hit me, all I had to do was get the wheels straight, center the fan gear, and drill a new hole in the center link for the tie rod to attach to, as the factory hole was too far to the left. Works like a charm now. Going to try and locate some wider wheels and 5 bolt hubs for the rear. Found these two different tires for the rear, but can't decide which ones I like better
-
3 pointsI got some toothpicks with my BBQ yesterday. After I "soften them up" I'll send them to ya!
-
3 pointsI finally got this thing back on 4 wheels and am getting closer to having it back together and ready for paint. A while back I made a stainless exhaust pipe and shortened it a little to move the muffler a little closer to the heat shield. No real reason other than I like the look of the shorter pipe.
-
3 pointsDone packing for first day setting up at Florida Flywheelers! More to go tomorrow!
-
3 pointsDid a little more painting and a little more assembly. Motor should be here soon and hopefully come springtime be ready to mow!!
-
2 pointsHello, I found a Sears David Bradley missing a hood and pretty rusted up. The hood I have on hand, however, I am leary about buying the tractor. There are a couple of implements, disc, blade, but those don't interest me too much. The tractor looks to be in fair shape but I haven't gone to see it yet. Can anyone give me a price on such a piece in the condition it's in? I know it's hard to guess, but I would enjoy the restoration on this one. The seller expects me to just meet half way and buy it, just like that? Well, I don't think that is too smart, especially if the rear end is all locked up or something. I believe the seller will be putting the tractor on blocks to see if the rear is freed up, or the clutch anyhow. Problem is the distance, it's at least 4 hours one way........Asking.500? Oldman
-
2 pointsExhaust valve is toast, will probably be to thin on the edge after being ground. That ring at the bottom is probably because it was run with the skirt broken on the piston, rocking in the cylinder, Not normal wear to me. Valve seats will probably clean up ok.
-
2 pointsHave you ever considered a red wood dye? The wood grain shows through.
-
2 pointsRobbie, that shiny cylinder wall and oil wash on the piston do look like a little refresh is in order. Prior to pulling it apart I would suggest cleaning up the points, flywheel and coil like Mike @Mike'sHorseBarn suggested so you know the condition of your ignition system.
-
2 pointsImagine how severely disappointed we would be with the product they would call a Wheel Horse at this point. They’d have safety interlocks to make sure you have both hands on the wheel before it engages the mower blades or some crap.
-
2 pointsCould be spindles for one of these front mount brush hogs.
-
2 pointsJohn or whoever else, have you heard of using a piece of large diameter PVC pipe to make your own spacers? These, pictured above, are definitely a very interesting dual spacer. I'm actually pretty impressed with the fact that they are a solid piece which adds weight. I don't think I would have any problem running those but I probably would use (5) 7/16" bolts to hold them to the wheels as normal and then also add the (4) 1/2" carriage bolts that John is suggesting. It's quite likely that either/or bolt size set up would work perfectly well by itself but if you're going to be working the tractor at all it would be tough to justify not doing a few extra dollars for Hardware just for the insurance and peace of mind. Don't forget to run the outside set of tires at a lower air pressure to compensate for traveling on unlevel ground so as to not Bend an axle or worse.
-
2 pointsSweet! Can't wait to see some more pics of all them goodies you landed!
-
2 pointsImagine what the pups would look like!
-
2 pointsDarn thing ain't even done yet... and it already looks soooo nice Denny! I'm begging you buddy, please don't ever sell this one... at least, not to anyone else but me.
-
2 pointsI think I’ll just continue saying “Wow!” Every time you post an update! Those pictures are so awesome, plus I don’t know how you get anything accomplished, the place is so clean!
-
2 pointsOil is definitely leaking past your rings hence not only the visible oil but also the "clean" part of piston. That I don't think will prevent it from running. Did you check for spark when it stalls and wont start back up?Did you check condition of points and condenser?
-
2 pointsTrue. Another issue I had was a chafed mag grounding wire on a 704 cutting out the ign. I would get a cheap inline spark tester ( Napa) and run the engine. If the spark stays strong during the poor running, then you can look at the fuel system.
-
2 pointsI had a C125 that had a bad connection in a main fuse. Fuse would get hot but not blow an fuse holder started to melt. I thought for sure it was fuel and just happened to notice the blackened fuse holder when checking the fuel line. Tractor ran fine then would bog down spit and sputter..
-
2 pointssome more done Needed a longer piece for the frame rails. The square section tapers to round and if too much of the round section is used, it looks funny and leaves voids. Here's joining 2 pieces which is kind of a pain in the ---- but needed to be done for both rails. Drilled some holes in the hood
-
2 pointsCould probably get away with long 1/2" carriage bolts through outside square holes too. I like the added weight. For spacer choice I prefer the ring type as they don't allow junk to get caught up and stuck between the rims.

.thumb.JPG.1b2a1a39cdcedb1e001571713350b32c.JPG)


This leaderboard is set to New York/GMT-04:00