
Leaderboard


Popular Content
Showing content with the highest reputation on 10/25/2017 in all areas
-
16 pointsThis is an easy project that is a lot of fun. If you use this while mowing, better have a side discharge deck. (Have two WH for mowing, Honda is for running around.))
-
6 pointsI had the same problem...you'da thot someone planted corn in the carb bowl. I tried Stabil, but that only turned the green 'seeds' to brown. Ultimately I began using Seafoam and have not since had a problem. A better idea is to buy Ethanol Free gas, which I've also done. Even with that, I still use Seafoam cuz I like to 'over-kill' an issue.
-
5 pointsI get enough 'back seat driving' from my wife and daughter in the car. My tractor time is my alone time. Jim
-
5 pointsJust an impulse reply because my wife is complaining and ragging on me right now. I would get her used to riding in it then switch to a rear discharge deck and run over the dog piles! Plus remove the umbrella so she can't use it for a shield.
-
5 pointsSo after a few too many searchs and phone calls I get a RETURN call from a machine shop owner not too terribly far away. Side note, shops that are willing to to work on one lung motors around here are EXTREMELY rare. Note also the owner actually calls me back, unheard of these days. This guy right off the bat says you must be working on a Kohler ....I says that's right howed you know? Only vintage motor guys want to save he says! Bamn right from the git go we hit it off. Offers me a couple of dirt cheap K's he been using for door stops and a wide frame puller Cub. Says he machined many a K series puller so when I inquire about pricing for such machine work I thinks, Jim, you gotta go meet this guy, this might be a relationship made in heaven. Stay tuned for this rebuild.
-
4 pointsFor all you Wheel Horse RJ fans! Here is patent on the first Wheel Horse three speed transmission. https://www.google.com/patents/US2988185
-
4 pointshi men, since the fender pan and belt guard were removed for the seat support repair, i also removed the hood. special thanks to my bud mark for the fresh automotive paint and clear. new decals from terry, super guy! custom stainless steel exhaust stack from john at blue ribbon welding in chester ma. the stack is something i bought at home depot. (actaully its a shower safety grab bar) my bud harry fabbed the rake mount so it works with a clevis hitch. and thanks to my friend phil for the pics. enjoy mike in mass.
-
4 pointsMint set of chrome lse rims and hubs showed up At fastenal today . now what to do with them 🤔
-
4 pointsYeah, some of the stuff made us sad to toss. I know the cat was put aside, unfortunately no one wanted the equipment. I didn't get pics of the 4000lb planer, they don't make stuff like that anymore and most people are scared from anything that requires some thought and physical ability The mill sold, a guy is going out Saturday to take it apart and it's huge. 52" blade run off the same cat that's in the truck (that was a spare)
-
4 pointsSea Foam is an awesome product and anyone who doubts it will have to grab a chair and sit a while as I explain in detail all of the things I have fixed or seen fixed with it.
-
4 pointsI've seen this a million times Bob.Well maybe not a million. I use premium no ethanol gas and my tractors that sit I use the 4 cycle fuel that places like Lowes and Home Cheapo sell. 3 yr shelf life. Never a problem since. And be careful with Sta-Bil. I have seen that crystallize also.
-
4 points30 days is about the "shelf life" of ethanol gas. It's all down hill after that unless you treat it with Sta-Bil or Seafoam.
-
4 pointsYup, same hood - just without the rust and peeling paint. It's got a few dents I'll need to work out, but overall pretty nice. I hope it's as good of a present as I hope. Emory has been begging for a "big" tractor and now has decided he wants me to fix up an old CG8 so he can have one that looks like a big tractor. I think he'll be happy when he finds out "my" tractor is really his!
-
4 pointsWorked a little while tonight. I welded up both seat pan mount ears and the holes in the steering tower. Please ignore my bird turd welds! I also rigged up my preliminary idea for getting the brake and clutch on one pedal. I also tried to keep the park brake by putting nuts on both sides of that rod on the brake band. It seems that I'll have to leave the spring off of the parking brake pawl for it to move freely. At least it seems to work. Guess I'll know more when I hook up the Briggs!
-
3 pointsOh no...here we go.
-
3 pointsFired up my dads gravely 8163-b up today, it was the first time in a few months that it had been started. I was surprised the Briggs started but it did without to much trouble just a little smoke at first. I’m am hoping to get it out again this weekend and take it for a nice spin and make sure everything still works. 496972F6-F730-4245-8D08-E5C9D507A702.MOV hopefully the video works but I’m not sure it will.
-
3 pointsOur local agriculture equipment dealer told me a couple of years ago that they switched from Sta-Bil to Seafoam and have not experienced any problems since then! I saw no reason to doubt him so I use Seafoam exclusive!
-
3 pointsThank you all for your help so far. I just became a supporter, so the above posts now include the photos for reference in the future. I checked a couple other things this morning and wanted to report my findings. The thrust washers were present, and measure ~1.134" ID, slightly oval by maybe .003". The two halves of the differential shell (what I'd call a carrier perhaps) are loose on the axles and measure ~1.158" ID and seem quite round. The assembly order on the axle (mostly for my own reference) outboard to inboard is: shell / carrier, thrust washer, gear, the circlip. The spring is indeed stiff, and I needed to compress it with channelocks to get it out. When it is in place, it seems to make contact with some but not all of the pinion gears. That is to say if you flipped it over, 1-2 of the 5 gears per side would fall out. Attempting to recombine the differential shells with all 10 pinion gears and the spring in place was challenging, and when I close this up for good will require some encouragement. And I just had an ah-ha moment typing this. I incorrectly had incorrectly assumed a "10 pinion differential" had 10-teeth on the pinion gears, and why I was surprised they were 11-tooth. But now I get that it really means there are 10 pinions gears in total (vs the 8 pinion differential) - not referring to the number of teeth. Doh! Outboard side of the differential shell / carrier (left on left and right on right): Inboard side of the differential shell / carrier (again, left on left and right on right): More to come... Again thanks for all the help so far. And also to @stevasaurus and @Sarge (and all the other military folks on here), thank you for your service!
-
3 pointsThe nasty green paint is almost gone
-
3 pointsI pulled and cracked the transaxle this evening. It was tough to get open, but with a spreader / clamp between the seat bolts and a rubber mallet, it spread open. I mentioned before one of the hubs (the right one) was very sloppy and chewed out at the woodruff key so that is scrap. Turns out the left side was frozen on - penetrating fluid, love taps, and then it snapped in two quite spectacularly using a gear puller. So now two scrap hubs. Once the dust settled and I found myself unscathed I proceeded on. It was a bit tricky to get the bolts out of the differential with the one side (left, input side) still in the case, but I managed it (once I had it apart, I realized I could have removed the inner circlip and slid the axle out in the opposite direction). Enough expose, on the results. I am hitting size limits, so I will link to Google for space considerations. * edit - now that I'm a supporter , I will try putting them inline for future reference * This thing has an 11-tooth pinion with 5 bolts holding the two halves together (partstree lists an 11-tooth pinion as the currently available replacement for the '72 1-0422 model anyway). Nothing seemed to have grenaded within the differential itself. The 11-tooth pinion gears had some mild wear, but I think they look ok. The spring had some grooves, and with the 11-tooth pinion fits VERY tight into the outer two halves of the differential. Having this apart in my hand now, I am rather surprised that I could spin the differential so easily with the hub in the video I posed above - I do not think I would spin it with the spring in just holding the shafts, like what is show in Stevasaurus's video. I loosely reassembled the differential without the spring, and could easily turn the (now open) diff by hand without the ratcheting / clicking. So my current hypothesis is that the ratcheting / clicking of my video above is the small pinion gears rolling across the groves of the spring. Is the wear on the spring sufficient to warrant replacement? Moving on to other things I noticed... All of the front / middle shaft needle bearings seemed ok, as did the large ball bearing on the output shaft. Both sides output shaft has scoring / pitting where they ride on outboard needle bearings just inside the axle seals. At the inside end of the shafts, there was some play but I think this is expected to allow the spring / pinion contraption to float. The inside of the case showed no marks of damage. As I mentioned before, only mild shavings on the filter screen. The numbers I could find stamped onto the parts are as follows: - 8046 on the right / brake / filter side of the case - 8047 on the left / input side of the case. - 80*0 (guessing 8050) on the right / brake / filter side of differential - 8051 on the left / input side of the differential * note all these numbers look to be Raider 12, GT-14, etc according to partstree * Gear counts from input to out are: - 90-2017 hydrogear output: ??? didn't count before I shipped it out - first shaft is 33-tooth which meshes with the hydrogear output; other end is a 22-tooth - the middle shaft meshes with the 1st shaft with a 44-tooth gear; other end (which meshes with the bull gear) is 11-tooth - the bull gear is 43-tooth - the 10 small pinion gears are all 11-tooth - and finally the gear which slides onto to the output shaft retained by the circlip is 25-tooth outside and 17-tooth inside (and the output shaft is 17 tooth) Other random notes: - differential nuts are on the right / brake / filter side (opposite input) - no roll pins between the two halves of the outer two halves of the differential - the seat bolts are blind, but i could see the differential and count bolts through the ATF filler pipe Stuff to replace: - spring (maybe?) - gasket between hydrogear and transaxle - gasket between two halves of transaxle - two hubs - two output shafts (both sides) - output shaft needle bearings (maybe? because of the shaft wear not necessarily how they feel) - output shaft seals - couple of wheel screws (or I could potentially just clean up the threads) Any thoughts? Am I missing anything? Any other 'while you're in there parts, perhaps other / all the bearing? ID tag on hydrogear: Filings on outboard side of filter screen: Filings on inboard side of filter screen: Enlisting the help of a hound's nose as a final diagnosis before getting to it: Right brake filter side before pulling: Left / input side before pulling: Don't work harder, use more tools (this was a good idea): First shot with the case open: Second look with the case open from a different angle: Going after the stuck hub - don't work harder, use more tools (this was a bad idea): 2-ton OTC hub puller + Dewalt 20v 1/2" high-torque impact = snapped hub between two bolt holes: First look into the differential, left / input side: First look into the differential, right / brake / filter side: First look at the front and middle gear shafts: Second look at the front and middle gear shafts: Grooves on spring, #1: Grooves on spring, #2: Grooves on spring, #3: First look at pinions: Differential plate with the pinons out (right / brake / filter side): Shaft wear, right / brake / filter side: Shaft wear, left / input side: Video of differential WITHOUT spring: IMG_2847.MOV Video of shaft / differential play: IMG_2830.MOV Video of differential (left / input side): IMG_2813.MOV Video of differential (right / brake / filter side): IMG_2814.MOV
-
3 pointsI agree with your analysis. That click just does not sound like it is normal. Once you take the brake side off, you will be able to pull out the differential without taking any other gears out. Use the deep side case half as a holder for the differential. This is important...take pictures for you and us to see. We can walk you through this. You are right about the ease of turning the axle...starting to think you have a broken spring...which means that you may be missing some teeth on either pinions or axle gears or both. It is funny that you can still turn the axles. See if you can count the bolts like I said above. I do not know if you have a 10 pinion differential...I am not familiar with the transmission number that you have either. Part of why I would like to see many pictures. it will help others sooner or later. BTW...if you do have the 10 pinion differential...the bolts go in from the top and the nuts would be on the bottom....opposite from what the videos says. My Mistake on that point.
-
3 pointsThat click is not what I expected to hear. As long as you almost have the trans off the frame anyway, I would open it up and at least change out the seals. Before you drop the trans...take out those seat bolts and shine a light down one of those holes. See if you can count how many bolts are holding the differential together. A 10 pinion Limited Slip differential will have 5 bolts...an 8 pinion differential will have 4. Here is a video of what a 10 pinion differential looks like inside... I think someone has been in there before. You should have the 90-2046, and I have yet to see Wheel Horse use any ATV cement on their gaskets. Not a big deal...just another reason to open it up and take a look. Make sure you have the shallow side (input shaft side) down when you open it up. These trans are not hard to work on...hardly any gears in there...and we can set you up with the numbers for gaskets, seals and bearings (if needed). I think you will find a copy of the trans manual for Sundstrand Automatics in the "Manual section". Let us know.
-
3 pointsWell, Road Runner has been at the spa for the last two days. I pressure washed his frame, stripped and etch primed the seat pan and hood, removed the brake drum and drive pulley, replaced the bent spindle, and did a few other things. I plan on welding up the broken seat mount holes (pretty common failure I think) and a few rust holes in the tower tomorrow. I removed the brake pedal and plan on making the clutch pedal operate the clutch and brake to make it easier for Emory to operate. Well, worn out, time for bed!
-
2 pointsWell, I've been so excited about this project that I need to share it. Can't tell my son though-this is going to be his Christmas present this year. He absolutely loves driving the C125 that I got from @oldredrider. I picked this ugly beast up for $50 at the auction in Charlottesville. I only wanted the deck from it. Got the idea to fix it up for Emory for Christmas. Best part is he thinks I'm doing it for me. Can't wait till Christmas morning for him to find out it's his. This is going to get the Vanguard I picked up last week. Got several ideas to make it just his. I'll share more later as I go. I do need to get in touch with @Vinylguy to get him to do a set of his custom decals for it. I'm going to need a little help hooking up the Vanguard. It's got one wire coming from under the tinwork and I'm not sure what I'll need. I'm thinking it will need a regulator, solenoid, and switch, but which do I use? Look at him in the last picture-no idea it is his! Oh well, that's enough for now!
-
2 pointsA Good friend of our family had a sawmill for years. He passed last year at 91 in a tragic accident. No one in the family want the mill so me and my dad helped his son and another friend clean up the mill since it was sold. Lots of metal. All no. 1 cast iron or I beams. Two huge planers run off 3 phase a truck body, a huge cat diesel off an old cable shovel, if it was heavy it was there. Loaded it with a case construction king back home with forks. We took 42,000 lbs out in 4 days. Sold what he could scrapped the rest. I got a bunch of nice tools, chain, binders and sheets of diamond plate. I'll post those in a tool thread heres some of what we took
-
2 pointshi all, the typical 3,4,500 series wh seat support cracked and broke on my 312. i welded in thicker metal and added gussets. love my hobart mig! mike in mass.
-
2 pointsMe and my dad didn't want anything but ray insisted, we spit 25% for the 2 days we worked. I let them use the truck this week to haul the i beams and the cat. Luckily the scrap yard was only a mile from the mill
-
2 points
-
2 pointsShowed that to my wife! "Don't even think about it" was her reply.
-
2 pointsThat is an ingenious contraption @Dennis Gintowt!!! The bar has now been raised significantly! I just found this post today after snapping a hub last night with a 2-ton gear puller driven with a 20v Dewalt impact. Don't try it this way:
-
2 pointsExcellent wright up and pictures Shawn. We need to find or fix those axles. I would replace that spring if we can find one...and I would replace those outer axle bearings. Finding a set of hubs should not be expensive or hard to find in your area. Use our classified section to look for and ask for parts. Our vendor section also has some of the things you will need.
-
2 pointsHold your control & tap the + key multiple times... to enlarge this image. Get one of these... http://www.wheelhorseforum.com/store/category/1-redsquare-support/ So, you can post all the picts you want here.
-
2 pointsto the Jim. Take Bob's advice and get the correct blower for your 314. Good working blowers can be found for $150-$200.
-
2 pointsIn 1970 there were 3 different model numbers for the tractor. Model 1-7451 has it's own parts list. Shows the 8144 single pulley. Model 1-7452 and 1-7453 share a manual. On page 4 (Steering and wheels) they show a single pulley #8144 for model 1-7452 and a double pulley #100244 for model 1-7453. On page 2 items 50 and 92 they show two different hydro units. Garry
-
2 pointsI would drain the gas,put in all new rubber fuel lines,check the screen on the fuel tank pet cock.Fill with fresh,non-ethanol gas,put in maybe like 12 oz. of seafoam and try it out again.Without seeing the tractor,it sounds like a fuel problem to me.Also make sure the fuel cap vent is operational.
-
2 pointsIf you have a starter/gen like the one shown in @gwest_ca's link. Here is a link to a quality after market regulator.http://www.psep.biz/store/kohler_starter_motors.htm Part #AHGDR6004
-
2 pointsHere are the 2 tillers and both show a separate small drive pulley for the tiller and the required distance between the pulleys In this 1971 parts list that cover all the models the GT-14 is identified by 1GT and the double pulley is 100434 in Group 14. See a 100... in the first picture of the sample above. Garry
-
2 pointsIt's a lift flag for a sno blower Henry. I don't believe is would go with a blower for a 552.
-
2 pointsThis is 4 wheel horses combined to make one. It has a raider rear end, with D axles and a D Differential, 520 swept forward axle and gear reduction steering, and a B&S cast iron 16hp. It has the frame stretched 6 inches in front of the motor. and it will handle a 60inch deck. I am going to put a ark 550 loader on it. It is a beast. It has a D hood and grill, and a early 80's dash. and it will also handle 16 rear tires. A friend of mine built this. I got it yesterday.
-
2 pointsYup, Coyote and now Road Runner. Maybe that Briggs will let it live up to its name. No idea what model this is. The serial number is rubbed off the plate, decals telling are missing, and the 10hp Kohler seems to be a replacement. Think I'll just label it a C165 since it will be running the 16hp vanguard. Went down and tore off the tin work and engine. Kind of naked now. Emory is pooped! Look at that left spindle - bet someone took a mighty rough ride to do that!
-
1 pointI'd have to say that wear on the tension ring to the diff gears may just be the click . Are the thrust washers between the axle gear and case end plate missing ? Seems like a lot of extra slop there and possibly those case end plates are worn out of spec to the axle diameter ? I've been into one of those once before repairing the axle key way cuts - had to weld on up and re-grind it to fit the key tightly , did not have nearly the extra play that your diff has in comparison . That ring I suspect is made from spring steel or at least bearing quality steel - should have to compress it to remove/install at least a little to remove it's intended pre-load to the diff gears . If the face of that ring is worn I'd suspect the mating face of the gear teeth is worn as well . From the looks of those parts either that thing has been ran low on oil or had a very hard service life...a lot of wear showing . Sarge
-
1 pointThat information all sounds good. I would keep up on the Maintenance and keep running it. If the right deal on a "backup" motor presents itself you ca always pick it up and have it on hand if needed. All told, it sounds like you still have a solid engine. Compression seems a little low but as long as it runs strong and does what you need it to do, keep at it. Sorry to hear about your injury, that does sound good at all!
-
1 pointThe older I get, the more I have to assume my guardian angel is plumb tuckered out. Lord knows it has well-earned some nap time. Cheap insurance. https://www.harborfreight.com/automotive-motorcycle/jack-stands.html
-
1 pointThe P216 will out perform both of those kohlers, however you have to ask yourself which engine YOU like better. The K321 will pull similar to the K341 but we all know how awsome it is to own the top dog. Actually the K361 is the top dog but you will never find one....... The knock is caused by too advanced timing, or most commonly an egg shaped crank pin. The pin diameter never increased as the cylinder size increased. It would be safe to assume a 16HP engine will wear the crankshaft faster than a 12HP. It is absolutly worth rebuilding either the K341 or K321. Both are highly sought after.
-
1 pointThe 1st picture is circa 2007 - I'm the masked man in the back doing the dirty work while dad gets the fun job of hauling the brush away. The next two are the start of the restoration shots! It has sat for the last 8 years, and I had to limp it out of the garage and into my trailer. After redoing the battery and starter cables, letting it sit for 48 hours with oil in the cylinder and turning the engine over with a breaker bar, the 'ol Kohler fired up on the 2nd crank with a shot of ether (first crank I forgot to choke and throttle - I was too excited - doh!). The wagon is original, and it has a replacement mowing deck. The original snowblower was sent to scrap unfortunately, but I sourced a 48" long-frame plow this summer which will be better here in PA since it's mostly slush anyway. I am slowly repainting pieces as they come off (I'd removed most of the sheet metal for diagnosis runs around the yard in the 2nd pic). Once things are mostly sorted with the hydro/trans, I'm planning on fresh Firestone bar & tri-rib rubber. I have so many fond memories mowing with this as a kid, and I am probably almost as (maybe more?) excited to get it back to being a workhorse as an adult and hopefully run it another 46 years! (I have a feeling it will outlast me)
-
1 pointAnd thats a wrap! Plenty of room. Now the fun starts.
-
1 pointWOW...It looks like it was well thought out. Should be a good loader tractor. Need to get rid of the PBR evidence though!
-
1 pointI bought this sickle bar a couple weeks ago and figured out the bottom drive pulley was backwards so I tried heating it up and it still wouldn’t come off. And yes I took both of the set screws off. And we put a puller on it and bent the pulley all up. So we found a pulley that is the same thing and put it on the right way and it works good. I just need to get a bigger belt and lube it all up. It’s a 50” too. I can’t wait to use it a lot. Any tips on running it or anything else.
-
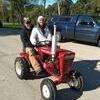
1 pointHave been prodded by Craig and Bryce to enter, here goes. My great grandson having seat time on my half size D - 160. 7=1/2 months old and he loves being in the workshop.
-
1 pointIt is 1-1/8" You only need the thin wrench to hold above the blade. Any 1-1/8 socket/wrench will work on the nut. Make you own out of an old blade. Hacksaw and grinder..isn't pretty but it works and is free.

.thumb.JPG.1b2a1a39cdcedb1e001571713350b32c.JPG)


This leaderboard is set to New York/GMT-04:00