
Leaderboard


Popular Content
Showing content with the highest reputation on 05/15/2015 in all areas
-
10 pointsIn a previous thread, several folks asked me how I painted my rims with tires already mounted. I recently did another set, so I illustrated the process as I did it. Typically, I like to paint the rims after they are mounted anyways, because inevitably when you have tires mounted on painted rims you’ll always scratch or nick them somewhere. I like to get the rims all cleaned up, blasted and primed, then mount my tires. Here’s my process: 1) Rims were sandblasted and primed with self-etching primer. Tires and tubes were mounted. Everything was wiped down with a pre-kleeno wax and grease remover prior to taping. 2) Using blue 3M tape, I go all the way around the rim slipping the tape between the rubber and rim occasionally tucking it tight with a very small standard screwdriver. 3) Then I create a wider tape ring a few inches out from the rim lip. 4) Slide the whole thing into a kitchen garbage bag. 5) Cut a hole in the bag revealing your tape ring below. 6) Tape the bag to your tape ring previously created on the tire. 7) For silver rims, I like Eastwood Silver Argent rally wheel paint and I use a Rust-Oleum Crystal Clear. http://www.eastwood.com/silver-argent-rally-wheel-paint-set.html 8) I wipe the rims down a few more times with a pre-kleeno wax and grease remover, blow them off with the gun, then shoot two coats of color and two coats of clear. I find that the Rust-Oleum clear holds a much better shine if you don’t let it set long between coats. As soon as it flashes, hit it with round 2. I do all four coats in about 20 minutes.
-
8 pointsI don't think I've shared this as I've been pretty scarce on forums since it happened.... but I pulled the trigger on a new trailer. I had the Wheel Horse two-place snowmobile trailer for several years, and while I loved it and had many fun conversations at shows while showing it off, I needed a better trailer to be able to haul to shows and for general use around the home. After long consideration regarding the need of a substantial trailer and the desire not to let this collectible un-restored metal trailer sit outside and degrade in another Minnesota winter I decided it was time. I'd have loved to be able to justify keeping both, but it wasn't a good fit for me. I never officially advertised it for sale publicly, but had told a couple people I was considering letting it go. There was one collector whom I knew was legitimately interested in making an offer if I was ever ready to let it go. We agreed on a price and one of my prize pieces headed for a new home. If he ever decides to speak up on it, I'll leave that up to him, but know that it is in good hands and will be meticulously restored, I have no doubt. This picture really highlights just how small even the two place snowmobile trailer is. With that part of the deal done, I began seriously looking for it's replacement. I wasn't in a hurry as show season was over and I didn't have any immediate hauling needs. It was likely going to just sit in the driveway over winter anyway. I had some bad experiences with a couple dealers along the way, but eventually landed with this 14 foot PJ Trailer built how I wanted. They had trailers in production, and I was able to get a change order done specifically I was able to get the bi-fold gate, removable stake pocket spare tire carrier and color I wanted. Sides are completely removable so if I need to run just the flat deck, I can. I like that because the trailer's stability isn't dependent on the sides keeping it from being wobbly like a lot of them you see. Pretty happy with this, it pulls nice and smooth. Looking forward to some nice trips to shows with it!
-
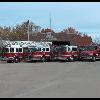
5 pointsHere are some pictures of the Wheel Horse representation at the Little Guys Show today., Friday 5/15 In no particular order.
-
3 pointsNice job Matt.I also do mine this way. I laughed when I once read some comments that its not a full restoration if you don't dismount the tires to paint them. If you know how to do it right you will save yourself a lot of disgust when you go to mount your tires back on your freshly painted rims and inevitably scratch them up.
-
3 pointsYou forgot step # 9 .... stepping back and grinning ear to ear ......
-
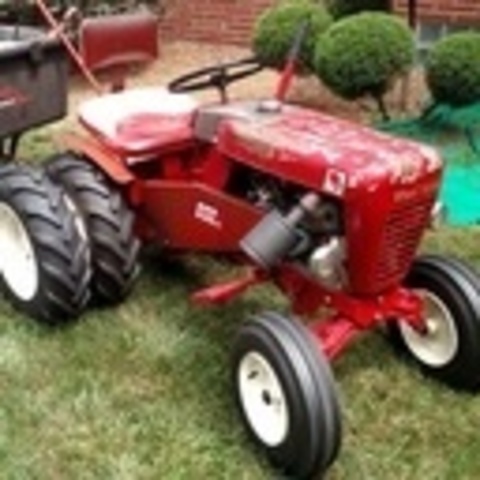
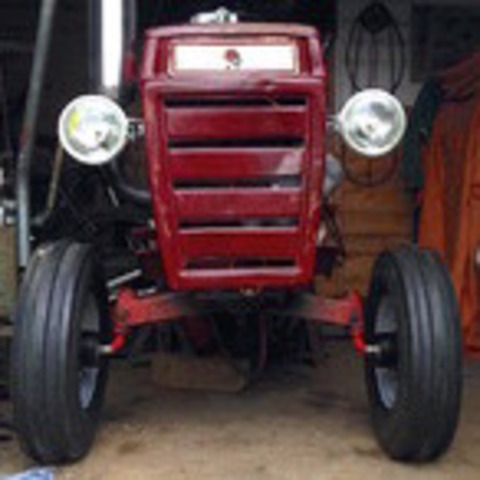
3 pointsI AM PLANNING TO GO TO THE BIG SHOW... I AM BRINGING MY 401.. A FEW THINGS I NOTICED ON MINE... 8 SPEED TRANSMISSION...23X10.50X12 REAR TIRES ON 10" WHEELS.... 2 HP BRIGGS.....WRONG FRONT RIMS,,,,WRONG HOOD.... THIS WAS MY FIRST WHEEL HORSE,,,I NEVER SAW ONE BEFORE....PUT IT TOGETHER BEFORE I CAME TO MY FIRST SHOW....I EVEN MADE A BRACKET TO ADAPT THE TRANS TO THE 401 FRAME HOWEVER,,,IT IS SHINEY,,,IT IS A HORSE, ,,,,REMEMBER,,,IT SHOULD BE FUN SEE YOU AT THE SHOW
-
2 pointsTook some time today to shine up the 55' Crestliner and load up 4 outboards to run at our first antique outboard meet tomorrow.
-
2 pointsIf your on mozilla firefox go to the top right screen settings (3 lines) click on options then click on the security tab then click on saved passwords and then click show passwords.
-
2 pointsThanks guys. That was one feature I really wanted. I don't know how long they've been making them with that as an option. I don't remember ever seeing any others around here with the option, but I had conceived that idea several years back, and thought if I ever got a trailer with a gate that's what I'd do. Several dealers tried to talk me out of it commenting how it doesn't really save you gas mileage or anything... which I contend is a moot point anyway. From my perspective, the gas mileage thing only becomes an issue when pulling an empty trailer allowing that whole gate to provide wind resistance, and I don't make a habit of running around with an empty trailer. Besides, they just wanted to sell me what they already had on the lot, which was full, non-folding ramp gate stock models. Another nice benefit is that when I'm pulling it, I don't have to look through the mesh gate to see behind me. The bi-fold lowers the view obstructing gate for a cleaner view of following traffic! Shopping around makes a difference. I was able to get what I wanted, in the color I preferred for less money than settling for something closer just down the road.
-
2 pointsHere is a picture of 857 horse's (Howard) 401 with the 8 speed transmission.
-
2 pointsRIP The King. This will be on repeat all day for me.
-
2 pointsExcellent write up and pictures Matt. Definitely first class results. What I do is cut several pieces of light card stock to the radius of the rim. With the tire deflated I slip them around the perimeter between the tire and rim. It holds itself in place. Finish off masking and spray away.
-
2 pointsHi Callum, while WN is apart the chassis will be getting cleaned up and sprayed with red oxide to add a bit of protection for now. She won't be getting the full paint job until any bugs have been ironed out and any tweaks that need tweaking are tweaked I'd hate to have to cut into nice shiny fresh paintwork.. The colours will be standard Wh colours body and wheels, gloss block engine and maybe rear axle... And a few polished ally bits No roll cage as it would only make the center of gravity a lot higher.. Morning all, a bit more progress for you.. Starting at the top... Brake fluid reservoirs mounting bracket.. Only tacked on at the mo. Middle... Bonnet hinges... Bottom... Two bit's of box welded to the engine frame... These will bolt to the chassis and will add vital strength to that area.. Getting the engine out was interesting, slide it forward and lift at the same time! Engine frame bolted back on to help keep things in line during welding... Plenty of surface rust to be cleaned off! A view you would only normally get if you were lying on your back and had just been run over by WN I did make a good start on the cleaning up and welding yesterday, lot's of joints like this needed welding up.. A few more parts have turned up.. New front tyres, sorry for the rubbish photo.. And some shiny stainless pancake air filters.. These are for a 1098cc MG Midget engine so two of them should flow more than enough air.
-
2 pointsBeen pecking away at the new one. Got the firewall, most of the steering and 90% of the frame is done. Still waiting for some sprockets and a new carb for the M8 to show up.
-
2 pointsMy 3 favorites of mine. Sorry,got a little carried away on pictures. My 57 I just got back together a month or 2 ago My 55 that I believe is still in its original paint, also has the cast iron nose weight And another 57 I have
-
2 pointsThis was my last custom build and since it was sold, I've been wanting to do another build but just haven't got around to it. Decided to do a copy of this build and the plan is to try and have it done for this years big show. The lowered front axle is done, welded some frame parts and collected most of parts needed. Had to buy new front fenders and will use a cut up old RJ hood I got from AMC Rules that came from Stevebo at the show a couple of years ago. Finally found a use for it! I'll try and post some build pics as it progresses. I do have another build in the works too but doubt both can be finished by the end of June
-
2 pointsEvanescence - Bring Me To Life: LInkin Park - Numb:
-
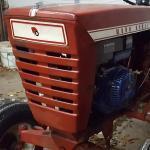
1 pointWas driving down the road and saw this for sale and decided to pick it up.Any one know what years this would be?
-
1 pointVery nice documentation on a very nice set of rims! They look really nice.
-
1 pointI'm still perk'n, but now I use an electric farberware unit. nuthin beats the perk.
-
1 pointJason, I didn't know you had involvement in those manuals groups. Neat! CDM started a lot of resource sharing groups over there and I just assumed the manuals groups were part of his initial effort. It's been so long I don't recall who did what. It's amazing how long some of us have been screwing with this junk. Jim, I should take your lead. I keep saying I'm going to do liquidate, but I just don't make the time. I'm hoping that this will be the year that I finally start moving some things out the door. I have a few "keepers" that will never leave (Lever, Senior, Rj35, 420LSE) but I have generally lost interest in having so much stuff. I'm in the 40's too. Want to make it more managable. Problem is, I think guys have gotten cheaper! Hate to take big losses just to make room, but might do it. i also added some other colors to the fleet and find I like some of them as much as the horses. Steve
-
1 pointI'm always very excited when I get a tecky running!!
-
1 pointThanks Steve! Yes, today is the last day. I voted on wifi then it let me vote again on cellular data lol Gonna fire up the PC and vote on it too.
-
1 pointI've been able to vote for the last 3 days...is today the last day Ben?? I did try to vote twice in one day, but this is not like Chicago, they would not let me.
-
1 pointThe more I look at the brake/clutch pedal, I agree. I think somebody made it. You may be right on the hood stand too. But why would they go through all of that effort? Wish these things could talk. What's the story?
-
1 pointYour right! I just imported the picture and changed the shading and it is an optical illusion. I guess the only odd thing left is the mid hood stand. I looked through the parts drawing from the years surrounding the 401 and can't find one similar.
-
1 pointIt worked, Dave! Now go out there and plant some sorghum in the lower 40!
-
1 pointThanks for pointing out "ghost voltage" SOL. I always learn something from your post!
-
1 pointYou can also get a pulley at TSC or any electric motor supply store. My RJ has a Browning pulley. I just painted it
-
1 pointHmm, how old was Steve in 1964?
-
1 pointComing along nice Shaun. Glenn
-
1 point35-36RL01 is the same as 02 03 etc. just continuing model years. 112990 is discontinued and I see no replacement for it.
-
1 pointAs long as you think it is a fixed up parts Horse, you might not mind making your own hitch pin. It is just bar stock with a groove on each end for a "C" clip. BTW, I think you have a very nice looking horse there.
-
1 pointThe answer is most likely "ghost voltage". This curve ball can be thrown at you if you are troubleshooting power circuits with a multimeter or an LED test light A multimeter or an LED test light draw almost no current thru the wiring under test so they will indicate voltage present under a "no load" or "non-burdened" condition. A corroded terminal can still allow enough current flow to fool a multimeter or LED test light.An incandescent tester is harder to fool. The actual electrics of the tractor will not be fooled - and that's why "good voltages" go dead under real life use conditions. We are gong to be heading back to the fuse / ammeter / PTO wiring connections to find out where it "goes dead" in the RUN position. I will wait for your answer as to what type of tool you have used so far to check for HOT wiring.
-
1 pointHow come I do not see any grease on Vin's prototype? Lol
-
1 pointfor vince heres a couple I have
-
1 pointI'll take the liberty to post my brothers (VinsRJ) '54 prototype with hand built fiberglass hood. No picture I've seen yet does this thing justice.
-
1 pointThat is crazy Steve....how much you want to bet she was texting while driving. Glad everyone is ok..........the old Dino can't be taken out that easily!
-
1 pointwhile its stripped will you take the opportunity to make a start on the painting? i reckon gloss black chassis and WH colours everywhere else that would look really nice. can't wait!! callum
-
1 pointThanks James, no need to be stunned but grinning madly is allowed Morning chaps, yesterday was a busy day in the workshop.. I wasn't happy with how the battery box sat, so I cut it off and started again.. It's a bit hard to get photo's as it's tucked away in the chassis, but it has a mounting bolt at the back, two underneath... And one on the side.. Plenty strong enough now A rare photo of Nigel smiling A very narrow axle.. And lot's of parts on and under a fold up table... Which can only mean one thing..... The strip down has started so I can fully weld up the chassis
-
1 pointBrought Two horses home from their winter pasture. Changed oil in the raider and put him to work mowing the ranch.
-
1 pointI got fed up with fighting them and got one of the Harbor Freight changers. Low cost and it works great.
-
1 pointI'm trying to imagine just what a "gas explosion" in your "man cave" actually sounds like? Really glad to hear everyone survived it Dino.
-
1 pointOriginally, we just had it in there laying on the blanket to soften the ride but, Duane and I both felt it would better survive the ride home standing upright instead. I really didn't want to take the chance of damaging this survivor.
-
1 pointC-101 is my first and only one, for now
-
1 pointWow Ian !! Your videos amaze me. I can't wait to see this monster when you get it finished. Thanks for keeping us updated.
-
1 pointI DONT HAVE A BIG YARD.. I DONT FISH,,,HECK I DONT HUNT.. I CAN MOW MY YARD WITH A PUSH MOWER.... 5 YEARS AGO ,I STOPPED AN OLD TRACTOR GOING OUT OF A MANS PICK-UP IN THE DUMP... HAD NO IDEA WHAT IT WAS,, A 401 WHEEEL HORSE..NO ENGINE,,,NO HOOD,,BAD REAR.. IT CAME HOME WITH ME NOW,,,,ITS THERAPY,,,DEVOTED PEOPLE AND HOBBY AND ALL PEOPLE ASK OF ME IS ARE YOU HAVING FUN? NOW,,,,I ASK YOU,,,,,,,,ARE YOU HAVING FUN?????? THANK-YOU FOR ASKING
-
1 point5 years old sitting on my dads 701 nuff said
-
1 pointI buy Wheel Horse tractors to use. None of mine are really "beauty queens", although I want to someday paint one up and keep it "for show" only. I actually started "messing" with mowers at an early age and have continued..... I was 2 years old when this photo was taken....May 1957.
-
1 pointAll of the above, including the sentimental. Many threads exist on this site concerning why some of the members do what they do. I think if you spend some time going into the different sections on the main page...like...Restorations, Tractors, Show pictures, etc and do some reading, you will answer your own question. BTW, I got into it the same way you did. My Dad passed and he had 4 horses in his shed. I started fixing them up, found this place and never looked back. Welcome to the hobby.


.JPG.9f2ecb26065c66527b0730084ab7fc7a.thumb.jpg.7dc8a04d9a53d44ee2b23f26ee94496f.jpg)


This leaderboard is set to New York/GMT-04:00