Leaderboard
-
in all areas
- All areas
- Markers
- Marker Comments
- Marker Reviews
- Articles
- Article Comments
- Article Reviews
- Classfieds
- Classified Comments
- Classified Reviews
- Wiki's
- Wiki Comments
- Wiki Reviews
- Blog Entries
- Blog Comments
- Images
- Image Comments
- Image Reviews
- Albums
- Album Comments
- Album Reviews
- Files
- File Comments
- File Reviews
- Posts
-
Custom Date
-
All time
November 28 2011 - April 18 2024
-
Year
April 18 2023 - April 18 2024
-
Month
March 18 2024 - April 18 2024
-
Week
April 11 2024 - April 18 2024
-
Today
April 18 2024
-
Custom Date
02/23/2014 - 02/23/2014
-
All time
Popular Content
Showing content with the highest reputation on 02/23/2014 in all areas
-
7 pointsHi All, Well ive finally managed to finish my latest fun video on building my snow plow, not that ill get to use till next winter, but its done:) Hope you enjoy it! Now i need to find time to get the charging system tested. cheers, Daniel
-
3 pointsI made my decision yesterday on my new chainsaw with a 20" bar. Although I have bought Stihl products for the last few years, after reading other forums specific to timber I decided to buy a Dolmar. I had initially thought of the next model up from what I bought which is their PS-6400. The Dolmar dealer, after lengthy discussion, led me to rethink my actual needs. I rarely fell a tree (I have large trees and will go to a pro for that) so do more limbing and bucking. The Stihl MS 261 C-M was what I compared the Dolmar PS-5105 to. To start, the Stihl was $180.00 more than the Dolmar. The horsepower is lower on the Stihl by .15 and the Dolmar's weight is .3 pounds heavier. The Dolmar is easier to maintain the top end as the cover is one piece covering the filter and cylinder head. This Dolmar model also has a one-touch lever by the right thumb similar to the Stihl. This last item is actually better than the Stihl as "Stop" is actually a downward movement. Both can take a 20" bar. Bottom line though is that the Dolmar has nice balance and "feels" right to me. So I bought the PS-5105. This is considered a "Pro" saw as the crankcase is made from magnesium instead of aluminum. This lightens the saw (powerhead) by .4 pounds and has an increase of .6 horsepower over their PS-510. Later on into the two-year warranty and just to make sure that there are no problems, I plan on replacing the muffler with a non-cat type plus doing some port work as well. That should bump the performance a bit more. It also helps that it is red and the dome is black! I plan on using it today.
-
3 points
-
3 pointsI think it is time to throw in the towel and just send my C160 over to Martin's for a Magic Carpet Ride!
-
3 pointsI wired an old 120V. thermostat up to a light bulb in one of the cabinets under my bench. When it gets real cold the light keeps things stored in the cabinet from freezing.
-
2 pointsThat's ok...I was planning on transplanting a new 302 in the spring...going to have to cut a little sheet metal away though to make room for the headers!
-
2 pointsJust change the filter when you get a chance. Maybe a blown head gasket and seeping antifreeze
-
2 pointsDidn't have a lot of time today but did get the bucket built. Just need to weld the inside and make new attachment plates to mount it to the loader.
-
2 pointsDoes that threadlocker release with heat, or do you need to use EXLAX ? I can't help myself.
-
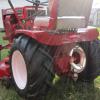
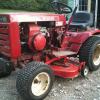
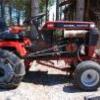
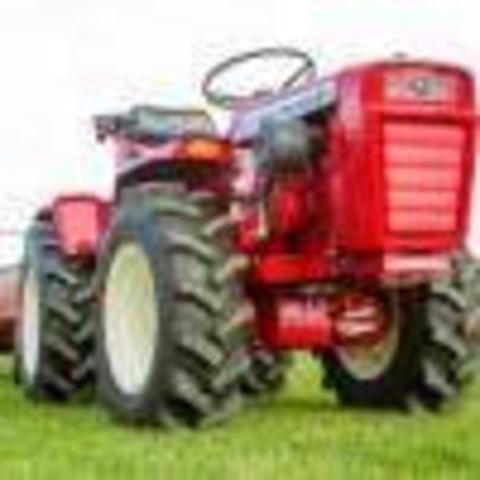
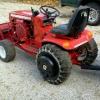
1 pointGood evening everyone, First post here, is going to be a big one but i need some help. I've been eyeing Wheelhorse rigs for quite sometime for snow removal. As a kid i can remember every surrounding neighbor blasting there driveways out with Wheelhorses & Blower attachments. It seemed as if the snow would throw for miles.. My current snow apparatus consist of a new Airens Pro 32 with a 21hp briggs, a old powerstroke that plows when it wants to & a decent toro that crapped out right before a storm. I had to buy the airens in a pinch when my toro went down and the "Polar Vortex" was headed my way... haha. It wasn't something i really wanted to do as i really was in the market for a Horse & blower but naturally nothing was available while in a pinch. So my question to you guys/gals is, 1. If i wanted to run a two stage horse or a berco, what machine is going to throw that snow the furthest. 2. Does engine size even matter if you can run smaller/larger pully sizes? 3. I see 520's, 416-8 & a one 518 up for sale. I understand the two 5 series i mentioned have bigger engines & there is also alot of other variables to consider rather than just the motor. Which of these is going to perform the best for me running a 2 stage blower. That's all it will be used for. 4. To who ever would, don't take this the wrong way..What is reasonable in terms of pricing? I've seen some of these units going for what i consider, astronomical prices like 3k+.. I understand alot of times ppl in general think there stuff worth it's weight in gold for some reason, but what is it with these 15-20yr old tractors? My neighbors weren't rich when i was a kid so i can't imagine they were spending huge coin every few years when they would turn out there old Wheelhorse's out for new ones. What would they spend on a bigger unit, $4000maybe $5500 hundred if they were getting getting the wool pulled over there eyes..? I know the commercial use Wright Stander i have was something like 8k new in 08, I've used it, added all the attatchments i need, replaced the motor for $1200. If i was to sell the 6yr old machine with a brand new motor id probably ask $3-3500 & it wasn't even used commercially. I don't see how the value of a lawn tractor thats been run for almost 20yrs & only cost $4000-5500 new can be worth $3000 also. I also remember as a kid, when my old man was fed up with fixing his lawn tractor it would go to the scrapyard because it was done, clapped out, used up & worth nothing. So i must ask, Is this just a niche where some ppl will pay big $$ for really old equipment thus the reason i see them selling for $3000? Hopefully someone can fill me in on reasonable prices & why they are really worth. Some of the hardcore horsemen might take all that the wrong way, it wasn't meant to, I'm just kinda boggled as to how some of these units are priced. 5. Here are some pics of the 520 I'm considering. Do any of you see anything obvious i should be aware of & anything missing that would prevent me from from mounting a blower..? & no it's not selling for 3k but i still don't understand how it's selling for what it is..lol. Thanks for taking the time to read the questions i laid out. Maybe you can help shed some light on them? Good day yall.
-
1 pointI went to the bi-annual Mount Gilead Ohio Farm Auction today at a moments notice. I got a call yesterday about the auction and found out it was today!! So no prep time on this auction. Didn't even have time to empty out my van! I figured it would be cold and windy and muddy as all get out. It was all of the above! They had several Wheel Horse's, Cubs, Sears and even a old Bush Hog tractor that was pretty old and cool. I had my eye on a couple WH's and most of them went for cheap! One was a 1970's C120-8 Speed, it went for a very good price of $175.00 with deck and all original paint, a very nice machine. There was a 1968 Lawn Ranger in good original condition with mower deck, it went for a mere $110.00! I didn't see the price of the 312-8 Speed w/snow blade or the Bush Hog. I bid on a descent 1056 with a Briggs motor instead of the 10 hp Kohler and a rare 1962 WH snow blade was on it. It got over my budget of $120, by one bid so it went for $125.00! The best tractor of the bunch was a very nice running 1972ish Charger 12 Automatic with a nice mowing deck. The seller was there running the machine most of the day. I talked to him and he got it 2 years ago with a house he bought. He mowed with it for 2 years and got a new mower because he didn't like the large turning radius of the WH. It was the very last tractor in the auction(ain't it always like that?!!) The auctioneer started off low and at about $50.00 I had to ask him what tractor they were auctioning right now? He stopped the entire auction and said to me, THE WHEEL HORSE!! Everybody looked at me like I was stupid but nobody was bidding on it. It got a few more slow bids and I bid on it at $100.00. There was 2 other bidders and everybody else was talking and carrying on and they didn't realize the nice WH that was up for bids! So I got it for $175.00 when the gavel fell! The seller didn't even know they were selling his machine and not many people knew that it was over until they saw me shut the tractor off. A few guys asked me what I just bought and I said with pride, that nice WH right here! They couldn't believe they missed out on it, since they had been waiting on it all day long! So I got lucky on it and was prepared to bid up to $250.00. The seat was in mint condition until the seller parked it in his garage a day before the auction and his Boxer dog chewed it to pieces! He said the dog got a good thumping after that! KJ
-
1 pointI started out last summer picking up a 1990 520H parts tractor that had no rear tires, front axle, engine, gas gauge, volt gauge, hour meter, and no steering. The hood and fenders had a lot of rust pits, and paint was pealing off in many places. I got it cheep and wanted for a loader tractor. I already had the forward swept axle, and gear deducted steering, And as for the rear tires I wanted 26x12x12's on it. I picked up a good running kohler 18hp Magnum from Kelly and started piecing it together bit by bit. I installed one of Matt's foot control assembly's on it and painted the tins (hood not finished yet still in primmer). I got it running today and took it for a spin with NO hood on it as it isn't ready yet. I have to say that it is faster then any of my other tractors by far! and the pedal control is just SWEET!!! It works Great from slow to fast and centers when you take your foot off. I am so happy with the way this tractor is turning out that I may need to find another one to put the loader on It's a blast to drive and is so much easier to drive then my 96 520H with the foot control! I have worked on this tractor hear and there as not to brake the bank if you know what I mean. I got all the gauges to work but the tach. Still need to play with that a little more to find out whats wrong with it. I got some new decals from Terry coming soon and we will see how they look in a few days. Hear are the pics Look at the lift lever, I moved the control from the steering wheel to hear as it will have a 3 point on back. this way I won't get bumped while using the loader. Hydro motion lever is also removed
-
1 pointA friend has a Kubota diesel that is starting hard in cold weather. My experience with Mercedes diesel engines tells me valve adjustment is key to easy starting in cold weather. I have found that engines that would not start in cold weather, easily start at zero degrees after a valve adjustment and without using the block heater. The reason is the temperature of the air in the cylinder is raised significantly when it is compressed. It is the hot air that ignites the fuel. The purpose of the glow plug is to help raise the temperature of the air. The glow plug does not ignite the fuel. The hot air does. If the valves are not properly adjusted the air will not be compressed sufficiently to reach the high temperature needed to ignite the fuel in cold weather. Proper valve adjustment is also important for the longevity of an engine. Valve adjustment on garden tractor engines is often neglected until the engine does not run properly any more or the engine destroys itself. Here is a publication from Caterpillar that explains why valve adjustment is important. I believe the ONAN Performer series engines have gotten a bad rap partly due to owners neglecting valve adjustment.
-
1 pointWell lets see loader project with power steering rebuilding a KT17 II for a tractor I haven't even picked up yet Install new rings in the 875 rebuild a snow cab frame for my blower tractor restore my c160 repair the back lip of my bathtub trailer refresh the engine on my 417 v blade tractor and on and on with what ever comes next LOL
-
1 pointA bit of trivia for you Dolmar fans. A gentleman by the name of Emil Lerp, the founder of Dolmar, developed the worlds first gasoline engine powered chainsaw in 1927.
-
1 pointRight on brother! That's the main reason that I sold/traded my Cubs and got Wheel Horses!
-
1 pointAs stated above.....get a copy of the wiring diagram, see what connectors you need and completely re-wire that GT!
-
1 pointBeen away all weekend, but did manage to fit some tyres on Friday with the help of my dad and his two tyre machines.
-
1 pointJust got finished clearing away the rest of the problem trunk. It was on a slope and I needed to make sure I had sound footing with each cut because there is quite a bit of weight involved. The Dolmar was great for being a new saw out of the box and had plenty of power. My "real" Blackhood also helped out, and then a shot of 2/3rds of my timber arsenal. This should all be nicely seasoned for next fall.
-
1 point
-
1 pointTime for another SUPPORT MEMBER raffle. The following 15 inch neon clock will be raffled off and all you have to do is go to the raffle area and grab a free ticket. Drawing to be held March 15th but don't wait too long as there can be an instant popup mystery prize drawn at any time till this raffle ends. NOTICE! We will not ship these clocks out of country so if one of our international wheel Horse brothers should win they will rec a $75 store credit at redoyourhorse.com Which can be used when purchasing any decals I have listed. I can ship decals first class international. If the winner is in the US they can choose this option if they so desire. Basically you could trade for whats behind door # 2. the winner of the clock can contact me and let me know how they want there clock to look. A picture of your favorite tractor or what ever you want. well almost what ever you want. The raffle opens as soon as Coach gets it going. Thank you all again for your support of the forum. I am just using my good friend Martins C-125 as an example of what you might want on your clock. The clock will actually have hands on it when it comes. Varosd will vouch for that. Yes Don you can actually win again but it is not likely. And Bob don't worry I am bringing one for the big show raffle so you are sure to win that one.
-
1 pointUpdate.... Once I got inside, as expected, the spider gear popped off with relatively little effort. The spider looks fine, no cracks, just a little stretched. Instead of purchasing a new or used cam gear with a better spider, I decided to Loctite Blue the old spider on. If it does not work, I will have to get a new cam gear anyway to get a better spider, so I'll just replace the whole cam gear along with the crank gear if I have to go back in. The spider does not move now; not at all. Also, I did the job with the engine on the tractor. Surprisingly easy job over all. I used wheel bearing grease to hold the three bottom steel balls in place. Checked their position in the cup with a flashlight to be sure. The rest of the governor parts look real good and the governor pin is right on spec. I'm just waiting for a new gear cover seal and gear cover gasket from onanparts and I'll button it up. Thanks again, Martin. I'm pretty confident this will fix things the rpm spikes..
-
1 pointTrust me, them 520's will blow some snow. http://www.youtube.com/watch?v=PX4qUILtQ1Y
-
1 point
-
1 pointHere is our SMS-50 Sickle Bar Mower on our 1965 -1054-A tractor. [ These parts are from a 50 inch sickle bar mower but this is a Model 7-1312 . The U Shaped piece on the end of the bar is where you bolt up the sickle bar on the back of the tractor -in front of the transmission. The SMS-50 does not have this type of "bolt up" and instead has a plate that bots to the back side of the tractor (or front of the transmission actually).
-
1 point
-
1 pointyour pics do not show the main frame mount with the correct angle. the diff between the 953/1054/gt14 and the 1257 is the the main frame mount. The 953 style has a 1" off set and the 1257 style both side are straight and the attachmatic mount is wider also for the 953 style
-
1 pointI like your starter! I used to use an old B&D 1/2" drill to start an old Gravely walk be hind I had.
-
1 pointThis is what I use I insert the valve in the block like this I spin the valve while slowly grinding material away You can take off too much very fast if your not careful
-
1 pointTake the plastic dust cap off they should fit WH that is, otherwize you need a deep dish cap like some aftermarket ones, maybe Simplicity they I think are deeper dished
-
1 pointfor all those complaining about no updates, heres one........ got the wiring harness all sorted this morning. it had the typical problems for these models, burnt terminals in molex connectors and the 30 amp fuse terminals were also burnt into the plastic fuse block. so purchased a new fuse block (del city part #73895 $4.14ea) and i used a few molex connectors from the kit i purchased earlier on for 416#1. i went through one area at a time, pulling and cleaning all the terminals or replacing if they were corroded or burnt. the ignition switch plug was also changed out for a good one as it wasn't holding the terminals correctly. all the wiring and plugs that were reused were given a good scrub to get them looking better...... heres a typical problem with the fuse blocks, too much electrical heat causes the terminals to burn or melt into the holder. I've had fuses welded to the terminals as well. new fuse block i used just about all the standard harness, cutting off the terminals that were bad and crimping new ones on. here the old fuse terminals have been removed and replaced with new, pushed home into fuse block. the factory fuse holder has the same bridged terminals as the replacement. the 30 and 25 amp fuses are both fed by a bridged terminal with one wire from the starter. i thought it would be better to run two independent wires from the starter to each fused circuit rather than run all through the one. the 1995 416-8 harness only runs one wire oem, but i noticed that my 1991 416H has two wires....so they did do it at one stage. i just think that running all the current for these 2 circuits through one wire is why this area has a problem in the first place.... this is the two wire fuse bridged terminals, the single wire bridged terminal fell apart from corrosion and being burnt. these are the replacement ones, they come in a strip of 4 but i already cut them for this application. since i changed my mind and went with single terminals, these weren't needed anymore. the strip also makes it impossible to crimp with the tool i have so the two wire single method worked better for me. since i wanted to run two wires to feed two circuits here i needed to use a circuit through the engine harness connector.... there are two spare so that is no problem. i picked the one that the engine harness side of the plug has the white wire that runs to the starter. this wire isn't needed on this model, so i will leave this one out and replace with a red power wire. the empty position is in the middle. this is the tractor side of the harness and not the engine side..... the engine side has a white wire from this center position. so this plug was swapped out, terminals cleaned or replaced and the red wire added..... this is the white wire at the starter end of the engine harness..... typical reason why checking these terminals can avoid future problems..... harness getting there. made up the pto safety switch assembly, two new switches and replated bracket with new fasteners..... harness taking shape on hood stand. also started to clean up the engine ready to go back together. also got some more parts painted.....
-
1 pointI just saw this ad. Love these old ads, almost like a Pond ... Mighty Mite Ad.pdf 1.19MB And also this video, "Crazy things people do at work" (5 min) . . . http://biertijd.com/mediaplayer/?itemid=44930
-
1 point
-
1 pointReally had no love for 2 wheel walk behinds. My Dad had a 2 wheeler that I was "required" to use to work the garden when I was a 60 lb. 10 year old. I learned to hate that killer tractor .It had a clutch for each wheel, and if they were not engaged at exactly the same time the handles kicked me in the ribs....It worked me more than I worked It .. Humm,.maybe that was Dads plan. Anyway I had a couple hours this morning to play with this little Model L. I checked the oil, pulled the plug, and spun her with my homemade electric starter. No fire at all. Should I go back to my original plan and CL it as a non-runner ? Well it only has 3 bolts holding the tin on, so off it comes. shined up the magnets with some scotch brite and spun her again. She threw plenty of spark. So , now I think this little tractor is startin to grow on me, and I need to see it run.. So I took the frozen up throttle cable off and pulled the wire out of the sheath and soaked it with PB. OOPS...gotta run to a Grandsons Basketball tournament....update when I get fuel in her.
-
1 point
-
1 pointDon't worry, I can make a couple of trips. However, I can't seem to find the raffle page using Tapatalk. I'm away from my computer this morning.how am I supposed to win???
-
1 pointWhen changing any fluid that my run down my arm I take an old sock and tie it around my wrist. It keeps fluid from running past my wrist down to my elbow!
-
1 pointI replaced my original wood tensioner. I made a new one out of locust which over time will get hard as woodpecker lips. After several hours of use shows only very slite ware. It is very simple to make and I definitely would not pay $50.00 for a plastic one. Just my two cents , thanks.
-
1 point
-
1 pointFirst of all, since most of you are in the US. I just want to wish you all condolences on your olympic gold medal hopes for men's hockey I don't know why the best hockey players come from Canada... maybe its the 8 or 9 months of winter! Go Canada Go! That being said, we will take Kessel and Vanreimsdyk back after the tournament to play for the Leafs. Okay, back to the C160. Last night I managed to have a fairly good night and everything worked well. First cleaned out the lift cylinder and all of the hyd lines THe rest is kind of a blurr. My youngest son - 15 years old came out to help me get the transaxle mounted and the hydrostat mounted back on that. Everything went back together really smooth and we were working so well together that I entirely forgot to take step by step pictures. The only other one I have is this one: and the other side: This is back on all 4! It performed amazingly! No leaks, Lots of power and speed in forward and reverse and no strange noises! We did get the weather that they were predicting last night including a Thunder snow storm so I didn't get a chance to run it hard for any length of time so that will be the job for this weekend. I plan to put a plow on it and give it a work out either tomorrow or Sunday and I will let you all know how it goes when it warms up. I'll also try to post a video of it working when I get there. So, thanks to everyone who contributed to this post and gave me advice along the way, This was probably the most complicated project I have ever done and I am very gratefull for all of the help. Oh and by the way, this is my first auto tractor and I like it!
-
1 pointSounds like a great deal! To help put things in perspective that little tractor was approx $4000 when new plus deck $1000-1500 and plow. They easily run 2000+ hours. Certainly wont cut as fast as a zero turn but she'll run dam near forever. Congratulations and good luck!
-
1 pointWell when it comes to Toro Wheel Horse parts seems like the price has gone through the roof. I personally thinks it's nothing but a way to stick it to Wheel Horse people. That in it self is a whole other subject. I myself have been getting my Wheel Horse items only from Pat's Small Engine. There prices have been the lowest I have found. I stop going to my dealer because he has been 20% to 40% higher. As far as engine parts I use Pat's again a couple of others engine only places on-line. Anything that can be bought from other than Toro I do that. I gave my local dealer a chance to match what I get it on the net for but he refused. So I told him nothing personnel but business is business. I have dealt with him for several years.
-
1 pointDuring a recent storm the shaft bearings in my 6-6212 snow thrower called it quits, and after disassembling the unit I realized that the the old 3/4" shaft was worn beyond repair. I initially thought about replacing the 3/4" shaft but as others have found out the 3/4" shaft / bearings can be substantially more expensive than the more common 7/8". I was able to find the bearings locally at a farm store, and ordered the shaft, pulley, and sprocket from surplus center (much cheaper than the local farm store!). Here are the part numbers if anyone needs them: 14 tooth - 40 pitch sprocket: 1-2123-14-d $4.40 7/8" Keyed shaft 36" long: 1-2982-87-3 $26.95 5.45" V-belt Pulley: 1-BK57-d $$14.30 Bearing HC205-14 $10.00 ea (2) 3/16" shaft key .50 ea (2) Total cost of the upgrade: $66.65 (plus $11.00 shipping) ...or about the cost of one OEM 3/4" shaft bearing! Here is the bearing that I used, fits perfectly into the original bearing holder. (note: leave the holders slightly loose while sliding the new shaft into place, then tighten fully): I missed taking photos of the assembly process, but here it is completed. I left the shaft long for final alignment of the pulley. You will have to cut the shaft to rough length before you attempt to mount the pulley, 36" is too long otherwise. I also too the opportunity to grease the tensioner pulleys and check the chain tension...maybe this summer the unit will get a paint job!
-
1 point
-
1 pointI would not want to try that on a Cub Cadet. I have one and thats enough. Actually I'm glad there are Cub Cadet nuts out there. Those people make it so there are more Wheel Horses for me
-
1 point
-
1 pointTake the bracket off of the tractor and drill a 1/4" hole thru the locking lever(s) and the bracket, WITH THE LEVER CLOSED onto a 3/4" bar or bolt. This pic shows the locking lever with 1/4" hole drilled. Then use a 1/4" clevis pin with a hair pin in it to keep the lever from releasing.
-
1 pointWhats up everybody, alot of you guys kind of already know a little bit about this project. There comes a time of when you can do things and finally its has come to life as we know it. It moves, runs fantastic. Kind of like excited if you know what I mean. Anyways I am not computer oriented so if I don't succeed at this I am pretty sure that Bob will get it straightened out. Well here goes.
-
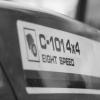
1 pointMost of the bolts will be 1/4"-20, 5/16"-18, and 3/8"-16. There may be some other oddball sizes. I think there are a couple of 7/16"-14. The sticker on the Raider is correct. When that one came out, they called the 3 forward and 1 reverse with Hi/Lo a 6-speed. In later models it was referred to as an 8-speed when they decided to include reverse as one of the speeds. And Until you decide to become a supporter, where you will be able to load larger files, you can get a free account at Photobucket.com and upload your pictures there. Then copy the link to the location on Photobucket, click the "image" button in the tool bar here, and paste the URL
-
1 pointI am torn between buying an old wore out loader for my C 121 or just starting from scratch. Any thoughts from you loader guys? My fab skills are decent, so that would not be a major hurdle. Having a loader sized just for my tractor does have a certain appeal. Sent from my SCH-S720C using Tapatalk 2

