Jump to content
Chuck14025

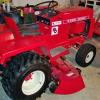
C-120 Automatic Shifting working very hard.

Recommended Posts

Chuck14025

1975 C-120 Automatic, 12hp Kohler.       HARD SHIFTING PROBLEM


Starting to shift hard especially going into reverse. Also, shifting is not 'smooth'.  

Tried adjusting 'Friction Collar' looser and snugger. Made it a little better but then things locked up - it did not want to go into reverse.

Manually  pushed wheel to get tractor to go into reverse.


Could it be the:

   Cam on the neutral adjustment,

   Lubrication on the neutral adjustment,

   The transmission,

   The friction collar?


Suggestions welcome.

Share this post


Link to post
Share on other sites
 
JoeM

A couple years ago a my friend experienced the same problem. One of the cam support socket head cap screws cam loose and backed out causing and was interfering with the hydro cam.

Might pay to take a closer look there.

One safety tip. Anytime I mess with those hydro adjustments I put the rear wheel up on jack stands for testing.

  • Like 2

Share this post


Link to post
Share on other sites
 
daveoman1966

You MAY also have a problem here....pretty common.  

REF 12a.jpg

MOTION 007A.jpg

  • Like 3

Share this post


Link to post
Share on other sites
 
Chuck14025

Thanks Dave and Joe,


I'll put the rear axle up on blocks to make sure the tractor doesn't run me down.


The tractor is stuck with the control lever forward. It will not come out of gear.


I don't find a broken weld, everything is intact, but I can't see the " cam support socket head cap screws " yet.
 

I have the original parts manual but can't see the 'socket head cap screw' listed. 1.  Can anyone help with that issue.


2.  Also, if I have to take the tractor apart to get at the cam mechanism, does anyone know of on-line instructions and diagrams on where to start?

Share this post


Link to post
Share on other sites
 
Searcher60

I'd wager the rod that runs thru the friction collar is seized. If so, you need to carefully get it apart, and that ain't easy if it is seized. That is why the welds break. 

  • Like 1

Share this post


Link to post
Share on other sites
 
chip61
1 hour ago, Searcher60 said:

I'd wager the rod that runs thru the friction collar is seized. If so, you need to carefully get it apart, and that ain't easy if it is seized. That is why the welds break. 


Mine is seized-been working with PB Blaster, vice grips and a 5/8" wrench-I've got it to move almost a 1/4 turn now-long way to go. I think I'm going to have to heat it to get it where I can get it apart to clean it.

  • Like 1

Share this post


Link to post
Share on other sites
 
daveoman1966

I ahve to add another pic of the frictioin control mechanism....  watch the little WOODRUFF key when taking this stuff apart.  You need to remove the woodruff key BEFORE taking out the shaft.    

MOTION 001A.jpg

  • Like 1

Share this post


Link to post
Share on other sites
 
Chuck14025

THANK YOU ALL for all the good advice.

The ACTUAL problem turns out to be …..

The CAM BLOCK PIN is hitting the CAM FOLLOWER ARM.

This is the location where the result of moving the shift lever back and forth engages the cam that shifts the transmission. I was focused on the FRICTION CONTROL which turns out to not be the problem.

The problem from the start is the CAM BLOCK PIN hitting the CAM FOLLOWER ARM which indicates something very major has moved at least 1/16” of an inch.

1.      It might be:

      1. The tractor body parts that house the SPEED & DIRECTIONAL CONTROL LINKAGE ASSEMBLY (the shifting assembly) or

2.      2. The REAR AXLE ASSEMBLY or

3.      3. Something has come loose or broke or

4.      4. A frame part has worn enough to allow something to slide 1/16” of an inch.

      5. Something else   ????

YOUR THOUGHTS on all the places to check would be very appreciated as always.

Share this post


Link to post
Share on other sites
 
Sarge

Look very closely at the rear plate under the rear of the frame where the transmission is bolted to it - probably cracked/broken from hard work/abuse . It's a common thing with these frames and the C's had braces to help with this , but if they are pushed hard enough or rammed into solid objects that plate can give up . What happens next is it usually loses most of the travel on the friction cam plastic section , so you lose forward travel speed and if bad enough you'll lose reverse ability altogether due to the transmission being tipped at an angle . I've re-worked the rear plate in the 1277 twice already , now the plate is shattered and done - have to cut it off and make a whole new one along with more bracing - yes, I work that tractor that hard . Loaded rear tires w/weights and chains will do some damage if pushed , lol - but I have the ability to repair/rebuild it so it's no big deal here ...


With the rear fender pan removed , it's easier to see the transmission mounting plate and rear of the frame - also it's not too hard to remove the trans once the frame is supported with jack stands - the only trick being to keep it from tipping off a garage jack since it's so nose heavy due to the pump and shape of the trans case . I usually leave the rear tires on them and just roll the whole thing back , access and repair the damaged frame , then reassemble it and go back to work .


Sarge

  • Like 2

Share this post


Link to post
Share on other sites
 
Chuck14025

Thank you very much Sarge.

I have a 1975 Parts Manual. I can't find the 'plate' you refer to. Can you give me more specific direction on its location?

Is there a way to lubricate the rod that holds the FRICTION COLLAR assembly to prevent it from seizing?

Share this post


Link to post
Share on other sites
 
pfrederi

The plate he is talking about is the rear end of the frame has 4 bolts that go through it into the tranny

Inkedframe_LI.jpg

Share this post


Link to post
Share on other sites
 
Chuck14025

Thank you.

Is the plate the actual frame or a separate piece? Is it vertical or horizontal? And, if you would, where can I find a copy of the parts diagram you posted?

Thanks again for your help.

Share this post


Link to post
Share on other sites
 
pfrederi


Inkedframe1_LI.jpg

  • Like 1

Share this post


Link to post
Share on other sites
 
daveoman1966

Here is the method I use to repair the cracks in the FRAME PLATE, using two 1/4" or 5/16 Angle Iron measured 2x2x6 .  These get bolted to the SIDE of the plate and the the base of it....where the orginal 4 trans bolts are.   If you just bolt a thick plate onto the back of the crqacked frame plkate, it will LIKELY just crack again at the corners / sides.  This method precludes that event and reinforces the corners.

Just work on one side at a time  to avoid collamity.   Just find 4 bolts about 1/4 or 5/16 longer than original...but not too long.  The 8 side bolts are 3/8 with Nylok nuts on them.    


FR FIX (7).jpg

FR FIX (8).jpg

FR FIX (9).jpg

FR FIX (10).jpg

  • Like 2

Share this post


Link to post
Share on other sites
 
Chuck14025

For the benefit of the next 'newbie' who encounters the same problem, the plate is 'vertical', attached to the rear end of the main frame.


OK Dave, excellent photos, excellent solution. How soon can you have custom angle iron ready for my C-120? I'm only half joking. You make 'em, I'll buy 'em.

I hope you saved a pattern. I'd bet you could sell several of these -- getting paid well for your time and materials.


Am I reading it right that they could be installed one at a time on each side without pulling the whole transmission away from the frame?


I'm only 2 hours north of you so I could pick mine up tomorrow --- don't want to rush you or anything.  Bet you could be a hero to several guys in the same predicament I'm in.

Share this post


Link to post
Share on other sites
 

Create an account or sign in to comment

You need to be a member in order to leave a comment

Create an account

Sign up for a new account in our community. It's easy!

Register a new account

Sign in

Already have an account? Sign in here.

Sign In Now

  • Similar Content

    • jmack
      By jmack
      I’m looking for a transmission dipstick to a D-180. Let me know if you see one. 
    • Doug B
      By Doug B
      Hey guys,I have a dilemma I need some help with. I have a 1969 GT 14 that I replaced the transmission and pump on. For about 2 weeks afterward everything worked great, but while mowing at a pretty good pace I noticed a shudder and the tractor slowed a little but not bad. The more I rode it the slower it got until it barely moves. What stumps me is the hydraulics are still very strong,as in I can back the 3 point under the bumper of my truck and if you lift the arms all the way up the front wheels of the tractor will clear the ground. Have checked the tow valve and checked the internal filter,but no luck. I have also checked and replaced the forward and reverse bypass springs and the lever is moving the cam to full travel, forward and reverse. Any help would be appreciated.
    • mattd860
      By mattd860
      I have developed a kit that allows a Wheel Horse / Toro hydrostatic tractor to be operated by a pedal on the right side of the tractor. The original forward/reverse lever can be retained or removed. The kit includes everything needed to install the pedal kit and installation is simple with the help of a downloadable installation manual. Additionally, only one (1) 1/4" hole will need to be drilled which can be done by a hand drill. No other drilling or cutting will be necessary. Any tractor with this kit can be converted back to stock without any visible evidence that kit was installed. However, you'll never want to do that

      The kit operates very simply and similar to modern tractors. When the pedal is pushed forwards the tractor will move forwards. When the reverse pedal is pressed downwards, the tractor will moved in reverse. If the operator takes his foot of the pedal at any time, the pedal will automatically center itself and the hydrostatic transmission will return to neutral (stop). This enables the operator to use both hands on the steering wheel or one hand on the wheel and the other operating an attachment like a snow blower, plow, etc.

      The foot pedal is custom cast in Aluminum, uses brass bushings to minimize wear, and it closely matches the OEM Wheel Horse BRAKE pedal commonly found on 8-speed manual transmission tractors. Modifications were done to the pedal to add the reverse pedal and adapt the pedal to the rest of the kit. For the most part, the pedal looks like it was designed and manufactured by Wheel Horse / Toro. Additionally, a grease fitting has been adapted to the pedal to further minimize wear and tear and if the brass bushings ever wear out they are fully replaceable without having to buy a whole new pedal. 

      The pedal kit fits the following series tractors with Eaton hydrostatic transmissions: C-1X5, 300, 400, 500. 
       
      My kit can be adapted to older hydrostatic tractors with the Sundstrand transmission, however, you will need to find an updated hydro cam commonly found on ebay. Message me for more information. 
       
      Here is a link where you can download the installation manual: CLICK HERE
       
      I am selling these kits for $330 shipped to anywhere in the United States. I offer multi order discounts as well. I will also sell to other countries for additional shipping charges to be determined.
       
      If anyone has any questions please feel free to PM me or post your question here and I will be glad to help. Or you can email me at mattdarling02@hotmail.com.

      Thanks!
       
       
      Below are pictures of the complete kit and the pedal installed on the tractor. Some modifications have been made since these pictures were taken. For example, the reverse pedal is now cast in aluminum instead of the steel pedal shown below. 


    • Dylan2342
      By Dylan2342
      New here! hello everyone! In a bit of a pickle here. My father owns a 1993 (I think that is the right year) 520H Wheel Horse. I don't commonly work on tractors but it seemed simple enough. the axle snapped on the left side, so it needed a new transmission. My dad bought a used transmission and I went to work changing everything out. The hydraulic pump that the engine's drive belt attaches to went to a different model/year of tractor, so I had to remove that part and swap it in from the old transmission. In the process I lost all of the oil in the pump (I mention this because I wonder if it has to do with my problem I'm having). When I reassembled everything I started the slow process of filling the transmission. I filled it up and started the engine. When moving the lever forward or backward, it had a tiny bit of power for a little bit and then lost power. The transmission wasn't doing anything, anymore. I though maybe that hydraulic pump needed to be primed, so we took the top hydraulic line off of the hydraulic pump right above the drive belt and used a transfer pump to pump some oil into the pump case. This still didn't work. I don't have enough experience with these hydrostatic transmissions to know if we got a bad transmission or if there is something obvious that I am missing when it comes to a transmission swap. I ask for any insight and help please. If you need pictures or any other info, then let me know what you need. Thank you!
    • Porkskin
      By Porkskin
      I have no understanding of what it is like to push one of these when the trans is disengaged and motion lever is in the forward position as the manual mentions. I hope this is not old ground and that I am not cross posting. With the trans disengaged and motion lever set forward there is still something spinning in and about the transaxle that is giving resistance. I need to know if this is normal or if I should be expecting more of a free wheeling experience. In effect, much less resistance. Thank you for comments or pointing me to a topic that already covers this. 
×
×
  • Create New...