Jump to content

Recommended Posts

Sarge

Ok....since the weather really turned cold I had to weigh my options for addressing the broken coupler . Best way is to either replace the pump , the pump's shaft or update to a newer style pump . Didn't have the time nor the weather window to go that route , so I did a last-ditch repair and installed a 1/4" grade 8 bolt , nylock and lock washer directly through the cast coupler and pump shaft .

Those pumps were built , as far as I know in Peru , Illinois by Sundstrand - which is about 35 miles southeast of here .No idea what plant they sourced their steel but the stuff is extremely hard and tough . Wiped out a HSS bit in short order as soon as it got through the cast portion of the coupler and hit the splined shaft on the pump - didn't even hardly cut into the surface . Tried a medium cobalt content bit (12%) and it barely started cutting the shaft before dulling . Now , mind you - this was done outside on the tractor with the engine still in place , worked on it Monday night until after 9pm in the dark with a nice cold mist/fog . Since no one around here carries decent quality , US made aircraft extension drills and I didn't have time to wait on the Brown guy I had to use a drill extension I had , which would fit a 1/4" drill bit . A light touch of the grinding wheel puts a short flat on the shank to make it easier to lock the bit in place with the set screws and prevent it spinning . Very low speed and TD Foamy lubricant had to be used with 1/4" solid carbide lathe centering bit . Unfortunately , the thing is a stubby with very short flutes - it is not designed to be run deep into a hole so it took a lot of pulling it out clean/rinse/repeat cuts to get almost all the way through the shaft ...


One surprise when I looked closely at the coupler was that it had been replaced at one time . The rubber puck is in good shape and someone had added 2 additional washers to space the pump end closer to the pump on it's splines - probably since the last one destroyed most of what it had already . They also added 2 hardened steel set screws which would not come out without risk of breaking off a hex socket driver . I just used those set screws as a guide to drill through the coupler and pump's shaft - which is part of the reason it was so hard to drill .


broken engine coupler.jpg


Sorry , no pics of the fight drilling the hole - it was cold and miserable enough and I didn't feel like fumbling with the camera phone . Typically , the outer half of those screws is soft but the contact ends are hardened pretty well . Those weren't so bad with a decent quality HSS bit , but the pump shaft itself was what caused all the ensuing fight ...


Made a trip to a local machine supply , no luck on a longer solid carbide or carbide tipped center drill , ugh . I did pick up a US made solid carbide ball milling bit - that did the trick on the last 3/16" of the pump shaft and what was left of it's splines . With a fiber optic light adapter for the old mini Mag light I could see what appeared to be ground metal bits buried into the other side of the cast coupler - probably remnants of the pump's shaft splines . No carbide to finish the cut I re-sharpened the cobalt bit and had a go with that . No dice , those chips killed the tip quickly . That machine supply (C&N in Dixon, ILL) has some "sale deals" once in awhile - basically a box of random whatever stuff that has a fly by night pricing - depends on his mood , lol . Came home with a whole bundle of odds and ends including US made solid carbide die grinder burrs both in 1/8" and 1/4" shanks . There was also an odd small set of mechanic's stubby length Champion Brute series drill bits for $5 - those proved to be excellent at cutting this mix of materials and went through it like butter - highly recommend them . Recommended application is exotic metals , stainless steel and aluminum - rated to even drill a grade 8 bolt .

https://www.amazon.com/Champion-Cutting-Tool-XL28-SET-6-Mechanics/dp/B005PUA14K


Installed the mentioned 1/4" grade bolt , nylock and lock washer under the bolt's head - that turned out to be a feat of aggravation . Since the space in there is so tight with the huge 2 cylinder engine in there , little to no room for that bolt , let alone a wrench or socket . The heads of the opposing bolts that retain the other half of the coupler to the flywheel were in the way and they are too long to remove without moving the engine . It's cold , damp and I'm no longer in the mood to mess with it so ended up using two fat-headed Gear Wrench open ends with round steel stock jammed into their box ends for leverage . Bolt tightened as much as I could muster , fired it and allowed the engine/pump to warm up . It had dropped to 26*F by this time but I didn't care - time to test Ugly Horse and see if it will live . Our local Village Idiot had left last fall and an old retiree had taken his place doing the Village work and mowing . He's not in very good shape and driving the Village's dump truck/plow isn't an option and they had been trying to find someone that could handle snow duties . A local truck driver got the task and promptly destroyed a lot of people's yards and what few alleys we have in town here - one of which is behind the welding shop in the next block West of me . Our drive wraps around this old building and allows meter readers to drive right up and take care of their task quickly , even if my 2 furball friends are out and about with me . The Lab mix is fine but can get a bit aggressive with a stranger - good dog but old and tired . The all-German black and red Shepherd on the other hand will defend his territory and his loyalty drive is a hazard to invaders (meter readers) so it's nice they can just drive up and not get out . I always plow this drive all the way through for this reason . The north side isn't used much , broken thin concrete and little sign of it at the street to the West but I always plow it anyway since the larger shed sits over there . This Professional Truck Driver came east from the other block's alley , picking up gobs of dirt , gravel and large chunks of several yards with the plow blade straight - came straight across the street and dumped it right in that driveway entrance....while I was sitting there working on the driveway with the 16 Auto after Ugly Horse puked it's pump coupler ....not impressed as the ^%*##^*^%% just drove off , ignoring some choice hand gestures .


That frozen , wet pile has sat there since Sunday at 4pm - Ugly Horse moved it in just a few easy swipes , along with cleaning up some messes he left at the intersection and the neighbor's property as well . The welder next door is missing some iron that he had at the edge of the alley so I suspect it will show up in the spring from that pile - I didn't notice anything in there and it's really frozen hard now . He's not worried about the iron - we'll find it in the spring I guess ...


The welder and I discussed possibly upgrading to a different pump/direction setup in the future since I doubt this repair will last all that long . Hopefully it holds up through the winter and doesn't break . I'm on the look out for known good used pump just in case and a buddy has a shop we can heat along with a large mill and lathe . If the pump gets changed it will get a better clamping type coupler to prevent wrecking the input shaft splines - shame on AMC for this design but it was actually common back in the day as I've seen it before on other equipment . Pump/engine alignment becomes far too critical and that's what causes wear and failures . Modern coupler designs allow a lot more flexibility and the clamping type reduce the risk of the splines being hurt from wear since the old ones were a simple slip fit . Even older Automotive spline couplers on steering boxes used a split design for safety to clamp down on those splines tightly to prevent wear over time . Slip those splines on a steering box and driving becomes a suicide mission ....will be visiting all this in the future spring .


Sorry for the rambling , just sharing a not too fun past few days .


Sarge


  • Like 3

Share this post


Link to post
Share on other sites
 
pfrederi

I look forward to your update in the spring with a clamping coupler..not sure what one of those looks like.

Share this post


Link to post
Share on other sites
 
Sarge

Look at any modern log splitter or any hydraulic/engine driven equipment that doesn't have the pump mounted directly to the engine - you'll find the clamp design couplers with a replaceable wear part , usually a cogged looking disk of some sort .

https://www.google.com/search?q=hydraulic+pump+engine+coupling&biw=1600&bih=718&tbm=isch&tbo=u&source=univ&sa=X&ved=0ahUKEwi4vo7xx-LQAhVF_IMKHSHPArQQ7AkIwgE


Here is a 3/4-11 spline split version , I suspect this is what would fit the Sundstrand divorced pump on the D series models -

http://www.surpluscenter.com/shop.axd/ProductDetails?edp_no=19121


Here is more like what I have in mind for adapting between either stock or upgraded engines and either the stock Sundstrand pumps or and updated different model/type pump -

https://www.ktr.com/en/products/power-transmission-technology/couplings/flexible-jaw-and-pin-bush-couplings/rotex/


Possibilities are endless - it's just a matter of getting past the stupid search engines and all the pollution from Chinese manufacturers , especially with all the Alibaba search engine results . It's aggravating trying to find specific builder parts the way all the search engines are polluted with sponsorships and manufacturers flooding the global markets with their junk ...

Look at the results of this simple search on images , 80%+ is sponsored results - hydraulic pump clamping splined metal coupling via Google .


To do a mod like this you'll need several simple pieces of information and get with a rep from a parts supplier or even local ag companies to figure out what's needed to make the conversion -

Engine mounting type/pattern/sizes including fasteners

Pump shaft dimensions/spline count/depth of engagement

Distance between engine mounting point (flywheel, in our case) and pump shaft , both at the shaft's end and limit of engagement depth


Some careful measurements , counting the splines on a decent pump and such - then just figuring out what parameters needed to find a proper clamping coupling .

I'm not an engineer , but if you can find one to help out that would solve 50% of the research part . This might be one of the reasons I get migraines , other than my stupid eyes are degraded and junk - hunting a donor is all that will fix it .


Sarge

Share this post


Link to post
Share on other sites
 
82Caddy

I've enjoyed following along on this rebuild.


I don't think the splines are the same or even close for an off the shelf coupler to fit the pump. If there was, someone would have found it long before now. 


Another option is to pull the pump, have a keyway cut into the shaft and then use a jaw coupler. It's what I have on my d200 with predator twin. Works super well. I'm not sure how well that'd fit with a factory engine as the couplers are pretty long. 

Share this post


Link to post
Share on other sites
 
Sarge

I'm pretty certain Sundstrand didn't set that shaft up outside the normal spline counts/sizes . The only real issue might be it's so very short - anything else rated for that much torque/horsepower would be longer and heavier , not sure what they were thinking other than a compact setup ...?

I'll have to find another pump either way and will work on this over the winter - may need some dimensions off the original K series to figure it out . I agree that a keyway or cutting the shaft into a hex shape would be more ideal , but there just isn't a whole lot of material there to start with and it's some very well hardened steel so that work doesn't come cheap in milling shops . Setup , indexing and such is what costs the most as you already know . Wish my buddy was tooled up more for his mill - his machinist backround is already useful and he could be a resource to do mods for folks .


Anyway , something to think about and beat winter time boredom in the shop...not that I ever have time to be bored anyway .


Sarge

Share this post


Link to post
Share on other sites
 
DavidP
On 11/27/2016 at 10:15 AM, Sarge said:

Ok....

Spent some quality time yesterday between commitments with a measuring stick and the wheels . In playing around with the bearing spacing on the hub I figured out the rim was just about too close for comfort unless it was run reversed with the valve stem inside . Being a trailer wheel , they are dimpled at the lug nut seat to keep a pre-load on the nut so they don't come loose . Personally , I'm not that concerned with the location of the valve stem - inside vs outside . I've seen both inside and outside locations get ripped off from sticks and such so it really doesn't matter . What does matter is running wheel weights - that is when they need to be located to the inside and using trailer wheels will require the holes to be drilled into the rim . Need to finish that today and I'll post up details on spacing and such ...


If you look very closely you'll see the raised dimple seats for the lug nuts -

dust cover installed 2.jpg


Reverse side of rim is not really designed for the nuts to seat but a 60* countersink can fix that although the raised dimple seat design will stand the rim off the hub by 1/16" or so ...shouldn't be a problem and will help with clearance to the axle casting -


dust cover installed.jpg


Sarge

On 11/29/2016 at 9:42 AM, Sarge said:


Sarge,

Would a rim with a 2:5 offset work with this setup on a D200 with 1' axles or is that moving the wheel to far out?

I'm thinking that it would make it so the rim wouldn't have to be flipped around, just not sure if that would cause other issues.


Edited by DavidP

Share this post


Link to post
Share on other sites
 
DavidP

Also,

What was the width of the hubs you used?

Share this post


Link to post
Share on other sites
 
Sarge

The hubs I used were just the standard light axle type - can't remember the specs on them now.


You have to measure the length of the existing knuckle arm and figure out the depth of the hub combination. Wish I could find the ticket for the hubs, but we've recently moved and everything is in storage.


Sarge

Share this post


Link to post
Share on other sites
 
DavidP

So glad you responded.

Super appreciate this thread and the links to the parts. :handgestures-thumbup:

I've been obsessing trying to figure out the missing pieces of this puzzle.

Knee deep in ordered parts while still trying to figure out the rest.


The hubs I purchased are 4 on 4" and measure 4-3/8" and use the L44643 bearings.

I was also able to locate some 8x7 rims with a 2.5+4.5 offset for any clearance issues and some new threads.

Ordered the 1-1/4" oilite bushings from MMC in 1" length so I can turn them down if needed.

Spacers, alxe stud and castle nut, bearings, and washers for mounting them I found from your links other than a 3/16" thick SS washer for the bearing pre-load that I found on ebay.


One difficult part to find are the 1-1/8" 1/16" wall bushings for the spindles.

I'm assuming that they are 3" long or there abouts but I'm unable to source them at that length.

The closest I found are either 2.5" or 2-15/16" in length.

The longer ones I found are sold in packs of 4 and have a minimum order of $50 ... truckandtrailer.parts


Did you go at the bores directly with that 1-1/8" reamer without drilling them out to a slightly larger diameter?

Still trying to locate a 1-18" reamer like yours but I did find a 1-9/16" counterbore with a 1/1/8" pilot.


I bought 6 Heim joints, 4- 1/2-20" RH for the outers and drag link ends, 2- 1/2-20" LH with 3/8" bores for the inners.


On the outers did you use a 7/16" or 1/2" spacers with the 7/16" bolt?


I bought some 7/16" ones and hope that they will work without issues.

I also found a less costly 6pk of boots for $30 on Amazon


I assumed you used a 1/2-20" Heim in the drag link at the bell crank with a 1/2" to 7'16" reducer and 7/16" bolt.

Did you drill that hole out and use a bushing in it or just the 7/16" bolt?

Same at the steering box end of the drag link?


You didn't mention what you did with the bell crank mounting hole and bushing.

In the picks you have a bushing installed there with a bolt through it.

I would like to do the same.


One last question (for now :wink:) ...

Do you do any modifications at the axle pin pivot?


Thanks Sarge!


Anyone reading through this and need some links to the parts I bought just let me know.


Share this post


Link to post
Share on other sites
 

Create an account or sign in to comment

You need to be a member in order to leave a comment

Create an account

Sign up for a new account in our community. It's easy!

Register a new account

Sign in

Already have an account? Sign in here.

Sign In Now

  • Similar Content

    • Rob R
      By Rob R
      So... I got cabin fever and against my best judgement, picked up from my brother a 520H Model # 4120OE02; Serial 1033076 (1991) that he got from a Friend who claim it ran but hasn't been used in years and was in dry storage. Included was a 48-inch triple blade mower in very good condition, total cost $250 ..... I figured that even if the tractor was no good the deck was worth the coinage....... and it had a good new battery....... So got it home fixed the one flat tire, replace the cooked fuse in the fuse holder. Cranked the engine over it cough a few times and then quit, was not getting fuel, replace the fuel line from the tank to the pump, pump not pumping, replace it with a B&S pump, cranked her over and she started right up ran and idled decent with no noticeable smoke. p.s. the hour meter is disconnected but you can tell she was run hard and put away wet but overall, in fair to good condition. 
       
      So without doing anything else time for a test drive. It moved forward and backwards took her out into the yard got about 50 feet and the motor started laboring to me was like the transmission was putting a heavy load on engine, I tried to shift into neutral, but it wouldn't let me do that and then the engine bogs down and shuts off. Wait like 10 seconds start her up again and the issue repeats.... In all my years I have never had anything close to this issue hence my call for help.
       
      I did all the normal stuff trans fluid looks clean added some 10-40 weight to top her off, did not change the filter yet as I do not have one in stock.  You can start the engine without engaging the transmission and it will run fine until the cows come home..... put it in gear forward or reverse and it will go an little ways and then the load condition occurs, the engine loads up and is dragged down into a stall. 
       
      Appreciate all your advice as this one has me stumped...... 
       
       
    • PWL216
      By PWL216
      Looking for a good to very good condition hood. Thx
    • jmack
      By jmack
      I’m looking for a transmission dipstick to a D-180. Let me know if you see one. 
    • wh315-8
      By wh315-8
      My 50” D-series tiller input shaft has like 3/16” +\-, play pulling in or out. Anyone else have this same thing. Is it supposed to have that much play? Have it all apart and was thinking of adding a shim or 2nd thrust bearing to lessen the play to at least 1/16”.
       
    • Truckedup1
      By Truckedup1
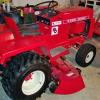
      I have a very recently restored 1989 wheel horse 520-HC tractor with 60” deck. Family owned for over 10 years but now it’s time for another project. Please contact me with any questions I have the original 60” deck but it was rough so I sourced the current deck off this site, it really is in excellent condition for not being restored.


×
×
  • Create New...