SylvanLakeWH 24,130 #26 Posted September 5, 2016 1 hour ago, jdleach said: After looking closely at the construction of my C-175, I can only say that the blackhoods are about the epitome of Wheel Horse design and construction. Consider: Last series with a die cast dash, the hood design and stamping is complex and well done, it has all the improvements found in the number series that followed, top-line trannys and frames, belting, and except for the Series I Kohlers, the best engines. There was a tremendous amount of engineering that went into these machines. I am glad I own one. 2 Share this post Link to post Share on other sites
Wheel-N-It 2,967 #27 Posted September 5, 2016 I think the Blackhood years are when AMC owned Wheel Horse. Am I right about that? Share this post Link to post Share on other sites
SylvanLakeWH 24,130 #28 Posted September 5, 2016 AMC owned WH from 1974 - 1982. (Straight from the Horses Mouth - Final Edition P. 217) Black Hoods were 1980 - 1984. (Based on RS Picture Galleries). 3 Share this post Link to post Share on other sites
Wheel-N-It 2,967 #29 Posted September 5, 2016 4 hours ago, SylvanLakeWH said: AMC owned WH from 1974 - 1982. (Straight from the Horses Mouth - Final Edition P. 217) Black Hoods were 1980 - 1984. (Based on RS Picture Galleries). Thank you for that info. I'm embarrassed to say I have yet to read the book. Share this post Link to post Share on other sites
jdleach 525 #30 Posted September 5, 2016 Don't feel bad Van, I haven't bought, or read the book either. Update on the C-175: It looks as if the tractor is much more original than I had thought. Given the type of fellow I bought it from, and the overall appearance, I strongly suspected he had "high graded" the machine, meaning he had removed usable parts for other tractors he has, and slapped on marginal parts to replace those taken off. I am certain he did that to the rear wheels, and when I went to pick up the machine, he had removed the clevis hitch, and admitted taking off the plastic fender pan (said it was busted). It now looks as though he had not gotten far in removing any other parts. I finally found the model and serial tag (it is under the dash, and I was unaware where WH put them for those years), and it confirms that the tractor is a first year, 1980 blackhood C-175. Was able to locate the engine tags, and both confirm that it is a 1980 KT17. After perusing the parts book and examining different pieces on the machine, the wiring appears correct, and in good condition. Headlight wiring will have to be replaced, and the jumper wires for the rear lights are missing, but all else looks OK. The seat is probably after-market, but the springs and bracket/hinges are original and complete. Used my wire wheel at the Shop yesterday and cleaned the small parts in preparation for painting. This seat frame has the large round rubber bumpers in addition to the smaller spring-loaded ones. Rubber is in good shape. Found out after getting a new gas cap in, that there is a difference in the filler neck inside diameter from the newer tractors. The I.D. on the 312 is almost 2 3/4", while the C-175 is approximately 2 9/16". New cap would not fit. Too, the threads were rather bunged up, no doubt because the P.O. had also replaced the cap, with the newer style, and was thus forcing it on. Was able to smooth out the threads with sandpaper, and I relieved the opening to accept the newer cap. Works OK now and seals. Got some Mean Green cleaner the other day, and will drag out the tractor and douse the tranny and hydro areas to remove the caked grease and dirt. May also go ahead and drain and refill the tranny and install the new filter. This machine is probably a later 1980, as it has the large seat bumpers (parts book states they were not on the earlier 1980 models), and has the Eaton 1100. Early 1980 production units had the Sundstrand hydros installed. Planning on attending Mentone, and am hoping to find some of the missing/broken pieces I need for the 175. The lever for disconnecting the engine from the hydro pump is completely missing, although the cross rod is still present. Also looking for a couple front rims and possibly wheel spindles and tie rods. The front end is pretty awful looking, and I expect the worst when I get to tearing into it. The tunnel plate where all the levers are was cracked in several places. Although I welded it at the Shop yesterday, the thin sheet steel warped and it doesn't look as good as I want. Will go ahead and re-paint it, but look out for a better one. Also looking for a clevis hitch to replace the one cabbaged by the P.O.. Fortunately, he only took the hitch, the other hardware is still on the tractor, and looks to be in good shape. 2 Share this post Link to post Share on other sites
Wheel-N-It 2,967 #31 Posted September 5, 2016 Sounds like you are well on your way to getting that C175 back to good condition JD. I'm really enjoying this thread. Can we get some pics of your progress? 1 Share this post Link to post Share on other sites
jdleach 525 #32 Posted September 5, 2016 (edited) Here ya go Van, and everyone else, some photos to mull over. These were just now taken. You can see the trusty 312 in the background. I had just spray lubed Wurth HHK on all the pivots, hinges, etc. since I washed the tractor yesterday. Here is a shot of the tractor, along with all the parts I have accumulated thus far. The photo doesn't do the machine justice, it is worse than it looks here. Here is the "innards". The tank has to come out for a thorough cleaning, although it now sports a new filler cap. Not really new, as this was the one I bought a couple years ago for the 312. The 312 got the new cap. As can be seen, the drive belt disengage lever is missing. Too, the parking brake is disconnected, and doesn't work. The hydraulic lift control lever has serious wear and is in need of bushing to keep it from flopping around. You can also see that the choke lever is bent. It appears to be in good condition, but will have to remove it and straighten. Right front wheel. This will have to be replaced. The outer bearing bore is all bent up and out, permitting the bearing to wallow around. Could straighten, bush, and use it, but I am just not that motivated. Too easy to just get a better rim. The PTO bail rod has been cleaned up and a new roll pin is stuck in there, along with a new clip. The top pivot is serviceable, but all the other parts were just worn out. Friday, I should get in a new clevis and trunnion. The PTO thrust bearing and needle bearing seem OK. Will clean, grease, and repaint. Motor mounts are shot, so will have to come up with something that will work. Not paying Toro $38 EACH for them. The foot rest is loose, and the anti-skid is shot, so I will go ahead and strip and paint the rest, and find some type of rubber mat to glue on. As can be seen, the belt is about to part ways. There is a new belt on the hood. Idler felt OK, but may replace anyway. That whole tunnel side panel has to be removed and welded up. Where the seat cross rail is bolted to the panel, the panel corner is broken into several pieces. Here one can see that only a part of one of the blades is left of the fan. There is a new fan on the hood. I hope the hydro pump isn't smoked. Good shot of all the new parts. There is several feet of new fuel hose, box of Corbin clamps, new tail lights, cleaned up battery hold-downs, new points and condenser, drive belt, stainless steel fasteners, fan, and the McMaster-Carr bag has a bunch of other odds and ends that have been taken from the tractor, and are already cleaned, and ready for paint and installation. The fender pan has been completely stripped on the underside, and just needs the top done. The belt cover will get the same treatment, then both will be re-painted. Last photo for now. Shows new mule drive belt for the deck, more hardware in bags, hydro oil and filter, and paint. Decided to go the Rustoleum route, even though I am a pretty good painter, and have a Binks gun and everything else I need to shoot a tractor, or car for that matter. But since this is a working machine (hopefully), and I have had some good success with rattle cans applied properly, I am taking the easy route. Now it is off to try to remove the gas tank, and hose all the grease and grim from the tranny and hydro unit. Neglected to mention the new wheel bearings on the hood, and that I am also getting a new PTO brake on Friday. Also, I just noted that the brake bracket is bent, and the lining is coming off, so a new brake band is in my future. Edited September 5, 2016 by jdleach 1 Share this post Link to post Share on other sites
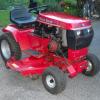
jdleach 525 #33 Posted September 5, 2016 Getting a little assistance from the grandcritter. 8 Share this post Link to post Share on other sites
19richie66 16,942 #34 Posted September 6, 2016 (edited) I believe if you get an engine mounting plate from a 418A or 418-8, you could mount the motor solidly to the frame instead of the mount with the rubber mounts. Looks good though. I have the same machine but in worse shape than yours. Edited September 6, 2016 by 19richie66 Added picture 1 Share this post Link to post Share on other sites
Wheel-N-It 2,967 #35 Posted September 6, 2016 Great pics. I'm gonna come back to this. Right now I have to watch Harley and the Davidson's on Discovery Channel. I will be keeping a close eye on your work JD. 1 Share this post Link to post Share on other sites
Wheel-N-It 2,967 #36 Posted September 7, 2016 JD, it looks like you've got this completely understand control. I enjoyed the pics and being walked through your progress. I'm looking forward to your updates ! 1 Share this post Link to post Share on other sites
jdleach 525 #37 Posted September 8, 2016 Tinkered with the C-175 a little this evening. Found more missing hardware, screws, etc., and made a small baggie with samples to take to Ace after work to get new fasteners. How in the hell can a machine run with so much missing? Tried to get it started for the first time, but only got it to bark occasionally. P.O. said it wasn't getting fire to the plugs. Sure enough, and it won't get fire with a 30 foot point gap. Points were not even closing. Roughed up the contact faces, adjusted by eye, and got a rather weak spark. So I now know the coil is probably good. Got a new set of points, but since the screws on the old set, which wasn't in very good shape, are something from the bench coffee can, I decided to get the proper filister head machine screws tomorrow before I install the new set. Did go ahead and install the new condenser, and tighten the loose coil bolts. All the wires will need new ends, so will have to get down to my electronics bench, find the proper ends, and solder them on. Tested the fuel pump, and after a bit of priming, got it to pump what looks to be a decent stream. Unfortunately, the float appears to be stuck, so I will get a carb. kit in and overhaul the thing. No doubt full of corrosion, crap, and varnish. With a little luck, may get it to fire this weekend. Would be great, since I am getting tired of pushing it around. 4 Share this post Link to post Share on other sites
Wheel-N-It 2,967 #38 Posted September 8, 2016 Progress is being made JD. Hang in there with it. Hopefully it's going to be one heck of a good machine! 1 Share this post Link to post Share on other sites
TDF5G 2,051 #39 Posted September 8, 2016 17 hours ago, jdleach said: How in the hell can a machine run with so much missing? 'Cause it's a ! 2 Share this post Link to post Share on other sites
jdleach 525 #40 Posted September 8, 2016 Do not worry Van, I won't get discouraged. I grew up pretty poor, and know well how to "make do", and keep things going. Lived for a few years in house without electricity. In very good shape now, kids are grown, nice home, vehicles, etc. I can indulge in the C-175 now because I want to, not have to. One of my rules, is to not pack sand down a rat hole, or throw good money after bad. When I decide to rejuvenate some machine, structure, property, whatever, I ascertain whether the candidate is worth it. Many factors go into the decision, but one of the biggest, if not the biggest, is whether the thing was quality to begin with. Wheel Horses, most anyway, fall into that category. The basic machines are very well made and engineered. So even if it is a total disaster, you generally still have something to work with. About the only way I would scrap it, is if was involved in a fire and burnt to a crisp, or rusted to the point of falling apart. This machine certainly isn't like that. But it is a definite mess, and I seem to continually find things wrong with it. But I take heart! There can only be so many things to fix. The problems, and the solutions, are finite. I got lucky with my 312-8, a true diamond in the rough, though not really very rough. This time, I am being brought back to reality. This sucker will run like new again, and look good to boot! 7 Share this post Link to post Share on other sites
jdleach 525 #41 Posted September 9, 2016 Another thing. I want to thank all the Wheel Horse nuts that post to this thread, or do the "Like" thing. It is appreciated more than you guys can know. The words of encouragement, witty comments, suggestions, and all else, is taken by me most seriously. While I really look forward to getting off work, or on the weekend, and finding the time to work on the tractor, I relish just as much, and look forward with the same anticipation, the posts that you guys write. In point of fact, I log on first to read the forum, then go diddle with the tractor. Thanks guys. 13 Share this post Link to post Share on other sites
19richie66 16,942 #42 Posted September 9, 2016 We're here for ya Bra! 3 Share this post Link to post Share on other sites
AMC RULES 36,945 #43 Posted September 9, 2016 You mean brah...I think. 2 Share this post Link to post Share on other sites
ACman 7,507 #44 Posted September 9, 2016 (edited) I'm with you @19richie66 ! If us men aren't thinking of tractors , then we're probably thinking of two other things . At least that's what my wife tells me ! JD your progress awesome , and love all the . Edited September 9, 2016 by ACman 2 Share this post Link to post Share on other sites
19richie66 16,942 #45 Posted September 9, 2016 Dah ting is, no mattra how you look at it, we're here for you "Mon" 2 Share this post Link to post Share on other sites
jdleach 525 #46 Posted September 13, 2016 (edited) Latest installment: Have not gotten done nearly as much as wanted. Took the bitter-half, daughter, and grandcritter to the tractor show at Elnora, IN last Friday. Saturday, I spent hours on end either behind the wheel of the 312-8 mowing weeds, or manhandling my string trimmer cutting weeds, banks, around trees, etc. The place looked pretty good when I left at around 6.30 PM for home. Then I ran out of gas in the country about 12 miles from my house in the city. Had to walk to fellows house, buy about 2 1/2 gallons of gas (thank goodness I at least knew him), and then get home, gas the Jeep, unload the trailer, put away the trimmer and Wheel Horse, etc. About 10 PM when I was able to get a shower. What a dope. Haven't ran outta gas for at least 35 years. Then I loaded up on beer. Ugh. Felt pretty bad Sunday, and didn't do a damn thing but recover. At least I had a sense of accomplishment. Between the hangover and the aches, was pretty miserable I did however, pull the carb. off the C-175 and took it to work with me today. Soaked all day in cleaner, blew it out, and re-assembled with a new Kohler kit I had in stock when I got home. I think it should do OK, in spite of the loads of sludge in the float bowl. Took some photos, and will post them later. For now, I am going to relax. Edited September 13, 2016 by jdleach Share this post Link to post Share on other sites
Tonyp 278 #47 Posted September 14, 2016 The C175 is awesome, keep the updates coming ! 1 Share this post Link to post Share on other sites
Wheel-N-It 2,967 #48 Posted September 14, 2016 Hope you are feeling better JD. How did the carb overhaul work out? Is the C175 running? 1 Share this post Link to post Share on other sites
jdleach 525 #49 Posted September 14, 2016 Yeah, much better. Didn't know if it was the beer, or the work. Probably both. A day off put me right though. Below are a couple photos of the carb. taken at work. Looked like your typical Kohler carburetor, normal amount of oil and dirt on the outside. The inside was full of some sort of jelly smag. No doubt from the P.O. leaving the air cleaner off of it. Even though the hood was down, I am sure storms blew water into the air horn, and thus into the float bowl. Oxidization had started pretty good, but was able to wire brush most of it away, and get all the passages clean. The throttle butterfly had begun to rust and seize in its bore (you can a bit of the rust in the second photo). Was able to free it, and the wear is not too bad. Believe I can get by without bushing it. Installed the new kit, and found during assembly that some maroon had lost one of the three air horn screws, which are 10-32. Joker had jammed a 10-24 into one of holes. Was able to save the threads. Proper installation calls for two of the screws to have internal star lock washers, and the third screw that passes through the air horn bore, to have just a sealing washer. Was able to get all the correct hardware from the local Ace store, and put it together correctly, including setting the float to 11/64". 1 Share this post Link to post Share on other sites
jdleach 525 #50 Posted September 14, 2016 Here are a couple photos of the overhauled carburetor, and my latest haul of new parts. You can see that 8 hours of soaking in cleaner certainly cleaned the carb. I have new lock washers and nuts to install it with (most likely the same maroon, lost the original lock washers and one of the nuts). The new parts are the trunnion, clevis, battery hold down strap, and PTO brake. Will not put them on as of yet, because I am going to remove the top PTO bracket and pivot, clean them up, and repaint. Will also paint the PTO bail rod with a galvanize type of paint, and the new parts, except the trunnion and bail, in red as was original. Trunnion will be silver like the bail. Will also rework the pulley, remove the snap ring and clean and grease the thrust bearing, the needle bearings, and repaint red. May as well do it right. The battery cable had serious corrosion, and one end literally fell off. Soldered on a new lug ( hate crimped connections), and will use it for now. Intend to get several feet of new wire, and install the new lugs (in the bag on the hood to the left). Will use shrink tubing to doll up the ends a bit. At least the repaired cable will provide the juice necessary to get the engine running. The two steel rods were purchased to make new battery hold downs. One is 3/16" dia., and the other is 1/4". Neither is the correct size as the original. Original rods are 7/32" in diameter. The reason is that Wheel Horse "crushed" the threads on the ends, thus swelling the metal and producing a 1/4-20 thread. Since I have decided that there is too much pitting in the originals, I am going to make new hold downs. Have not decided whether to use the 3/16 or 1/4 yet. Will probably use the 1/4, since it will still fit into the holes in the dash column. Going out now to install the carb. 5 Share this post Link to post Share on other sites