Jump to content
Sign in to follow this  
312Hydro

The Road to Redemption

Recommended Posts

312Hydro

All I can say is :D

I am going to be going through a similar process with the 71 Bronco I bought. I started tear down last night, and I too took lots of pictures for re-assembly. Mine won't go nearly as fast as yours though.

Lots of good tips here, and I will be sure to steal a few when it comes time to do the painting / preping.

Keep up the good work, and I can't wait to see it when you are done!!!

Good luck on your project,71 Bronco. Take pictures from different angles too. I've really started to rely on them and the parts diagrams at Toro and Partstree. If my post can help you then it's been worthwhile! I learned more here from others than I ever knew about :ROTF: :woohoo:

Share this post


Link to post
Share on other sites
 
312Hydro

Great job so far. I am new to WH, so I really enjoyed reading the thread. I think it reads better than many books. Keep up the good work and I can't wait to see the finished product.

:ROTF:

Thanks, I'm pretty new myself. I have to give the credit to the forum members.Seeing their :D projects got me motivated. :woohoo: Hoping to see it done soon.

Share this post


Link to post
Share on other sites
 
312Hydro

Started to put the control tower together today. Was going pretty well until I realized I needed 1/4 x 1 1/2 key for the rock shaft.

WheelHorse312Hrestoration2011124.jpg

Switched to sand blasting and priming the last (I hope) of the :woohoo: . WheelHorse312Hrestoration2011133.jpg

I found some stress cracks in the seat mounting plate so I'll need to weld them first.WheelHorse312Hrestoration2011136.jpg

Also got the seat back painted and I'm going to look for a substitute for the seat bumpers from :D . My coil springs have the covering coming off but I think I have a fix for that.WheelHorse312Hrestoration2011115.jpg

I still haven't painted the hood and fender pan,saving them for last. Anyone know where to get the nylocks for the controls local?I'm going to check with Maple Mountain tomorrow.

Share this post


Link to post
Share on other sites
 
312Hydro

Sorry for not updating. I've really been trying to get this done. The grass looks to be about 4-6" tall an growing! A lot has been going on,mostly running for parts. After getting the control tower mounted I spent a lot of time looking at Parts Tree schematics and the pictures I took while taking the 312h apart. I've got to say that you can never take enough pictures while disassembling. Make sure to take them from different angles too. My pics really saved me when I needed to know where that 1 little part went. :woohoo:WheelHorse312Hrestoration2011148.jpg

The tower is time consuming and I did get the hydraulics in. I had a problem with my steering being sloppy and the bushing and hole was egg shaped. I never felt the steering was that great anyway.

Well did a search and VOILA!, I found Duke's post with the modified bearing! Here's the link Steering Bearing I had a problem doing this mod tho. The 312H has the control rods running alongside the steering shaft. I'll get into this in another post but I did modify Duke's and sorekiwi's solution and it works great! I did cut the bolts shorter .

WheelHorse312Hrestoration2011180.jpg

Then it was on to the wiring harness.

WheelHorse312Hrestoration2011155.jpg

Cleaned it and took time getting it right.

WheelHorse312Hrestoration2011162.jpg

I had a broken stud on the volt meter that needed fixed.

WheelHorse312Hrestoration2011187.jpg

Got a 10-32 bolt ,ground down the head and epoxied into the gauge.

WheelHorse312Hrestoration2011188.jpg

Wiring in and onto the red paint!

WheelHorse312Hrestoration2011194.jpg

I cheated again,painted all the undersides that you will never see with the Fire Red that I got at Walmart. Must be made by Niles because it matches exactly.

[@ mr.pipes Do you think you could get one coat on the hood and seat pan with the 4oz cup?] Yes,you can use the touch up gun to shoot the hood ,fender and other parts. It worked fine. I was able to use another 12 ounces leaving me with 8 oz.in the can.

WheelHorse312Hrestoration2011197.jpg

Maybe for the mower deck. I was pretty happy with the results but I think I'll color sand the parts at a later time. About a month, CHRIS11? I think 1200 paper is used too. Hafta check on that. Also started on the motor.

WheelHorse312Hrestoration2011200.jpg

Was able to get the heat fins blasted and painted.

WheelHorse312Hrestoration2011215.jpg

Drying as I type. Still need to Assemble the motor,Make 1 tie rod,and get the hood black painted . Then get it all installed. More later......

Still looking for one nice 6" hubcap...... maybe consider buying 2 if I can't find it.

Share this post


Link to post
Share on other sites
 
travisg84

Beautiful resto! I've been off of redsquare for awhile but, i've got a bit of a wheelhorse itch here lately. I hope to be posting my own resto/mod shortly! The tear down on mine was almost 2 years ago. I hope I remember where thing go haha! Really though that's a truly beautiful job you are doing! :woohoo:

Share this post


Link to post
Share on other sites
 
312Hydro

Beautiful resto! I've been off of redsquare for awhile but, i've got a bit of a wheelhorse itch here lately. I hope to be posting my own resto/mod shortly! The tear down on mine was almost 2 years ago. I hope I remember where thing go haha! Really though that's a truly beautiful job you are doing! :woohoo:

Thanks,Travis. The pictures were the key to a trouble free assembly for me. Between Partstree and the info provided by the members of the forum,I don't think you'll have any problem on your resto.

Gonna try to play catch up with this post ,but will probably finish in the morning.

Finished painting and assembling the Kohler .Mounted the hood after getting the black painted.410eb530.jpg12478f84.jpg

I modified the hood brackets so I could use some grommets that I got at the Home Depot. It really firmed up the hood and I can get replacements easily.21f47dc5.jpg0719e5bc.jpg

Had a lot of items to finish up. Needed to make a rockshaft before I put the fender pan on.5d329581.jpg

Remember the old hitch pin? I used it and the brass bushings from my brake pedal in the new lift arm. I bought new 3/4" ID bushings at TSC for the pedal. All I had to fab was the arm itself and just weld it to the shaft. The shaft and bushings fit like they were made for it.63bcf98d.jpg

Burnt it in with .035 flux core at the highest setting on the Lincoln 135.d18c5135.jpg

Took care to tack it so that it was straight when doing the final welding.e98a5e82.jpg

The rock shaft fit and works great. Still need to put the tiller on to give it a real test. Also need to make the mid mount pulleys. I'd like to thank Lost Pup :D for his posts on making his tiller parts. By reading how he did his I was able to figure out what I wanted.

Got the fender pan on and mounted the seat. I took the original springs and coated them with Plasti Dip spray. Built up a nice coat too. I'm looking for a set of seat bumpers to replace mine as the are pretty worn out. 8db583a3.jpg

Finally installed the engine with the help of my son Matt. We used the hardtop hoist that we built for his Jeep TJ to muscle in the Kohler. What an easy way to do it!d40c892a.jpg

That left one final part to install before moving on to the transmission oil.Had to weld up some pinholes and paint it first,1abb3352.jpg

More to follow......The Road to Redemption is getting shorter :ROTF:

  • Like 1

Share this post


Link to post
Share on other sites
 
travisg84

On the hood brackets another thing that will work is welding them shut and then redrilling them. My dad did the ones on my 312 3 yrs ago and it's been wobble free since!

Share this post


Link to post
Share on other sites
 
chris11

Rich, All i can say is WOW.Its not the same tractor. That thing looks brand new. Great job.

Share this post


Link to post
Share on other sites
 
312Hydro

On the hood brackets another thing that will work is welding them shut and then redrilling them. My dad did the ones on my 312 3 yrs ago and it's been wobble free since!

Thanks,Travis for the tip. Might try that on the next one.

Share this post


Link to post
Share on other sites
 
312Hydro

Rich, All i can say is WOW.Its not the same tractor. That thing looks brand new. Great job.

Thanks for the compliment Chris,I didn't know where the road would lead once I started down it! 778e2e55.jpg

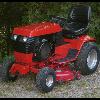
I gotta say that the end result was more than I expected and I really feel good giving my :ROTF: the attention it deserved. Never once in all those years has it let me down. Yesterday in the evening I finished up adding all the fluids (thanks for the tranny bolt trick,Mr.Pipes! ) and finally cut my grass for the first time since June. Headlights worked great! Today, my wife and I used the :D to haul branches from a tree we trimmed.a0bee041.jpg87347804.jpg

I'm going to redo the deck since I have about a week ( :D ) till I need it to mow again. I need to get the decals but I'm not in a hurry. Also going to redo my dump cart too.Satin Nickel wheels with red frame and top rail. Thank you to all who followed along giving me advice and encouragement! :woohoo: It really meant a lot and kept me going. I'll post some updates as the tractor gets it's decals. Still needs it's front hub caps and I need to adjust the forward ground speed and parking brake. A few little things to finish too like the tie rods and a good vinyl under the seat springs to save the paint. I put masking tape and heavy duct tape there for now. Here's an interesting item, I found out after all these years that I really own a 1991 312H ( 5112KE01) (1030082) . So if any mods read this please change to 1991 in the post title. I took over 700 pictures during the build and really used them when it started to go back together.

I'm going to be posting with more pics if anyone has a question about some thing I did and as soon as the deck is done I'll post up the pics with it on the :P .

Share this post


Link to post
Share on other sites
 
farmer

Rich,

:P:D:D

Great thread :D I've enjoyed following your adventures,

You took what looked like a :woohoo: and gave it new life for the next ...? years, Morgan Freeman would be proud. :P

Three questions ;

How do you plan to treat it in the future? B)

How much $ did you get for your hay crop? :ROTF:

And.....what's to become of the CSI tent,... tomatoes..pumpkins? :D

:D

Share this post


Link to post
Share on other sites
 
dclarke

Great job Rich, :woohoo: what a change between your first picture and your last one.

Share this post


Link to post
Share on other sites
 
massey

All of your work paid off, it looks 100% better.

Share this post


Link to post
Share on other sites
 
jbumgarner

Great Job on the Restoration. I hate its over, I have enjoyed seeing and reading the thread. It's like getting to the end of a good book. I guess I will need to start looking for another thread to read. The tractor looks great. Hope I have the same results when I start on my 702.

:woohoo:

Share this post


Link to post
Share on other sites
 
Horse'n Around

Well done Rich !!!!! :woohoo:

Share this post


Link to post
Share on other sites
 
mr.pipes

Great job Rich! :ROTF:

You should be proud. :woohoo:

That was one of the roughest looking 300 series I have seen and you certainly redeemed yourself.

Once you put the decals on it will look as good as the day you bought it.

I'm glad the tip about tranny bolt helped.

Just curious, where did you get your new seat and are you happy with it?

Once again, fantastic job. I really enjoyed your thread. :D :D

Share this post


Link to post
Share on other sites
 
JimD

Rich, it has been a real pleasure following this thread. What a transformation! A job well done sir. :woohoo:

Share this post


Link to post
Share on other sites
 
shorts

well done :ROTF::D:woohoo:

It's been fun following along

Share this post


Link to post
Share on other sites
 
HorseFixer

Very Nice Rich! :woohoo: You gave her the full Monty, :D Looks good.

Cheers ~Duke

:ROTF:

Share this post


Link to post
Share on other sites
 
Zeek

Nice job :woohoo:

Share this post


Link to post
Share on other sites
 
312Hydro

Rich,

:clap:  :clap:  :clap:

Great thread  :thanks: I've enjoyed following your adventures,

You took what looked like a :P and gave it new life for the next ...? years, Morgan Freeman would be proud.  :P

Three questions ;

How do you plan to treat it in the future? :D

How much $ did you get for your hay crop?  :D

And.....what's to become of the CSI tent,... tomatoes..pumpkins?  :D

  :clap:

Wow!So many comments!

Well, the answer to your three Farmer are:

The :wh: has a permanent spot in the garage and I need to get a cover for it. I'm going to wax it after 30 days. I can't see myself letting it go after all the effort to get it new again. It will get used as I just bought a snow cab for it and I'm going to look for a 48" mowing deck and a snow blower. I did get a tiller and need to make the pulleys for it .

Due to spotty markets at this time of year our hay crop didn't bring enough for a cup o coffee! I was unable to find a :wh: baler :D Honestly I'd never seen my grass above the front tires! It took a long time to mow but I was enjoying it :lol:

I'm going to mark the pieces before I take it apart so it can be used again. It really goes up easily and shouldn't take up any room stored. I plan on making a small 6x8 as a greenhouse to use in the spring next year. It won't need a high roof but it will need vents.The peak will be around 7 feet instead of 13 feet like it is now. I really liked the convenience of having a dedicated spray booth, the fan worked great and it made it easy to paint.I found out that the best duct tape for this is 3m tape made just for tarps and drop cloths. got it in the paint section at Home Depot. I'll put the model number in when I go to HD. Second choice would be Gorrilla duct tape its black I think. Stay away from the cheap stuff,it won't hold up and comes unstuck.

I can't say how good it feels to have rebuilt the :wh: . Maybe I can get another 20 years or one of my son's will end up with it. If Morgan Freeman or Tim Robbins ever stop by I'll be sure to get a picture of them with it! :D You know I really need to thank my wife and sons for helping out when they could :thanks:

Great job Rich,  :P  what a change between your first picture and your last one.

Thanks I'd like to put up a side by side, I have a hard time looking at the before pics.

All of your work paid off, it looks 100% better.

Thanks, Even 50% would have been a big improvement! :D

Great Job on the Restoration.  I hate its over, I have enjoyed seeing and reading the thread.  It's like getting to the end of a good book.  I guess I will need to start looking for another thread to read.  The tractor looks great.  Hope I have the same results when I start on my 702.

:D

Thanks. Ya I know what you mean. The process of getting there is really where the fun is at. Making decisions and doing it your way are the rewards. You'll have great results just by using the info from this forum! I can't tell you enough how much I learned reading the members posts and doing searches on this forum.The best part is when you get to say" I did it myyyy wayyyy! (Apologies to ol' Blue Eyes)

Well done Rich !!!!! :D

Thanks,I gave it my best shot.

Great job Rich! B)

You should be proud. :woohoo:

That was one of the roughest looking 300 series I have seen and you certainly redeemed yourself.

Once you put the decals on it will look as good as the day you bought it.

I'm glad the tip about tranny bolt helped.

Just curious, where did you get your new seat and are you happy with it?

Once again, fantastic job. I really enjoyed your thread. :D  :thumbs:

Thanks mr.pipes! I knew some one gave me that tranny bolt tip but I couldn't find it to give you credit. I'll be sure to edit that .

I didn't know how bad it really looked until I started seeing the new pics during the rebuild.That seat was given to me by my wife's uncle Sam. I gave it to him about 10 years ago for his tractor but he couldn't use it. When I went over to straighten the bent part on the frame ,I mentioned that I had to buy a new seat ( ya ,spending too much in duct tape :D ). He gets this out and I took it home. It's off of a Hyster tow motor and I was able to just redrill the holes on the springs to match the seat. I'm happy with it. Best constructed seat I've ever had.

Rich, it has been a real pleasure following this thread. What a transformation! A job well done sir.  :thumbs:

Glad you enjoyed it and thank you. It amazed me too!

well done :clap:  :thumbs:  :ROTF:

It's been fun following along

Thank you, shorts! Glad you enjoyed it!

Very Nice Rich!  :D You gave her the full Monty,  :thumbs: Looks good.

Cheers ~Duke

:beer:

Thank you ,Duke for posting about the steering bearing mod you and sorekiwi did! What a difference ,the steering is rock solid now and I don't think I'll ever need to think about it again.

Nice job :thumbs:

Thanks,Zeek ! Your avatar brings back memories of my chilhood! I didn't use a knife but the result was the same. :thumbs:

Share this post


Link to post
Share on other sites
 
shootinok

Never did like those black grilled hoods :D

__until now that is....

Yours looks to me like its wearing a mask, like Zorro or the Lone Ranger.

What a great looking rig!

Nice Work :woohoo:

Share this post


Link to post
Share on other sites
 
312Hydro

Never did like those black grilled hoods :ROTF:

__until now that is....

Yours looks to me like its wearing a mask, like Zorro or the Lone Ranger.

What a great looking rig!

Nice Work :woohoo:

:D Thanks John! I guess it would be like the Lawn Ranger! I thought it looked odd without the black! It's just what I was used to. :D Heck,It was hard to tell what it was before :P

Share this post


Link to post
Share on other sites
 
The Toolman

If you haven't fixed yer seat yet, you can use a set of the soft rubber factory bumpers that are used on the front a-arms of cars. They are usually bolted on with a single 3/8 bolt on the bottom.

These are the ones that keep metal from metal hitting when the vehicle bottoms out. I'm sure you know what I mean though...... :woohoo:

Share this post


Link to post
Share on other sites
 
71_Bronco

Well done, and nice resto.

Question, How much paint did you use? I am going to be doing my Bronco this winter, and was trying to come up with how much paint I should get. My buddy (who does bodywork on the side) said that 1 quart would be fine, as after you add thinners and all that, that you will have more. I was thinking about buying 2 quarts just to be safe. I will be doing the underside of the hood & fender pan (where you used the rattle-can), so I might need a bit more then you.

Thanks, and great tractor!

Share this post


Link to post
Share on other sites
 

Create an account or sign in to comment

You need to be a member in order to leave a comment

Create an account

Sign up for a new account in our community. It's easy!

Register a new account

Sign in

Already have an account? Sign in here.

Sign In Now
Sign in to follow this  

×
×
  • Create New...