Jump to content
Sign in to follow this  
Duff

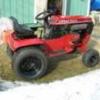
Older mid-mount grader blade - will it fit?

Recommended Posts

Duff

Hi, folks,

I've got a line on an older mid-mount grader blade, M/N 67-40BM01, vintage 1976. It appears to be one that mounts to the front rather than the rear brackets. Will it fit or can it be made to fit my '89 312-8? :whistle:

Thanks as always, guys!

Deereman

Share this post


Link to post
Share on other sites
 
TT

It'll fit right on your 312, Deereman. :whistle:

That's the beauty of Wheel Horse Tach-A-Matic hitches. (or Attach-Matic :WRS: )

Share this post


Link to post
Share on other sites
 
Duff

Thanks, TT! With luck, another attachment will soon join the collection! :whistle:

To my surprise, I ran the Toro part numbers for a new one and found that between two suppliers I've worked with I could actually build one from scratch using OEM parts. The cost, on the other hand, was a little frightening! :WRS:

On this used one, if I get it I'll have to ask around the forum for some help with measurements and specs to fabricate the lift link - that's the only missing part.

Thanks again!

Deereman

Share this post


Link to post
Share on other sites
 
T-Mo

Congratulations, Deereman, on finding a much desirable attachment. I know I would love to have one. :whistle:

Share this post


Link to post
Share on other sites
 
TT

On this used one, if I get it I'll have to ask around the forum for some help with measurements and specs to fabricate the lift link - that's the only missing part.

If you get the grader blade , attach it to the tractor and block it up with some wood scraps. Measure the distance between the grader blade lift link attachment point and the hole in the RAISED lift lever shaft then make a lift link to fit. Some tractors vary in height, so that's the best way to make one that you know will fit. :whistle:

Share this post


Link to post
Share on other sites
 
Duff

If you get the grader blade , attach it to the tractor and block it up with some wood scraps. Measure the distance between the grader blade lift link attachment point and the hole in the RAISED lift lever shaft then make a lift link to fit. Some tractors vary in height, so that's the best way to make one that you know will fit. :WRS:

TT, you are the MAN! Thanks as always for the great advice! :whistle:

Deereman

Share this post


Link to post
Share on other sites
 
Duff

If you get the grader blade

Got it! Or should I say, it's on it's way here. :whistle::WRS::D

Probably paid way too much for it, but I've been looking around for almost a year and haven't seen one available anywhere, which tells me these are indeed scarce items.

Pix to follow....... :D

Deereman

Share this post


Link to post
Share on other sites
 
Duff

Oooh, boy. Got the grader blade here and although the metal is rusty, it's mostly surface rust. I'm plenty used to working through that.

But what I hadn't anticipated is the post the blade swivels on is frozen tight. :WRS: And I do mean tight! :D I'm working with penetrating oil and light taps with a hammer to work things loose but it's a slow process. I did come up with one idea and could use some thoughts from the pros around here:

If I drill a 1/8" journal the length of the post that's half into the post and half into the sleeve it turns in, won't that provide better lubrication movement in the future (and also help the penetrating oil now)? I think the rust problem may have developed form the extremely tight fit originally that didn't allow grease to flow freely around the post (or a PO who didn't give a darn, or sitting for 20 or 30 years in storage....) Since the normal lock-to-lock "swing" of the blade is only a few degrees, there's not much rotation to move grease around anyway...

Thoughts? Am I crazy? :whistle:

Thanks, guys!

Deereman :D

Share this post


Link to post
Share on other sites
 
TT

You'd probably be better of smothering it with anti-seize or a hard grease once you do get it freed up and apart.

If you want the grease to travel around the pivot pin by using the original fitting on the tube, just use a hand grinder and cut a shallow spiral groove around the pin. :whistle:

(make sure you start the groove a little deeper where it lines up with the fitting.)

Share this post


Link to post
Share on other sites
 
.5racer

To help get it loose , try a fast heat with a rsbud of a torch to just the outside and heat very fast . Set your touch to the highest heat avalible to be safe ,fast heat the outside all the way around so it expands and move back and forth and apart. Once apart get you some scotch bright , brown is better , and buff the pin , if you can chuck in a drill that would help or lathe . TT is right on with the spiral cut once apart ,need a grease fitting though , outside will work ,center of pin wil work too depending on size , drill half way through the pin length wise the sideways to the hole for grease outlet, . Either way works great . If the outside would be easier you might have weld a nut or slug to have more threads for zert.

Share this post


Link to post
Share on other sites
 
TT

The pivot pin is welded to the blade mount on the originals, Terry. The pivot tube is welded to the mounting frame and has a grease fitting installed about halfway up. The pins were never clearanced for grease distribution though, and it's amazing that they even had a grease fitting since they barely turn. You sure wouldn't see that on an MTD! :whistle:

Share this post


Link to post
Share on other sites
 
.5racer

Is the grease fitting removable ? would that be a way to get penatrent in to soak ? Still some heat would hep though ?!?! Myabe not ??

Share this post


Link to post
Share on other sites
 
HorseFixer

Hi, folks,

I've got a line on an older mid-mount grader blade, M/N 67-40BM01, vintage 1976. It appears to be one that mounts to the front rather than the rear brackets. Will it fit or can it be made to fit my '89 312-8? :D

Thanks as always, guys!

Deereman

Nice Find! :D You did good! If you get tired of it, I will put it to work on my 1054 :WRS: The best part I wont charge you a dime! :whistle:

Duke

Share this post


Link to post
Share on other sites
 
TT

Yes, the grease fitting should be a short one that screws in. Heat would definitely be the best, but some PB Blaster or equivalent (does PB Blaster actually have an equal? :whistle: ) through the hole certainly wouldn't hurt. :WRS:

Share this post


Link to post
Share on other sites
 
Duff

As always, guys, thanks for the terrific tips/advice. :WRS::D I've got some work ahead of me!

I've pulled the grease fitting - it was as dry as a bone, which may say something about the PO (who abandoned the grader blade in a storage trailer in Florida, or so the seller told me). I'll work some Blaster in there and at both ends, and continue to tap it lightly with a hammer every so often to help shake things up. Once apart, I like TT's idea of cutting a sprial groove in the post. I'm pretty handy with my Dremel tool and a reinforced cutoff wheel.

This forum is GREAT! :whistle:

Deereman

Share this post


Link to post
Share on other sites
 
sorekiwi

(does PB Blaster actually have an equal? :whistle: )

You know, I tried PB Blaster years ago and was disappointed, then recently after reading about everyone raving about it I bought another can and tried it again. I cant say I'm too impressed, I dont think it works any better than WD40 (which I also dont think works that great).

I'm going back to using normal old ATF, diluted with a bit of WD, which I think is a lot more effective. I've also had success with old brake fluid in the past, but its pretty nasty to work with.

Maybe my tractors are rustier than yours :WRS:

Share this post


Link to post
Share on other sites
 
HorseFixer

Have you guys ever heard of "MOUSE MILK" I have friends that are aircraft mechanics and they rave about the stuff and CREEPING action it has to get into threads. I think im gonna try some.

http://www.mousemilk.com

Duke

Attached Image

post-4-1212639999.gif

Share this post


Link to post
Share on other sites
 
linen beige

I've done a lot of small scale model building in the past 4 decades, but I've not yet milked a mouse! :whistle:

But seriously, PB Blaster is good stuff, I have a can of it in my tool box right now, but it cooks away if heat is used. CRC 5-56 is a wax based penetrant that rather than cooking away under heat, actually melts into the joint further as heat is applied. It is still there and still lubing the joint after it has cooled down enough to handle. It also protects against further rusting. After using several types of penetrants on the seat mount bolts of cars, it's my favorite. Another VERY good penetrant is "oil of wintergreen". It is sold in drugstores. Pipe fitters, plumbers, and aircraft mechanics swear by it, and it smells good. I've seen it used to break threaded joints in fifty year old cast iron drain pipes and steam heating pipes. Just a few drops, a few minutes, and voila, parts unscrew like they had never been torqued down.

Something else to think about: I've run into more than a few pins, etc. that were stuck together by old grease, not rust. Hardened grease is a fantastic glue, Especially in tight fitting assemblies. A little heat softens it up and turns it into grease again.

If you're wetting the frozen joint down daily and allowing it to sit and loosen up, you may try hooking a bungee cord to one end of the blade and the other end to the mount to put a slight, constant pressure on the joint. Alternate ends of the blade on alternate days, and that might speed it up.

Just remember, it didn't freeze up overnight, so don't rush it. This is one of those times a bigger hammer is not a good idea.

Share this post


Link to post
Share on other sites
 
Duff

PB Blaster is good stuff, I have a can of it in my tool box right now........

If you're wetting the frozen joint down daily and allowing it to sit and loosen up, you may try hooking a bungee cord to one end of the blade and the other end to the mount to put a slight, constant pressure on the joint. Alternate ends of the blade on alternate days, and that might speed it up.

Just remember, it didn't freeze up overnight, so don't rush it. This is one of those times a bigger hammer is not a good idea.

Well, when I read your post something struck me right between the eyes (and it wasn't mouse milk!!!). The guy shipped me the grader blade unbolted from the frame and mount/tilt assembly, so I've just been playing around with the frame and swivel stuff. It never dawned on me to put the blade back on and use that for extra leverage. Boy, am I :imstupid: :whistle::WRS::D

And I used to think I was a fair mechanic........ :dunno:

Anyway, I 've been doing the daily soak and wait with PB Blaster. Already gave up on the hammer thing. NOW I'll add the blade back into the mix!

Thanks for the info!

Deereman :D

Share this post


Link to post
Share on other sites
 
TT

Did you get that grader blade freed up yet, Deereman? :whistle:

Share this post


Link to post
Share on other sites
 
Kelly

I had one that was froze solid, I had to heat it, it still took 2 days of messing with it.

Now it moves very freely, good you put the hammer down

I had to block mine up off the ground and had my son hold it after heat was aplied and worked it back and forth, getting it started was the hard part.

Share this post


Link to post
Share on other sites
 
GlenPettit

In addition to penetrating oils, auto parts stores have a "CRC Freeze-Off" spray which will cause a bolt or rod to contract slightly. If the nut or case is warm or hot, force and this usually frees the parts.

Glen

Share this post


Link to post
Share on other sites
 
TT

If I ever overcome my cranial-rectal illness and remember to take a candle out to the shop, I'd like to try the "wax trick" I learned a while back.

An old feller I know claims if you can heat a bolt, pin, bushing, or whatever up with a torch warm enough to get some candle wax to flow around it, it will come apart with ease. Now I just have to remember to try it. :whistle:

Share this post


Link to post
Share on other sites
 
Kelly

I was told the samething TT, but I can also never remember to try it, always do the samething penetrateing oil and heat and get mad.

Glen I seen that stuff just the other night in Walmart made by CRC I might try it to see if it works.

Share this post


Link to post
Share on other sites
 
linen beige

If I ever overcome my cranial-rectal illness and remember to take a candle out to the shop, I'd like to try the "wax trick" I learned a while back.

An old feller I know claims if you can heat a bolt, pin, bushing, or whatever up with a torch warm enough to get some candle wax to flow around it, it will come apart with ease. Now I just have to remember to try it. :whistle:

The CRC 5-56 is a beeswax based formula, pretty much melted wax in a can, and a lot more convenient. I've watched my dad use the candle trick on a seized exhaust manifold bolt in an old Chevy van (after it caught fire when a mechanic tried to use a torch!) and it did work for him.

Share this post


Link to post
Share on other sites
 

Create an account or sign in to comment

You need to be a member in order to leave a comment

Create an account

Sign up for a new account in our community. It's easy!

Register a new account

Sign in

Already have an account? Sign in here.

Sign In Now
Sign in to follow this  

×
×
  • Create New...