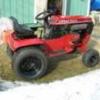
Duff 206 #1 Posted February 11, 2011 Here are the parts and directions needed to make your own tie rods for 300-400 series tractors, and possibly others if they use the same style tie rods (the experts will know!). First, the parts laid out: The tie rod ends are high-strength ball joint ends, McMaster-Carr stock # 60645K441 ($6.08 ea) The tie rods themselves are ASTM Grade B7 alloy steel threaded rod, 3/8-24. A 24" piece is McMaster-Carr stock #98957A805 ($5.53 ea.) Alternately, and in retrospect I wish I had done this myself, you can use 318 stainless rod, stock #93250A465 ($11.33 for a 24" piece). The protective covering is high-strength aluminum tube, alloy 2024, .370ID and 1/2"OD, McMaster-Carr stock #1968T241 ($19.71 for a 3' section) The lock nuts are 316 stainless, 3/8"-24. Each tie rod takes a 7-1/2" piece of threaded rod. This gives you maximum adjustment to achieve toe-in while still having plenty of material inside the tie rod ends. A 24" piece of rod will make three tie rods (yes, I know, but it'll give you some spare material in case you bend one somewhere later on). The trick is in the length of the aluminum tube. While on my tractors a length of 5-5/8" is perfect to give me 1/4" of toe-in, I recommend that you first build your tie rods without the aluminum tube, install them and set your desired toe-in (if any), then measure the length between the two locking nuts that lock the tie rod ends in position on the threaded rod. Once you have the measurement (and are sure of it!) cut the aluminum tube to length, then take one tie rod end off, slide the tube on (it's a nice, tight fit!), and put the tie rod end back on using the aluminum tube as your reference point for how far on the rod to thread the tie rod end. As I said above, I used alloy steel threaded rod but now wish I had bought the stainless rod (only because I've used stainless hardware everywhere else on my tractors). Either way, the aluminum tubing will cover it, and I use Neverseize both to make it possible to remove the tie rod ends in the future and to provide corrosion protection under the aluminum tube, The finished product on a tractor looks like this: You could easily paint the tie rods; I just like the raw metal look! Hope this may help someone else! Duff :thumbs: 1 Share this post Link to post Share on other sites
420lse 18 #2 Posted February 11, 2011 Nice skills for sure :thumbs: Share this post Link to post Share on other sites
Anglo Traction 759 #3 Posted February 11, 2011 Nice Mod Job Duff ! . Just about to check mine over to see if I need to do something similar. Share this post Link to post Share on other sites
KB9LOR 4 #4 Posted February 11, 2011 I know I need a new right side one for my Workhorse, and I can get the parts cheap, so this thread will be marked to save! thanks Duff! Share this post Link to post Share on other sites
wheelhorse656 20 #5 Posted February 11, 2011 Sweet That is all i have to say :thumbs: Share this post Link to post Share on other sites
Coadster32 793 #6 Posted February 11, 2011 Good idea! :thumbs: Share this post Link to post Share on other sites
Kelly 1,028 #7 Posted February 11, 2011 I built the same basic set up for my rat tractor, but I used regular ajustable tie rod ends, like I see you did for the outers on your tractor. Thanks for posting this, many can benefit from it. Share this post Link to post Share on other sites
dclarke 4,011 #8 Posted February 11, 2011 Nice job Duff I like the way you did that. Share this post Link to post Share on other sites
can whlvr 991 #9 Posted February 11, 2011 good job :thumbs: Share this post Link to post Share on other sites
AMC RULES 36,941 #10 Posted February 11, 2011 Great reference material Duff, thanks for the tip. :thumbs: Share this post Link to post Share on other sites
B-8074 19 #11 Posted February 11, 2011 I made a set similar to those but used heim joints. Your way is more user freindly. I had to weld nuts to the end of the tubes for the heim joints to screw into. Nice work I may have to borrow ypur idea for the next ones. Share this post Link to post Share on other sites
Sparky-(Admin) 19,439 #12 Posted February 12, 2011 Nice pics and a great write up Duff . Thanks, Mike........ Share this post Link to post Share on other sites
Don1977 604 #13 Posted February 12, 2011 I did mine around 1988 don't remember exactly. Share this post Link to post Share on other sites
danjmah 71 #14 Posted February 12, 2011 Hope this may help someone else! Duff Excellent instructions! This will indeed help me! Thanks. Share this post Link to post Share on other sites
tophatbufflo 2 #15 Posted February 12, 2011 I believe that TSC sells the ends also. allyou have to get is the threaded rod and alumniun Share this post Link to post Share on other sites
sgtsampay 117 #16 Posted February 12, 2011 :thumbs: Thanks you very much for the very well made guiide. I will make my tractor a new set come spring. :thumbs: Share this post Link to post Share on other sites
dgoyette 12 #17 Posted February 12, 2011 Looks great Duff! Curious why you chose to or had to attach it to the bottom of the spindle versus the typical attaching on top? It seems to have kind of a downward angle. Share this post Link to post Share on other sites
VinsRJ 721 #18 Posted February 12, 2011 Thats how I have repaired / replaced a number of tie rods on early suburban 400s. Great idea! :thumbs: Share this post Link to post Share on other sites
Buzz 502 #19 Posted February 12, 2011 Very helpful. This should be pinned to the "Very Useful Posts" section at the top of this section. Share this post Link to post Share on other sites
boovuc 1,090 #20 Posted February 12, 2011 This is another tutorial that I cut and pasted into a Word document with the pictures and saved for future referance. Thanks, Duff and all those who contribute to Red Square. These posts are why hobbyists, collectors and WH owners come here and keep coming back. BooVuc Mill Hall, PA Share this post Link to post Share on other sites
JC 1965 1,528 #21 Posted February 12, 2011 :thumbs: Thanks for posting this Duff. I need a set of tie rods for one of my tractors. Thanks to you, I can make them myself. THANTS AGAIN !! :thumbs: Share this post Link to post Share on other sites
jdpuller 2 #22 Posted February 12, 2011 good stuff Thanks :thumbs: Share this post Link to post Share on other sites
HorseFixer 2,012 #23 Posted February 12, 2011 Nice article Duffer! A question to all, what would be a good all around length to have on hand even if it will need to be cut or trimmed? Thought I would make a few up (even if long) keep a few in the Dukes parts dept. Ya cant have enough spares ya know! :thumbs: Share this post Link to post Share on other sites
chevy030303 0 #24 Posted February 14, 2011 :thumbs: very nice i would buy or make them. Share this post Link to post Share on other sites
Duff 206 #25 Posted February 14, 2011 Looks great Duff! Curious why you chose to or had to attach it to the bottom of the spindle versus the typical attaching on top? It seems to have kind of a downward angle. Darren, I think you got me on this one. The old ones I took off this tractor were installed on the bottom, but I have another where they're mounted on top. In the next couple days (I'm laid up with the flu) I'll go out and check to see if on top would work better, and if so, how much it changes the measurements I gave. If top is better, I'll edit my original post so those folks who may have bookmarked this thread have the right info when they go to make their own. (Boovuc - hope you see this, and sorry, buddy, if I published the wrong info before you printed them!) Stay tuned, and sorry for the confusion! Duff :thumbs: Share this post Link to post Share on other sites