Jump to content
Sign in to follow this  
Aussie

416-8

Recommended Posts

Aussie

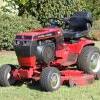
I posted a picture of my 416-8 over in the introductions section after I got it a couple of months ago. It runs well but looks rather scrappy due to poor paintwork. It also has a few oil leaks. I decided to remove the tinwork for painting and soon it looked like this;

2uf4r52.jpg

A few more bolts to undo and next thing I was left with;

2zi6lhs.jpg

I really didn't have a lot of problems with things being seized. Whatever didn't have surface rust was covered in a good coat of oil insulated by grass clippings. The hardest thing was the steering wheel roll pin and after soaking it repeatedly and banging on it ineffectually for a few weekends I gave up and removed the column with the dash top and set it in the vise. A couple of good hits and it came right out. The PO didn't do any maintenance, but luckily he only had it for a couple of years and mainly used it to give occasional rides to his grandkids. Prior to that whoever had it wasn't shy with the grease gun so thankfully there isn't any major wear in the front end or steering.

Now that it is all apart I might as well go right through and do everything and then it should be good for the next 21 years. The rims look untidy so strip the tyres and off to the sandblaster they go;

29vcumb.jpg

The frame doesn't have any cracks or splits and the bottom two holes for the gearbox mount have a factory reinforcing strip. I'll make up a similar piece to tie the top two bolts together and paint it all up. The back of the dash stand is starting to crack at the two holes for the front seat base mount, so this weekend I am going to cut a couple of reinforcements and weld them in.

I have ordered all the wear parts from Jack's small engines and they sent me two boxes with everything I needed. Vinylguy52 sent me a full set of decals and I can see why he has an excellent reputation, Terry really does a top class job.

I'd also like to thank GlenJeri. Glen sent me a cap for the steering wheel and a shifter knob, both very well crafted and he is very helpful and welcoming. I would find it impossible to complete this project without people like these who are prepared to take the extra effort to pack and ship items overseas, many thanks.

I am debating whether I should split the gearbox to check it internally while everything is apart. I have got all new seals and I didn't get any water out the drain, actually I didn't get much of anything out of the drain, all the oil had already departed via the left rear axle seal. I have a new transmission gasket, and don't think it will be too big a job, but am a bit worried in case my balls go shooting off across the workshop :) . I think I'll re-read a couple of the excellent trans rebuild posts on here first.

I'll update next week when I can take some photos of progress.

regards from the land downunder

Share this post


Link to post
Share on other sites
 
sorekiwi

Looks like you are on top of it Aussie!

It appears like yours is in a lot better shape than a lot of the ones up here. A few winters covered in snow really gets the rust setting in. Your bodywork seems to be reasonably straight, and that would be the hard part to find downunder.

The cracks in the rear of the consol are pretty normal.

Dont be afraid of the transmission. I'm sure the needle bearings would be available locally.

I missed your post in the intro's section till now. :)

Share this post


Link to post
Share on other sites
 
massey

Great start going on there. Good luck. :)

Share this post


Link to post
Share on other sites
 
Aussie

The rims look a lot better after a sandblast and powder coated

jqkqbs.jpg

Got the tyres fitted - 23 x 10.50 - 12 Duro on the back, 16.50 x 8 front

2co500k.jpg

I made up the reinforcement tabs for the rear of the console and started to strip the tins off the Onan.

More to come

Share this post


Link to post
Share on other sites
 
Wheel Horse Fan

Nice work so far. Those tires look wider than 10.5s.

Share this post


Link to post
Share on other sites
 
C-Series14

Way to take it down to how they begin! :thumbs: Wheels alone equals... :)

Share this post


Link to post
Share on other sites
 
Save Old Iron

Now that it is all apart I might as well go right through and do everything and then it should be good for the next 21 years.

Love The concept of refurbishing for the next 21 years. Your attention to detail will get you there.

The one extra detail I found helps with keeping the paint on the tractor a little longer is to go over each part and look for sharp edges left from welding splatter or shearing action of the metal cutter. Small amounts of casting "flash" or metal edge "smear" can create near razor sharp edges that do not cover well with either primer or top coat.

These sharp edges can be addressed with a quick stone mounted to a Dremel tool.

Excellent start.

Share this post


Link to post
Share on other sites
 
stevasaurus

Man, I love those tires and rims. :) Trying to send that book to you, but can walk you through it if you run into problems with the trans. :thumbs:

Share this post


Link to post
Share on other sites
 
Aussie

stevasaurus - thanks heaps for the manual, I have sent you a pm. With the manual and your previous detailed posts I am much more confident about tearing into the transmission. Thanks also to MikesRJ for assisting with the manual, the support from you guys on Red Square is fantastic :thumbs:

I have removed the heads from the Onan to decarbonise and clean up, nearly done. It wasn't too bad inside and the bores look fine. When the motor is done I will start the trans, hopefully next weekend.

I didn't get much done on the tractor this weekend as it is spring down here and the grass is growing, so most of the time was spent mowing (unfortunately not with the Wheel Horse :) )

Thanks for the tip save_old_iron, I am going over the bits and pieces with a file and sanding disc to clean up weld spatter and sharp edges. The dremel would be a good idea for some of the tight spots. I removed a home made steering stop that was welded to the frame and looked fairly ugly (a cut off bolt)

I am very happy with how the rear tyres look on the rims as they sit nice and flat across the tread, and I was worried the 10.5 might have been too much for the 7.5 rims, but all looks fine.

And yes, I know you want pictures, more soon.

Share this post


Link to post
Share on other sites
 
JimD

Nice work so far Aussie. I know it's only going to get better from here. Looking forward to more progress. :thumbs:

Share this post


Link to post
Share on other sites
 
mavfreak

liking the wheels so far can't wait to see the rest

Share this post


Link to post
Share on other sites
 
Aussie

Well, progress is slow but steady. I haven't finished painting anything yet. I removed all the tins from the Onan for repainting, and to clean down the motor. While it is apart I thought I might as well decarbonise the heads and check the sump as well. I want to try soda blasting to clean the heads up.

r89qa9.jpg

I cleaned most of the crud off the gearbox ready to pull it down and went to remove the shifter. The retaining screw was broken off flush with the case but a drill and easyout got it out without any problems.

ouxo2r.jpg

I took a photo of the shifter as I haven't seen one before and it may help someone else out if theirs comes loose. The collar is retained on the shaft with a roll pin and the screw (broken off bit in foreground) has a little nipple on the end that goes into the recess in the collar.

14o272g.jpg

I don't have a B&D Workmate but two sawhorses with a couple of clamps made a stable bench to hold the gearbox. It all came apart fairly easily and looks good inside.

mmycsx.jpg

There was a fair bit of surface corrosion evident at the top of the housing due to condensation but it cleans off really easily. Has anyone ever painted the inside of the housing to seal it up? I was thinking of giving it a coating of Glyptal. I have started to clean everything up and discovered they sent me the wrong axle seals from Toro. The part number on the bag is correct but the seals are the large outer diameter ones. I should be able to get some to fit from the bearing house.

27y3g48.jpg

Off this topic, but I am fairly happy that I have managed to buy another Wheel Horse. It is a late model 520H with 60" deck. One owner with 850 hours up. The PO appears to have looked after it extremely well.

It is over 500 miles away, so I am off on a trip to pick it up next weekend. I will start another thread on it when I get it home.

jl2jis.jpg

Hopefully next time I will have some painted parts to show.

regards

Share this post


Link to post
Share on other sites
 
dclarke

looks like you're doing a great job Aussie, thanks for all the pics. :thumbs:

Share this post


Link to post
Share on other sites
 
Craig Arndt

Reminds me of my 416-8 restoration. Nice work. I too wound up buying a 520-H but with 48" deck and 799 hours. Currently in restoration phase, just starting to reassemble.

Share this post


Link to post
Share on other sites
 
sorekiwi

Has anyone ever painted the inside of the housing to seal it up? I was thinking of giving it a coating of Glyptal.

The tractor's looking good Aussie. :thumbs:

I've never seen the inside of a manual transmission painted, but at least some of the hydro units were painted on the inside from the factory. Of course the hydro is a lot more sensitive to dirt or casting sand or whatever. Not sure if its Glyptal or not, whatever it is is stuck really well, and it is the dark red/brown colour.

Wouldnt hurt to paint it, but on the other hand if you use the tractor enough the tranny will probably get warm enough to get rid of the condensation naturally. Most of the "water in the transmission" problems we have up here are caused by the things being left outside over the winter with 6" of snow on top. It leaks into the tranny through a bad shifter boot.

You wont have that problem downunder!

Share this post


Link to post
Share on other sites
 
buckrancher

These sharp edges can be addressed with a quick stone mounted to a Dremel tool.

chuck I believe it's called a file (better control) :):wh: :thumbs:

Share this post


Link to post
Share on other sites
 
sorekiwi

chuck I believe it's called a file (better control) :):wh::thumbs:

Now you wouldnt expect Chuck to use a file when there's something electric that can do it, would you?

Share this post


Link to post
Share on other sites
 
chris11

Great start, cant wait to see more.

Share this post


Link to post
Share on other sites
 
Aussie

I cleaned the gearbox housing up and painted the inside with Glyptol, I'm really pleased with how it turned out. I'm trying to source new axle bearings and seals at the moment, my local bearing supplier is trying to track some down for me.

I have a week off work, will post some more progress photos next week when I can download them.

I took the heads and inlet manifold in today to get them soda blasted, I haven't tried it before so will be interested to see how it comes out.

I also set up an electrolysis bath in a five gallon bucket to clean up some of the small brackets, etc. Another thing I have read about but not previously tried, so far it appears to work well and is much quicker than mollasses which I have been using on larger parts for some time.

I took the 60" deck off the 520 the other day, man is that thing heavy. I want to check it all out before next mowing season. I also got a lead on another Wheel Horse from a friend yesterday, am going to check it out tomorrow. It appears to be a 312 or 314-A.

I'd like to see some pictures of your 520 mrwiggles, although I don't anticipate restoring mine in the near future. I did get a set of decals ordered though, while they are still available.

I must admit I prefer the file to the Dremel most of the time unless I am working outside or on bigger things, the sparks from the abrasive wheels seem to spread everywhere.

Share this post


Link to post
Share on other sites
 
Aussie

Here are some more progress photos.

Once I dismantled and degreased the gearbox housings I wire brushed them to clean off all old paint and rust

152z11i.jpg

Then I cleaned them with a phosphoric acid based cleaner to provide a good base for the primer.

167k1z8.jpg

I gave the parts two coats of KBS epoxy primer, which is similar to POR15

11tr821.jpg

Followed by a primer

2j4o9z9.jpg

and finally top coat (all coats brushed on)

104m8gl.jpg

All ready for reassmbly as soon as I get the bearings.

Here is a shot of my first electrolysis set-up in a bucket which works really well for small parts.

214xyzm.jpg

This works so well that I made a larger one in a rectangular tub and cooked the muffler for the Onan up for 24 hours. This is the result, ready for some heatproof paint.

34zlfdk.jpg

More to come......

Share this post


Link to post
Share on other sites
 
jasoncracer

nice stripping job on the metal i like the idea :ychain:

Share this post


Link to post
Share on other sites
 
Aussie

Progress has been slow but steady but I am now getting ahead. I tried soda blasting to clean up the carbon in the combustion chambers in the heads and got the inlet manifold and sump cleaned up at the same time. I hadn't tried it before but it came out really well and seems to be a good way to clean up aluminium components. Cost about $25 for the four pieces but would be cheaper to get more done at once.

6hnoy1.jpg

I now have a reasonable size pile of red parts

23mwviw.jpg

As well as a heap of black ones

16240lv.jpg

And a few more cleaned up and ready for paint

23uyoar.jpg

I got all of that last lot primed yesterday. I have had trouble sourcing bearings for the gearbox, I managed to get the open ended rollers locally but the closed end rollers weren't available anywhere. I ended up ordering them from Jack's and they left Chicago on Monday, so hopefully will get here by next week. I want to bolt the gearbox to the frame before I start adding other parts so that is a bit of a hold up at the moment. I can adjust the valves and put the engine back together and get all of the fasteners that I will need organised in the meantime.

Hopefully I will have it back up rolling for the next post.

Share this post


Link to post
Share on other sites
 
btrrg1969

Looking good :ychain:

Share this post


Link to post
Share on other sites
 
rickv1957

Looking good there!!!

Share this post


Link to post
Share on other sites
 
C-Series14

That is how you take 'em apart!!! Bravo! :ychain:

Share this post


Link to post
Share on other sites
 

Create an account or sign in to comment

You need to be a member in order to leave a comment

Create an account

Sign up for a new account in our community. It's easy!

Register a new account

Sign in

Already have an account? Sign in here.

Sign In Now
Sign in to follow this  

×
×
  • Create New...