dgjks6 6 #151 Posted January 1, 2011 Foiled Again... So I opened this bag: and every part is in a little bag like that - and got these out: and started mounting this piece: And then looked at the assembly diagram and could not find that piece and realized the pin was broken. Off to ebay and $9.00 and back to waiting. At least I have a plan. And the wife is upset. She wants me to spend as much time with her as I do with my tractor. As if. Share this post Link to post Share on other sites
dgjks6 6 #152 Posted January 4, 2011 Well, vacation is over and I am back at work doing nothing. Did not get as much done as I wanted. I got the tractor completely apart and put the transmission on the frame, then found out that some steering parts were broken, so they are on order. Then went to work on the engine and found more missing and broken parts. I've been spending money and not getting much done. So lets get to the update. New money spent: $50 on disposables (turpntine, paint, sand paper) $1 washers (parts) $9 steering pin (parts) $30 governor gear and washer (parts) $25 torque wrench (tools) $53 mini tire changer (tools) Day #212 parts = $741 tools = $343 disposables = $124 I am hoping the 416 rebuild I have planned next goes cheaper. It should, because I won't have to buy a transmission, seat pan, etc. Share this post Link to post Share on other sites
dgjks6 6 #153 Posted January 4, 2011 This is getting old. I really could not make this stuff up. Do all of you run into problems at every step like I do? So here is the trauma of the day. I got home from work, looked in the mailbox and there were no goodies, so I decided to go thourgh each piece of the disassembled tractor. After reading apost about the lift lever I decided I would fix that today. The button was stuck, so I thought...How hard can this be. (BTW - wife is in room watching me) Step 1 - figure out how to remove rubber handle lift with small screwdriver and spray in WD-40 put towel and handle and remove with pipe wrench so far so good - going easier than I thought Step 3 - remove pin with punch - this is a special pin, it dissovles after being removed from hole. Really, it was gone after it came out. step 4 - remove spring Step 5 - get kiss from wife as she tells me how lucky I am to have her Step 6 - try to figure out why rod does not come out Step 7 - wonder if this is normal Step 8 - go to other tractor (1989 312-8) and look at lift arm and see it is straight. Step 9 - hope that this was a change for 1989. Go to photo section of red square and look at pictures of black hoods and realize most don't have lift arms - but the ones that do are straight Step 10 - %#$$^&$%^& Step 11 - see if I can straighten myself - with a long enough lever I could move the world Step 12 - Pull hard and hear creaking and feel cold metal. Have visions of breaking metal, flying pieces, dented cars, and disability insurance go through my head. Step 13 - stop step 14 - go to red square to post my experiences. Anyone got a lift lever? Share this post Link to post Share on other sites
dgjks6 6 #154 Posted January 4, 2011 sorry for the late addition - wife just left Step 16 - listen to wife tell me I spend more time with my tractor than with her. In less than 5 minutes went thorugh entire range of emotions. Share this post Link to post Share on other sites
Zeek 2,284 #155 Posted January 4, 2011 sorry for the late addition - wife just left Step 16 - listen to wife tell me I spend more time with my tractor than with her. Join the crowd :thumbs: Share this post Link to post Share on other sites
jachady 130 #156 Posted January 4, 2011 From my experience with this, it is easier to straighten on the tractor. Put tractor in gear, find a pipe that slips OVER the lift arm to the point that it is bent, push forward (or sideways, some are bent a little off that way too). Heat may be necessary, just let it cool slowly afterwards. Then after it is straight, cut out a U-shaped piece of steel and have it welded to the lift arm to add some extra strength. I learned this trick after straightening mine three times. Share this post Link to post Share on other sites
Philipp 1 #157 Posted January 5, 2011 Heat the lever where it bends up with some acytylene untill it becomes red. Then it bends back with ease. Good Luck! Share this post Link to post Share on other sites
dgjks6 6 #158 Posted January 6, 2011 DISCLAIMER I do not ever want to offend anyone here, but I do want you guys to know the thoghts going through my head during the restoration. So please, no one be offended. I need everyone's help if I ever plan to get a running tractor. So I am looking for a lift arm. Some on ebay and some from the website here. Do I pay a little more to a Red Square vendor, negotiatiw with them, or just buy the part of ebay? So I got the new pin for the front axle. After spending 20 minutes sanding and polishing it to get ready for paint, I realized that it was the wrong one. Does not have the place for the c-clip. Ordered a new one from partstree - thought I would give them a try. To be continued... Wife is yelling Share this post Link to post Share on other sites
dgjks6 6 #159 Posted January 7, 2011 So anyway, the front axle pin from ebay was wrong, so I ordered a new one, and at the same time ordered the coper washer. SinceI ordered one thing the shiping for the washer was free. Total = $26 So far the 1/4 torque wrench has arrived, now just waiting on the governor gear and the copper washer to build the engine. Day #215 Parts = $767 Disposables = $124 Tools = $343 Share this post Link to post Share on other sites
dgjks6 6 #160 Posted January 11, 2011 Time for the monday night bored at work post. I have been spending money like no tomorrow, and not getting anything done, but th eparts are coming in slowly. I am sorry for the frequent updates without progress, but if I don't, then I will forget what I spent, which is actually one of the things I really want to keep track of. So since my last visit I spent (prices include shipping - which I think is a large part of what I have spent): $78 on a new muffler - probably did not need, but couldn't resist $24 on a lift arm $24 on a tachometer $14 carb float I got the tach and the governor gear today - just waiting on the copper washer for the rebuild Totals Day #219 Tools = $367 Parts = $883 Disposables = $124 Now, before I get myself freaked out about the cost, I have to remember that I did a lot of it to myself. The tractor had a perfect transmission that I gave away, and I spent almost $200 getting this one running - and I still don't know if it will work. I also gave away the PTO drive pulley - another $25 for me to replace. There have also been double purchases such as two front axle pins cause I bought the wrong one first time. And I probably did not need the new muffler. If I was more resposible and had a clue what I was doing, I would still be close to $500 in parts, but not near where I am now. And as far as the tools, I look at those as an investment. Share this post Link to post Share on other sites
bmuone 15 #161 Posted January 11, 2011 Good job of keeping up with things. I forgot..what was the orig invest? I'm like you when I buy a tool or something extra...it just does not seem to be chargeable to this project. But why else would you buy cans of IH Red Restoration paint or a sack full of nr 5 nuts and bolts or fuel cut off or etc etc? But heck that's what a project is for...right? Looking good!!! Share this post Link to post Share on other sites
dgjks6 6 #162 Posted January 12, 2011 I paid $375 for the c-85 with a new 36inch rear discharge deck and a 37inch snowblower in good shape. I bought the tractor knoeing the engine did not work. I spent over a year trying to figure out what to do with it. I was for a time going to part it out, then I was going to put in a bigger motor, the I was just going to rebuild the k181 and make a worker. After giving away a lot of pieces I finally decided on this path. Still not sure if I made the right decision...but I am enjoying the ride and learning a lot. Share this post Link to post Share on other sites
can whlvr 991 #163 Posted January 12, 2011 so on the bright side ,u will have a machine that will out last anthing on the market for 2000.00,u will be able to fix it your self because u did all the work on it and u will be familular with it,and what else does one do with extra time? Share this post Link to post Share on other sites
flyovrcntry 115 #164 Posted January 12, 2011 I like to rationalize,but be careful.You could end up in court like that "divorce or bankruptcy" Share this post Link to post Share on other sites
dgjks6 6 #165 Posted January 15, 2011 Day #22 I am pround to announce...PROGRESS at the start of the day we had: and at the end of the day before our hero retires to bed we have: I will only post the before and after pics and skip all of the play by play because this post is getting way, way to long And all of this done for no additional cost All of the parts I ordered have arrived I received the copper washer for the governor retainer pin and the pin for the axle. If you can't tell I installed the steering. So far every part I can remove has been removed. Only 2 parts reassembled without being removed are 1 engine main bearing and a bushing where the steering rod goes into the steering support. I could not find that part, and the rod seems tight in the steering support so I left it alone. Lesson for the day - when priming parts - cover all threaded areas with tape. It is very hard to put nut on painted threads. After completing the above work, with what little energy I had left, I cleaned the engine mounts. Let me describe this process, because it is extraordinarily inefficient. Scrape off grease. Clean in sink with warm soapy water. Clean with Fantastik. Sand with 150 grit paper. Wash with turpentine. Enjoy the smell of turpentine. Prime. And this is the hard part. Wait. Second lesson. The spray can enamels work wonders, but take days, even weeks to cure so they won't scratch. Off to toro dealer tomorrow hoping they carry .005 shims for the cam shaft. Now here is my next step. Please correct me if this is going to cause problems. Get engine mounts on. Clean, paint, and mount front rims. Put on rebuilt engine. These steps should take me until august. As an aside. How do you remove the bearings from the front rims? Do they need to come out? How do you tell if they are bad? Share this post Link to post Share on other sites
TT-(Moderator) 1,127 #166 Posted January 15, 2011 Remove front wheel bearings using a long skinny punch (or similar tool) from the opposite side. If they're sloppy or feel rough when turned, they're bad. The front mounting block for the engine cradle is much easier to install with the front axle out of the frame. I seriously doubt your Toro dealer will have a cam shim. I can see what I have if you can wait until I get a chance to look for one. I'd be happy to put one in the mail if you don't mind waiting. :banghead: Share this post Link to post Share on other sites
bitten 133 #167 Posted January 15, 2011 It sounds like you are learning a lot. Glad you are having fun with it. Share this post Link to post Share on other sites
dgjks6 6 #168 Posted January 15, 2011 Yes, I am learning a lot. I knew these things lasted forever, but now I know why. The are fairly straight forward to work on. The toro dealer thought they had them. Sent 20 minutes going though secret drawers. All they had were shims for the balance gears. TT - I appreciate the offer, but they ordered one for me. It hopefully will be here this week. Thanks though Share this post Link to post Share on other sites
dgjks6 6 #169 Posted January 15, 2011 2 steps forward - one step back TT - you were right - the front engine mount cradle is impossible to install without removeing the front axle - which is impossible to remove without removing the steering shaft. Not that I didn't spend 20 minutes trying to install it without removing the axle. Question for the day. Did wheelhorse use lead in their paint in 1981? If so I may need my house decontaminated. Or I may leave it and blame my kids behavior on lead poisoning. Share this post Link to post Share on other sites
bitten 133 #170 Posted January 15, 2011 I think lead paint was stopped in the early 70's, but not for sure on that. Share this post Link to post Share on other sites
C-Series14 15 #171 Posted January 16, 2011 2 steps forward - one step back TT - you were right - the front engine mount cradle is impossible to install without removeing the front axle - which is impossible to remove without removing the steering shaft. Not that I didn't spend 20 minutes trying to install it without removing the axle. Question for the day. Did wheelhorse use lead in their paint in 1981? If so I may need my house decontaminated. Or I may leave it and blame my kids behavior on lead poisoning. As far as the front engine cradle block, it can be done...but it is hard...don't ask me how I know... :banghead: Share this post Link to post Share on other sites
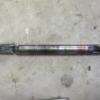
dgjks6 6 #172 Posted January 18, 2011 Well, its that time again. Bored at work and time for the weekend update. This arrived in the mail: Its an awesome tool. Got both front wheels off in a matter of minutes. Then I learned something. The amount of grease inside the hub is unbelievable. The bearings seemed good, so after realizing I would never get the grease out, I taped up the end and sanded and painted the rims: I am going to use the 23x8.5x12's off my 416 for the rear. The rims are really rusted, but the tires hold air, so I should be able to fix them up. Then I painted the motor mount and learned yet another valuable lesson. I need a better painting space. I have a piece of plastic on the floor. I prime, flip, prime, flip, paint, flip, paint, and then admire my work. This is what I found: Picked up some of the primer from the plastic. Now I guess it is time to start over. And lastly before the questions start, I decided to work on the center console. Took every piece off, cleaned and primed, and painted. I also learned that there is more rust on the center console than the rest of the tractor. Some of the bolts had the threads rusted off. So I am replacing these with stainless bolts. Also, after a weekend of a stuffed head and cough I learned a back room in a basement is not a well ventilated area. I will be wearing a mask from this point on. I received the shift boot ($7), bought some stainless nuts and bolts ($4), and bought more paint and sandpaper ($20 of disposables) Day #226 Parts: $894 Tools: $367 Disposables: $144 This is getting expensive, but all I am missing is the rear fender. Oh, and my question. My next step is to bolt the center console back on. Is there anything I need to do before that? Any other parts to put on first so I don't have to do the put on take off and put back on thing again? Share this post Link to post Share on other sites
btrrg1969 11 #173 Posted January 18, 2011 awright , glad to see it go the other direction :banghead: Share this post Link to post Share on other sites
C-Series14 15 #174 Posted January 18, 2011 If I remember correctly from my last full restore, I don't think there is anything. I just looked at my parts diagrams for my 1979 models in both Auto and 8-Speed and everything looks like all the shafts will slide thru the side holes and the brake latch, clutch mechanism, and/or the motion control lever will get installed after the hoodstand gets installed. I could of sworn I had to unbolt mine though for SOME reason! I am lucky if I remember what I had for lunch! Now, what was the question???? For painting, string a wire across the room and use coat hangers to hang stuff to paint. I have a metal display rack mounted on a large wooden cable drum with wheels on the bottom and off the rack hangs removable rods that I hang stuff off of. That rack probably has 100 coats of paint on it!!! Share this post Link to post Share on other sites
bitten 133 #175 Posted January 18, 2011 Yes hanging your parts I have found is the only way to go. What is your new tool? Share this post Link to post Share on other sites