Save Old Iron 1,563 #126 Posted December 18, 2010 Greg, thanks for sticking with this, especially the $$ part of the build. I think this will give everyone valuable info on the $$ commitment involved in a rebuild / restore venture. Great thread. Share this post Link to post Share on other sites
Save Old Iron 1,563 #127 Posted December 18, 2010 Greg for steering wheel removal and all around "just a darn handy thing to have around" checkout http://www.harborfreight.com/14-piece-gear...-set-30305.html short of having a shop press, this can do the same job with a little PB Blaster. Share this post Link to post Share on other sites
dgjks6 6 #128 Posted December 18, 2010 Got the front PTO off and refinished. Paint is drying. Been working on the steering wheel. That harbor freight gear puller looks like a handy device. But how do you use it? The steering wheel on the tractor has a solid top. There is no center cap. Share this post Link to post Share on other sites
C-Series14 15 #129 Posted December 19, 2010 The three spoke steering wheels of that era had 2 different center caps from what I have seen. I have some with a cap that has little openings that you can use a small screwdriver on to pry out and the other is a solid center cap. On my C-141, it had a solid center cap so I got a thin small screwdriver and made my own opening and popped it off. I then put it in my 12 ton press and pressed it out. There is some plastic inside the steering wheel right above the shaft, so I took a drill and step drilled it open until I could see the shaft... Share this post Link to post Share on other sites
dgjks6 6 #130 Posted December 22, 2010 Day #199 And the costs keep going up. First tools arrived: Now the good news and if this is how the rest of the restration goes, it is going to take a long time. This is really the series of events as they happened. Got the from tach-a-matic off. Took it all apart. Cleaned, sanded each part, primed, and painted. Then went to home depot to get stainless steel bolts. Saw the prices and went home and polished the old ones. Reassembled everything, and scratched a bunch of the paint off (forgot the first rule - be patient). Then realized that I put it back together backwards. Took it apart and put it together correctly. Then repainted it completely assembled. Total cost = 0 (yeah) time spent = about 5 hours - just for this: finally got the pulley - boy it looks small - I hope it is the correct one. Do you paint these? Engine guy bored/honed/cleaned/turned and everything else he needed to do to the block, valves, crank, and rod. He measured everything and all is in spec and should all fit together. Cost - $175. He also said I needed and a new exhaust valve - ordered a new one - not kohler for $15. took apart the carb and bought a rebuild kit - $15 Bad news to follow... Share this post Link to post Share on other sites
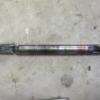
dgjks6 6 #131 Posted December 22, 2010 Still can't get the steering wheel off. Thought about keeping it all together and disassembling from below, but I need to replace this: And in the process of hitting the steering wheel broke this: So I am stuck at this point: So as of day #199 parts: $701 tools: $265 disposables: $65 So here are the plans in the order I plan to fo them: Hit the steering wheel get a piece of glass and sand paper and flatten the head Hit the steering wheel Clean engine parts (starter, oil pan, etc) Hit the steering wheel Reassemble carb Hit the steering wheel After valve arrives, put engine together Hit the steering wheel Break the steering wheel Find a new steering wheel on ebay (will all wheel horse steering wheels fit?) Share this post Link to post Share on other sites
TT-(Moderator) 1,127 #132 Posted December 22, 2010 Remove the bolts that fasten the aluminum dash section to the hoodstand and pull the whole works up off the tractor. Get it to a vise strong enough to clamp the bottom of steering shaft (but not on the gear) so it won't turn. (I have even welded a tab to the side of the shaft so it COULDN'T slip in the vise and cut the tab off when done) You can try doing this with just arm power first, but if that doesn't work, use a 2X4, wooden ball bat, or something similar placed through the wheel to carefully (get that? CAREFULLY!) twist (revolve/spin/turn like you are steering the tractor) the wheel on the shaft. Share this post Link to post Share on other sites
btrrg1969 11 #133 Posted December 22, 2010 Greg I feel for you , looks like murphy is giving you a hard way to go. I hope you hang in there , good luck I'm pulling for you Share this post Link to post Share on other sites
C-Series14 15 #134 Posted December 22, 2010 If you were close, we would take it apart like TT said and throw it in my 12 ton press...That is how I did a couple of my wheels... Now, if you are desperate AND there seems to be no hope of getting the wheel off, as a last resort, you CAN cut the shaft below the battery tray, take it apart, fix the dash, and then get a piece of tubing that the steering shaft will fit into, slide the shaft back together, and drill a hole in each side of the cut thru the tube and shaft and bolt it back together. I did that to my first WH I restored many MANY years ago...it is still together. Share this post Link to post Share on other sites
dgjks6 6 #135 Posted December 23, 2010 two posts to add to the blog. first post: TT - you da man anyone know the part number of the collar? I see a collar in the parts diagram, but it does not look like a big piece like the one I broke. Next post is going to be how I am documenting the process so I can remember how to put back together. 1 Share this post Link to post Share on other sites
dgjks6 6 #136 Posted December 23, 2010 This is just an example of how I am dcumenting the process. At the beginning I just took things off, then after my 6 month hiatus, I have no idea were they go, or which bolts go where. I will have to deal with that eventually, but I am confident - as long as you guys haven't given up on me you can help. No I am writing what I do, storing the parts for each step in a bag, and labeling all the pics and bags by date - so hopefully I can just work backwards to put this thing together. I only have 30 - 60 minutes a day to work, but if I can do one step at a time I hope to be done someday. Here's and example: Share this post Link to post Share on other sites
rickv1957 70 #137 Posted December 23, 2010 Your doing a great job!! Rick Share this post Link to post Share on other sites
dgjks6 6 #138 Posted December 27, 2010 I've done 30 in here and 10 min there and here is where I'm at for the tear down: I do have to say how much I respect all you guys who get these things completely stripped to the frame in one day. This is a really dirty job everything is covered in a layer of grease. So here is what I have left: Parts of clutch Part of brake part of steering PTO lift lever I'm kinda stuck - what order should I do these last parts? Share this post Link to post Share on other sites
dgjks6 6 #139 Posted December 28, 2010 OK - I have the whole day off. Got home at 0730 this AM from work and started more tear down I am stuck in these two places: How do I get the PTO lever out? And how do I get this off the lift lever? If I bang it into the side of the support I am afraid I am going to bend something. Share this post Link to post Share on other sites
dgjks6 6 #140 Posted December 28, 2010 Oh, and this... I got the allen screw out, but nothing will budge. It is suffering from lack of force? Share this post Link to post Share on other sites
CasualObserver 3,406 #141 Posted December 28, 2010 You mean the locking collar? It's a generic hardware piece, available at your local Ace , True Value or Hardware Hank... split it with a chisel and move on. (Or if you really want to mess with it... heat/penetrating oil and it will eventually free up) Share this post Link to post Share on other sites
TT-(Moderator) 1,127 #142 Posted December 28, 2010 You have to remove the rubber grip to get the PTO lever out. Sometimes it's easier to deal with the arm on the lift lever shaft if you remove the hoodstand from the frame first. Scrape and use sandpaper to clean all paint from the shaft (including the footrest support rod) before attempting the removal of pieces that are slid on to them. Laying the hoodstand on it's side with something supporting the immediate area around the lift shaft will be a huge help. The collar on the clutch and/or brake pedal can be given a nudge with a pipe wrench if you don't have a torch. Share this post Link to post Share on other sites
wheelhorse656 20 #143 Posted December 28, 2010 ok get a metal chisel place the end of the chisle in between the pedal and the lock color give it a few wacks. if that does not work cut it off they cost 3 bucks at home depot. Share this post Link to post Share on other sites
TT-(Moderator) 1,127 #144 Posted December 28, 2010 place the end of the chisle in between the pedal and the lock color give it a few wacks. That's a great way to knock a chunk out of the cast pedal. :ychain: Share this post Link to post Share on other sites
dgjks6 6 #145 Posted December 29, 2010 End of Day #206 no change in expenses parts: $701 tools: $265 disposables: $65 Still working on getting the head flat. I think I am going to have to take off almost .001inch to get it flat and I hope it works. Hopefully start engine rebuild tomorrow - along with complete disassembly. If I have not said it before - you guys who can take one apart in a few hours amaze me. Thanks to everyone for their advice. Pipe wrench and sand paper are wonderful tools. Sanding everything before removal of pieces helps a lot. I learned they painted the tractors AFTER they put them together. This will save me some time. I was planning on painting each piece individually, but now found that would be a waste. I am going to clean each piece, put it together, and then apply some paint. I got a larger compressor for Christmas so I may get a spray gun and try my hand at that (best part is since it was a gift... no additional cost for tools) Still have to cut the rubber to get the PTO lever out. I was hoping I could save it but it looks hopeless at this point. Anyway, here is where I am at: Night all, and thanks Greg Share this post Link to post Share on other sites
dgjks6 6 #146 Posted December 29, 2010 What am I missing? I got all the pieces off except the lift bar and I can't figure out how to get this off. Share this post Link to post Share on other sites
TT-(Moderator) 1,127 #147 Posted December 29, 2010 Flip the frame over and remove the E clip from inside the left frame rail, then slide the flanged bushing back out of the hole in the frame. Slide the shaft of the lift arm out through the hole (where the bushing was) and twist the other side "up" so it will clear the right frame rail. Pull the arm out of the frame. :ychain: Share this post Link to post Share on other sites
wheelhorse656 20 #148 Posted December 29, 2010 Grate job so far I am looking forwards to seeing it finished! Share this post Link to post Share on other sites
dgjks6 6 #149 Posted December 30, 2010 Gentlemen, it has been a long and difficult task, but today I announce VICTORY! Every nut, bolt, pin, clip,and piece is apart Tomorrow it is supposed to be in the 40's. I was at the auto parts store getting a thermostat for my daughter's car and purchased some valve grinding compound and some engine degreaser ($9 total - in disposables). Tomorrow all greasy parts on the garage floor and degreased. So day #207 Parts = $701 Tools = $265 Disposables = $74 It took 207 days to get this far - may take another 207 to get done, but my 11 year old just came in and asked if this was going to be done by the time for the show so we can take it. Now for the parts where I need even more input... What order does it go back together? You can't be too specific. Share this post Link to post Share on other sites
dgjks6 6 #150 Posted January 1, 2011 Happy New Years Eve to ALL! Today's update. Sanded and painted the frame. Went to the store to get cleaning stuff, and I can't lie to you guys, I made a mistake. Was looking for a good cleaner/degreaser - wasn't sure what to get - so I bought a gallon of Phosphoric Acid - said was good for rust, which it is, but sucks on grease. Anyway - primed and painted underside of frame. Was suprised to find several places on the frame where there is no paint. Seems Wheel Horse did not paint until after assembly. So here's a pic of my tractor, the engine is missing, its in the basement, but every other part is here: So here is going to be my rebuild order. Put trans on frame with rear tires and put on front suspension and steering, then go from there. Here's the problem. What is this hole for? Share this post Link to post Share on other sites