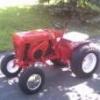
WH854 44 #1 Posted December 3, 2009 Picked this up today it was listed on craigslist for $75.00 I sucked it right up I checked it out, it has a home made lift arm made out of a piece of pipe. Here are some pictures I hauled it home in back of my minivan as you can see. A good haul I Think Chas :notworthy: Share this post Link to post Share on other sites
rickv1957 70 #2 Posted December 3, 2009 Looks like you got a great deal!!,Rick Share this post Link to post Share on other sites
HorseFixer 2,012 #3 Posted December 3, 2009 Not a bad price. Geter sanded and painted and she will serve you well :notworthy: Share this post Link to post Share on other sites
Sparky-(Admin) 19,434 #4 Posted December 4, 2009 Make sure you swap the left and right wings as their on the wrong sides. Good price and with some paint will look great. Mike......... Share this post Link to post Share on other sites
TT-(Moderator) 1,127 #5 Posted December 4, 2009 Make sure you swap the left and right wings as their on the wrong sides. Actually -- they're just upside-down. :notworthy: Share this post Link to post Share on other sites
WH854 44 #6 Posted December 4, 2009 Thanks for the tips guys! I wonder how long they have been on the wrong side. The parts breakdown shows they are on the wrong side too. Chas Share this post Link to post Share on other sites
Sparky-(Admin) 19,434 #8 Posted December 4, 2009 Actually -- they're just upside-down. I'll never get this Wheel Horse stuff right Mike............. Share this post Link to post Share on other sites
Horse Fanatic 49 #9 Posted December 4, 2009 The original lift arm is basically just a piece of pipe, maybe yours is the original. Share this post Link to post Share on other sites
TJ 171 #10 Posted December 4, 2009 Good deal. :notworthy: Share this post Link to post Share on other sites
WH854 44 #11 Posted December 4, 2009 Any of you guys ever work on one of these blowers? I need to know what is the best way to take the auger of, I have everything just about taken of. But the auger, and the shaft and pullys, that drive the auger. They are going to be tuff to get off. I think maybe the bareings maybe rusted on,are they pressed on. Chas Share this post Link to post Share on other sites
whfan74 2,015 #12 Posted December 5, 2009 Looks to be a fair deal to me! Congrats! Can't beat the price! Share this post Link to post Share on other sites
can whlvr 991 #13 Posted December 5, 2009 you have to take the pin out on the shaft opposite of the handle side then drive the shaft out,once you get it moving it goes ok the bearings are inside the auger shaft which will come off when you get the 3\4 shaft pounded out,the bearings come out of the auger pretty easy,then you can work on the auger alot easier,when i rebuilt mine i found getting the pin back in the 3\4rod the hardest part,its alot easier to paint the body and inside alot easier,good luck Share this post Link to post Share on other sites
bitten 133 #14 Posted December 5, 2009 Better hurry up the snow will be here before we know it :notworthy: Share this post Link to post Share on other sites
WH854 44 #15 Posted December 5, 2009 Thanks Don I thought that was the way to get it out. I hope it is not to rusted up in side the auger shaft. Chas. Share this post Link to post Share on other sites
WH854 44 #16 Posted December 5, 2009 Well I got the auger out today.(thanks to Don for his advice)It will need new bearings for the auger, they are ball beartngs. The seals are shot. Here are some pictures of todays work. Above are the pieces in a pile. The auger needs some straighting, a few rough edges ground off. The case needs some welding here and fhere. Chas. :notworthy: Share this post Link to post Share on other sites
can whlvr 991 #17 Posted December 7, 2009 good job getting her apart,if there is a bearing shop near you try them for the bearings,they are pretty standard and not too expensive. Share this post Link to post Share on other sites
WH854 44 #18 Posted December 22, 2009 Got two bearings for the auger!!! Did some cleaning and painting Here are some pictures. Every one have a Merry Christmas Chas. :WRS: Share this post Link to post Share on other sites
can whlvr 991 #19 Posted December 22, 2009 looking good Share this post Link to post Share on other sites
rickv1957 70 #20 Posted December 22, 2009 Good job,you will have that blower restored before you even need it!!!,Rick Share this post Link to post Share on other sites
WH854 44 #21 Posted December 27, 2009 Got the parts all painted IH Red. Had to do a little jugling to paint them. It's about 30 degrees out, so I warmed them up by the wood burner,took them outside painted them one at a time, brought them back in, hung them by the heater to dry. IT worked!!!! Chas. :thumbs: Share this post Link to post Share on other sites
420lse 18 #22 Posted December 27, 2009 :notworthy: Wow, nice work! Can't wait for the final assembly. Share this post Link to post Share on other sites
scifi4all 6 #23 Posted December 28, 2009 Great Work on that blower! I just want to offer one piece of advice. The exterior gear (on the left rear of the blower, on the end of the pulley shaft) that drives the chain and auger should have a guard on it. On my first tractor and snow blower this guard was missing when I bought it. Long story short I got a glove to close to it and lost the tip of my left pointer finger, from the cuticle to the end. I turned the PTO off every time that night, except the last time. Made a guard immediatly after that, but it was too late. Stupid! Stupid! Stupid! The old guards are a simple piece of flat bar bolted over the gear and chain. I believe I have seen a larger guard covering the entire gear around the shaft, could even be made of plastic, not sure. There's even a guard for the chain in the front of the blower from the top down around the bottom. That is also flat bar. I just don't want to see anyone else make a stupid mistake. Still your doing a great job. I just replaced the chain and the two bearings on the pulley shaft of my snowblower. It did'nt go as easy as I would have hoped but it runs smooth now. Share this post Link to post Share on other sites
WH854 44 #24 Posted December 28, 2009 Thanks for the advice Rolls! I am going to make a guard, The manual calls for 2 guards, one on top and one on bottem. Chas. Share this post Link to post Share on other sites
WH854 44 #25 Posted December 31, 2009 I am still working on this project, a little at a time. Thats why it is called a project. A couple more pictures!!! Thats all fffoolks Happy New Year Chas :banghead: Share this post Link to post Share on other sites