
Leaderboard


Popular Content
Showing content with the highest reputation on 06/09/2015 in all areas
-
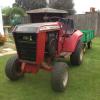
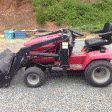
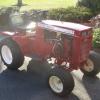
6 pointsMy 12 raider was very lonesome for the last 5 years so i thought i would get him a partner. A big brother, so to say. Here is the new one on the ranch! Not as easy to find as you people down south, but they are here!
-
5 pointsGot both of the 520's that I picked up at the auction last week cleaned up. I even got to put the cultivator on one and use it in the garden. I need to get the clevis hitch installed so I can use the rear cultivators to cover up my tire tracks. Thad (Ohio)
-
4 pointsHi all, I am a wheel horse man at heart but I couldn't pass up on this cool little machine, you don't see them very often over here. It's a January 1963 Original, complete with three-point hitch. After a wash and parked next to my C-120 It needs some parts and a good service but I have got it running and it runs sweet. Are there many other Cub owners on the forum? Tom
-
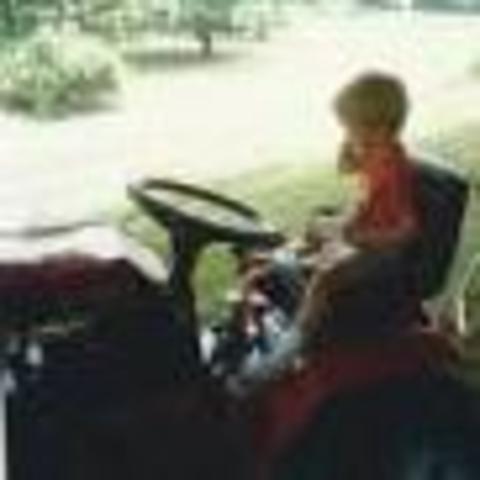
4 pointsWell lemme start by introducing myself. I live in Indianapolis IN and I work in aviation building interiors for private airplanes. I'm 29 and I think my love for Wheel Horse's started way back when I was very young. I spent every summer at my grandparents house and one thing that has always been a great memory to me is Grandpa's tractor. He always owned a Wheel Horse from when I can remember. I remember many days after riding on his knee mowing the yard we would stop for lunch and you'd be sure to find me sitting on the tractor eating mine. I would do anything I could to ride on the tractor with him, who can resist such a cute face :). Many times me and my older brother would sneak down to the barn just to try and start it with out Grandpa knowing about it. We would wash and wax the tractor any chance we could get. I'm sure he was appreciative of that since it kept his Horse clean and kept him from having to do it! We would ride around in the cart hooked up to it until he kicked us out! So many great childhood and teenage year memories were made with Grandpa and his tractor. He sold his Wheel horse in about 2007/08 and got a zero turn. He couldn't swing his leg over the shifter and steering wheel anymore. This is me and him on what I think is his old C-120. Here is my older brother on the same tractor Here's me eating lunch as usual on his last Wheel Horse. The same model I picked up , a 312-8 Me (in the red hoodie) and my Cousin riding on Grandpas lap on his C-120 My mom is driving in this picture. She thinks its around 1975-1976. Not sure of the model tractor. Heres me and all the cousins getting pulled in the cart with his 312-8 One last one, me on his lap, my brother on the bar and my cousin in the cart. Grandpa passed away in 2010 and life kinda went on for me just enjoying those memories. Until recently. Me and my wife moved into a house in October of 2014. We got a decent amount of snow her in Indy and there was no way I could shovel our driveway. So I decided I could just smash it all down with my truck. That worked kinda until I got the car stuck in the driveway on my way to work one morning. After about 20-30 min I was able to get out and once I was at work I text my wife and told her we are either getting a new car, a snow blower or a tractor with a plow. Well, she wasnt going for the car and a good snow blower will run you $450-650 so I opted to find a tractor with a plow. I knew it had to be a Wheel Horse since I knew how reliable and versatile they are. I also have a soft spot for them since I have so many good memories with one. To Craigslist I went and until two weeks ago I couldn't find a good deal. I found this 1990 312-8. I came with a snow blower a 42" deck, wheel weights, chains, and all the original owners manuals. Tractor ran great and started right up when I went to look at it. By no means is this thing pristine though, but it had everything I needed and it was all in working order. Here she is on all her glory. Only paid $450 for everything. I will upload many more tomorrow, but for now I have to go, the wife is requesting my presence! Hope you guys enjoy and hopefully this turns out as nice as I hope it will!
-
3 pointsI don't often post photos relating to military vehicles (one of my other hobbies) on RS but when I saw this at the first show of the 2015 season I thought it might attract some interest on the other side of the big pond. At first sight I thought it was probably a 'fanciful' resto but it turned out to be authentic. Officially designated Chevrolet 15cwt. (3/4 ton) General Service Van, the chassis and running gear were produced at the GM plant in Oshawa Canada and shipped along with an engine in a separate crate to other British Commonwealth countries (hence being RHD). This one was assembled at the GM-Holden plant in Perth Western Australia where it was fitted with Holden's one piece coupe cab all steel utility body. It's been through a very high standard ground up restoration to the original spec which included the original engine, gearbox, axle, brakes and suspension all being rebuilt. The bodywork is in Forest Green, the color of the home service in 1945, and has been given the markings of the 9th Australian Division, 2/7 Field Regiment, Royal Australian Artillery. My vehicles are in matt green so I'm spared having to work to this exacting standard (thankfully). Andy
-
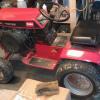
3 pointsRecently had a 1974 C160 join the herd still need to change the fluids and replace the rear tires, they look like they are original but only hold air for about an hour. Came with a decent 36" rear discharge deck.
-
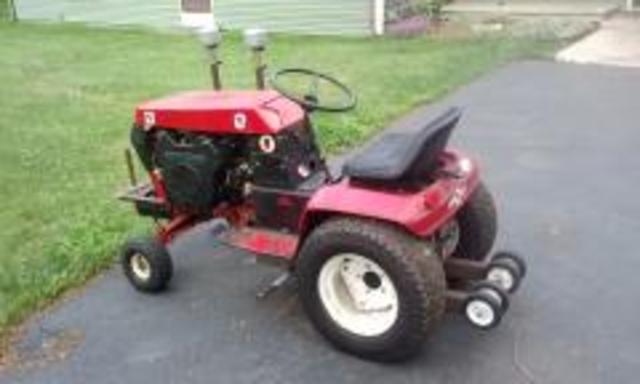
3 pointsway too many 210 tires 21 batteries Brian
-
2 pointsHey everyone,I have been a wheelhorse owner for probably 5 years now and have gone from 1 to 13 (don't tell my wife, I have them hidden around here). I currently use my bronco 14 to mow with and haul my firewood trailer in the winter, my 12 automatic I use for towing duties threw out the year and some mowing here and there, winter time it sees the most work plowing snow like a champ, I am 95% done on a frame up restoration on my 603. It was a complete basket case rust bucket when I got it but with a little time and help from some great friends and family it's almost ready to show at this year's Pennsylvania show. It will be our first trip down. I have met some great people in this community and I'm not sure why it took so long for me to join. If anyone is from Western mass feel free to hit me up.Matt
-
2 pointsThe UPS man just dropped off at my house a heavy box from Rallye Productions . The box was loaded with this years Wheel Horse Show dash plaque featuring showing the 1971 Bronco 14. Now sorry folks for "no picture" in this thread ...... so ifn's ya' wanna see and get a dash plaque ya' gotta' bring your Wheel Horse to Wheel Horse Show.! Wild Bill
-
2 pointsI change the oil & filter on my Sunstrand every June after the show regardless of hours. I use Mobil 1 10-40. Overkill perhaps but I want this thing to run as long as it can
-
2 pointsThanks Callum. We have a couple more possible options for high speed testing that are worth looking into. But no rush for the high speed stuff, best take my time and get WN operating good to start with. Evening guys, today's "to do" list looked something like this.... Find out why the fuel tap is leaking.. Fill diff with oil. Finish the wiring, it's about 90% done. Finish the prop shaft.. About 50% done. Bleed the brakes again to get the last of the air out. Warm the engine up and change the oil. Set the front end up. Get WN off the bench.. Go for a test drive Well, I didn't quite make the test drive deadline today, but getting very close.. Due to a measuring problem I had to make another sleeve to join the 2 parts of the prop shaft together... For once I can say the measuring cock up wasn't down to me but measuring calipers.. Nigel will vouch for that as well! Getting the engine running again was fun.. The spark at the plugs which was there yesterday had vanished today!! After lot's of searching and ing I traced the problem down to the run/stop switch which had decided that the run position just wasn't an option any more! So sorting those two problems kinda killed any chance of a test drive today But there's always tomorrow The amended "To do" list.. Find out why the fuel tap is leaking.. Fill diff with oil. Finish the wiring, it's about 90% done. Finish the prop shaft.. About 50% 90% done. It just needs welding and fitting. Bleed the brakes again to get the last of the air out. Warm the engine up and change the oil. Set the front end up. Get WN off the bench.. Go for a test drive With WN off the bench it only seemed fair that I rolled her outside for a few photos.. For me... This one really hits the spot
-
2 pointsPaul if you having problems keeping the gas primed to the pump try putting an "in-line" chk valve in the line feeding the carb.... they work great and are inexpensive.... http://www.ebay.com/itm/221021780029?_trksid=p2060353.m1438.l2649&ssPageName=STRK%3AMEBIDX%3AIT
-
2 pointsFiance found an awesome deal today, I think it is a C145. Came with a 42" side discharge mower, and snowthrower. Snowthrower has a lot of welding on it. Engine is a Kohler, I have included 3 photos. It started up after a few tries. I am hoping for a hand to help me with this. I am slightly familiar to Wheel Horse, and am just glad to have one again! Questions are: What year is this? I can't find a data plate anywhere. I think it is hydrostatic, there is no gear shift. Large lever on right has to be pulled up and back hard before you can drive it. Is ithis normal? Also, parking brake and release lever needs work, any suggestions? Runs decent, I missed the putt-putt-putt so much and didn't realize it! My sentimental side is kicking in... If you have any tips, suggestions, please let me know. Glad to back in good company of a Wheel Horse...
-
2 pointsYou on vacation again?
-
1 pointI purchased two tillers at the Wheel Horse Show this Summer. Total for both was $225. One tiller had the correct bracket mount for my (418A & 417-8) but the tines were worn to nubs and the main shaft had side to side movement. The second was the older style with the axle mount attached to the tiller bracket but with perfect tines. First job was to weld a nut to the tine tube to drive a threaded rod to press it off. With the good tines removed from the older unit I went to work on the newer one. The drive pulley refuse to budge as it has a small mushroom on the shaft end. I used open end wrenches and screwdrivers to drive the pulley but the internal clip deformed and the entire pulley shaft came out from the body of the tiller. I was able to turn the end of the shaft so the pulley would slide off. Open up the case and noticed a crack in the top bolt housing, it did not go through so I simply reversed the tiller halfs by swapping the open and closed pulley shaft bearings. Now the cracked section in on the bottom and the steel tiller shell can connect to a case with a good hole. I think the PO had let the top bolt go loose and a few cracks developed in the steel shell near the mount for the lift chain. I welded up the cracks on the shell so problem fixed. The side play in the main tine shaft was due to the c clip coming loose so the PO thought it was thrash. I think the clip was damaged by the PO trying to remove the tines in an improper way. The case was opened , parts cleaned of dirt and rust and reassembled with only new c clips for the shafts. Ultra Black was used for the gasket and so far no leaks. I used One quart of gear oil to refill. All the bearings were oiled and has no rust or damage. There was gear oil in the unit when I opened it. Comments Welcome.
-
1 pointHello Fellow WH fans. I'm a newbie here. I found this site while trying to research parts, manuals, tips etc for my old Horse's . I have an Old 1978 C141 that i have owned for 25 years and a few years back i upgraded to a 1997 416H, both are running fine, i use the old C141 to pull the trailer around the place. I have a 42" rear discharge deck for the old C141 and on the 416H I run a 48" side discharge deck. also have a couple of snow blades which i dont really use very much just wanted to say hello and i'll be asking a few questions or browsing looking for some answers as I am currently working hard to Fine Tune the 48" side discharge ; leveling and adjusting the cut height as i have always thought the cut was too low. cheers! earlybird http://www.wheelhorseforum.com/uploads/monthly_2015_06/100_0095.jpg.fdd9108e2e1574bdf5292e05ee3f5f5d.jpg
-
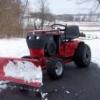
1 pointWell my local dealer came thru again! Great guys. They showed this tractor to me 2 weeks ago and asked if I was interested. It was really hard to start and pretty dirty but there wasn't any rust on it. I said "sure am interested" but I have no way to get it to my house. They said see what you can do. Two weeks go by and I stopped by early this morning to pick up some other parts. I mentioned that I had no luck in getting a trailer. They said we will just have one of the guys throw it on a trailer and he can follow you home. Pay us when you get the cash. We shot some starter fluid in the carb and by some miracle she fired right up! A 1993 520-H with a 48" deck followed me home today. Some faded paint, lots of crud and dried dirt BUT underneath is a rust free awesome hunk of tractor! Hour meter stopped at 658 hrs so I am not really sure what the hours are. New oil filter, tranny filter, fuel filter, air filter are all in store for tomorrow as is a wash. The Onan sounds awesome and doesn't burn oil. I put fresh gas in her and cut a third of my yard with her this evening and the hydro is strong, the motion control lever doesn't need any adjusting and the cut was great. Support your local dealer!
-
1 pointIm going to try and lift the body first. But I have a feeling might be easier just to trim.. Will see tho. Ill post updates this weekend when I jump back into it.
-
1 pointI agree on it being very tight fit. Ive drove it up and down my road. 3 mile dirt road with bot holes and such. Never once heard it scrape or hit or anything. and dont see any signs of that. But I do agree, probably going to try trimming it a bit. I had to take care of some chores around here with it and then im pulling it apart again and doing trimming and paint
-
1 pointI am very fearful releasing this information would result in it being used against me !
-
1 point
-
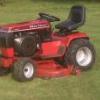
1 pointI will take this 195 to the show. It runs and looks real nice. It comes with the correct mule drive for a 195 and a quick attach snow blade rear axle bracket. NO ATTACHMENTS INCLUDED .I can't hold it for anyone unless I have a strong deposit. They didn't make many of these, 5-550 at most. 1400.00 firm will get it hauled to the show. This is a pre-show sale, at the show it will have a higher price tag on it... I have also included a video..
-
1 pointHow do you hide 13 horses?
-
1 pointWelcome to Red Square, and hello from another Hoosier! Very nice story about your love affair with Wheel Horse tractors. Enjoy your time here at RS.
-
1 pointI think you found the problem. 50 degrees or 80 degrees....not much difference to your engine.
-
1 pointQuick update. Dash tower painted and frame rust converter.
-
1 pointThanks for all the suggestions. I tried cleaning the fuel cap and left it loose and it ran for about 45 minutes. The air temperature was only in the 50s so I'm not sure if it has do with the fuel cap or temperature, but it seems promising that may have cured it. This weekend it will be hot ,, in the mid 80s , so that will be the true test.
-
1 pointI had an original a few years ago. Great running unit.
-
1 pointI like the cup holder. Thanks for the pictures Lane. Good looking stuff. Is that grader blade new?
-
1 pointAbsolutely the best thing you can do for longevity!
-
1 pointGlenn, the P/N that John provided is for the rear wheels. The gage wheels are the ones in the front (on the sides). I have a 48 inch deck and the P/N for these is 68-2730. The things they assemble to (the brackets with all the holes in them) are P/N 68-2350. I replaced a couple of these on my deck and I don't recall prices near as high as John cited, although the hanger bracket was $40-ish. I also bought the Ex-Mark gage wheels-less $ than Toro. Check out SJM Parts-they have lots of generic parts (like Stens) and for less $ than Stens direct
-
1 pointI think I got that one. Ill check when I get home and let you know. If so, Ill try to send it with Bob. Stay tuned.......
-
1 pointNext year they need to secure the camera against poop splatter and eaglet perching.
-
1 pointWon't ever be this big! This was my Grandfather's place, and the garden that he kept for about 45 years! My 416-H was his, and it tilled this every year from '94 through the '04 season. Thought some of you might like to see this! Pic 1 is the whole property, in pic 2, my Grandparents are standing next to the garden. That area in the middle was the strawberry patch!
-
1 pointVery worthy Stallion! Good luck. Don't we all want one of those D-200's? Yes we do!
-
1 pointI have been using these for years. Mr. Gasket #2485 set of two. They use to be $4.50 on ebay. They fit B-80 and B-100 over hub weld. They also fit older style like 701 and 704 but I use a little of that flat packing foam stripped off in about a I inch wide piece six or seven inched long and around the HUb. That foam secures the chrome cap on and you should not have to worry about losing one. http://www.ebay.com/itm/MRG2485-Mr-Gasket-2485-Wheel-Hub-Chrome-Dust-Caps-1-790-Dia-/231238178259?hash=item35d6de95d3&vxp=mtr
-
1 pointNice to see, even nicer to see another Hudson Valley guy! beautiful land
-
1 pointLooks so nice, have a source to share Lane... for those chrome front hub covers?
-
1 pointSpent a little time this afternoon pulling it apart and cleaning it up. Will do a refurbish on this one. I have one for show so this will be clean with new paint, decals etc. It should come out pretty nice and be very presentable. Here is how it sits now. Tins will be sandblasted the rest will get sanded and primed.
-
1 pointI did a little horse tradin with my brother for this 165. It cost me an outboard. She's in real nice mostly original shape. Runs real strong full throttle but runs kinda poopy at lower speeds. Here is what previous owners have done to it trying to get it to run right. Flush tank, new fuel lines, brand new carb, new points, coil and condenser. Compression test is good, check valve clearance good. .Its not carb or points settings, they are spot on. All grounds and connections are good. I know this tractor has left more than a few guys scratchin their heads... I haven't had much time to look into it myself...
-
1 pointGlenn, the part number is: 95-4102. There is a seller on eBay currently that has them for $67.99 with free shipping. These have a bronze bushing so should last a while. They are an odd size so I doubt that there would be anything else that would be compatible.
-
1 pointPics of boats on grass. What next, pics of your Horses on water? J/k Steve, the boats are beauties, just like the Horses.
-
1 point Pretty darn sure a minivan would do the job... Lol
-
1 pointGot the new canopy on Monday, but it's been raining ever since. No chance to put it up. Wife stopped me when I started dragging it up from the basement last night. Said you can't set it up in the living room... What? It's not like a greasy old tractor. Anyway, I wasn't going to leave it there. Guess I'll wait for better weather.
-
1 pointToday I got the pto arm from the 520 put on the c-100 so now the pto can be used. All that's really left is make a battery box to hold the battery, then do a final wiring. The muffler was raised up in the front to allow easy acces to the clip on the pto lever.
-
1 pointThanks Terry for putting up the pictures Rick
-
1 pointmore progress.... clutch, brake pedals and linkages on and got the brake band lining stuck in the brake band....... heres how i did the brake band....... brake band ready to have lining glued on. it was previously blasted and yellow zinc plated. lining purchased through mcmaster carr, http://www.mcmaster.com/#6175k813/=r94hwf the lining needs to have two holes put in one end to clearance the rivet heads in the band... hole positions marked. the lining was easy enough to drill with a drill bit so thats how i made the holes. i picked a drill size just slightly larger than the heads of the rivets. holes look positioned ok around rivet heads..... then i needed to cut the lining to length, i marked the side of the band where the old lining ended and then marked the new lining the same. squared of mark and cut to length. the lining cut easy with a large sharp pair of scissors.... i used the brake drum as a mandrel to clamp the lining tight to the band. i smeared black silicone on the lining and using a battery clamp bolt and spacer, drew the band together tight around the drum. the band and lining needed a couple bar clamps as well to keep pressure all the way around. i will leave it for a good 24 hours and see how it worked out. i haven't done one of these before but heard others on here use silicone to glue the lining. i guess i will find out how well it sticks.....
-
1 pointhad the dash apart so we could scan the decal areas. while apart i pulled the circuit board for the warning lights at the molex connector. the connector half in the board end had definitely seen better days, one corner was burnt out and two wire terminals had corroded so bad they broke away from the block. so we needed to replace the block and put new terminals on at least two wires. i decided to re-terminal all the wires so we shouldn't have any issues down the road. (i did this at work in my lunch break, so thats why you see a powder hopper in the first pic.....) while getting the engine in running condition i knew both molex connectors were going to need some work so i purchased this kit. i could have just got a couple 9 pin molex connectors and terminals, but decided to get this as it has way more different pin count male and female blocks and terminals and wasn't really much more than just 2 or 3 9 pins and a few terminals. I'm sure they will get used for something. you need to have a special crimper for these terminals, which i picked up when making a new harness for the c160 here > you will also need some side cutters, insulation strippers, plus the 9 terminal molex block to match the one you are replacing and 9 terminals (those came in the kit). a tool for removing the terminals from the block would be handy here as well, but i left mine at home and so i had to butcher the old burnt block as i cut the wires to keep them at the most length. the tool is definitely the easier way..... heres a pic of the tool from my c160 wiring thread...... need to get the block in the same position as the one you are replacing, notice some of the holes are 'keyed' with flats, not every one is round. i rotated the blocks so they are both the same and marked the same position on both blocks. i knew the green went in the corner terminal (which i now have marked) so that was the first wire position i started with. one by one each wire is cut, position it came from is noted and then a new terminal is crimped on and it gets inserted in the corresponding position in the new block. i left the wires as long as possible, cutting right at the old terminal, i already knew i had a little wire length to play with, but didn't want to push my luck so i shortened them only the slightest amount.... heres how the terminals look, this is the 'male' side we are working on....... almost done..... one terminal gets two wires, so we need to make sure both wires get pushed in far enough to get a good connection, tight fit, but once its crimped almost the same size as one wire. all wires crimped with terminals and in the block in their right positions ( I hope so.....) heres what the boards look like, row of LEDs down one side are your warning lights........
-
1 pointLong story short. Im just finishing this up. All I have left is wireing....
-
1 pointShould be this one: http://stores.ebay.com/Gregs-Marine-Wire-Supply?_rdc=1


.thumb.JPG.1b2a1a39cdcedb1e001571713350b32c.JPG)


.JPG.9f2ecb26065c66527b0730084ab7fc7a.thumb.jpg.7dc8a04d9a53d44ee2b23f26ee94496f.jpg)


This leaderboard is set to New York/GMT-04:00